[00:02]
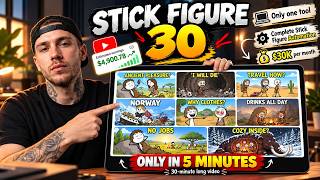
me and my friends started a YouTube channel where we began uploading ancient were able to achieve some really good growth on that channel. It took us monetized, but we've now been working on it for the past 4 or 5 months, and we're
[00:16]
every single month. And the most amazing part is, in the last video, I showed you everything from start to finish. I showed you exactly how we started the channel, how we uploaded videos every
[00:28]
single day, the problems we faced along the way, and how we slowly grew the figure videos is that they're actually pretty easy to make. You can even create them using just images, which means you get way fewer glitches, and the final
[00:41]
video comes out much cleaner. And the craziest part is, these videos actually have a lot of viral potential. Now, obviously, the competition in this niche is getting higher and higher, but the views still haven't really slowed down.
[00:54]
Every single day, people are creating videos on completely new topics, and are even a lot of channels that were started pretty recently, and they're already getting viral videos. But after my last video, almost all of you were
[01:07]
comments. How do you actually make these videos? Show us the full process. And honestly, before this, I used a pretty complicated method where I had to use a bunch of different tools. But in today's video, I'm going to show you one tool
[01:20]
where you can basically do the entire process in one place. And I actually used that exact same tool to create this video you're about to see. So, first, the quality looks like. >> Imagine you have not eaten a full meal
[01:33]
in 2 days. Your feet are bleeding. It is freezing. [music] Something in the dark wants to eat you, and you start playing music. That sounds insane, but that is exactly what ancient humans did over and over for tens of
[01:47]
[music] thousands of years. We think of our ancestors as primitive, exhausted our ancestors as primitive, exhausted survivors. Work, eat, sleep, repeat. because when you look at what they actually left behind, you do not just
[02:00]
find spears and bones. You find flutes. You find drums. You find dice. You find paintings deep in [music] caves where no one lives. So, what did ancient humans [music] discover that they were not just surviving. They were living. And what
[02:16]
they did for fun might surprise you more than you think. Give me a binary answer down in the comments. Yes or no, do you think you have more free time than a because I am coming back to it at the end and you are probably wrong. And if
[02:29]
you ask, "What did ancient humans do for fun?" you have to first forget everything you think you know about what did ancient humans do all day. Most people picture endless grinding work from sunrise [music] to sunset. That
[02:41]
picture is wrong. So, that's the kind of video you can create. And right now, I'm going to show you exactly how to make it, step by step. You can generate the images inside the same software. You can generate the videos there, too. You can
[02:54]
create the voiceover, sound effects, background music, and even do the editing, all inside the same app. Basically, you only need this one app and it can handle almost the entire process for you. I'll reveal exactly
[03:07]
which software I'm talking about later in the video. And the best part is, you and you don't have to spend hours thinking about what prompt to use for you the complete system and exactly how everything works. So, just keep watching
[03:22]
everything works. So, just keep watching the video till the end. prepared the entire road map for how we are going to create stick figure animation videos today using full automation with just a single tool. So,
[03:35]
prepare a master prompt. Inside this master prompt, I've already mentioned have to do much work yourself. The prompt you're seeing here is displayed looks like this. But when you click the link in the description, you'll either
[03:48]
get a PDF or the document will open directly in front of you like this. As written out in detail. All you have to do is copy the entire thing, come back to chat GPT, paste it here, and hit send. After that, it's going to ask you
[04:01]
for a reference script so it can understand and extract the DNA of that can simply take scripts from YouTube channels in your category. That way, chat GPT can understand what kind of video you want to make and how you want
[04:14]
see, I've already prepared four reference scripts here and these are all from some of the most viral videos. So, you can just pick whichever ones you might look like this here, but you'll also get them inside the document. You
[04:26]
script, and the same thing for all four collected a bunch of reference titles here. So, you need to copy all of these and paste everything here. As soon as you paste it, chat GPT will
[04:40]
format, and then you just have to hit send. After that, give it a little time these scripts and understand how they've been written, how the hooks are created, the overall structure, the concept, and basically every important detail. Once
[04:54]
reference images so it can analyze the visual style. For that, you can see I've the visual style here. I've also written down how far into the script each set of images was used. For example, if I zoom in here, you can see this is a really
[05:08]
long line, almost enough for a 1-minute section of the video, and all of these images were used over that audio to complete the entire video. So, what you to use as your reference. Then, for the videos from that channel, take a
[05:21]
For example, I can take multiple screenshots like this and then number all of them from one onward. So, if there are 20 screenshots, I'll label is pretty simple. When we give all of these screenshots to chat GPT, along
[05:35]
with the script, it can understand exactly which image was used where, how covers, and how the visuals are structured throughout the video. Now, copy the script as well. Then, I come back to ChatGPT and simply tell it, in
[05:49]
it a script along with all the images that were used to create the video for that script. I've numbered every image 1, 2, 3, and so on. So, it can beginning and which one comes at the end. Then, I ask it to analyze
[06:02]
everything and figure out by itself how many images should be used for each part appear, and what kind of visual should be used at each point. So, I paste the entire script here and upload all of our reference images. Once I do that,
[06:15]
ChatGPT will analyze everything, from the visual style and colors to how many script, and it'll understand the complete visual structure of the reference video. So, after that, as you can see here, it analyzes everything
[06:28]
really deeply. It completely decodes the reference scripts, the structure, the visuals, basically every single detail. Once that's done, I can simply tell it to suggest 10 viral ideas for me, and it immediately gives me 10 different ideas.
[06:40]
It also points out which ones it thinks are the strongest and explains why. But, you can also research ideas yourself. For that, just go to YouTube and search using incognito mode, and once you click
[06:52]
will automatically start recommending a bunch of similar stick figure videos on your homepage. Now, out of all those videos, you need to look for an idea then think about how you can create something different from it. For
[07:05]
example, take a look at this video. It was uploaded just 8 days ago, and it already has more than 885,000 views. So, you can look at videos like this and Now, if I come back to ChatGPT, you can see I can simply give it an idea and ask
[07:20]
script. And because it has already analyzed all of our reference scripts, it can write that script almost instantly. So, as you can see, I've placed the script ChatGPT generated in the script section here. But, honestly,
[07:32]
you know what works even better? Writing the script yourself. Of course, you can overall structure, but if you actually write the final script yourself, you video feel original and getting millions of views. But let's say you don't have
[07:45]
any time at all. Maybe you're outside, traveling, or you just need something Filmora. Filmora gives you a ton of different options, so you can basically prepare your entire video from one place. Here, you'll find AI copywriting.
[07:58]
topic, choose your language, there are a lot of languages available here, and you can even decide how many results you want, or you can simply click generate, and within a few seconds, it'll give you an engaging script. So, as I've shown
[08:11]
you need something instantly, you can high-quality script. But if you put in more effort yourself, you can make the script even better. And if you want to write everything completely on your own,
[08:23]
the scripts they generate, take the overall idea and structure from them, That's exactly what I've done here. I wrote the final script myself. After tell it that this is my own script, and then I submit it. First, it analyzes the
[08:39]
it asked me what I want to do next, and as you can see here, there's an option called break it into scenes plus images prompts. So, I select that option and paste it here. ChatGPT will immediately break the script down into multiple
[08:51]
every single scene. And the best part is, it decides on its own where each exactly which lines of the script each image prompt was created for, so you can easily match the image with the right part of the script. So, first, let's
[09:05]
to Filmora. You don't need to go to a separate website to generate images. You generation, and you don't need another tool for audio, either. We're going to do everything right here. Just click on stock media at the top, and inside that,
[09:19]
you'll find AI media. Here, you'll get options like image to video, text to video, and AI image. So, we'll click on AI image. Now, all you have to do is And after a little while, you can see that the image is generated. You can
[09:33]
directly drag and drop it onto your timeline. Then, we go back, copy the can also change the image generation model from here and choose whichever one you like. You even get Nano Banana Pro here. So, we select the model, paste the
[09:46]
prompt, and hit generate. And once that image is ready, we can simply drag and drop it onto the timeline as well. I'll also show you later how you can create high-quality videos with this, how you can download Filmora, how to use it, and
[09:58]
now, we'll just repeat the same process. We copy the third prompt, come back hit generate. So, basically, you just need to generate all of your images one by one using the exact same process. And if you click on any image, you'll see a
[10:12]
settings panel open up on the side. From there, you can apply different effects, other options. You also get animation features and several other tools. So, basically, you have almost everything you need inside this one software. So,
[10:25]
first, let's generate all of the images one by one. Now, after that, we also need to create the audio for our video. So, first, let's copy the script, then come back to Filmora. Here, you can see an audio section at the top. Just click
[10:37]
different options. We're simply going to click on AI audio. Inside this, you'll find AI music, sound effects, and text-to-speech. So, let's click on text-to-speech. Then, click next, and paste your script here. As you can see,
[10:50]
are a lot of different languages available. You'll also get a bunch of them sound really good and realistic. So, [music] you can choose whichever additional settings down here, so you can adjust everything according to your
[11:03]
preference. Once you selected your voice, you'll also find another option automatically clean up and adjust your text, so the final voiceover sounds better. After that, you just have to click generate. And after a little
[11:16]
ready. Now, simply add it to your timeline. As you can see, I've already timeline. There's one more thing you can and you'll get a bunch of different options. One of them is called silence
[11:28]
detection. Click on that, adjust the settings according to your preference, settings as they are. Then, click analyze. What this does is detect all the unnecessary gaps in your audio. Once it finds them, you can click finish and
[11:41]
replace, and all those extra gaps will be removed. This makes the voiceover sound much more natural when you listen to it. Now, the next step is to match just need to add the images one by one
[11:53]
voiceover. Remember, when we generated the image prompts earlier, I mentioned exactly how many lines or how much audio each image was created for. So, you adjust each image and make sure everything matches perfectly with the
[12:06]
voiceover. That's exactly what I'm doing here. Once all the images are properly bunch of options at the top. One of them is transitions. Click on it and you can apply a transition to all of your clips at once. Just select the transition you
[12:19]
want and click apply. As you can see, the transition is now added between all because it keeps the scene changes smooth and also adds a little bit of look better. Now, the default transition duration is a little too long, so we can
[12:33]
simply click on the transition and the settings panel will open on the side. From here, you can adjust the duration. I'm going to set mine to 0.21 seconds transition to a single clip or you can apply it to all of them at once. Apart
[12:46]
different effects here that you can use however you want. Now, if you click on titles, you'll find a lot of different options here as well. One of them is AI captions. Inside this, you'll get a speech-to-text option. Click on it,
[12:59]
to process, and you can also choose the language for transcription. You can even to translate the captions. Just turn on auto match and click generate, and that's it. It'll automatically generate captions for your entire video. Now, if
[13:12]
you double-click on the captions, the settings will open again. From there, captions. You can change the color, font, style, and pretty much everything else. You'll also get different presets,
[13:24]
like and adjust everything according to your preference. It's honestly very simple. Now, if there's an image that you don't really like or you feel like click on it. On the side, you'll see an enhance option. Click on that and you
[13:37]
You can also use this to enhance your video. Now, if you go back to stock option as well. So, let's say you want to turn this image into a video. All you have to do is upload the image here, set the aspect ratio, choose the quality,
[13:53]
select how many seconds you want to be and choose the video generation model. available, so you can pick whichever one you like. After that, you just need to For stick figure videos, I usually like to keep it simple, so I'm just going to
[14:06]
type slow animation because that works really well for this kind of content. Then, simply click generate and after a little while, your video will be ready. The result is actually pretty amazing. You also get an AI sound effects option
[14:19]
here. So, if you want to create a specific sound effect for your video, and apply it to your timeline. Just adjust the settings, generate the sound course, you'll also find a bunch of background music and many other options
[14:33]
this software, so you can go through all of these features yourself. It's basically an all-in-one software and I've personally been using Filmora for it's really impressive what you can do with it. So, to download Filmora, all
[14:47]
you have to do is click the link you'll find in the video description. Once you click on it, you'll be taken directly to the Filmora website. And from here, you can download the latest version of Filmora. You can download it for Mac or
[15:00]
available as well. You can also check from here. There are some pretty reasonable pricing options, so you can simply choose whichever plan works best for you. I'll leave the Filmora link,
[15:12]
along with the links to everything else I used in this video and all the comments. So, you can just check everything from there, download Filmora, start making your own videos, and grow your channel.