
The Perfect Sell Setup: STARC + CCI
40sThis segment reveals a precise, rule-based trading strategy that combines price and momentum extremes, offering a clear educational takeaway for traders.
▶ Play Clip"The title promises a sell confirmation strategy and delivers exactly that, though the content is brief and could be more detailed."
This video demonstrates a sell trading strategy that combines the STARC band and CCI indicator to identify overextended price and momentum conditions. The presenter walks through a step-by-step example, explaining the logic behind the trade setup and the importance of waiting for confirmation before entering a trade.
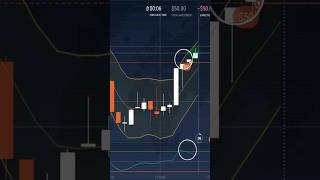
The price moved upward and touched the upper STARC band, indicating that the price has reached a stretched zone and is no longer trading in a normal range.
The CCI indicator also touched its upper extreme level, confirming that momentum is overextended, not just the price. This combination is crucial for the trade setup.
The trade is not based solely on a price increase; it requires both price and momentum to reach an extreme together. This dual confirmation makes the signal more reliable.
The market was not in a strong one-direction trend; the price was moving in a controlled range, which makes this type of reaction trade more reliable.
Once all conditions were confirmed, a sell trade was placed with a fixed one-minute expiry, exactly according to the strategy rules.
After the sell trade, the price did not drop instantly. It often gives a small reaction first—sideways movement, a small push, or retesting the entry level. This is normal and beginners should not panic.
Before the expiry ended, the price moved downward and the sell trade closed in profit.
The strategy relies on the confluence of price and momentum extremes, confirmed by the STARC band and CCI, to execute a high-probability sell trade. Patience during the initial price reaction is key to success.
What does the upper STARC band indicate?
The price has reached a stretched zone and is no longer trading in a normal range.
00:02
Why is the CCI indicator important in this strategy?
It confirms that momentum is also overextended, not just the price.
00:15
What market condition makes this type of reaction trade more reliable?
The market is not in a strong one-direction trend; it is moving in a controlled range.
00:42
What is the recommended expiry for the sell trade in this example?
A fixed one-minute expiry.
00:54
What should a trader do if the price does not drop instantly after placing a sell trade?
Do not panic; a small reaction is normal, and the price may move sideways or retest the entry level before dropping.
01:08
Dual Confirmation Principle
Emphasizes that selling requires both price and momentum extremes, a key principle for reliable signals.
00:28Market Context Matters
Highlights that range-bound markets are more suitable for this strategy, adding a crucial filter.
00:42Patience During Entry
Warns against panic when price doesn't move immediately, a common beginner mistake.
01:08[00:02] was taken step by step so you can clearly understand the logic behind it. First notice how the price moved upward and touched the upper stark band. This tells us that the price has reached a stretched zone and is no longer trading
[00:15] in a normal range. At the same time, if you look at the bottom of the chart, the CCI indicator also touched its upper extreme level. This confirms that momentum is also overextended, not just the price. This combination is very
[00:28] important. We are not selling just because the candle went up. We are selling because both price and momentum reached an extreme together. Another important point here is that the market was not in a strong one direction trend.
[00:42] The price was moving in a controlled range which makes this type of reaction trade more reliable. Once all these conditions were confirmed, the sell trade was placed with a fixed one minute expiry exactly according to the strategy
[00:54] rules. After the sell trade was placed, you can see that the price did not drop instantly. And this is where many beginners panic. Price often gives a small reaction first. Sometimes it moves sideways, sometimes it makes a small
[01:08] push, and sometimes it's the entry level again. This is completely normal. Now, let's look at the final result. As you can see, before the expiry ended, the price moved downward and the sell trade closed in profit.




⚡ Saved you 0h 01m reading this? Transcribe any YouTube video for free — no signup needed.