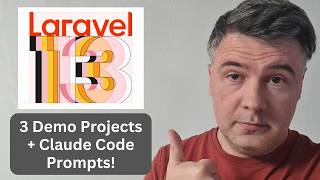

Laravel 13 Crash Course in 30 Mins?
45sThe creator challenges traditional long-form courses, promising a dense, AI-driven approach that resonates with modern developers' time constraints.
▶ Play Clip"Title accurately describes a 30-minute crash course for beginners covering Laravel 13 fundamentals with three demo projects."
This video presents a new 30-minute crash course on Laravel 13 for beginners, focusing on fundamentals through three demo projects generated with AI. The instructor emphasizes understanding concepts over writing code, reflecting the 2026 developer workflow where AI generates code and developers review it.
The course is a new style for 2026, shortened to 30 minutes. It uses AI-generated demo projects to teach fundamentals, as developers will increasingly rely on AI for code generation.
Project 1: Landing page with routing, controllers, views. Project 2: Blog with database, models, migrations. Project 3: CRUD with authentication using starter kits.
Uses Laravel Herd for local environment. Laravel new project wizard with options: starter kit (none for public site), testing (Pest), database (SQLite), frontend compilation (yes), Laravel Boost (default).
Uses Claude Code to generate a landing page for a fictional startup. The AI creates routes, controllers, and Blade views. Key concepts: routes/web.php, controllers, Blade templates with layouts and sections.
New project with MySQL database. Configures .env file for database credentials. Shows migrations for users table, then uses Claude Code to generate blog with categories and posts.
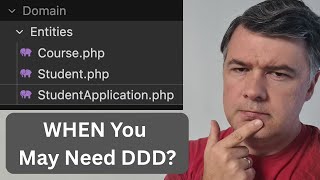
Models represent database tables. Category hasMany Posts, Post belongsTo Category. Factories and seeders generate fake data. Route model binding automatically fetches model by URL parameter.
Uses Laravel new with LiveWire starter kit for authentication. Claude Code generates full CRUD for categories and posts with resource controllers, form requests for validation, and Blade views.
Demonstrates listing, creating, editing, and deleting categories and posts. Uses route resource for automatic routing. Middleware protects routes with auth. Redirects with success messages.
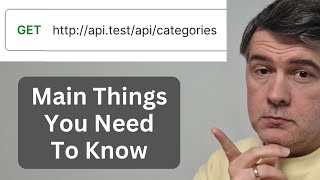
The three demo projects are on GitHub with original prompts. Encourages viewers to dive deeper into specific topics like APIs, other starter kits, or automated testing on Laravel Daily.
This crash course provides a high-level overview of Laravel 13 fundamentals using AI-generated projects, preparing beginners to understand and review code rather than write it from scratch.
What is the recommended local development environment for Laravel according to the instructor?
Laravel Herd, which installs everything needed on your machine.
03:44
What are the three demo projects covered in this crash course?
1. Landing page with routing, controllers, views. 2. Blog with database, models, migrations. 3. CRUD with authentication using starter kits.
01:35
What is the purpose of Laravel Boost?
It prepares your project with guidelines and skills for AI agents.
04:49
What is route model binding in Laravel?
A feature that automatically fetches a model instance based on a URL parameter, typically by primary key or a specified field like slug.
18:22
What are the seven methods of a resource controller in Laravel?
Index, create, store, show, edit, update, destroy.
23:40
How do you define a foreign key in a Laravel migration?
Using the 'foreignId' method with 'constrained', e.g., 'foreignId('category_id')->constrained()'.
17:49
What is the default database in Laravel if not specified?
SQLite, which is just a file in the project folder.
05:03
What is the purpose of form requests in Laravel?
They are separate classes that contain validation rules and authorization logic for form submissions.
22:29
New Course Style for 2026
Introduces a shortened, AI-integrated approach to learning Laravel, reflecting industry trends.
Learn to Read Code, Not Write It
Emphasizes a shift in developer skills towards reviewing AI-generated code.
02:32Laravel Boost for AI Agents
Highlights a new tool that configures projects for AI agent compatibility.
04:49Route Model Binding Explained
Demonstrates a key Laravel feature that simplifies database queries in controllers.
18:22Resource Controller Methods
Lists the seven standard CRUD methods, a fundamental pattern in Laravel.
23:40[00:00] Hello guys, what you will see in this
[00:02] video will be a course, a new course on
[00:04] Laravel Daily, Laravel 13 for beginners.
[00:07] And this is a new kind of style of
[00:10] courses. I thought how to proceed with
[00:12] courses in 2026 because no one has time
[00:15] for that to watch two-hour courses or
[00:18] longer. So I shortened it massively. And
[00:21] I need your opinion if you watch that
[00:23] course. This is free on YouTube or you
[00:25] may want to watch it on Laravel Daily by
[00:28] lesson. The idea is this. We work on
[00:31] specific demo projects. And the goal is
[00:34] to show a realistic project, very
[00:36] simplified design-wise, but realistic
[00:38] project generated by AI because I think
[00:42] that many developers will not write the
[00:45] code by hand in 2026 and beyond. But we
[00:48] need to understand the fundamentals. So
[00:50] I will have three projects generated
[00:53] with prompts in cloud code. But then I
[00:56] will go and explain step by step the
[00:59] fundamental concept that people would
[01:01] need to know when learning Laravel. So
[01:04] they need to understand the fundamentals
[01:06] the pieces not necessarily the deeper
[01:09] syntax because you can prompt AI for
[01:11] that now. So I think even with the age
[01:13] of AI people will still need courses but
[01:15] they should be much more densed much
[01:17] more practical and using AI pretty
[01:20] heavily like we all do in 2026. So this
[01:23] is my attempt. Please watch and share
[01:25] your opinion. It matters a lot to me
[01:28] when thinking about how to proceed with
[01:30] other course updates for Laravel 13 on
[01:33] Laravel Daily. Now, let's dive into the
[01:35] course itself. Hello guys, welcome to
[01:37] this course about Laravel 13 for
[01:40] beginners for someone who haven't tried
[01:42] Laravel at all. In this crash course in
[01:44] 30 minutes, I will try to explain the
[01:46] fundamentals of how Laravel works and we
[01:49] will create three demo projects in those
[01:52] half an hour. I will show you the
[01:54] example of a simple landing page with
[01:57] just home about and contact us. So we
[02:00] will learn about how routing works,
[02:02] controllers and views. Then the second
[02:04] project will be a blog with posts and
[02:08] categories. And then you will find out
[02:10] about how database works and how to get
[02:12] the data from the database. And then the
[02:14] third project we will use one of the
[02:16] Laravel starter kits and we will create
[02:19] resource CRUDs resource controllers and
[02:22] validations and forms with authenticated
[02:25] users. I think this will cover the
[02:27] fundamentals of what you need to know
[02:29] about how Laravel works as an overview
[02:32] and we will also heavily use AI. I will
[02:35] prompt cloud code to generate that code.
[02:38] This is what I fundamentally believe in
[02:40] in 2026 as developers. Now we need to
[02:43] learn to read and review the code not
[02:46] necessarily write the code. So this is
[02:49] exactly what I want to mimic in this
[02:50] course. Quite a lot of you will not
[02:52] write the code. You will ask AI agents
[02:55] to generate the code but then you still
[02:57] need to understand at least on
[02:59] conceptual level. You may not know some
[03:01] of the syntax and you may prompt AI for
[03:03] that. But this is exactly what I think
[03:05] the job of a developer will be in 2026.
[03:08] So this is the premise of this course
[03:10] for you to understand Laravel project,
[03:13] the structure and the main types of
[03:15] projects you would create with Laravel.
[03:18] Let's dive in. Let's start by creating a
[03:20] new Laravel project and I will show you
[03:22] the installer the wizard of Laravel new
[03:24] project and what choices you may want to
[03:27] make. Before starting with Laravel, you
[03:29] need to have software on your machine
[03:31] for PHP. So according to the official
[03:34] documentation, there are two ways.
[03:36] either you have prepared commands for
[03:38] operating systems or my personal
[03:41] favorite recommendation is to install
[03:44] Laravel herd. So that is a software that
[03:46] will install everything you need on your
[03:48] machine. You can download it at
[03:50] herd.laravel.com.
[03:52] And then here I am in my herd folder and
[03:55] I launch Laravel new project. And what
[03:57] are the choices? Laravel has starter
[04:00] kits but they are optional. It depends
[04:02] on what kind of projects you want to
[04:04] create. And by starter kit it means
[04:06] authentication mechanism. So if you
[04:08] choose any of those reacts view or
[04:10] liveware wireware you would get
[04:11] something like this homepage with login
[04:14] and register buttons. So I will use fake
[04:16] filler chrome extension and this is what
[04:18] you would see inside with the starter
[04:20] kit the dashboard and then settings to
[04:23] change your security or appearance or
[04:26] profile. So that's if you want to create
[04:28] a project with authentication. But if
[04:30] you want to create a simple public
[04:32] website like a blog or API project then
[04:35] you don't need the starter kits and you
[04:37] may choose none. We'll get to starter
[04:39] kit project in the third example of this
[04:42] course. Which testing framework do you
[04:44] prefer? I recommend best which is now
[04:46] the default in Laravel Laravel boost.
[04:49] This is pretty important in AI agent
[04:51] era. I recommend you stick with yes. and
[04:54] then Laravel boost will prepare your
[04:56] project with guidelines and skills for
[04:58] AI agents. The next question of the
[05:00] wizard is to choose the database. This
[05:03] is your personal preference what you
[05:04] use. By default, it's SQLite which means
[05:07] you don't need to install anything
[05:09] specifically. SQLite is just a file in
[05:11] your folder of the project. The next
[05:14] question is compiling the front end. Do
[05:16] you want to compile right now npm
[05:17] install and npm run build? because the
[05:20] default framework homepage comes with
[05:22] tailwind already prepared and I've
[05:25] chosen yes and then the final part is
[05:27] configuring Laravel boost. So what
[05:30] skills and guidelines for which AI
[05:32] agents do you want? For the first
[05:34] attempt I will advise to stick with the
[05:36] default. So you may choose guidelines
[05:38] skills and boost configuration. Do you
[05:41] want her MCP for starters? You probably
[05:44] don't. And then choose which AI agents,
[05:46] which IDEs you use. For example, I can
[05:49] untick cursor Gemini and open code. And
[05:51] then it will install the scales and the
[05:54] guidelines only for claude code and
[05:56] codeex which means claude.md file and
[05:59] agents.mmd file. And that's it. That's
[06:02] all the installation. And now we can do
[06:04] project.est
[06:06] which is powered by my Laravel herd. And
[06:08] yeah, this is the Laravel 13 homepage.
[06:11] And if we open that project in VS code
[06:14] or other IDE, the main thing where to
[06:16] start is the list of routes, which in
[06:18] this case is just one route of welcome
[06:21] page. But instead of digging deeper into
[06:23] default homepage, let's try to create a
[06:26] very simple public page for a fictional
[06:29] startup with AI because we are now
[06:32] entering the error of fewer developers
[06:34] would type the code manually and more
[06:37] developers would read the code generated
[06:40] by agent. So that's why I will
[06:42] initialize the repository and commit
[06:44] installed Laravel. And now I will launch
[06:47] cloud code. So in the terminal clear cd2
[06:51] project and then I launch cloud code
[06:53] with dangerously skip permissions. I
[06:55] have alias for that. And I will launch
[06:58] this prompt for project number one in
[07:00] this project. The first demo landing
[07:02] page for fictional startup with a few
[07:05] pages to demonstrate the routing and how
[07:08] the pages generally work in Laravel for
[07:11] public facing website. As you can see,
[07:13] cloud code catches the skill of tailwind
[07:16] CSS development. That's why Laravel
[07:18] boost was important. Okay, we're done in
[07:20] 1 minute and 23 seconds. And let's click
[07:23] that. And we have the homepage of
[07:26] fictional startup with very minimal
[07:28] design, but that's intentional. We're
[07:30] talking about Laravel here, not that
[07:31] much about Tailwind. So let's see what's
[07:33] inside the code. So the main file
[07:35] listing the pages of the website is
[07:37] routes web.php. So if you navigate here
[07:41] about and contact us, then the URL
[07:43] changes and that is powered by this
[07:46] file. So these are the URLs and these
[07:48] are the controller methods that power
[07:51] those pages. Controller is a class in
[07:54] Laravel that gets the data from the
[07:56] routes from the URL from the parameters.
[07:59] then transforms that data if needed and
[08:01] then passes that data to so-called blade
[08:05] file. This is the classical so-called
[08:07] MVC approach model view controller.
[08:10] We'll talk about models and the data a
[08:12] bit later but for now you need to
[08:14] understand routing then controllers.
[08:16] Each controller method is responsible
[08:19] for separate page but it may be separate
[08:22] controllers as well. This is your
[08:23] personal preference. And then each
[08:25] controller returns home which
[08:27] corresponds to the file in
[08:29] resources/views
[08:30] folder in this case home blade. Blade is
[08:33] Laravel templating language. So HTML
[08:36] with some constructions on top. So for
[08:38] example for each loop looks like this
[08:41] with blade. So blade directives start
[08:43] with at at if at for each and others
[08:47] also you see tailwind classes here and
[08:50] some variables. So this is how you
[08:52] define the variable in blade and that
[08:54] variable come from the controller. So
[08:56] this array those keys become the
[08:59] variable in blade also to have separate
[09:02] pages using the same layout. This is how
[09:05] it looks. There are two ways to do that
[09:07] in Laravel. I will show you one of them.
[09:09] So extends layouts app. This is the main
[09:12] HTML for the full page. And then we have
[09:15] yield content which becomes in homelade
[09:18] section content. And then if we open
[09:21] resources views about blade for example
[09:24] extends layout then another section and
[09:27] then section content which is different
[09:29] for every page and that title about is
[09:32] another section here on top yield title.
[09:35] So this is how you do with templates and
[09:38] same layouts for different pages. A few
[09:41] more important things. If you want to
[09:43] have a link to some kind of URL, you may
[09:46] reference route home, route about and
[09:48] route contact by their names in routes
[09:51] webph. Each route may have optional name
[09:54] which is a good practice to have the
[09:56] name instead of URL because URLs may
[09:59] change. And another thing with the front
[10:01] end I mentioned that Laravel comes with
[10:03] Tailwind 4 preconfigured by default with
[10:06] V server. So this is the line that
[10:08] ensures that npm install and npm run
[10:11] build or npm rundev compiles the assets
[10:14] accordingly and in the package json file
[10:17] you may see tailorent here already
[10:20] installed with vit as well. So that's
[10:22] basically all you need to know to create
[10:24] simple public websites with laravel
[10:26] routing controller methods and blade
[10:28] views. Now I will show you the second
[10:30] project demo and this will be the prompt
[10:33] again with AI for that blog with data
[10:35] from the database and again I start with
[10:38] Laravel new project and the same wizard
[10:42] with the same choices as the first
[10:43] project except for database. I will
[10:46] choose my SQL and this is the point I
[10:48] will show you how to configure MySQL in
[10:50] Laravel. And then the question from the
[10:52] wizard do you want to run default
[10:53] database migrations? So, Laravel comes
[10:56] with a few database tables preconfigured
[10:58] in so-called migrations and you may run
[11:00] them right away if you have your MySQL
[11:03] database ready. But even if you haven't,
[11:05] it will create it for you. So, it tries
[11:08] to find the same database as project
[11:10] name and would you like to create it?
[11:12] Yes. I have MySQL local server with
[11:15] default credentials which is root
[11:17] database user and no password. And this
[11:20] is exactly the defaults from Laravel.
[11:23] again npm install and npm run build and
[11:26] other defaults. Then the installation is
[11:28] done and we're opening the project in
[11:29] IDE and we look at the file very
[11:31] important file envolder.
[11:35] So this is where you configure a lot of
[11:37] main things about the project like app
[11:39] URL for example powered by Laravel herd
[11:41] automatically and the database. These
[11:44] are again my default credentials for
[11:46] MySQL. may be different on your machine
[11:49] but this is exactly where you provide
[11:51] the credentials database username and
[11:53] password important part thatv should be
[11:56] very secure on your local machine and do
[11:59] not push it to any repository on the
[12:02] server there should be anotherv file
[12:04] with the credentials for server database
[12:07] and server parameters but the security
[12:10] rule is that this file should be get
[12:12] ignored and never in a public repository
[12:15] because well it contains all the path
[12:17] passwords. And now if we open our
[12:19] database, we see already some tables
[12:21] like for example users table. This is
[12:23] the structure and a few more tables. And
[12:26] this is powered by actually the same
[12:28] thing of database migrations that we saw
[12:31] earlier in the installation. So create
[12:34] users table. This is how you define the
[12:36] database structure in Laravel migration
[12:39] file with fields inside strings
[12:42] timestamps and others. And then if you
[12:44] want to transform the structure to the
[12:46] actual database, you run artisan
[12:48] command. PHP artisan migrate. Laravel is
[12:51] full of commands. PHP artisan something.
[12:54] So for example, migrate will execute the
[12:56] migrations. But in this case, it's
[12:58] nothing to migrate because we already
[13:00] have those database tables. But if for
[13:02] example, we delete all of them and rerun
[13:06] those migrations again, it will execute
[13:08] those migrations. And if we refresh,
[13:11] those tables are here again. So this is
[13:13] how database structure works in Laravel.
[13:15] And now we open again cloud code and
[13:18] prompt to create a simple blog which
[13:20] would take the data from the database.
[13:23] And this is exactly what I want to show
[13:24] in this lesson. As you can see cloud
[13:26] code AI agent is running PHP out
[13:29] command. So there's make model make
[13:31] controller. We'll talk about models in a
[13:34] minute. This is exactly [clears throat]
[13:34] what is powering specific database
[13:37] table. And let's actually watch it in
[13:38] action. So it creates the migrations for
[13:41] categories and post tables. Then it
[13:44] creates the model. So we can actually
[13:45] talk about it now. Model is a class that
[13:48] powers the work with specific database
[13:50] table. So category is for plural form of
[13:54] categories database table. Then you
[13:57] define the fillable fields. What fields
[14:00] do you want to work with? And then you
[14:02] define relationships between the tables
[14:04] between the models. So category has many
[14:07] posts. This is one to many relationship
[14:10] on the database level. And then the
[14:12] other way around we have second model
[14:14] post with set of fillable columns in the
[14:17] database. Then we have relationship to
[14:19] category which is the other way around.
[14:21] There's has many and there's belongs to
[14:24] table. And then also there's cast to
[14:26] work with datetime specifically for
[14:28] Laravel. I will not really stay on that
[14:31] too much. Factory is about fake data and
[14:35] about testing. And this is also outside
[14:37] of scope of this course. But basically
[14:39] every model may have factor with some
[14:42] fake data just for testing. And then
[14:45] there's cedar which may use those
[14:47] factories to create that fake data. So
[14:50] this is the cedar for fake or semi-fake
[14:53] categories. And this is the cedar for
[14:55] post. So we will have 10 posts each with
[14:58] random category. And then we have the
[15:01] main file called database cedar that
[15:04] basically seeds all database. So you
[15:06] call whatever cedars you want. And
[15:08] probably somewhere down below the agent
[15:10] executed command not only PHP artisan
[15:13] migrate for the database but also
[15:16] artisan DB seed to actually seed that
[15:18] data. And as a result we refresh the
[15:21] database and we have categories with
[15:23] that data. And timestamps by the way are
[15:26] automatic in Laravel with created at and
[15:28] updated ad. if you use those eloquent
[15:31] models and also posts again fake data
[15:34] with random category ID here and
[15:38] timestamps here and then if we take a
[15:40] look at controllers so you saw the
[15:42] controller for public website with
[15:44] hard-coded data in this case we use
[15:48] eloquent model which basically
[15:50] represents the database table and then
[15:52] we query so this is how you query the
[15:54] database with Laravel with eloquent
[15:56] models it's a lot of syntax options But
[15:59] basically what you need to know is post
[16:02] where and then pageionate or get
[16:05] probably another query is more simple
[16:07] for categories. So category this query
[16:10] is optional then order by name and get.
[16:13] So this is how you get all the
[16:15] categories from the database. Also you
[16:17] may specify with count of posts and then
[16:20] again similar to previous lesson we
[16:22] return blade view and pass the data
[16:25] array. Blade views by the way may be
[16:27] dotsarated or slppparated which means
[16:29] subfolders in resources/views.
[16:32] So we have one controller method for
[16:34] post controller for index for the list
[16:36] of posts and then show specific post and
[16:40] then in the routes web again we have two
[16:42] routes homepage and the post and then
[16:45] the blade layout you already saw that
[16:48] app blade with HTML then post index
[16:51] extending layout with the content and
[16:53] then we have all the variables here with
[16:55] if with blade and with variables shown
[16:59] with another transformation if needed.
[17:02] Probably it's better now to switch to VS
[17:05] Code and see the project or actually
[17:08] let's click the project here. So project
[17:10] 2.est should be the URL here. And do we
[17:13] have a blog? Yes, this is our result.
[17:15] Again, very simplified in terms of
[17:17] design intentionally. But what I wanted
[17:19] to show you is list of blog articles
[17:22] coming from the database. Then sidebar
[17:25] here with a category ID which then
[17:28] filters the list of blog posts. And then
[17:31] if we go here, there's a slug of post
[17:35] which shows the post details again with
[17:37] the same layout similar to previous
[17:40] project demo. And if we take a look at
[17:42] the code now in VS code, I will just
[17:44] briefly repeat what we saw already. So
[17:45] migrations for categories and for post
[17:49] important part is this line. Foreign ID.
[17:52] This is how you define the foreign key
[17:53] between database tables in Laravel. So
[17:56] foreign id category id with constraint
[17:59] to which table by default it's plural
[18:02] name of category without underscore id.
[18:05] So categories so this is how you define
[18:08] the foreign keys. Then you already saw
[18:10] factories and cedars. This is all in the
[18:12] database folder of laravel project. And
[18:15] then in the routes web in addition to
[18:17] postcontroller index method we have
[18:20] postcontroller show method with
[18:22] interesting concept called route model
[18:24] binding. So this is how you define the
[18:26] parameter of the URL. If you have this
[18:29] for example here the slug then you may
[18:32] define the model name and the field to
[18:36] automatically filter by and then in the
[18:38] method of show you type hint the model
[18:42] and then that object becomes the post
[18:45] with all the fields from the database.
[18:48] So that's called route model binding.
[18:49] Very important concept and oftenly used
[18:51] in Laravel. And then the other concepts
[18:54] you already saw passing the data to
[18:56] blade. In the blade we have if and
[18:59] [snorts] sections and others some more
[19:01] syntax options like in every framework
[19:04] but in this course I don't want to state
[19:06] too much on the details. I want to give
[19:08] you the overview of how the things work.
[19:11] So the main things that you need to know
[19:13] for such project public website with
[19:15] data from the database you need to know
[19:17] the same routing controllers and blade
[19:21] views and for the data you need to be
[19:23] familiar with models database migrations
[19:27] and if you want some fake data factories
[19:30] and cedars and now I will show you the
[19:32] third project with starter kit how does
[19:35] it work if you want to have
[19:36] authenticated users so in case of
[19:38] laravel new we will choose one of them.
[19:41] And if you are not a JavaScript
[19:43] developer, so you don't want to learn or
[19:46] use React View or Swelt, LiveWire is
[19:49] your best bet. Even if you don't know
[19:51] LiveWire, this is kind of a Laravel way
[19:54] to have dynamic websites without
[19:56] JavaScript. But you may choose LiveWire
[19:58] Starter Kit and then continue using
[20:00] Laravel controllers inside. This is
[20:03] exactly what I want to show you. So kind
[20:05] of the quickest way to start with
[20:07] Laravel. So we choose Live Wire. We
[20:09] choose Laravel's built-in authentication
[20:12] for single file LiveWire components.
[20:15] This is debatable for LiveWire users,
[20:17] but I will choose no. I have separate
[20:20] courses on LiveWire on Laravel daily
[20:22] website. So, you may go into those
[20:24] deeper. Again, we install Laravel Boost
[20:27] and Laravel Boost with LiveWire starter
[20:29] kit. It will also install Livewire
[20:31] skills and guidelines if you want to use
[20:34] LiveWire deeper. And again, we choose to
[20:36] run npm install and npm run build. And
[20:39] for Laravel boost, same thing but with
[20:42] one new addition. So if Boost detects
[20:45] that some third-party package has its
[20:48] own guidelines, you may want to tick
[20:50] that box or tick it off. So Laravel
[20:53] Fortify is a first-party package, but
[20:55] still it's a separate package for
[20:57] authentication. And let's choose to
[21:00] install those guidelines as well.
[21:03] For everything else, it's the defaults.
[21:05] But as you can see here there are skills
[21:08] and guidelines for example for livewire.
[21:11] Here we have livewire development as a
[21:13] skill and also flux library is part of
[21:16] livewire. So this is the example how
[21:18] Laravel boost guidelines and claude MD
[21:20] and agents MD and skills depend on the
[21:24] packages of Laravel ecosystem that you
[21:26] choose during installation. But of
[21:28] course you may add more in the future on
[21:30] top but this is outside of this course.
[21:32] So now we have the project we may go to
[21:35] that in browser. We may register in this
[21:38] case we have escalite database. We
[21:40] create an account and we have empty
[21:44] dashboard. So we have a new user
[21:46] registered authenticated and now we
[21:48] build the functionality and again I will
[21:50] prompt cloud code for this. I want to
[21:53] build two cruds for same or similar
[21:56] blog. So managing the categories and
[21:58] managing the posts. So I want to show
[22:00] you the forms, the validation, the whole
[22:03] life cycle of so-called CRUD. So let's
[22:06] prompt for that. This will be a bit
[22:08] longer prompt. It will work probably for
[22:10] 5 minutes or so. So I will come back at
[22:14] the end and comment the code step by
[22:16] step or actually I thought it would be
[22:18] beneficial to watch it in action and
[22:20] again comment what it does like a
[22:22] developer would write that manually. So
[22:24] first again we have the database make
[22:26] model make controllers and make
[22:29] requests. So this is a new thing for
[22:30] form requests. We will have the
[22:32] validation files and I will comment on
[22:35] them in a minute. So it generated the
[22:37] files with PHP artisan make something
[22:39] commands. Again as I said there are a
[22:41] lot of PHP artisan commands and then it
[22:43] fills the files with exactly the fields
[22:46] in migrations. The model again this is
[22:49] how you see the same things for the
[22:51] second time. It's kind of repeating. So
[22:54] then the factory for title and factory
[22:57] for post data. Then cedar for five
[23:01] categories. Cedar for three posts for
[23:04] each category. You can kind of read it
[23:07] in almost English language without even
[23:09] knowing the exact syntax. Then in the
[23:12] form request for storing the category we
[23:14] will have validation rules and authorize
[23:17] true means all authenticated users may
[23:20] access that action. Similar update
[23:23] category and store post request more
[23:26] validation rules and also you may
[23:28] specify different custom messages for
[23:30] validation errors. And then the
[23:32] controller for category controller you
[23:34] will see in action so-called resource
[23:38] controllers. So if you have the full
[23:40] CRUD typically in Laravel there are
[23:42] seven methods for that I will open the
[23:44] official documentation of Laravel. So
[23:46] basically these are the methods of
[23:48] controller. So index to list the data
[23:51] create for the form store to submit the
[23:54] form then show individual record edit
[23:56] that record the form update action and
[23:59] delete action destroy. So this is
[24:02] exactly what AI agent is generating. Now
[24:04] for index we have list of categories
[24:06] with the blade view again dotsepparated
[24:09] for the folder. So there will be a
[24:11] folder of categories and then separate
[24:13] blade files for each page. Then store
[24:17] method show and others. So this is for
[24:19] the categories and then almost identical
[24:22] structurally for the post. So this is
[24:25] the crud how it works with Laravel and
[24:28] after some action. Okay. So the agent
[24:31] jumped to automated tests. The tests
[24:33] will not be covered by this course. I
[24:35] have separate courses on automated
[24:37] tests. But it's great that AI agent runs
[24:40] the test and ensures that the
[24:42] functionality actually works including
[24:45] Laravel Pint. There's Laravel Pint
[24:47] package for code styling and we have the
[24:50] summary. Now let's see how it works in
[24:53] action and then we'll look at the code.
[24:55] So if we refresh our dashboard now, we
[24:57] should see categories here and I see the
[25:01] styling off which means that the agent
[25:04] didn't run npm install and npm run
[25:07] build. And you can do that in cloud code
[25:09] kind of a side tip by doing exclamation
[25:11] mark. And then you can run bash commands
[25:14] like npm install and npm run build in my
[25:18] case. You can do npm rundev as well. And
[25:21] now if we refresh the website, yep, we
[25:24] have some styling. So this is the list
[25:26] of categories. No categories found. And
[25:29] now it's time to look at the code. So
[25:31] these are the changes in git. Look at
[25:33] how many files. So this was a bigger
[25:36] change like five minutes for AI agent.
[25:38] And if we take a look at category cedar,
[25:41] we do have category cedar and post
[25:44] cedar, but the main database cedar was
[25:47] not changed. So this is how the main
[25:50] database looks by default in Laravel
[25:53] demo user with test example.com. So in
[25:56] this case let's manually add this call
[25:59] or actually VS code will autocomplete
[26:01] that or actually we don't need the
[26:02] default C. So let's comment that out.
[26:04] And now we can open the terminal here in
[26:06] VS code and run PHP artisan DB seed. And
[26:09] now if we refresh the page yep we do
[26:12] have demo categories. So this is how our
[26:15] CRUD works. We can add a new category.
[26:19] We can edit any category dot dot dot and
[26:22] we can delete probably with confirmation
[26:26] indeed. So that's how it works. For the
[26:28] post, there should be probably a
[26:30] drop-down for category. Yes. So the list
[26:33] of categories is passed to the create
[26:36] form of post and let's see that in the
[26:39] code. So in the routes web we see a bit
[26:42] more code than in the projects before
[26:44] because it's starter kit and we have
[26:47] so-called middleares. So middleware in
[26:50] Laravel is a way to protect the route or
[26:52] route group in this case with some kind
[26:54] of rules and the most popular one is O
[26:57] and also verified means email verified
[27:01] which may or may not be enabled in the
[27:03] user model that's a separate topic and
[27:05] the dashboard is powered by default
[27:07] starter kit and these are our routes
[27:11] it's not route get this is what I meant
[27:13] by resource controller it's route
[27:15] resource and then automatically that
[27:18] route resource
[27:19] powers all those seven methods that I
[27:22] mentioned. So index, create, store,
[27:24] edit, update, and destroy only show
[27:27] method is missing because it's not
[27:30] needed in the CRUD. With this, you
[27:32] basically saw it all in action. So
[27:35] controllers and blade views are not new
[27:38] to you. What is new is store method. So
[27:41] to create the data in the database, we
[27:43] use the same eloquent model category
[27:45] create and then we pass the array. The
[27:48] array may be just key and value but also
[27:51] request validated means that the form
[27:54] was actually validated. And this is
[27:56] where we have those form request
[27:58] separate classes that you saw already by
[28:01] AI agent. So these are validation rules
[28:04] and only those fields are passed to the
[28:06] model to create the actual record in the
[28:09] database. And then after you store you
[28:12] return not the blade view but you return
[28:15] redirect to wherever you want to the
[28:17] route name which is automatically by the
[28:20] way assigned again in the resource
[28:22] controller. Automatic route names are
[28:25] these. So resource name and
[28:27] thenindex.create
[28:29] and others. So you redirect to that page
[28:31] with success message that is then shown
[28:34] in the blade with edit category you see
[28:36] the same route model binding we
[28:38] discussed earlier in the previous
[28:40] project and by default that route model
[28:43] binding if you don't specify the slug
[28:45] it's by ID field by primary key so if we
[28:48] go to categories and click edit the
[28:51] parameter is / one/edit which is
[28:54] automatically parsed by laravel
[28:56] controller with route model binding and
[28:58] also you see compact here. This is a PHP
[29:01] function to avoid key and value pairs if
[29:04] they are repeating. It's just kind of a
[29:06] shorter way to do the same array. And
[29:09] then other eloquent model operations is
[29:11] category update and category delete,
[29:14] which basically means exactly what the
[29:17] name says, update or delete the record
[29:19] in the database. So that's basically all
[29:21] you need to know to create such CRUDLike
[29:24] projects with Laravel. So choose the
[29:26] starter kit. Livewire is the quickest to
[29:29] start with if you don't want JavaScript.
[29:31] And then inside you create routes,
[29:33] controllers, resource controllers in
[29:36] this case, the same blade views with
[29:38] Tailwind, the same eloquent models for
[29:41] operations with the database and form
[29:44] request for validations. And as you saw
[29:47] throughout all the scores, you can ask
[29:49] AI agent to generate a lot of those
[29:52] things, at least the first version. So
[29:54] for all of those three demo projects I
[29:56] will not only put them on GitHub but
[29:58] also in that repository I will put the
[30:00] original prompts in markdown so you may
[30:03] understand the origins better where do
[30:05] those things come from and how they were
[30:07] prompted. So yeah, this is where I want
[30:09] to end this course because I think you
[30:10] have enough of the overview of the
[30:12] concept understanding about Laravel
[30:14] fundamentals and then you may want to
[30:16] dive deeper into separate topics of how
[30:19] Laravel works with APIs for example,
[30:21] what are other starter kits on how
[30:23] Laravel works with React View or
[30:26] Livewire, how automated testing works
[30:29] and a lot of details. We have the
[30:31] courses about that on Laravel daily
[30:33] website. So browse around and choose
[30:35] which projects you want to dive deeper
[30:37] into. But for now, that's it for this
[30:38] time and see you guys in other
⚡ Saved you 0h 30m reading this? Transcribe any YouTube video for free — no signup needed.