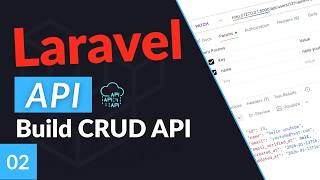
Build CRUD APIs in Laravel in minutes
44sShows beginners how to quickly create a full set of CRUD APIs, a common and practical task.
▶ Play ClipThis tutorial demonstrates building a full set of CRUD APIs for Laravel's default User model, covering create, read, update, and delete operations with HTTP methods and route conventions.
Building CRUD APIs for Laravel's default User model: create, get, update, get all, and delete.
Define a POST route to '/api/users' with an inline function that uses the User model's create method.
Use Postman to test the API by sending a POST request with name, email, and password; Laravel returns JSON with a 201 status code.
Define a GET route to '/api/users/{user}' using route model binding to automatically fetch and return the user.
Use a PATCH request to the same URL, calling the update method on the user model with the request data.
Define a GET route to '/api/users' and return User::all() (note: pagination recommended for production).
Use a DELETE request to '/api/users/{user}', call delete() on the model, and return response()->noContent() (204 status).
Override the default ID lookup by specifying a custom column (e.g., email) in the route definition: Route::get('/users/{user:email}', ...).
Laravel makes CRUD API creation straightforward with built-in features like route model binding and automatic JSON responses, but additional concerns like validation and pagination should be addressed for production readiness.
"Title accurately describes the content: a beginner-friendly tutorial on building simple CRUD APIs in Laravel."
What HTTP method is conventionally used for creating a resource in REST APIs?
POST
00:55
What is the conventional URL pattern for a REST API resource?
Plural resource name (e.g., /api/users)
01:21
What HTTP status code does Laravel automatically return when a model is created?
201
06:01
What is route model binding in Laravel?
It automatically injects the model instance based on the route parameter (e.g., {user} fetches the User by ID).
07:08
What is the difference between PATCH and PUT HTTP methods?
PATCH is for partial updates; PUT is for full replacement of the resource.
09:07
How do you return a 204 No Content response in Laravel?
Use response()->noContent()
14:48
How can you use a custom column (e.g., email) instead of ID for route model binding?
Define the route as '/users/{user:email}'
17:18
POST for Create
Establishes the fundamental REST convention for creating resources.
00:55Automatic 201 Status
Laravel automatically returns a 201 status code for newly created models, simplifying response handling.
06:01Route Model Binding
Demonstrates a powerful Laravel feature that reduces boilerplate code for fetching models.
07:08No Content Response
Shows the correct way to return a 204 response after deletion, following REST best practices.
14:48Custom Route Key
Illustrates how to override the default ID lookup with any column, adding flexibility to API design.
17:18[00:00] Hey, welcome back. So on this episode,
[00:02] we are going to be building a full set
[00:05] of CRO APIs for the user model that
[00:08] comes with Laravel by default. So we're
[00:10] going to have a create user, get user,
[00:12] update user, uh get all users, and
[00:15] delete user API. So I have selected the
[00:19] user model to for today's video. Uh but
[00:22] you can actually go ahead and use any
[00:24] other model that you have on your
[00:25] project. The reason I chose the user
[00:27] model is because it ships with Larville.
[00:30] So if you create a new project, you
[00:31] should by default always have this users
[00:34] model and table. So that's why I
[00:36] selected it. But if you have an existing
[00:38] model, uh you can use it and follow
[00:40] along. The process should be basically
[00:42] the same.
[00:44] Okay guys, so first up, we're going to
[00:46] start off with the create user route. So
[00:50] what you need to do is define a simple
[00:52] route the same way you usually do. Now
[00:55] for create APIs the general convention
[00:59] is to use a post request or HTTP post
[01:02] request. So that's what we are going to
[01:04] do. So I'm just going to type in post. I
[01:07] will later on have a video on REST API.
[01:09] So I'll go a little bit more in depth
[01:10] into the general conventions for REST
[01:13] APIs. But in this video I'm going to
[01:15] keep it relatively simple. Next up we
[01:17] need to define the URL for our post API.
[01:21] So the convention in the Laro community
[01:23] and also for REST APIs is you're going
[01:25] to have your resource name. So in this
[01:28] case it's going to be our model name
[01:29] which is user and then we're going to
[01:31] have it be plural. So it's going to be
[01:33] users. And that's it. That's the URL.
[01:36] And now we can go ahead and either
[01:38] define your controller or in this case
[01:40] I'm going to have an inline function
[01:43] anonymous function just to keep it
[01:45] simple for the sake of time. And last
[01:47] but not least, because we are going to
[01:49] be basically passing some data, I'm
[01:52] going to define the request in my
[01:55] function definition as well. All right.
[01:58] So now that we have our API, the next
[02:00] step for us is actually to create a new
[02:02] user. And this is very simple to do.
[02:04] This is basically laral eloquent. Uh so
[02:08] we can go ahead and say user equals
[02:11] our model name. So in this case I'm
[02:13] going to be importing app models user.
[02:17] So I do have autoimp import on my ID
[02:19] setup. So if you guys see me quickly
[02:20] type these in. Usually I am importing
[02:23] them but they are like autoimp imported.
[02:25] So as you can see it got imported over
[02:28] here. So make sure you have done that.
[02:30] And now we can just go ahead and call
[02:32] the create method on the model.
[02:36] Okay let's quickly do that. And I'm
[02:37] going to pass in some data. So the
[02:40] default loable user model needs the
[02:42] name. So I'm going to pass in request
[02:47] name. So we need to make sure we always
[02:49] pass this.
[02:51] Next up we are going to have email. So
[02:54] I'm going to say request
[02:57] email.
[02:58] So this will be passed in the HTTP post
[03:02] body.
[03:04] And last but not least, we need
[03:06] password.
[03:09] So for the password I'm just going to go
[03:11] ahead and use the loable hash facade. So
[03:15] we can say hash make and just pass in
[03:19] this password field. Now we don't have
[03:21] any validation at the moment. So
[03:23] technically all of these could be empty.
[03:25] We're going to cover validation on a
[03:26] separate video. So for now we assume the
[03:29] client will always pass these values.
[03:32] So, so now that we have created our
[03:34] user, the only step left for us is to
[03:36] actually go ahead and return the user.
[03:39] That is it guys. So, we have created our
[03:41] first post or create API. So, how do we
[03:45] actually go ahead and test this out?
[03:47] Now, for testing purposes guys, you can
[03:49] do it from your terminal. If you know
[03:50] how to use curl, you can go ahead and
[03:51] use curl. Curl is a little bit difficult
[03:54] to use. So, many people might not be
[03:56] familiar with it and it's not very
[03:57] visually appealing. So generally what
[04:00] most people do is they use a different
[04:02] software
[04:04] for example something called like
[04:06] Postman and they use this tool to test
[04:09] their APIs. Now there are other tools
[04:11] like Obsidian. There is another one
[04:13] called I think HTTP PI this one and many
[04:17] others. You can also install extensions
[04:20] on VS code or I think if you use uh Jet
[04:25] Brains or different IDs they should also
[04:26] have that. So, I'll leave that to you
[04:28] guys which one you prefer. For me
[04:30] personally, I have used Postman for many
[04:32] years. So, that's what I'm most
[04:34] comfortable with. And I'm going to be
[04:35] using Postman. But there is no specific
[04:37] one. You can use any of them that you
[04:40] like. So, I'm going to go ahead and add
[04:44] our local host URL. Last but not least,
[04:48] we need API and then users because
[04:51] that's what we defined in our URL here,
[04:54] right? And then I need to now pass name,
[04:56] email, and password. So let's go ahead
[04:58] and do that. I already had these done
[05:00] because I was testing it, but we can say
[05:02] name. I'm going to say hello world. For
[05:06] email, I'm going to say YouTube at
[05:08] test.com.
[05:10] And for password, I'm just going to put
[05:11] some random characters.
[05:14] So for the request type, again, we also
[05:16] need to make sure this is post. So for
[05:18] example, if I put I don't know delete
[05:20] and I hit send, it's going to say method
[05:23] not allowed because we still we haven't
[05:24] created it. So it needs to exactly match
[05:27] what we have defined. So I'm going to
[05:29] set post and click send.
[05:33] And voila, we have created our first
[05:36] successful post API. So it is now
[05:39] returning the user as well. And if you
[05:41] guys notice, it's actually already
[05:43] formatted into JSON. So Larl is very
[05:45] nice. it automatically formats
[05:48] everything for us. So it's very nice and
[05:50] clean. We don't actually need to
[05:51] manually
[05:53] uh return the response in JSON. We just
[05:56] pass it the model and lot handles the
[05:58] rest for us. One more thing I want you
[06:01] guys to pay attention is if you look at
[06:02] our uh API status code response code it
[06:06] is going to be 2011. So 2011 uh
[06:09] corresponds for a new record created
[06:12] right. So Lable actually also
[06:14] automatically handles that. So if you
[06:16] return your model and it was just
[06:18] created, it will actually have a 2011
[06:21] status code. Okay, so that's also very
[06:24] nice. We don't need to worry about the
[06:25] status code. I will have a separate
[06:27] video for handling different status
[06:28] codes, but for now, Laravel makes this
[06:31] super super easy for us. All right. So
[06:33] now that we have created our first API,
[06:36] let's go ahead and create the next one,
[06:39] which is going to be get a single user.
[06:42] This one, very similar process, guys.
[06:44] Again we need to define a route for get
[06:47] request or get users. It is going to be
[06:49] a get http get request. Now for the URL
[06:54] it still follows a similar format where
[06:55] we have the model name followed with you
[06:57] know an s plural. So it's going to be
[07:00] users but then we are going to pass in
[07:03] the unique identifier for that user as
[07:06] the second part of the URL. Right? So
[07:08] this part for this part we can go ahead
[07:11] and use the loable uh route model
[07:14] binding. So I'm going to have like a
[07:16] dynamic
[07:17] URL here. I'm going to say user
[07:20] and I'm going to quickly define our
[07:23] function here as well. So I'm going to
[07:24] say function
[07:27] and we can go ahead and use ludable's
[07:29] route model binding. So we can say user
[07:32] user and a lot of will automatically if
[07:35] we for example pass in a user ID go
[07:38] ahead and find that user and injected
[07:41] here right so with route model binding
[07:43] and actually it's very easy we can just
[07:45] return user that's it that's all we have
[07:47] to do so this is our get user API so
[07:51] just the oneliner in loable so let's go
[07:53] ahead and test this one out as well uh
[07:56] I'm going to go ahead and open Postman
[07:59] uh I'll save this one as create user. So
[08:03] I'll save it and I'm going to create a
[08:04] new one. So let me copy it.
[08:10] So the URL is going to be API users and
[08:14] then followed with our users ID. All
[08:17] right. So let me zoom in a bit more so
[08:19] it's easier for you guys to see. So this
[08:21] user's ID was 13. So I'm going to put in
[08:25] 13. Hit send. And as you can see this
[08:29] API is also working. Uh also one more
[08:32] thing to pay attention guys. As you can
[08:33] see this one has a 200 API. So this is
[08:35] okay API while our create request had a
[08:39] 2011. Right? So we didn't need to worry
[08:41] about the status code. A lot just
[08:43] handles it for us out the box. Uh which
[08:47] is very nice and kind of saves you quite
[08:48] a bit of time and you don't need to
[08:50] worry about them. So I'm going to save
[08:52] this one as well. I'm going to say get
[08:53] user API.
[08:55] Uh let me save that.
[09:00] Okay. So let's go ahead and create the
[09:02] next API which is update user. Now for
[09:07] update operations there is two types of
[09:09] HTTP request we can use. We can use
[09:11] either patch or put. Now there are quite
[09:15] small differences between the two. So
[09:18] the general difference is going to be
[09:19] with patch you're going to be updating
[09:21] you're going to be doing a partial
[09:23] update and with a put you're going to be
[09:26] performing a full replace or full update
[09:28] of the resource. Now that's very
[09:31] oversimplified. There are a lot more
[09:33] differences. So I'm not going to be
[09:35] covering all of that on today's video
[09:36] because I think it requires its own
[09:38] video.
[09:39] But for now I'm going to be using a
[09:40] patch because I'm going to be partially
[09:42] updating the user. I'm going to be only
[09:44] updating their name. So this one also is
[09:47] going to be very similar. It will
[09:49] actually follow the same URL as our get
[09:52] request but just have a different
[09:55] request type. So I'm going to copy this
[09:58] put here and let me put this above it.
[10:01] But instead of a get HTTP request, we're
[10:03] going to have a patch, right? But the
[10:06] URL is actually going to be identical,
[10:08] right? So same URL.
[10:11] Now, how do we update the user? In this
[10:13] case, it's also the same. We can go
[10:15] ahead and say user
[10:19] update
[10:20] and the usage is similar to this create.
[10:23] So I'm just going to actually copy it
[10:24] from the create at the top and we can
[10:27] pass in the fields we want to update. So
[10:30] I'm going to pass it in name.
[10:35] Now you see here it says request is not
[10:37] accessible. So we need to also define
[10:40] the request in our method. So I'm going
[10:42] to go ahead and put it here as well. And
[10:46] now we have this request as well. So
[10:47] this is our update. And after we have
[10:49] done the update,
[10:51] we can go ahead and return the user back
[10:55] to the client. So I'm going to go ahead
[10:56] and save this one as well, guys. Let's
[10:59] go back and test this API as well.
[11:04] So I'm going to create a new request.
[11:07] I'll copy our get request URL.
[11:12] and replace this get with a patch.
[11:16] And now we need to pass in a new name.
[11:18] So the previous name was hello world.
[11:22] I'm going to rename it to hello
[11:25] YouTube.
[11:28] By the way guys, when you're using
[11:29] Laravel, you can put your uh data both
[11:33] in HD params and the body. Both should
[11:35] work, but Larl is quite flexible. It
[11:37] handles both cases. So, I'm going to be
[11:39] using query paramounts because it's a
[11:41] bit easier for me to add on the video.
[11:45] So, I'm going to hit send.
[11:48] And as you guys can see, we now get
[11:51] hello YouTube. And to just double
[11:53] confirm, if we go back to our get
[11:56] request and hit send, we get hello
[11:59] YouTube. So, the update was successful
[12:01] as well.
[12:03] All right. Now next to up to the next
[12:05] API which is going to be get all users.
[12:09] Uh you guys probably can guess this one
[12:10] is going to be also quite similar. So
[12:13] for the get all users
[12:17] I'm going to copy the existing get user
[12:19] we had. So let me define it under here.
[12:24] So for the URL because we're getting all
[12:27] users we obviously are not going to have
[12:28] this second part. So I'm going to remove
[12:30] it. And the general convention is you
[12:32] just basically have your resource name
[12:35] followed by an s plurals and that's your
[12:38] URL. Of course, we are not no longer
[12:41] doing route model binding. So this one
[12:43] we also don't need. And we can just say
[12:46] return user
[12:48] all.
[12:51] Uh obviously one question you might have
[12:53] well this isn't very efficient right? If
[12:54] you have like thousands of users, this
[12:56] will be very slow or like crash or
[13:00] timeout. So we will be learning how to
[13:03] do pageionation on a later episode. It's
[13:05] actually very easy to do for with
[13:07] larable. But for now, I'm going to
[13:08] return all the users
[13:11] in this case. So I can get rid of this
[13:13] actually as well. So let's save it.
[13:15] Let's go back and test this API as well.
[13:20] Uh I'll copy it.
[13:22] Let me save this patch as well. So, let
[13:26] me save it.
[13:29] Okay, I'm going to rename it to update
[13:32] user.
[13:35] Now, we have get all users and the URL
[13:38] is going to be API
[13:41] users. We don't need to pass in anything
[13:42] else. So, I'm just going to go ahead and
[13:45] click send. And as you guys can see, we
[13:48] are now getting all the users in our
[13:51] database. So I have 13 users. This is
[13:53] the last user we created. So you can see
[13:56] all of them here, right?
[13:59] Okay. Last but not least, we are going
[14:01] to have delete user.
[14:04] You probably can guess how it's going to
[14:05] be. I'm going to copy our get user as
[14:08] the base. So for delete, the general
[14:11] convention again guys is going to be a
[14:13] delete HTTP request and the URL
[14:17] convention is similar to a get user. So
[14:20] they all start with this users plural
[14:23] and then followed with the specific user
[14:25] we want to update. So this one is going
[14:27] to be delete.
[14:29] Of course, we're not going to be able to
[14:31] return the user. We're trying to delete
[14:33] it.
[14:35] So to delete our user or our model we
[14:38] can just say user delete. So this should
[14:41] delete it. Now for the response the
[14:44] general consensus we can go ahead and
[14:46] just do something like response because
[14:48] we don't have anything to return. So and
[14:50] laral has a quick helper for us. We can
[14:52] just say no content. All right because
[14:56] again we don't have anything to return.
[14:58] So, we're going to go ahead save this
[15:03] and we can now go ahead and test it out
[15:06] on Postman.
[15:07] So, I'll quickly save this as well in
[15:10] our collection.
[15:14] And I'm going to copy this get user.
[15:19] So, we need to change this uh request
[15:21] type from get to delete.
[15:24] And I'm going to delete the user we just
[15:27] created. So I'm going to hit send
[15:30] and as you guys can see
[15:32] uh we are getting a 204 no content
[15:36] status code. So this 204 is
[15:38] automatically handled by Laravel because
[15:41] we said no content right. So it's
[15:43] handling the status codes for us. Now of
[15:45] course to verify the user was deleted
[15:47] I'm going to go back to this get request
[15:51] and try again with user 13.
[15:54] And as you guys can see now it is
[15:56] returning a 404 not found right and even
[16:00] if you go to get all
[16:03] if I scroll all the way down it ends at
[16:05] 12 right so that user did indeed get
[16:08] deleted right so okay guys so that's it
[16:11] that's the process for creating CRUD
[16:14] APIs in Ludal it's very easy of course
[16:17] there's a lot more to do we have things
[16:19] like validation authorization
[16:21] uh pageionation a lot more stuff to
[16:23] cover But this is the basics of it,
[16:25] right? And again, things for like
[16:26] validation, and pageionation, these are
[16:28] things you probably are using if you're
[16:30] working with Laravel on day-to-day
[16:31] basis. So, it should be very easy for
[16:34] you to also add them to your APIs. One
[16:38] last thing I want to cover before I end
[16:40] today's episode is what I showed you
[16:42] guys so far. We have been using kind of
[16:44] the primary key or the ID for the update
[16:48] uh get and delete operations, right? So
[16:52] what if you do not want to use the ID
[16:54] right? So for example here if I go to
[16:57] this get user what if you want to use
[17:00] the email right so let me take this Dr.
[17:04] forest. So I'm going to copy the email.
[17:06] So what if you want to get this user
[17:09] using their email instead of the ID,
[17:12] right? So right now if I put the email
[17:13] and click send, we get a 404 not found.
[17:18] This is actually very easy to do. You
[17:20] can actually tell a lot of what key or
[17:22] what property or what field to use to
[17:25] fetch the user. So we can just do a
[17:27] double colon and then put in the field
[17:30] name. So in this case, email. So Larival
[17:33] will go ahead and
[17:35] search the email to find that user,
[17:38] right?
[17:39] Same thing again, you can do it for
[17:41] delete as well. So I'm going to put
[17:43] email here as well. And we can put email
[17:46] here as well. So let's go ahead and
[17:49] quickly test it. If I go back to our API
[17:52] again, try again.
[17:55] Uh we are not getting a user. Let me see
[17:58] why.
[18:00] So everything looks correct. Uh
[18:05] ah I forgot to copy the O my bad. Sorry
[18:08] guys. Sometimes it happens on the video.
[18:13] All right. Hopefully now it will work.
[18:15] Okay. So as you can see now we are
[18:18] fetching the request or fetching the
[18:20] resource using the email property. Of
[18:23] course the same will work for uh delete
[18:25] as well. So if I come here and I instead
[18:27] of this 13 I put the email and I hit
[18:31] send
[18:33] as you can see obviously the deletion
[18:34] was successful and if I go back and I
[18:37] try to fetch Dr. for us again we get F44
[18:41] not found and if I go to all users and I
[18:43] try again uh we no longer have that
[18:47] property right so that's it guys this is
[18:50] also like a quick thing I wanted to
[18:52] cover on today's episode I hope you
[18:55] learned something new if you have any
[18:56] questions leave them in the comment
[18:58] section below forget as always like the
[19:00] video subscribe if you still haven't and
[19:03] I see you on the next episode have a
[19:05] great day bye
⚡ Saved you time reading this? Transcribe any YouTube video for free — no signup needed.