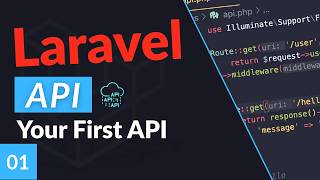
Install Laravel API Support in 1 Command
41sSaves beginners from confusion about missing api.php file.
▶ Play ClipThis video is the first episode of a Laravel API course for beginners, covering how to set up a Laravel project for API development and create a basic JSON endpoint.
Introduction to the Laravel API course for beginners. Assumes viewers have basic Laravel knowledge and now want to build APIs.
You don't need to create a new Laravel project to add APIs; you can use an existing one. If starting fresh, run `laravel new [project-name]`.
Starter kits like Laravel Breeze are optional but help with boilerplate (login, logout). Select 'blade with Alpine' as the stack; skip 'API only' since it will be covered later.
Choose SQLite for simplicity (no extra setup). Run default migrations. Open the project in a code editor.
Older courses referenced a default `api.php` route file, but it no longer exists in Laravel 9/10+. You must install API support manually.
Run `php artisan install:api` in the project root. This adds boilerplate code, a new migration (`create_personal_access_tokens`), and a new `routes/api.php` file.
In `routes/api.php`, define a route: `Route::get('/hello', function () { return response()->json(['message' => 'hello world']); });`.
API routes automatically get the `/api/` prefix. To access the route, use `/api/hello` in the browser. The prefix is customizable (covered in a later episode).
API requests are stateless (no sessions/cookies). Routes in `web.php` have CSRF protection enabled, which would break API POST requests. API routes bypass CSRF and are designed for stateless JSON responses.
Under `bootstrap/app.php`, Laravel defines the API routes and prefix. The prefix is customizable via the `api()` method or `withRouting()` configuration.
This first episode sets up a Laravel project for APIs and demonstrates creating a simple JSON endpoint, preparing for more complex routes and database integration in the next episodes.
"The title accurately describes the beginner-friendly tutorial on creating a first API with Laravel; the video delivers exactly what it promises."
What command enables API support in a Laravel project?
php artisan install:api
2:26
What is the default URL prefix for routes defined in `routes/api.php`?
/api/
5:29
Why should API routes not be placed in `routes/web.php`?
Because web routes have CSRF protection enabled, which would break stateless API requests (especially POST/PUT).
6:09
What helper method is used to return a JSON response in Laravel?
response()->json([...])
4:23
In which file does Laravel define the API route prefix and `routes/api.php` inclusion?
bootstrap/app.php
7:15
Simple API Route Creation
Illustrates the minimal code needed to create an API endpoint in Laravel using a closure and the `response()->json()` helper.
3:28Stateless vs Stateful Routes
Explains the fundamental reason for separating API and web routes: CSRF protection and session handling differ.
6:09Configuration in bootstrap/app.php
Shows where Laravel registers the API routing and how the prefix can be customized, which is key for developers who need to modify default behavior.
7:15[00:00] Hey everyone, welcome to the first
[00:02] episode of my Laravel API course for
[00:04] beginners. In this video series, I'm
[00:06] going to be covering all the basic
[00:08] information you need to know to start
[00:09] building your own APIs inside Lavel. So
[00:13] in this course, I'm assuming you guys
[00:14] have the basics of Ludal down and now
[00:17] you're trying to learn how to build your
[00:19] own APIs. Okay, so let's get right into
[00:21] it. So first thing first, you don't
[00:23] actually need to create a new project to
[00:25] start adding APIs. So if you already
[00:27] have an existing project, you can follow
[00:29] along. But if you don't, the first step
[00:31] is for us to create a new project or a
[00:33] new Laravel project. So I already have
[00:35] the command here. So I'm going to go
[00:36] ahead and run Laravel new. And this is
[00:38] my project's name. You can name yours
[00:40] whatever you like. Hit enter.
[00:43] Now we don't necessarily need any
[00:45] starter kits to add APIs, but just to
[00:48] make things a bit easier, I'm going to
[00:49] go ahead and select lot of a breeze. So,
[00:51] we have some basic boiler plate, you
[00:53] know, for logging, log out, uh, things
[00:55] of that nature. If you're not familiar
[00:57] with starter kits, you can skip this
[00:59] part or just follow along as I'm doing.
[01:02] And next up, for this one, I'm just
[01:03] going to go blade with Alpine, the first
[01:05] option. It doesn't really matter which
[01:07] one you select. So, I'm just going to go
[01:08] ahead with the first option. I do
[01:10] recommend you skip the API only because
[01:12] I'm going to be covering that again. So,
[01:14] we're just going to go with the first
[01:15] option. And I don't care about dark mode
[01:17] for the course. I'm going to select
[01:19] pest. And that's it. So now we should
[01:21] have a new Lo project. If you already
[01:23] have an existing one, you can skip this
[01:25] part and follow on the next step.
[01:29] All right. For database, you can select
[01:30] any of these you like. I'm going to go
[01:32] with skill light because it doesn't
[01:33] require any setup. And I'm also going to
[01:35] run the default migrations.
[01:39] All right. Now, with the setup done,
[01:40] let's go ahead and open up uh this
[01:42] project in our code editor real quick.
[01:46] Okay guys, so my project installation is
[01:48] done. And I have also gone ahead and
[01:50] opened the project in my editor. So
[01:53] before we actually get started, you
[01:55] might be looking at if you are looking
[01:56] at some older courses online, uh you
[01:59] might end up noticing that there is no
[02:01] API. Here some some older courses I
[02:04] think prior to Larl 9 or 10. There used
[02:07] to be a default API. PHP that is no
[02:10] longer here. So the first step we need
[02:11] to do is actually to install API support
[02:14] for Laravel. And for that we need to
[02:16] actually run a command. So, open up your
[02:17] terminal and make sure you have
[02:20] navigated to your project root
[02:21] directory, which is where I am right
[02:23] now. And we need to run the following
[02:25] artisan command. So, I'm going to run
[02:26] PHP artisan
[02:30] install API.
[02:33] And what this command will do, it will
[02:35] add some boiler plate code that allows
[02:37] us to support APIs. It also add some
[02:40] additional changes that I'm going to
[02:42] cover real quick. It's also going to ask
[02:44] you to publish some new database
[02:46] migrations. I'm going to go ahead and
[02:48] hit yes. Do that as well. So once you do
[02:51] that, the first thing you notice is it
[02:53] added a new database migration file. So
[02:56] it's under database migrations. It's
[03:00] this file. So it's going to be create
[03:03] personal access tokens. Uh we're going
[03:05] to be covering that on later episode.
[03:07] This is for a lot of sanctum and it's
[03:09] going to allow us to do authentication
[03:11] and authorization for our APIs. So it's
[03:14] quite powerful. Uh one more change that
[03:16] it's going to also do is it's going to
[03:18] add this new API.php
[03:20] route file. So this one is very useful.
[03:22] We're going to actually be defining all
[03:24] our APIs inside this file. Okay, let's
[03:28] get right into it. So now that we have
[03:29] done the initial setup, it's actually
[03:31] very easy to create our first API. It's
[03:34] very similar to how you would do it with
[03:35] normal web.php. PHP. All you have to do
[03:38] is just simply do route
[03:40] followed by the HTTP request you want.
[03:43] So in this case, I'm going to go with a
[03:44] get request.
[03:46] Next up, you need to define your URL or
[03:49] URI. In this case, we're going to be
[03:51] building something super simple. For the
[03:52] first episode, I'm going to say hello
[03:53] for hello world. And last but not least
[03:56] here, you can either pass in a
[03:59] controller or for now, I'm going to keep
[04:01] it super simple and I'm going to have an
[04:02] inline function, basically an anonymous
[04:05] function. So I'm going to say function
[04:07] and I'm just going to define net over
[04:10] here. Okay, on the next episode we got
[04:11] are going to have a controller. So don't
[04:13] worry about that. Now that we have
[04:15] defined our route, usually if you have
[04:17] an API, you want to return some sort of
[04:19] JSON in your response. That's actually
[04:21] very easy to do with Laravel. All we
[04:23] have to do is do return response.
[04:27] And on this response helper, there is a
[04:29] JSON over here and this will allow you
[04:32] to return JSON to your clients super
[04:34] easily. Okay, so for the first parameter
[04:37] is going to be what we are returning,
[04:39] right? So that's going to be the
[04:40] response of our API and this is going to
[04:42] take an associative array in PHP and you
[04:46] can return anything you want. So let's
[04:47] say I want to return a message
[04:52] and I'm going to return let's say hello
[04:56] world. All right, just for now some
[04:59] basic content returned. Don't forget the
[05:02] semicolon.
[05:04] And that's it. Okay, this is our first
[05:07] super basic API. So, let's go ahead and
[05:09] save this and open this up in a browser.
[05:13] So, I have my project open over here.
[05:16] Uh, now one thing you may notice if you
[05:18] go ahead and do /hello,
[05:21] you will actually get this 404 not
[05:24] found, right? Even though if you look at
[05:26] our route, it is actually called hello.
[05:29] So uh what lable does is if you are
[05:31] defining an API inside this API.php file
[05:34] is it will always add an API prefix
[05:38] before all your routes. So it will
[05:40] always be API and then followed by
[05:42] hello. So that's what actually we need
[05:44] to put in. So I'm going to go back and
[05:46] change it up to API hello.
[05:50] And now you guys can see we are getting
[05:52] actually a JSON response from our API.
[05:58] Now a question you might have is like
[06:00] hey why do we need to put our routes
[06:02] inside this API.php and why can't I just
[06:05] for example go ahead and put it inside
[06:06] this web.php right what's the use case
[06:09] is it just the prefix there's actually
[06:11] more than that so usually if you have an
[06:14] API it's going to be a stateless request
[06:17] right while when you have this like
[06:19] web.php PHP files it's going to be
[06:20] stateful right so for example the user
[06:22] might already be logged in they have
[06:24] some sessions they have some cookies but
[06:26] when they are using APIs they're not
[06:28] going to have any cookies they're not
[06:29] going to have any existing sessions so
[06:31] it's going to be stateless and larville
[06:32] is going to handle these two routes
[06:34] separately also usually well actually
[06:38] not usually always by default Laravel is
[06:40] going to do CSRF authentication on
[06:43] web.php PHP routes while with API routes
[06:47] because it is stateless there is no CSRF
[06:50] protection right so if you were for
[06:52] example to put some sort of post request
[06:53] or put request inside this web.php PHP
[06:56] and you try to access it or call it
[06:58] similar to like a normal API, Laravel is
[07:01] going to be doing that CSRF protection
[07:03] check and all your calls are going to
[07:06] fail. Okay, so it's very important for
[07:07] us to put all our APIs under this
[07:11] API.php file to kind of keep it super
[07:13] simple. Okay,
[07:15] and one more change, I'll just quickly
[07:17] show it to you guys. If you go actually
[07:19] under your uh under your Bootstrap
[07:22] app.php PHP file. You will also notice
[07:24] that now there is this new line over
[07:28] here. So this is actually where Laravel
[07:30] is defining it. Right? So all the APIs
[07:32] are going to be read under this routes
[07:35] API.php file. Now later on on a later
[07:38] episode I'm going to show you guys how
[07:39] you can actually change this API prefix.
[07:41] This is customizable. So none of none of
[07:43] these are hardcoded. We can customize
[07:45] them, but those are going to be for the
[07:47] next episode. So that's it guys for
[07:49] today's episode. Super basic. I just
[07:51] wanted to cover how to get the initial
[07:53] setup done and create your first API. On
[07:56] the next episode, we're going to talk
[07:58] about how to load data from the database
[08:01] and also a bit more complex routes,
[08:03] maybe having like dynamic URLs and
[08:05] things of that nature. See you guys on
[08:07] the next episode. Have a great day. Bye.
⚡ Saved you time reading this? Transcribe any YouTube video for free — no signup needed.