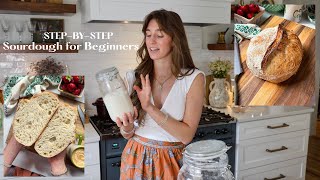
Sourdough Secrets: You Can Make It!
42sThe creator builds curiosity and confidence by promising that sourdough is easy and unlocks unlimited recipes, which hooks viewers seeking simplicity in a trendy topic.
▶ Play Clip[00:00] Today I'm going to show y'all how to
[00:01] make sourdough starter and sourdough
[00:02] bread for beginners step by step.
[00:05] Sourdough is one of those things where
[00:07] it seems really complicated, but it's
[00:09] actually one of the easiest things. And
[00:11] once you master like sourdough starter,
[00:13] not even sourdough bread, just sourdough
[00:14] starter, like you are unstoppable. You
[00:16] can make biscuits, pancakes, ficashia.
[00:20] Ficashia is one of the easiest breads.
[00:22] Honestly, even easier than like a bread
[00:24] loaf, which I'm going to show you how
[00:25] easy a bread loaf is. You're going to be
[00:26] like, your mind's going to be blown. And
[00:28] you can make like baklava ficasha,
[00:30] s'mores ficashia, um lemon blueberry
[00:33] ficasha, cinnamon roll ficashia. All
[00:35] those recipes are on my blog, by the
[00:37] way. Um I don't know what English
[00:40] muffins. Like literally the
[00:42] possibilities are endless. So let's just
[00:44] go ahead and get into it. First things
[00:46] first, we need to make some sourdough
[00:47] starter. Sourdough starter, for those
[00:49] that don't know, is this live culture of
[00:51] bacteria. It's good bacteria that is
[00:53] created by fermenting flour and water.
[00:56] Those are the only two ingredients you
[00:58] need. And it's basically a natural
[01:01] leaven natural. It basically helps your
[01:03] bread rise naturally without using like
[01:05] commercial yeast, which is still not bad
[01:08] and it's great when you're in a pinch.
[01:10] But you're going to start off with a
[01:12] glass jar. I highly recommend a glass
[01:13] jar. This one is I think 800 ml big. Um
[01:19] you can use one smaller. I also This is
[01:22] like a recycle jar. So you can thrift
[01:24] jars, you can recycle them from like
[01:26] when you buy
[01:30] like pickles at the grocery store. Just
[01:33] wash it out. Make sure it doesn't smell
[01:34] like pickles. We're going to put our
[01:36] glass jar on our scale and we're going
[01:38] to hit the tar button to cancel it out
[01:40] so that it zeros out. You're always
[01:41] going to want to use equal parts water,
[01:43] equal parts flour, and equal parts
[01:45] sourdough starter. Now, we currently
[01:47] don't have sourdough starter, so we're
[01:49] going to start off with 50 g of
[01:52] water. And we're going to hit the tar
[01:54] button to zero it out. So I went
[01:55] overboard and did 53 g. So we're going
[01:57] to do 53 g of flour. And now that we
[01:59] have equal parts flour and equal parts
[02:01] water, we're just going to mix this
[02:02] together. Going to add the lid. And
[02:05] we're going to let this sit for 24
[02:06] hours. The process of creating your own
[02:08] sourdough starter from scratch is going
[02:10] to take about 7 days total for it to
[02:12] become properly fermented, live, bubbly,
[02:15] active, and ready to naturally rise your
[02:17] all your breads. Literally whatever
[02:18] bread you desire. So, every day we're
[02:21] going to feed it once a day. So, let's
[02:24] pretend it's day two. Take 50 g of
[02:27] our made from scratch sourdough starter
[02:30] and discard the remaining sourdough in
[02:32] the jar. Kind of like to swirl around
[02:33] warm water until the jar is clean. The
[02:35] thing is, you never want to wash it out
[02:37] with soap as that will interrupt the
[02:39] fermentation process and it's not really
[02:41] good for the bacteria and it might taste
[02:44] like soap. So, just don't do it. Also, a
[02:47] tip is to get this sourdough starter out
[02:49] of your sink immediately because this
[02:51] stuff will harden like concrete. Just as
[02:53] with day one, we're going to add equal g
[02:56] of water. So, we did
[02:58] 52. Same ratio for flour. So, we're
[03:00] going to do 52. Basically, you always
[03:03] want that flour fully absorbed when
[03:06] you're mixing. I'm just going to add it
[03:07] back into your rinse
[03:11] jar. You're going to repeat that process
[03:13] for 7 days total. And you got to feed it
[03:15] every day. every 24 hours because it is
[03:17] now a living breathing organism. Maybe
[03:20] not breathing, but living. It's a living
[03:21] organism. So, you're gonna feed it the
[03:23] same exact ratio of sourdough starter,
[03:25] flour, and water. So, if you decide to
[03:28] keep 50 g or even 100 g of sourdough
[03:31] starter, you're going to do 100 g of
[03:32] sourdough starter, 100 g of flour, 100 g
[03:35] of water, kapish, tomato, tomato. I
[03:39] don't really know catchphrases that
[03:40] well. But if you want to save yourself
[03:42] some time, you could also just always
[03:43] ask your friends for a bit of their
[03:45] sourdough starter. I've given my friends
[03:47] so much sourdough starter and I love it
[03:50] because basically you can give them your
[03:52] discard and they can feed it same day
[03:53] and it's perfect. Or you can go ahead
[03:55] and feed it for them and they just start
[03:56] the process the next day. Also, I feel
[03:58] like the longer it firmness, the better
[04:00] it tastes. But this guy is bubbly and
[04:02] ready. I'll actually show you yesterday
[04:04] when it was like overflowing bubbly and
[04:07] ready. So, let's make some sourdough
[04:08] bread. So, we just need four
[04:09] ingredients. It's our sourdough starter
[04:11] that's active and bubbly, our flour,
[04:14] some lukewarm water, and some fine
[04:16] baking salt. My sourdough starter I
[04:18] usually feed about like 8:00 a.m. and
[04:20] then I'll start making bread about like
[04:22] 100 p.m. I'll even push it to 2:00 p.m.
[04:24] sometimes. Um, you can be really relaxed
[04:27] with yourself. Like, don't stress out
[04:28] about those certain times, but gives you
[04:30] kind of an idea of my time schedule.
[04:31] We're going to start off with 330 g of
[04:33] lukewarm water. Then, we're going to add
[04:35] 100 g of your active sourdough starter.
[04:39] And then 10 g of
[04:42] salt. Lastly, we're going to add 450 g
[04:45] of flour. I'm just using allpurpose
[04:47] flour, but you could use bread flour.
[04:49] Totally up to you. Guys, your hands are
[04:52] your best kitchen tools. So, you're just
[04:53] going to mix this. You could also use
[04:55] like one of those circular kneading
[04:57] tools, but I just mix it with my hands
[04:59] until all the flour has been
[05:02] absorbed. It also takes like less than
[05:04] 30 seconds. So, why am I going to waste
[05:06] a kitchen tool? There's like flour
[05:09] everywhere. You've done your hard part.
[05:10] Evade your sourdough dough. We're going
[05:12] to cover it with either Okay. I like to
[05:14] cover it two different ways. Don't hate
[05:16] me for the first way. Saran wrap. I know
[05:19] plastic. But it just like traps in the
[05:23] moisture and that's what we want. We
[05:24] want it to get like we want it to get
[05:27] nice and warm in there cuz you want cuz
[05:30] okay summertime is the best time to make
[05:32] sourdough bread in my opinion because it
[05:34] rises so much quicker and it's so much
[05:37] more bubbly in the summer time cuz it's
[05:38] nice and warm and you know how you want
[05:41] your dough to rise in a warm
[05:42] environment. Same here. Same situation
[05:44] here. The segway which I feel like you
[05:46] all appreciate is I'll wet this under
[05:49] like really hot water and then I'll ring
[05:51] it out so it's nice and it's just damp
[05:54] and then I cover it. Right now we're
[05:55] using a dry. We're going to set it aside
[05:58] for
[05:59] 30 minutes. After 30 minutes we're going
[06:02] to complete our first lift and fold
[06:04] process. So imagine the bowl is divided
[06:06] into four different corners. So we're
[06:08] going to lift up each corner from the
[06:10] center and the bottom and then we're
[06:12] going to fold it into the center. So,
[06:14] lift it up, fold, rotate. Now, an hour
[06:17] and a half has gone by because every 30
[06:19] minutes for a total of three to four
[06:21] times, you're lifting and folding those
[06:23] four corners into the center. So, we've
[06:26] trapped in all of this beautiful air.
[06:29] All this air to create those beautiful
[06:31] air bubbles. That's what I meant. And
[06:33] then we have the final folding process.
[06:36] So, this we're going to stretch out our
[06:38] dough like as much as possible, kind of
[06:41] shaking it underneath because we don't
[06:42] want to break the dough. We don't want
[06:44] to tear the dough. We don't want to
[06:46] flatten it or knead it. We want to keep
[06:48] all those air bubbles in it. And then
[06:50] you're just going to gently roll it up.
[06:52] And then kind of push it towards you to
[06:55] roll tightly. And we're going to put it
[06:56] in our flowered bread basket and leave
[06:58] it on the counter for another hour. And
[07:00] then we're going to put it away in the
[07:02] fridge. Also, I've left it basically out
[07:05] on the counter until I've gone to bed,
[07:06] which will be like 11 or 10 o'clock
[07:08] sometimes. And I feel like the longer it
[07:11] says I've room temperature, the more it
[07:12] gross. So, I think that's totally fine.
[07:15] I've never had a problem with it. But, I
[07:18] wouldn't put it in your fridge any
[07:19] earlier than like 8:00 p.m. And then you
[07:21] could bake it at like 8:00 a.m., 9:00
[07:23] a.m., even up to like 2:00 p.m. the next
[07:27] day. Now that our breads have rested in
[07:30] the fridge overnight, it's time to bake.
[07:31] Now, I only have one Dutch oven, so
[07:33] we're baking one bread at a time since I
[07:35] made two yesterday, so we can bake them
[07:37] together. Um, okay. So, this one is a
[07:41] cinnamon swirl ch No, cinnamon sugar
[07:44] chocolate chip swirl sourdough loaf. I'm
[07:47] so excited for it. If you have a sweet
[07:48] tooth, this this is going to be your
[07:50] girl. Um, basically how I made it was I
[07:52] made my regular sourdough loaf that I
[07:54] just showed y'all, and then halfway
[07:56] through the lift and folds, I added in
[07:57] chocolate chips so that they'd be evenly
[08:00] distributed. And then right before the
[08:01] final fold, I sprinkled it with like
[08:03] some cinnamon sugar. And then I just put
[08:05] it in the bread basket to rest overnight
[08:07] and or do like its long fermentation
[08:09] overnight. Um, so now it's time to bake.
[08:12] So to bake our sourdough loaves, we want
[08:14] to set our oven to its highest
[08:15] temperature. Mine goes to 500. I
[08:18] wouldn't recommend going more than 500
[08:19] if your girls more than 500. You could
[08:21] also do 475, 450. And I like to preheat
[08:25] it for at least 30 minutes so it's going
[08:26] to get really hot. And then I also like
[08:29] to put the base of my Dutch oven in the
[08:32] oven while it's preheating so that it
[08:34] gets super hot. Um, and now we need
[08:37] parchment. A
[08:39] hint, crinkle your parchment paper and
[08:43] score your bread on your parchment paper
[08:45] prior to adding adding it to the Dutch
[08:46] oven to make your life easier. Your
[08:48] bread directly on your parchment. Ooh,
[08:52] this one got a little sticky
[08:54] overnight. If that happens, don't worry.
[08:56] You can wash this and you can just dust
[08:58] it with a little bit of flour. When you
[09:00] go to score your bread, you want to do
[09:01] like quick and deep slits. Oh, and I say
[09:04] that, but these chocolate chips are
[09:06] stopping
[09:08] me. We're going to do a little cross.
[09:10] Sometimes you can, if you want those
[09:12] edges to come up, you can kind of just
[09:14] scoop them up a little bit and this will
[09:16] help them rise better when
[09:21] baking. There we go.
[09:24] Now that our bread is in the oven, we're
[09:26] going to bake it about 20 minutes at
[09:28] like 475 to 500. This is going to with
[09:31] the cover because this is going to help
[09:33] create steam within the Dutch oven and
[09:35] that is going to help your bread rise
[09:37] and like get nice and big. So, when you
[09:39] take the cover off, you're going to
[09:40] notice your bread is like basically the
[09:42] size it's going to be. Um, I used to
[09:45] when I first started making sourdough,
[09:47] I'd look the cover and it would be flat
[09:49] and it' be like it'd be the most
[09:52] heartbreaking thing to see. But after 20
[09:54] minutes of baking with the cutter, we're
[09:56] going to remove the cover to bake
[09:58] another like 15 to 20 minutes at
[10:00] 450°
[10:02] F. I would tell you the calculations in
[10:05] Celsius, but my brain just isn't going
[10:07] to do that this morning, unfortunately.
[10:09] Maybe I'll put them right here so y'all
[10:10] can know. Um, and yeah, and then
[10:13] basically when you take the cover off to
[10:15] bake, that's when it's going to get
[10:16] super golden and brown and crisp on top.
[10:19] And I would just keep an eye on it after
[10:21] about 15 minutes. Um because every oven
[10:24] is different, especially like gas,
[10:26] electric, so it could get brown a lot
[10:29] quicker or a lot slower. You might have
[10:30] to go a little
[10:33] more. Look at the
[10:36] swirl. The smell of fresh bread smells
[10:39] amazing. But this is like the smell of
[10:41] like bobka, a chocolate chip cookie, and
[10:44] like a cinnamon swirl pretzel all had a
[10:46] baby with sourdough bread. That's what
[10:48] this smells like. You can see this
[10:50] theme.
[10:59] Okay, now the hardest part about baking
[11:02] bread is the waiting after you've done
[11:05] all the hard work to make it. That's so
[11:07] hot. Oh my gosh. Okay, you want to wait
[11:10] at least 40 minutes to an hour before
[11:11] slicing into it because it's still
[11:13] baking, guys. Like, that's why it's
[11:14] piping hot. It needs to cool down. It
[11:16] needs to stop baking. Um, and it's I
[11:19] promise you it is worth the wait.
[11:32] Some flaky
[11:36] salt.
[11:39] M. It's so
[11:41] chewy. The outside is
[11:48] crisp. I also cut my finger.
[11:51] I'm excited to chocolate chip love.
[11:53] Okay, ending the video on my phone, but
[11:55] if you guys have any sourdough
[11:56] questions, please let me know in the
[11:58] comments. I'm here to help. I'll also
[12:00] have full details written out on my
[12:02] blog. But until
[12:04] then, I'm going to eat some sourdough.
[12:06] up.
⚡ Saved you 0h 12m reading this? Transcribe any YouTube video for free — no signup needed.