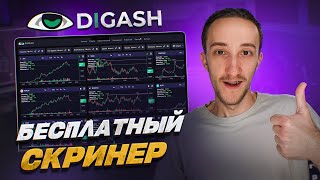

No-Registration Crypto Screener
49sShows instant access to top coins without sign-up, appealing to casual traders.
▶ Play Clip"Delivers a thorough walkthrough of the free screener, but the title's 'best' claim is subjective and the video includes promotional content."
This video is a comprehensive tutorial on the free version of the Digash cryptocurrency screener. The presenter demonstrates how to use its features to find active coins, customize workspaces, set up filters, and utilize various indicators and notifications to improve trading decisions.
The video introduces the free functionality of the Digash screener, highlighting its size and usefulness for trading.
Users can access the screener without registration, view top coins by transactions and volatility, and change timeframes directly on the site.
The screener shows technical data for coins including volumes, price changes, transaction volatility, and correlation, all clearly displayed.
After logging in, users can edit workspaces, select exchanges (Binance Spot/Futures for screener, all exchanges for coins tab), and set filters by volume and correlation.
Sorting is available by alphabet, volatility, correlation to Bitcoin, volume, transactions, top growth/decline, and more. Premium adds volume spike sorting.
Free version allows updates every 30 seconds, minute, 5 minutes, or manually; real-time updates are premium.
Indicators include 'My Trades' (shows trade history on chart), technical data, RSI, and ATP, all customizable.
Free version offers three workspaces; premium offers unlimited. Users can add coins to favorites (up to 5 in free) and monitor them like a watchlist.
Users can change themes, adjust number of charts (1-5), and customize density level colors and other visual settings.
An enlarged chart view includes indicators and drawing tools for marking levels, rectangles, and using a magnet marker.
The coins tab shows a large chart with drawing tools, allows switching between spot and futures, and offers sorting by notifications, name, volume, etc.
Users can select from multiple exchanges (Binance, Bybit, Bitget, Gate, OCX) and customize column sizes, with automatic sizing option.
A density marker shows green for long and red for short density. Free version only allows 24-hour timeframe for columns; premium offers all timeframes.
Filtering by volume and correlation is available in screener tab only. Levels can be adjusted by number of candles and indent.
Users can set up Telegram notifications by entering their ID and starting the bot. Free version offers five price-crossing notifications; premium adds density, price change, correlation, listing, volatility, and volume surge alerts.
Premium feature that allows setting reminders about rest, strategy, etc., to help traders stay disciplined.
A promo code 'Green' is offered for 10 days of free premium access, limited to 500 activations.
Shows recent coin listings with exchange and date, and allows saving screenshots. Premium offers instant listing notifications.
Users can import/export settings, share configurations, and connect exchange API keys to display trades on charts.
Typing from any tab opens a global coin search showing exchanges and spot/futures availability.
The Digash screener offers a robust free tier with many features for finding and analyzing trading opportunities. Its customization options and fast notifications make it a valuable tool for traders.
What is the free version's limit on workspaces?
Three workspaces are available in the free version.
07:23
How many favorite coins can you add in the free version?
Five favorite coins are available in the free version.
07:49
What update frequencies are available for sorting in the free version?
30 seconds, every minute, every 5 minutes, and manual updating.
04:26
What does the density marker indicate?
Green indicates long density, red indicates short density.
13:29
What is the promo code offered for 10 days of free premium access?
The promo code is 'Green'.
17:36
How many price-crossing notifications are available in the free version?
Five notifications about price crossings are available.
15:47
What is the 'My Trades' indicator used for?
It displays your trade history on the chart, including entry and exit points and results.
05:40
Which exchanges are available in the coins tab?
Binance, Bybit, Bitget, Gate, and OCX.
02:19
What is the global search feature?
Typing from any tab opens a global coin search showing exchanges and spot/futures availability.
22:25
What is the cost of premium access mentioned?
Premium access is available for $18 for Trading topics.
14:53
No Registration Needed
Users can start using the screener immediately without sign-up, lowering the barrier to entry.
00:19My Trades Indicator
This feature integrates exchange API keys to display trade history directly on charts, aiding in performance review.
05:40Instant Notifications
The screener provides near-instant price crossing notifications, enabling timely trading decisions.
15:20Promo Code for Premium
Offering a promo code for free premium access is a strategic move to attract users and showcase premium features.
17:36Global Search
The ability to search any coin from any tab streamlines workflow and improves efficiency.
22:25[00:04] free functionality of Screen Hash, it is quite large and useful, I will show various tricks, methods of application and how to use it correctly to pull green and earn with [music]
[00:19] trading when entering the site. We even without registration already see configured workspaces in which we can view the top by number of transactions, top by volatility, and that’s simple, that is, we can just go to the site and without
[00:34] registration see the active coins we need, the coins that are currently at the very top, this is very convenient because you do not need to log in anywhere, register, you can even log in from your phone and immediately see the active
[00:49] coins for you that are suitable for your trading. Because here we have workspaces already configured to search for active coins, we also have a time frame change available in the upper right corner, click and you can select any
[01:04] time frame, for example, Let's set a minute and all our charts have changed and now they are on a minute time frame. That is, even without registration, you can do all this and conveniently view all the coins that we have. Let's also
[01:19] set another one, for example, 4 hours. This is how it looks on the four-hour volatility.
[01:34] coins are simply growing. We also see all the technical data for the coins: volumes, price changes, transaction volatility, correlation. This is all clearly and clearly shown. Let's now log into our account. Click the login button. After logging in,
[01:50] we already have the settings for our workspaces open. That is, we can already delete, add, move, change, and configure spaces. Let's first analyze the screener tab and the workspaces themselves.
[02:06] Here we can completely customize everything for ourselves. Click on the pencil, go to editing. Here we can select a name, then an exchange. In the screener tab, only
[02:19] Binance Spot and Binance Fut are available, but in the coins tab, all exchanges are already available, and here you can select any exchange you need: Binance Bybit, BitGet Gate, and OCX. That is,
[02:32] for the screener tab, we have one exchange, for the coins tab, we have all the exchanges that are available in the screener. Let's Next, let's move on to editing. We selected an exchange. Further formations are not available to us. In the free version of filtering, we
[02:45] can select a filter by volume from and to filter out liquid and illiquid coins. Also, the interval that will be considered for filtering can also be added to the blacklist. We can add unnecessary coins to it and set up
[03:00] filtering by correlation to Bitcoin. We can also select an interval for it, and this is very convenient, it will help us sort unnecessary coins because in the screener tab we only have 10 coins available. So, we scroll down below, and here we have the
[03:15] end of the list, and we can thereby filter the coins so that the best ones are shown at the top. But for the coins tab, there are no such restrictions. And in the coins tab, all coins are shown from all exchanges, so as
[03:29] for the coins themselves, there are no restrictions at all, so you can conveniently look at the filtering in the coins tab in the screener. Here they are all, a huge huge list that is here. Then, after filtering, we go to
[03:43] sorting, here we can choose any sorting, we have available alphabetically by volatility by Correlations to Bitcoin by volume by number of transactions by top growth top decline Nater selected coins coins with price alerts and also
[04:00] sorting by volume spike which is already available in Premium access. Here you can also tick the box to pin coins with new alerts and where there is Art, coins will be shown at the top. Also, for sorting, we can
[04:12] choose a convenient period for you for which sorting will occur. Further, the update frequency for sorting in real time is available only in the premium version. And in the free version, it is available from 30 seconds
[04:26] every minute every 5 minutes and updating manually. Then, go to the chart tab. Here we can select the time interval, that is, the time frame that will be displayed for all coins on the chart. Next, we can configure
[04:40] the number of candles to display. For example, I have 120 and this means that my coins will be marked like this in 120 candles on the chart. If, for example, we set 400, well, or Let's measure here, for example, we set 520
[04:56] and Our charts will be narrowed like this, if 120, then these are the expanded ones too. It's up to you, a hybrid chart setting is available. You can also set an indent for the number of candles on the chart. Indent - This is exactly
[05:11] the distance we have here, that is, if you want the chart to be in the center or close to the scale with the current price, you can also conveniently set it up to automatically find the density slope levels.
[05:26] This is already available in Premium access and opens in the full version. Next, go to the indicators tab. Here we have all the indicators available. You can even display them all on one chart. The first indicator is my
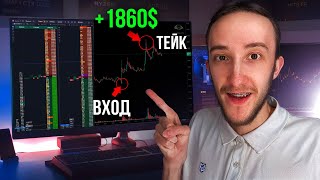
[05:40] trades. Here we can see the history of your trades, which will be displayed on the chart. That is, you can connect your IP keys, and your entry and exit points and the result of completed trades will be shown on the chart.
[05:55] You can also save a screenshot, and there will be all the statistics of your trade, how much you earned in percentages and in money. This is very convenient. We recently added this feature, and now you can connect your PIP keys to view the trades you
[06:09] make in the screener itself, displayed on the chart. By the way, if you want add some function to the screener Do you have an interesting idea, then be sure to write in the comments, we read all the comments and rely on them in
[06:23] creating new functions. We have an indicator, this is technical data for a coin, here you can select the volume of price changes, transaction volatility, correlation with Bitcoin, a surge in volumes and nar. That is, you can see
[06:38] all the statistics for the coin, all its data. You can also select any period and configure it so that it is convenient for you. Each setting for technical data is available. You can also choose the location. Where the
[06:52] technical data will be located, from the left, top, right, top, bottom, left, bottom, right. is on the top left. And you can place it on the top right or bottom right, left, bottom, that is, there is also a hybrid setting, which is very convenient for you, it allows you
[07:08] to see the information you need. Also, from the indicators, RSI is also available and ATP is also available. Full settings can be completely customized from color settings to customized from color settings to the period, width, closing, and range. As a
[07:23] result, we get such a workspace with us. In the free version, three workspaces are available. But if you want more workspaces, for example, 4-5 to infinity, then this is already available in
[07:36] Premium access and here there is just an unlimited number of workspaces. You can also create spaces in Premium access. In the free version, we can add coins to Favorites, click on the flag that is in the upper right corner of the
[07:49] coin, select a color, and the coin is added to Favorites. Five favorite coins are available for the free version, you can add them like this, and you will already have a fully prepared list of the coins that you are monitoring. By the way, I
[08:03] made myself a workspace with favorite coins, and here they are marked, you can now monitor them like a Watch list. It is very convenient. Also, at the top right, we have the design settings, we can
[08:17] go and choose a convenient theme for you. Screenshot view, for example, now I have three graphs, Screenshot view, for example, now I have three graphs, you can put two graphs, this is what it looks like. You can make five graphs in total. This is how they will hardly be, or
[08:30] one graph. This is how it will go. Such a large one takes up the entire screen, and scrolling through them like this is also very convenient. The clear favorite coins button is immediately available here, that is, we can click on it and all the coins that are in our
[08:44] favorites are located, we can delete them with one button, all the coins at once. It is also Color settings and design for the densities of horizontal levels are also available here. tilts and other various settings so that the screener looks in the
[08:59] format that suits you best. At the top right, we have a button we can click on and we will have an enlarged graph. Here we also have all the indicators available, plus the drawing tools we need. We
[09:13] can draw, mark levels, tilt rectangles, a magnet marker is available, we can beautifully mark all this and select the desired formation for ourselves. A list of the coins that we have also opens here. We can find the coin we need,
[09:28] can find the coin we need, printed, a coin appeared. Also, sorting options are available here with an enlarged graph, and here we can beautifully mark all this in the top right. We can also add a
[09:40] coin to Favorites. Take a screenshot. Click on it and a screenshot is made with the name of the coin and a graphic image of what it looks like. We can then paste it into the chat and share the formations and the coin that you
[09:55] are considering for trading. I also wanted to remind you that we have Telegram, where we post current updates, what we are currently working on, the functions that have been added. We also have a chat in which you can ask
[10:09] questions, share ideas that you want to add to the screener, and communicate. Share current formations and view the settings. Completely ready-made configurations are also available in the channel in a pinned
[10:23] message. Completely ready-made configurations that can be downloaded and applied in your trading are also available. That is, you download them, add them, and you have the entire screener configured. Next, we go to the coins tab. Here we see a
[10:36] large coin chart. All drawing tools and indicators that we have are also available. Another very convenient and cool feature is changing the Spot futures. That is, now we have Bitcoin futures enabled and we can click on the button and when we
[10:52] click, our chart changes to Bitcoin Spot. This is very convenient because we can view the formation that is on the spot in one click. Now, spot is available. When we click, we already have a fuge on the right, we see the coin columns, and this is very convenient
[11:06] because we can immediately add coins to Favorites and sort them by notifications. Where we have notifications set for favorite coins, by name, by volume, by price, by correlation, by volatility, and also
[11:20] by the number of transactions. This can also be done. That is, we just click on the value and we sort bam bam from largest to largest. Smaller or from smaller to larger, now the top of the fall, now the top. Just now, coins
[11:35] that correlate with Bitcoin, the very first Bitcoin, now coins with a negative correlation, volatility and the number of transactions, the smallest by the number of transactions and the largest. Very cool done. You can also change the
[11:49] column size to make it convenient for yourself. Plus, you can also change the exchanges here. All the exchanges that we have, binance, bybit, bitget, gate, ocx, you can choose any exchange for you and see the coins that are on it. All sorting for these exchanges is also available
[12:04] and this is very convenient. We select and we show all the coins that are on these exchanges. We also have columns that are automatically updated and sorting changes become more relevant. For example, a coin has grown,
[12:19] hop-hop sorting has updated and immediately shows the information we need. Also, at the top right, we have available settings. Here we can check the box for automatic column size and our columns are made according to the
[12:33] settings and sorting we set. This is very convenient because, for example, we knocked down or did something else, click like this, automatic size. Bam, it's done automatically for us. It's also possible and not automatically, that is, you
[12:47] can turn it off, you can customize it as you like, and it will also remember, for example, let's go to the screener tab and now let's go back to the coins tab and we see the setting we
[13:00] set has been saved, click the checkbox. Bam, and we have it done automatically. Next, we have this available here, you can choose the sorting options we have here, that is, we can set coins from notifications here, favorite coins, these are the
[13:14] first two columns that we can sort further, this is a marker with densities, this is not available. In the free version, this is an identifier that is next to the coins and shows whether there is a density on this coin.
[13:29] Green is in Long, red is in Short density. Next, we can select here in the free version this. Which columns will we have? Only a 24-hour timeframe is available for columns. All timeframes from a minute to 24 hours are
[13:43] already available in the full version in Premium access, but in the free version we can just choose which columns to show. For example, we can remove volatility. There we will have correlation as a result, there will be three columns. Or we can do
[13:56] the opposite. Set all the columns that we need for nature to last, bam, set its volatility, bam, set now we have all the sortings that are available to us. By the way, write in the comments. What sortings do you
[14:10] use for your trading strategy? It will be interesting to read to see which sortings are most often used in trading. Further filtering is available here, you can select a coin and add it to the blacklist. For example, if you don’t want
[14:24] some coins to be shown, you can add them here. Filtering by volume and correlation is unavailable in the coin tab, but it is available in the screener tab. Further, levels are available here, you can select the number of candles. Indent. The number of
[14:39] candles is what is shown. What kind of chart will be. For example, like this one, or compressed, expanded, compressed. You can also conveniently make it for yourself. And the indent is exactly this location, that is, how far the chart
[14:53] will be from the coin price. Further, we have density levels and slopes. This is already available in full access, which can be purchased for only $18 for Trading topics. This is generally very, very
[15:07] little, so you could say it's just a symbolic amount for such a large functionality. Next, we have a density map here. It's not available in the free version. density map here. It's not available in the free version. Next, there's the notification tab.
[15:20] notification so that we receive Telegram notifications. Here, enter your Telegram ID and turn on the Bot. There, simply click start in the Bot and after the Start button, the bot will already send us notifications. What is available for us by
[15:34] notifications? Here we have notifications about new densities, price changes, correlations, listing volatility, and volume surges. They open in Premium access. And in the free version, we have five notifications available about
[15:47] price crossings, that is, we can go to the chart, click the plus sign on the right, and we will receive either a sound notification or a Telegram notification. We have five notifications available here. You can set them like this. By the way, notifications
[16:00] come very quickly. Let's see. I turned on the sound checkbox here and look how fast it is. I didn't even have time to say it, it already worked as soon as I crossed it. It worked right away. We recently updated the speed of
[16:14] notifications and now they come instantly. And it's done very quickly, if it crossed even a little, it will work right away, let's see now, it came again, and here at the top right we have a notification, that
[16:29] is, In the free version, five notifications about price crossings are available, and they can come in the sound notification feed, as now, and in Telegram, this is also available in everything In the free version, by the way, Let's see And
[16:41] sorting, for example, here I set a notification Yes, now about price crossings, and here we can click on the bell and sort the five notifications that we have, it's also very convenient that sorting by notifications,
[16:56] that sorting by favorite coins, then we have the psychology tab, it is available in Premium access, and here you can set various notifications, set various notifications, reminders, for example, about rest Read
[17:09] about your strategy before a deal, select the text you want to be sent to you, the trigger period, and you will be sent such reminders to control yourself as much as possible and remember how to trade in
[17:22] order to take the right actions and make money with trading, then we go to the Premium tab, here you can find out how the free version differs from Premium access See the differences between what's there and what's
[17:36] here, and also especially for those who are watching the video now, let's make a are watching the video now, let's make a promo code, call it Green, and when you enter this promo code, you will be given access for 10 days. That is, you can
[17:48] now enter the promo code Green, click the apply button, and you will be connected to the screener for free for 10 days. 500 activations are available for this promo code. days. 500 activations are available for this promo code. So, hurry up, next
[18:06] This tab can be sorted by coin names, by exchanges sorted by coin names, by exchanges on which the listing took place, and by date. When we had the first listing and the last, for example, now we have
[18:20] February 28th, and the Red coin was listed on Binance SP, then the HA SOS BitGet FUT coin. We can click on them to see the coin chart, what it looks like, that it was really listed 6 hours ago, almost seven, and it's all very convenient. This is all
[18:37] done also in the top right, we can click on the button, we will save the coin chart and a screenshot will be created, which we can share with other people in the chat, send them that there is such a listing now. Such an interesting coin. And in
[18:51] Premium access, notifications for listings are available. You can turn them on and you will already receive notifications about the appearance of a new coin. And by the way, we have now greatly accelerated the notification for listings and it arrives
[19:05] within a few seconds after the coin listing itself. That is, you list a coin and a notification already arrives on the first candle. This is very cool. We worked a lot on this and now it works very quickly. That is, a coin appears
[19:19] and a notification about the listing immediately arrives that such and such a coin has appeared, plus the chart is immediately shown in the screener at the very start. And thus, you can trade the coin faster than anyone else because, as a rule, as soon as a coin
[19:32] is listed, a lot of formations appear and you can earn a lot on such activity. Let's now go to the profile tab in the upper right, click on the profile and here we have the import and export of settings available. That
[19:46] is, you can check the boxes and share your configuration with someone or, conversely, apply someone else's configuration. For example, in our Telegram there is Config in the pinned message. You can download them and here in In the profile tab,
[20:02] you already click the checkbox, select Which setting do you need, then click import, select the file you downloaded and you will already have the entire screener fully configured. Also, the function that we recently added is connecting exchanges. Now
[20:17] we have Binance available here. That is, you can connect your PIX, just click on the pencil and here we have a field in which we insert IP keys for reading and after which all our transactions that
[20:31] we make will appear on the chart. This is very cool and conveniently done. Let me show you how it looks. Here we entered our IP keys. It says connected. After that, we can add a display in the screener tab in the
[20:45] indicators. Click my transactions. Here you can customize the color for display. can customize the color for display.
[20:57] the indicators in the upper left, select my trades, and after that you will see an icon that we click on, and we are already loading trades for this coin. I clicked on the trades, they were successfully loaded, and I had a trade here. Let's
[21:13] and I had a trade here. Let's show you where I entered, that is, the green triangle is where I entered, the red one is where I exited, and as a result, we now have our trades that we are making displayed. This is very cool and convenient. We
[21:26] can click on the triangle and see the statistics. The percentage is written here, and how it generally looks. Here, of course, I ate the glass, and this is also available for each coin. For example, here I remember entering, we can click on load trades, and
[21:41] hop trades are immediately loaded. When clicking, we have a percentage available, how much we earned, that is, our entry point, exit point, and also when clicking on the screenshot, here in the upper right, we can see the
[21:56] profit we earned and without profit. You can also choose which screenshot you want, for example, Let's click with profit, and the screenshot is saved, and we Here we can insert it into the chat, share it with
[22:10] someone, click paste. And this is how beautiful it looks: our entry point, exit point, and all the statistics on transactions are clear and understandable, and very convenient. Made for trading. I also wanted to tell you about a very cool feature:
[22:25] we can start typing from any tab on the screen, and a global coin search will appear. For example, now I typed the coin PNU, and here it says that there are 10 coins and on which exchanges, for example, here to Binance, BG, Bybit, and Gate, and
[22:40] for example, here to Binance, BG, Bybit, and Gate, and also Spot or F, and we can go from the Big Search and see the coin we need. Let's type ada, and here coin we need. Let's type ada, and here ada appears, let's just type coin. And
[22:54] here 144 name. Let's type 20, so BTC on each exchange, and thus it is very convenient that we can find the coin we need from any tab. As a result, we have now analyzed the free functionality of the screener
[23:08] Gash, it is very large and useful, the screener is very good at helping find the best coins for trading, automatically marks the density slope levels, a large number of notifications and reminders on psychology are available. Listings,
[23:23] advanced notifications, various types of sorting, filtering, display of your trades, full statistics, density map. And thus, trading becomes much easier and more profitable. Well, this video will come to an end.
[23:39] Thank you all very much for watching. Let's shake hands. Let's have fun, let's get green. Thank you very much everyone. Goodbye, bye-bye.

⚡ Saved you 0h 23m reading this? Transcribe any YouTube video for free — no signup needed.