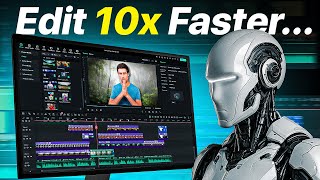

Stop Editing Manually in 2026!
43sDirectly challenges viewers' current workflow, creating urgency and curiosity about AI tools.
▶ Play Clip"Delivers on the promise of AI-driven editing, but the title oversells 'future' while the video is a practical tutorial."
This video demonstrates how to use Wondershare Filmora 15's AI-powered features to create documentary-style video effects, from war zone animations to AI-generated videos, and emphasizes the efficiency gains of AI in editing workflows.
The video opens with the claim that manual editing is a mistake in 2026, and AI can make editing 10x faster.
Wondershare Filmora 15 is presented as the best free editing software, accessible on PC and phone, with features comparable to After Effects.
The interface includes an import area, preview area, properties/effects panel, and timeline. Stock media, audio, titles, transitions, filters, stickers, and templates are available.
To create a war zone effect, set saturation to -100 for a vintage look, then use the Pen tool to create a custom mask around the desired area.
Use the camera icon to take a PNG snapshot of the masked area. Duplicate the layer with Alt+drag, then invert the mask on the top layer to reveal the surroundings.
Create a border in Photoshop/Photopea, import it, and use a linear mask with keyframes to create a revolving outline animation.
Add drop shadow, animate the jet across the canvas, and use keyframe graphs for smooth motion. Duplicate layers for multiple jets.
Merge cloud layers into a compound clip for easy management. Apply Slow Zoom and Glow effects to enhance the scene.
Use AI Image generation (Nano Banana) to create a news article image from a screenshot. Then use the shape tool to create a yellow rectangle for highlighting.
Set the blend mode to Multiply and use a linear mask to animate the highlight. Add a zoom transition and 3D motion effect for cinematic feel.
Use a paper background, import an image, and create four snapshots with rectangle masks. Apply basic 3D rotation keyframes to each layer for a folding animation.
Add a title with custom fonts and animations. Apply Old Video, Slow Zoom, and Paper Crinkle effects for a vintage documentary look.
Access the Infographics section in Effects to find animated charts (pie, bar, line). Customize data and import to timeline.
Use Text to Video under AI Media to generate AI videos with props and sound effects. Extend scenes with the Video Extension tool.
Remove unwanted objects from clips using the Object Remover tool with shape or brush selection. No quality loss.
Use Smart Edit > Silence Detection to automatically cut silent parts from A-roll clips. Set threshold and duration to analyze and apply cuts.
Import animations from other projects using File > Import Sub Project, allowing team collaboration and reuse of assets.
Generate dynamic captions with AI Caption, choose language, and customize text properties. Apply to all layers at once.
Filmora 15's AI tools significantly speed up documentary editing, from generating assets to automating cuts, making it possible for one editor to do the work of ten.
What is the first step to create a war zone animation in Filmora?
Set the saturation to -100 to give a vintage theme.
02:50
How do you create a custom mask in Filmora?
Use the Pen tool to draw points around the area you want to mask.
03:06
What is the purpose of the Invert Mask option?
It shows the rest of the surroundings while the bottom layer shows only the selected area.
04:04
How do you create a duplicate layer in Filmora?
Hold the Alt key and drag the layer upwards.
04:04
What is the Nano Banana model used for?
It is an AI image generator that creates realistic images.
10:38
How do you create an article highlight effect?
Use the shape tool to create a rectangle, set its color to yellow, and then use a linear mask to animate it.
11:17
What blend mode is used for the article highlight?
Multiply.
11:59
How do you create a paper folding effect?
Take four snapshots of the image with rectangle masks, then apply basic 3D rotation keyframes to each layer.
13:51
Where can you find animated charts in Filmora?
In the Effects tab under the Infographics section.
17:33
How do you extend an AI-generated video scene?
Use the Video Extension tool and describe the next scene.
20:54
What does the Object Remover tool do?
It removes unwanted objects from a video without quality loss.
21:50
How does Silence Detection work?
It analyzes the audio and automatically cuts out silent parts based on threshold and duration settings.
25:15
What is the benefit of importing sub-projects?
It allows you to reuse animations and assets from other projects, saving time.
27:25
How do you generate dynamic captions?
Go to Text > AI Caption, select language, and click Generate.
28:32
AI Editing is the Future
Sets the premise that manual editing is outdated and AI is essential for efficiency.
00:02Snapshot Feature
Demonstrates a time-saving feature that eliminates the need for external screenshot tools.
03:35Nano Banana AI Image Generator
Highlights the integration of a top-tier AI image generator within the editing software.
10:38Silence Detection for A-roll
Shows a practical AI tool that automates a tedious editing task, saving hours.
23:33Future of Editing
Predicts that one AI-savvy editor will replace teams of ten, emphasizing the importance of AI skills.
31:24[00:02] have a team of editors who edit their videos. But you guys edit their videos. But you guys That too using AI. 2026 is coming. And if you guys still edit manually
[00:16] then you are making a big mistake. In this video, I will show you how to recreate these six most used effects from documentary niche using AI. how you can also make your editing 10x faster, you will also know this by the end of this video.
[00:29] So without any delay let's move on to our editing software which is Wondershare Filmora version 15. Filmora is the best free editing software available right now, which you can access everywhere from your PC to your phone. And
[00:42] this software has so many features that you can literally compete with After Effects I am not exaggerating this thing, rather download Filmora from the link given in the description.
[00:54] After which, as soon as you open it, you will reach an interface like this. All you have to do is click on New Project. After which your interface will change and you will come to your project. Let me first explain the interface to you. This
[01:06] is very easy. First of all, you can import any element from your device by clicking here. As you can see. Let And you can drag and drop your assets into the timeline. To
[01:20] put it simply, this is your import area where you will see all the assets of your projects. To the side of this is your preview area where you And then to its side is the Properties and Effects area. That means
[01:34] all the properties of your assets that you want to change or mold according to your edits will be visible to you here. This is your timeline where you will edit the layers. Inside End Timeline, you can use
[01:47] many of the features mentioned above to increase your productivity. Where you are already given some traditional stock footage and assets. Next to it is audio where
[02:03] its side there is a title where there are already many presets as per your requirement. In Transitions you will find transitions of more than 200 different categories. you will find transitions of more than 200 different categories.
[02:16] your editing much easier. And then you have filters, stickers and templates. Now that the interface is clear, let's move on to our first scene creation, which is the war zone animation. To
[02:35] map to the timeline and increase its duration slightly. You can also zoom in and out of your timeline from here. So first of all you have to select your map layer and go to color. Where
[02:50] you will already get many color tone presets. But for now, all you have to do is scroll down a bit and set its saturation to -00. This will give your map a vintage theme. You
[03:06] Now we will use the Pen Tool for our animation. All you have to do is select your assets and for our animation. All you have to do is select your assets and find the Pen tool with the help of which you can create a custom mask. You will not have to
[03:21] depend on pre-provided masks like other software. You can make it yourself. Now, whichever area you want to show as a war zone , you just have to put points on the border of that area points have to be closed. So that you will have a cut out. Something a bit like this.
[03:35] After this you have to click on the camera icon made here. After which you can literally take a screenshot of whatever is visible on your preview screen as a PNG. If I were doing this in any other software, I would have to
[03:48] its background would have to be removed and then imported again, which would consume a lot of time. But there is and the PAG will appear inside your project file. Now all you have to do is click on the Alt key and
[04:04] drag your layer upwards. This will create a duplicate layer of your existing layer. You have to click on the upper layer and click on Invert Mask on the right side. So that the rest of the surroundings will also become visible. The bottom
[04:18] layer shows only your selected area. The top layer shows the rest of your body. Now when both these things are separated then you have to right click on your PAG and then click on Reveal in Folder. So that you will know
[04:31] where your PAG is saved in your device. Basically, Filmora also manages your folders automatically. You just have to do editing as an editor. There You just have to do editing as an editor. There
[04:43] is no need to worry about anything else. After this you have to Photoshop or Photo Pia and prepare a border for it and export it in PNG format. After which, coming back to Filmora, you just have to import the border
[04:56] and add it to the timeline. Due to which an outline stretch its duration a little as per the timeline. Now you have to select the layer with the outline and select the linear mask here. What this mask will do is that it will
[05:11] What this mask will do is that it will create an animation from this. You need to add a key frame to the start of the layer, which you can do from here. And then go ahead a few seconds and
[05:25] drag your mask from the X position here. This will create a revolving animation. create a revolving animation. You can increase or decrease
[05:38] its size from the preview screen. After this you have to go to the image here. Where you can now adjust the properties of your PAG. Like let's say I want the shadow of this jet. So I'll just click on the drop shadow here.
[05:50] So that I can get a shadow. The end scene will look a little more cinematic. I look a little more cinematic. I
[06:02] can also control the properties of even shadow like color, angle, size, opacity etc. as per my wish. Now you have to its position outside the canvas to create a nice animation. After which, you have to move a little forward and bring the jet into the canvas and take it out from the other side.
[06:16] So that a flying animation will be created. If you click on this icon at the top of the player, the keyframe graph will also be shown here. Which you can also customize according to your needs. Here, if I click on the key frame,
[06:29] many options will open here. Out of which, there is an option of easy in graph. So let me apply it here. You can even see here that you have got many graph options here also. Unlike Premiere Pro,
[06:42] All the work will be done within this layer. And both your timeline and interface will be quite clean. So if I run a little animation and show it to you, then run a little animation and show it to you, then something like this animation is being created.
[06:56] Now to make this scene a little more intense, I will create two more layers of this jet and change their position and size. This is very easy to do. All you have to do is change the X value of the copied layer. This will create a scene where three
[07:10] fighter jets are flying over the war zone area. also import the page of the clouds here. And I'll give them some animation too.
[07:22] After which, if you run your animation and see it, you will see a scene like this. But now you can see that many layers of clouds have formed in our timeline. So to clean it up you
[07:39] clicking on it, all your cloud layers will be merged and your timeline will be cleaned. And in the future, if you need to edit all the clouds together or add some animation, then the compound clip will be very helpful for that.
[07:52] Now the scene is set up. So finally we use the amazing effects provided by Filmora. You have to go to Effects and search for Slow Zoom and then bring it to the timeline. Due to which some such animation will be seen.
[08:05] I reduce its duration. And I You can also control the settings of the effects from here. Like I narrow down its range a little bit. Now if I show it to you, it would have become something like this.
[08:25] to create a zoom in and zoom out effect. After which the final output will be something like this. But the scene still doesn't feel special. So we add another effect which is mild movement. You can also change its settings according to your needs.
[08:38] So that there will be some movement in your scene. Now finally, after this, to make our outline glow, you have to search for glow and apply this effect So that your outline will start glowing. And then
[08:53] after this, if you have a PAG with a warning sign, then you just have to place it between the mask layer and your original layer. Now your final scene setup is ready. To clean up the timeline, you can select all the layers together, split them,
[09:07] and delete them all at once. Now the scene is ready but no video looks good without sound effects. So for this you just have to go inside the sound effect in the audio section here. Where you will get whatever sound
[09:19] effect you search for. You don't need to spend hours fiddling with third-party software. Everything is inside Filmora. You can also use sound effects directly by dragging and dropping them. I'll add a jet
[09:31] sound effect here to make the scene look a little dramatic. Now if I show you the final animation that we created, it looks something like this.
[09:45] created a Magnets Media-level scene because Filmora's interface is so easy. And our time is spent only in editing. Not in useless activities. Now, if you want, you can convert this entire scene into a compound clip by clicking here.
[09:57] This will clear the timeline and you will be able to start further editing. Now let's move on to creating our next effect, which is literally going to take less than 2 minutes. Article Highlight Effect. So for this, first of all
[10:11] I take a screenshot of the last frame of my animation. That too inside Filmora, after which if I go inside Stock Media, then here you will see many options inside AI Media. Like image to video,
[10:25] for which you are also given access to Vio3 here. Can you imagine this is what you are getting with these editing software. Same way there are other options like text to video. But for now let's go to AI Image. Where literally you are
[10:38] given a model of Nano Banana to generate your image. For those who don't know, nano banana is the best AI image generator at present which gives absolutely realistic type images. I will upload the screenshot I took here.
[10:51] And then I will give you a prompt to create a news article. After which, if I click on Generate, my editing assets will start getting created inside the editing app itself. There is assets will start getting created inside the editing app itself. There is
[11:04] You will get such result in just a few seconds. Can you see how perfect this is? There are still many people who do this work manually on Photoshop. But you can do your work 10x faster by using AI media. I'm going to drag this directly
[11:17] into my timeline. Now let's create an article highlight effect. For this you have been given the shape tool here. In which if I select rectangle and create a rectangle on the preview screen. I will even increase the zoom level and
[11:29] show it to you clearly. You can customize your rectangle however you want. Let me rotate it and select the color yellow from here. Let me I'm going to drag it down so I can have visibility. After which you have to go
[11:46] ahead in the timeline and place your cursor where you get a black background. And by zooming out you have to take a snapshot and save it. After which you have to delete the shape layer and import this layer here
[11:59] which will automatically get aligned at the right place. Now you have to select your PAG and go to Basic. Where inside the blend mode option you have to choose Multiply. And then going to the mask, you have to select the linear mask and
[12:12] going to the mask, you have to select the linear mask and You can even move the mask from the preview screen itself. So if I run the animation and show it, here the article highlight animation is ready. But to
[12:25] make it more cinematic, we'll convert both of these layers into compound clips. apply between these two effects. Here at Literally, you have a variety of transitions available. But for now we need a zoom out
[12:39] apply zoom six here. After which, if I run and show it, we are getting some kind of transition like this. And since I want to make the scene a little bit more cinematic. So I'm just going to go
[12:52] into Effects and bring the 3D Motion effect into the timeline under the Basic category. Exactly at the moment when my transition is complete. If I were to score runs, something like this would be created. As you can see that the blur has become too much then you can reduce it from here.
[13:06] And you can also customize the remaining settings as per your requirement from here. Now if I show you the final output that we have created in just 2 minutes, it looks that we have created in just 2 minutes, it looks something like this. Is
[13:22] effect which is the paper folding effect. So to create this animation, first of all we will go to the library under stock media where under solid color you will find many colors which you can use as a background. Here
[13:37] if I search paper then I will get a lot of paper motion backgrounds. For now I'll choose this one. After this you have to go to media and import your PAG. And we will adjust its size. Something like this. So now to
[13:51] create the paper folding animation, you first need to add a ruler guide inside your preview screen. So that go to the mask and select the rectangle tool. After which you have to adjust your mask in such a way
[14:06] that the lower part of the right hand side is completely covered. And then because we have to take a snapshot here. After this you have to move your mask and take a snapshot of the other side also. You have to do the same thing
[14:20] for all four quarters. After which you will now have four PNGs in your project file. After this moment, you have to delete the page that was in your timeline. And then you have to bring the snapshots you took into the timeline. These
[14:34] four snapshots will automatically reconstruct your entire image. Now let me unhide the background as well. After this moment, you have to go inside the effects and apply basic 3D to your first layer. To make it easier for you to understand,
[14:48] You have to open the effects settings here and then come to starting here and give a key frame. After which you have to move a little forward and add the keyframe again. Now you have to come back to your first keyframe and
[15:03] change the rotate value here in such a way that your PNG is not visible. Your PAG is there in the canvas itself but it is at an angle which is not visible to us. So if I run here, I will get some animation like this.
[15:18] also. But the animation timing of all your subsequent layers should come a little later than the first one. As you can see I'm adding the key frames a little bit later. Not at all in the beginning. The animation you guys would have created till this moment would be
[15:30] animation you guys would have created till this moment would be something like this. and write a heading. Like I write Japan here. You will see all the features of the text here. Such as giving background to the text
[15:45] Such as giving background to the text , fonts, color, outline and everything. So for now I'll look for a nice font. After which you will see many animations for text also in animation. You can choose any animation.
[15:58] If I play the scene for you, it would look something like this. Now to make the scene even better, we will add some effects here. The first effect among these will be the Old Video Effect which will give a slightly vintage type look. But
[16:13] I reduce its fade a little so that I can sustain the colors. Then we have to add another effect which is slow zoom. Which has to be applied after the text animation is over. And I reduce its range a little bit. After this, you have to
[16:26] add the paper crinkle effect in the timeline which will give the final touch to the scene. Now the scene is complete. So I select all the layers and convert this into a compound clip. And we have shifted directly from the previous animation to this animation.
[16:39] add a transition here as well. Tone paper so that there will be some kind of seamless transition between the two scenes. The so that there will be some kind of seamless transition between the two scenes. The effects are still pending. So again to give sound effects I will come here and
[16:54] search here paper turn and I will place it at the time of transition. And further, when our PAG is unfolding, at that time also I will add different sound effects which will give the paper sound effect. After doing all this, you will finally have
[17:07] After doing all this, you will finally have created some such animation. documentary videos gain a lot of views. Now let's move on to
[17:20] our next animation which is the infographics chart. I am sure you must have infographics chart. I am sure you must have which are animated and also present the data in a very nice way.
[17:33] animate such graphs because they do this work in After Effects. But we will play smart here. If you go to the Effects tab in Filmora, then on scrolling down here you will find a section of
[17:47] infographics. Where you will find many such effects which involve data work. Basically, you will get templates for all such effects from progress bar to loading, which you can animate as per your requirement. As you
[18:00] can see here, this number slider animation is talk about money. In this section, you will find an option of animated charts at the top. If you click here you will find many different ways to present the chart.
[18:14] Like the progress bar that used to be very common on YouTube. Pie chart graph, bar graph, line graph asetra asetra. All types of animated charts are available here. You can customize everything from their animation to their details as per your choice.
[18:27] On the right hand side you are given the option to customize all the properties of the graph. And if you go to data from here,
[18:39] here you can directly import any already made data. And your graph will automatically adapt according to that data. There you have to do is click on Import to Timeline here. And your
[18:53] animated graph will appear in your timeline. I'll drag it onto the first layer. If you want to make some changes to the data in the future, you just have to click on Edit here. And you will be back at the interface where you
[19:05] can make any changes. Auto Effects will not even a 3 minute job. Now let's move on to our next animation which is AI videos. Any documentary video is incomplete without AI. Where big editors have
[19:21] taken subscription of different AI tools and get their props enhanced by Chat GPT and And then after converting it into a video, we waste hours. At the same time, if I go to the Text to Video category under AI Media in Filmora
[19:36] and what I want for my edit, then you will also get the option of AI prop generator here which will enhance your prop so that a good video is generated and as soon as your
[19:51] you click on generate, then within a few minutes your AI video will be ready You can drag it to your timeline without any problem. I'll play it for you.
[20:03] without any problem. I'll play it for you. 500 Just One More Day. That too with sound effects. Even the character expressions were perfect. I'll
[20:17] expressions were perfect. I'll play it again and show you. I didn't have to generate multiple results. Nor did you have to waste time going outside the editing software. Everything happened in just two clicks. Now
[20:29] suppose the video you have generated is shorter than your desired time duration you imported yourself and its duration is shorter, then what will you do in that case ? You guys spend hours
[20:42] searching for some new good stock footage again. But there is no need to do this in Filmora. Because they have AI for this work also. Suppose I have to extend this scene a little bit. So for this you just have to go to the video extension tool here
[20:54] and upload your video here. After which, from here you can decide the camera movement as to what kind of shot is required in the scene. And then you can describe here what scene you want next in the video you have uploaded.
[21:08] your result will be ready within a few minutes. If I bring it into the timeline, you can see that not even a single frame has a problem. The I had written anything in the prompt then obviously the scene was not making sense.
[21:23] But the better you progress, the better the scene will be generated here. And by following this work flow, your productivity will also increase significantly. Since we have created the scene, I will also add a market sound effect here.
[21:36] Now I know you guys have seen so much AI in Filmora that somewhere you guys might clients then I will earn more money but wait because the next two AI and the last one which is my
[21:50] personal favorite can literally save your entire day. So without any delay let's move on to the next effect which is object removing. I am sure as an editor you must have many such clips which would be perfect
[22:02] but due to some element you cannot use them. Like I have this solitude scene here. But there is a bird here which would have been better if it were not there. So normally in this case the editors either start looking for another clip
[22:14] or waste hours in roto editing. But there is no need to waste time in Again Filmora. All you have to do is click on the object remover option here. After which such a popup will appear in front of you. Here you can
[22:26] select the object inside your video either by creating a shape or with the help of the brush tool. Doesn't matter whether the object is moving or still. Whatever object you want to select, you can select it here. After which, if you click on remove,
[22:38] removed from your video within seconds. And he will disappear in such a way that it will never seem like he was there. And in all this, neither the quality of your video will go down nor will you have to waste hours. Now scenes,
[22:50] not applied transition and effects in the last two-three scenes. So let me do this before the next animation. You must have seen this film burn transition many times in documentary videos. So you will get this transition inbuilt inside Filmora. All you have to do is
[23:03] drag and drop it. And here we've shifted from sin data to an AI scene, so we'll need a slightly unique transition here. So I'm going to use the memory scene transition here, which will give us some animation like this.
[23:20] look more like a movie than a documentary, I will add an old video effect to it so that all these scenes look like a flashback. Now the six effects that I talked about in the beginning of the video have been But since you guys have stayed till here in the video, I will also tell you about a bonus
[23:33] feature here which can literally save you a lot of days as an editor. literally save you a lot of days as an editor. Cutting a Rolls. Before editing any documentary video, you have a raw clip called A-roll, which is
[23:45] sometimes even two to two hours long. And your job as an editor is to make cuts in them so that even the raw clip plays like a perfect video. But literally it takes a lot of hours and sometimes even days. But now
[23:57] you do not need to do this work manually. I'll show you why. I have imported one of my video clips here. In which I have taken a lot of gaps so that I can show you people the use of future. So this is a 48 second
[24:09] clip that I'll play you the audio of first. For editing, but somewhere in it the creator You can hear how much background noise and reverb there is
[24:23] in it. If I go to audio here and turn on AI Voice Enhancer, listen to the audio again. So I'm recording this video just so you guys can get hired by Talking Heads Videos for documentary editing.
[24:36] opening Audio City or using any sound designing software. And apart from all this, you can make whatever changes you want in your video from here. For example, if I want to
[24:49] change the color of my T-shirt, I can simply go to the color section and change the colors manually from there. And I can make the color of my T-shirt a little dark grey. You can see how easy color grading is here. You have the option to
[25:01] here. But this is not the amazing thing. If you right click on your video and go inside the Smart Edit tool, then you will get an option of Silence Detection here. As soon as you click on this, a popup like this will open.
[25:15] Where you will see the graph of your audio in this way. Now if I silent parts or unnecessary parts from my video clip, it would easily take 15 to 30 minutes. Doesn't matter how short the clip is. But if I
[25:30] reduce the threshold value here a little bit and make the duration 0.2. That means if I remain silent anywhere for more than 0.2 seconds, that scene will be cut. And after this, if I click on Analyze, then the cuts will be automatically added to my video. And those
[25:43] scenes where I took a gap must have been hidden. Like look at this. you guys can enjoy talking head videos for documentary editing. But there is a creator in it somewhere. Please
[25:56] note here that where I was silent, Filmora has jumped the scene. Now at this moment I am silent as well, so I can just click here and hide it. And then it will take a long jump. As you can see, I will give it to
[26:09] Look here again, I was silent here, so this area has been hidden. It's not You will go to his place, there is an option for this inside Filmora. Like right now I'm going to shut up again. Now, just as I remained silent here, I suddenly started speaking again.
[26:22] just have to hide or unhide it according to your convenience. After which you just have to click on Finish and Replace. And the long clip you brought to your timeline will automatically have the unnecessary parts cut out and updated in your timeline.
[26:35] Can you imagine how much easier your work will become if you edit podcasts or any kind of videos where the client gives you air roll clips? gives you air roll clips?
[26:47] something like this. I'm just recording this so you guys can enjoy talking head videos for documentary editing. But somewhere in it the creator will give it to you with some hesitation. At this moment, if you go to cut manually, there
[27:00] At this moment, if you go to cut manually, there into a compound clip. Now all these add tools were such that they will increase your single handed productivity
[27:12] as an editor. But if you work with a team, then you will have to share things like project files somewhere, which again is very you have to first open those project files in a separate tab. He has to get it adopted according to his timeline.
[27:25] After that you start editing. But this problem is not there in Filmora. You have to click on the file here. After which you will get the option of import sub project here. After which, if you have created any other animation in any other project
[27:38] which you need in this project, then you can select it from here and import it into this project. You can see that all the assets and materials of other projects have been uploaded here under Project Media.
[27:53] and this animation will be visible to me in my preview. I have taken this project file Basically, if people have shared their work then editing is very easy for you. You do n't need to create things again and again. You
[28:06] customize it according to your needs. If I inside this project where I can my needs. And if you guys feel that all your editing
[28:19] problems have been solved then wait. Let me used multiple AI tools for captioning which are expensive and do not give good results. But as I said, with Filmora you don't need to go anywhere else.
[28:32] If you go to AI Caption under the Text category here, you will get the option of Dynamic Caption. Here you can select whether you want captions for the entire project timeline. In which language do you want it and if it needs to be translated then
[28:45] After which, if I click on Generate, I have spoken only in this part of the video, so subtitles are placed here only. synced. I will play it and show you. Somewhere in it the creator will
[29:02] give it to you with some hesitation. At this moment, when you go to cut manually, Filmora has not need to make any changes here. If you click on the text level, the entire
[29:15] transcript will open on your right side, which you can then edit manually. Or you can go to Basic and change the rest of the properties of your text. change the rest of the properties of your text. Such as font, size, scale,
[29:27] it shows the active color which word I am speaking. You can even choose the background here. Whenever you speak, your background color will move to that word. As the word is emphasized. And if you're only making changes to one text layer
[29:40] , you don't need to worry. You can make changes to all text layers at once by clicking Apply to All. You can make changes to all text layers at once by clicking Apply to All. You can even animate text from here and under templates you
[29:52] get a lot of templates that will represent the subtitle in different ways. For example, if I select this template, the color of the word will automatically become black and a white background will appear behind it. In the same way, you
[30:04] can use different templates. Now if I show you the final output after all these changes, it will look I show you the final output after all these changes, it will look something like this.
[30:45] you guys can enjoy talking head videos for documentary editing. But somewhere in it the creator will give it to you with some hesitation. In this moment you are going to manually make a cut. Instead, there
[30:58] is an option for this inside Filmora. Like right now I'm going to shut up again. Now, just as I remained silent here, I suddenly started if you use this option inside Filmora, it will automatically apply the cuts. this will make your work very easy because the
[31:12] raw clips that you will get are of two to ten hours and instead of sitting for two hours and making cuts, just use silent detection and your videos will be cut automatically. Again, if this was a useless part, it must have been cut. We created all this animation in a very short
[31:24] time because we were using AI. And this is the future of editing. In the future, no one will hire 10 editors in their team but will hire one editor who can do the work of 10 people alone. And you
[31:37] can do this with the help of Filmora. Filmora is packed with features and AI tools. If I explain their uses to you, then a 3 to 4 hour course can easily be made on this topic. If you want a separate dedicated video on this topic then help me
[31:50] As soon as this video touches 3 lakh views, I will share a master class with you guys on Filmora. Till then see you in the next video



⚡ Saved you 0h 31m reading this? Transcribe any YouTube video for free — no signup needed.