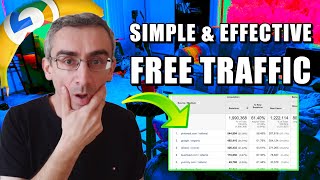

Before and After Gets 1M Views
46sThe before-and-after tactic is proven to drive massive engagement and traffic, as shown by the 1 million visits example.
▶ Play Clip"Delivers a practical tutorial on using before/after pins for Pinterest traffic, though 'targeted' is oversold – the method is effective but not uniquely targeted."
The video demonstrates how to use Google Gemini (referred to as 'Google Nano Banana') to create before-and-after images for Pinterest pins, driving free traffic to blog articles. The creator shares a step-by-step process from finding free stock photos to publishing optimized pins, claiming significant results like 1 million visits from Pinterest on a single article.
Using before-and-after images on Pinterest to drive traffic to blog articles.
An article with 35 comments and 1 million visits, most traffic from Pinterest.
People like seeing proof of results; before/after images are engaging.
Previously required permission/payment for images; now AI tools like Gemini make it easy.
Use sites like Vecteezy, Pexels, Pixabay with free license filter.
Choose images with white background, no face for better engagement.
Upload image and use prompt: 'Edit this image to make him appear more muscular' – using 'appear' bypasses policy.
Save the AI-generated realistic after image.
Set custom size 1000x1500 pixels; upload before and after images.
Arrange images side by side, add 'before' and 'after' labels in white.
Use text like 'Lose belly fat with this one exercise in 30 days' to attract clicks.
Upload pin, optimize with title, description, board, tags, and link to blog article.
Encourage repinning by embedding pin in blog post.
Produce and publish one before/after pin every day for consistent traffic.
Use Gemini to add a background like a living room; crop to avoid face.
Consistent daily pinning leads to visible traffic increase.
By consistently creating and publishing before-and-after Pinterest pins using AI-generated images, you can drive significant free traffic to your blog articles, as demonstrated by the creator's success with 1 million visits.
What is the recommended image size for a Pinterest pin?
1000 x 1500 pixels
04:08
Why should you use the word 'appear' in the Gemini prompt?
To avoid policy restrictions against making someone look shredded or having six-pack abs.
03:24
What type of stock images are preferred for before/after weight loss pins?
Images with a white background, no face showing, and a free license.
02:10
How often should you create and publish before/after pins according to the creator?
Every day.
09:41
What is the purpose of adding the pin to the blog article?
To encourage repinning from the article, which drives more traffic.
08:08
1 Million Visits from Pinterest
Demonstrates the effectiveness of the method with a concrete, impressive number.
00:16People Love Before/After Proof
Explains the psychological driver behind the strategy's success.
00:48Using 'Appear' to Bypass AI Policy
A practical trick to generate realistic 'after' images without triggering content restrictions.
03:24No Face in Images Preferred
An engagement tip based on the creator's experience, useful for audience targeting.
05:22[00:01] how I use Google Nano Banana to get a lots of free traffic from Pinterest to my blog articles. Now, this is one of my articles and here you can see how to get rid lower back fat once and for all. And when I scroll here, here you can see how
[00:16] down on the bottom, you will see this article got 35 comments. This is my affiliate offer. Okay. And when I go here on stats here, you will see that this article got 1 million visits. And
[00:32] most of these visitors actually came from Pinterest. And when I go back here, you will see that I opened this article with my Pinterest pin. And here you can see this is what is interesting. Before and after. People like to see before and
[00:48] after. Okay, I use this for weight loss, but you can use this tactic for weight loss. You can use it for dog grooming for example or for haircut or whatever you want. But like I said, people like to see before and after. They like to
[01:02] see how this in this case exercise work. They like to see before the exercise and after the exercise. Okay, people like to see proof and that is why you need to make before and after pins. Now this used to be really really hard because
[01:18] you needed to go on Google images. You needed to find the before and after images. And then you needed to find the person who made that image, that photo, and you need to contact them, ask them for permission to use that image or even
[01:32] to pay them to allow you to use those images. But luckily for us, we now live in AI age. So what you need to do, you need to go on, for example, vecti,
[01:44] pixels or pixabay or whatever website you want. You need to click here on photos. And then here you need to search for example fat belly. Okay. And what
[01:56] you need to do next you need to click here on license type. Click here on free license. That is really really important. You wish to use free license. And here you can see there is lots of images of belly fat. But this one here
[02:10] is actually perfect. When I click on it I will open this image. You can see this I will open this image. You can see this is the guy and he has a big fat belly and there is a white background that is perfect for us. Okay, because we can
[02:24] change the background if we want and for some reason people more like from my experience people like images where people on these images don't show their face. So try to find images like this without face in this case when it comes
[02:39] to weight loss. Okay. So I need to click here on download and I need to download this image to my desktop. Next thing I need to do I need to go on Google Gemini. I need to click here on tools and then click here on create images.
[02:54] And then I need to click here on this plus to add a file. I wish to upload the image that I just downloaded from vect easy. Let me find that image. This is the image. Now you can first change the background if you want. In this case I
[03:08] don't want to change the background. And here I need to give it a prompt. I can say something like this. Edit this image to make him appear more muscular. Now this is important. You need to say in this case make him appear. Okay, that is
[03:24] important. If you say just make him look like he's shredded or he has six-pack abs or something like that, then Google Gemini will not do that because it goes against the policy. Okay? So you need to see this appear. Okay? That is
[03:39] important. And then simply press enter. And now just give it a few seconds to And now just give it a few seconds to actually make this image. Okay. Okay. Here you can see how this looks. It actually looks really really good. It
[03:52] doesn't look unrealistic. It actually looks realistic. It's not that shredded. So this is a good image. I need to click here and I need to download this image to my desktop. So next thing I need to do, I need to make a Pinterest pin. Now
[04:08] for that I will use Canva. You can use Photoshop, or whatever you want. I will click here on custom size and I will say 1,000 with 1500. Okay, because
[04:21] that is the recommended size of the pin. Okay, Pinterest pin. Click here. Create a new design. So now I need to upload these two images. But first I will change the background of this pin. I will choose dark blue. Okay. something
[04:37] like this for example and then I will click here on uploads click here upload files and I need to find those two images that I just created. Okay, this is the one image and I will upload another one second image that I created
[04:52] with help of Google Nano Banana. This is the second image uploading. Okay, here you can see. So just give it a few seconds to upload this image. So I will seconds to upload this image. So I will simply drag this image here. Okay. And I
[05:08] will move it like this. Okay. And I will actually move it here. And I And I will actually move it here. And I will enlarge this image. Okay. And I will move this image here. Okay. I will actually make this image smaller.
[05:22] Something like this. Okay. [snorts] Something like this. And I will edit this image like this. Okay. Now ideally you can make the line here between these two images but this looks really really good and I will say
[05:37] something like this. Let me just choose the text. I will say before. the text. I will say before. Okay. And I will move this here. Okay. And I will actually make this text to be white because here it is invisible.
[05:54] So let me just click here on white. Okay. And here you can see it is white. And I will add another one. And here I will say after. Okay. And again same thing I will click here to change this to be white. Okay. And I will move this
[06:11] text here. Okay. So now here you can see before and after. And then here I need to choose text style. So I can choose one of these text styles. Well actually we'll stick with the same text style. So I will
[06:27] click here and I can say something like this. For example, let me just delete this. Okay, I can say something like this. So let me just move this here. Okay, I will make it center and I will make these letters to be also white.
[06:43] Okay, here you can see lose belly fat with this one exercise in 30 days. Okay, and I will move it here. And I can also make this to be a bit larger. something
[06:56] like this. Okay. And here you can see how this looks now. Here you can see before and after this exercise. And here you can see lose belly fat with this one exercise in just 30 days. Now that is a catchy title. People will stop to see
[07:11] these images here and then they will read this title here on the image itself. So what I need to do I need to click here on share and then I need to click here on download and then click here on download again and I will
[07:24] download this pin on my desktop. So next thing I need to do I need to go here on Pinterest and I need to click here on create and click here on pin. I needed to create a new pin. Click here. Let me find that pin that I just created. This
[07:40] is the pin. This is how it looks. As you can see it actually looks really really good on Pinterest. It looks even better. And you need to optimize your Pinterest pin for Pinterest search results. You need to add a title, description, you
[07:54] need to add a board, write board, you need to add tags, and you need to add a link to your blog article or wherever you are sending people. And like I said, you are sending people. And like I said, I added this pin on my article because I
[08:08] wanted people to repin this image here on Pinterest because that will get me more traffic. People will repin easily pins like this. Okay? And I already
[08:20] explained to you how to optimize Pinterest pins. So after you finish everything, just click here on publish and that's it. You will publish this pin. So what you need to do, you need to go back here on your article and you
[08:33] need to start creating more. You need to start creating more pins like this. Okay? Before and after pins. Like I said, I didn't add background here on my images. As you can see here, I didn't add it is just white background. I would
[08:50] suggest you to add some background. You can easily do that here in Google Nano Banana. You can add some background. So let's say for example, I can say for example, add a living room background and make it blend and then simply press
[09:03] enter. Let's just see what will happen. Okay, I'm guessing that I will get a really good result. Just give it a few seconds. Okay, here you can see. But I would crop this size. I wouldn't show the face of this person here. As you can
[09:17] see, as I already explained, people react better on the images where people on the images itself are not showing face. But this is a good im background.
[09:29] So you can simply click here on download. You can go back here on Canva and you can replace these images. But like I said in this case, I leave it I will leave it with a white background. Okay? And like I said, you need to start
[09:41] creating before and after pins every day. And you need to start pinning those pins. You need to start publishing those pins every day. And trust me guys, after just 30 days, you will start seeing results. you will start getting free
[09:56] traffic to your blog to your articles. Of course, like I said, if you optimize that pin and also what I would suggest, I would strongly suggest you to initially start driving traffic to that article so people could would actually
[10:12] know for that article and they would actually start pinning that. Okay? And I can confirm that these methods work. As you saw, I'm getting a lots of traffic from Pinterest by creating pins before and after. Okay, so this is how I use
[10:27] Google Nano Banana to get a lots of free traffic from Pinterest. to see more ways to make money online, make sure to subscribe to my channel and And also on your right side, you can see more videos that you can watch on
[10:42] YouTube that may help you to make money online.

⚡ Saved you 0h 10m reading this? Transcribe any YouTube video for free — no signup needed.