AI Summary
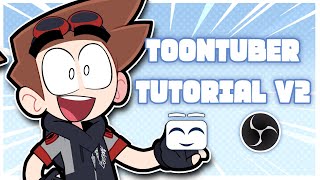
This video is a comprehensive tutorial on setting up ToonTubers, a customizable VTuber alternative that runs through OBS. The creator explains the requirements, installation process, configuration, and customization options, including emotes, costumes, and triggers. They also address common issues like flickering and provide optimization tips.
Chapters
ToonTubers are a type of VTuber that can be animated however you want, similar to GifTuber Deluxe. They run through OBS using media sources, allowing any gif or video to be your ToonTuber.
Each emote is broken down into four files: transition, idle, talking, and peak. The peak is usually the most open frame of the talking animation.
You need the starter folder, OBS Studio, the free Source Clone and Audio Move plug-in, and SAMMI. This version uses current OBS and no paywalled plugins.
Extract the starter folder to the base of the SAMMI folder, open the example deck file, copy the text, and paste it into SAMMI. Then configure the mic name variable.
The freeze filter holds the change over post while files flicker to load, preventing flicker. Source clones are used for smoother file changing.
Adjust mic settings with threshold and easing. Peaking should have a much higher threshold than talking.
To add emotes, copy and paste the example button, change the name and appearance, and update the text inside quotes to the emote name. Files must be named in the format: normal_idle, normal_talk, normal_peak.
Custom animations can be added using the custom animation template button. Costumes are separate folders with alternate files named the same way.
Load all animations at once to avoid flickering, since the first swap in a session takes longer. Adjust timing in the Animate button for different animations.
Mentioned in this Video
Tutorial Checklist
Study Flashcards (10)
What are ToonTubers?
easy
Click to reveal answer
What are ToonTubers?
ToonTubers are a type of VTuber that can be animated however you want, similar to GifTuber Deluxe.
How are ToonTubers run?
easy
Click to reveal answer
How are ToonTubers run?
ToonTubers are run through OBS using media sources, so any gif or video can be your ToonTuber.
00:25
What are the four files that make up an emote?
medium
Click to reveal answer
What are the four files that make up an emote?
Each emote is broken down into four files: transition, idle, talking, and peak.
00:51
What are the requirements to set up ToonTubers?
medium
Click to reveal answer
What are the requirements to set up ToonTubers?
You need the starter folder, OBS Studio, the free Source Clone and Audio Move plug-in, and SAMMI.
01:03
What is the purpose of the freeze filter?
hard
Click to reveal answer
What is the purpose of the freeze filter?
The freeze filter holds the change over post while the files flicker to load the new one, preventing flicker.
03:09
How should the peaking threshold be set compared to talking?
medium
Click to reveal answer
How should the peaking threshold be set compared to talking?
Peaking should have a much higher threshold over talking so it only activates when you're loud.
03:36
What is the file naming format for emotes?
medium
Click to reveal answer
What is the file naming format for emotes?
The file naming format is: normal_idle, normal_talk, normal_peak, etc., where 'normal' is the emote name.
04:16
How can you trigger emotes?
medium
Click to reveal answer
How can you trigger emotes?
You can trigger emotes via hotkeys, stream deck, foot pedal, or even Twitch follows with SAMMI.
04:46
How do costume changes work?
medium
Click to reveal answer
How do costume changes work?
Costumes are separate folders inside your ToonTuber folder with alternate files named the same way, and can be entirely new characters.
05:26
Why should you load all animations at once?
easy
Click to reveal answer
Why should you load all animations at once?
Load all animations at once to avoid flickering, since the first swap in a session takes longer.
05:53
💡 Key Takeaways
ToonTubers are customizable VTubers
Explains the core concept of ToonTubers as a flexible VTuber alternative.
Emote file structure
Details the four-file breakdown for each emote, which is essential for customization.
00:51Improved optimization
Highlights the update removing previous downgrades and paywalls, making it more accessible.
01:17Freeze filter prevents flicker
Explains a key technical solution for OBS version 20+ media encoder changes.
03:09File naming convention
Provides a clear naming format for emotes, crucial for proper functionality.
04:16Preloading animations
Offers a tip to avoid flickering by loading all animations at once.
05:53Full Transcript
[00:00] ToonTubers have been updated, and if you don't know what ToonTubers are, they're this. They're kind of a VTuber that can be animated however you want. Sort of like a GifTuber Deluxe.
[00:12] Like I chose to animate myself on Tuesdays at 24 FPS with a variety of poses for each emotion. But you don't have to limit yourself to looking like this. You can go all Phoenix Wright on them if you wanted. The only restrictions you have are what you can animate.
[00:25] You see, ToonTubers are run through OBS using media sources. so any gif or video you want could essentially be your toontuber. They have transitions in between emotes and you can stay open when you talk LOUDLY.
[00:38] You can have as many emotes and animations as you want. Custom animations like taking a sippy, or eating, but they will have to be triggered by something like a hotkey or stream deck.
[00:51] Each emote is broken down into four files. The transition, the idle, the talking, and the peak. For me, the peak is normally just the most open frame of the talking animation, but you could have it look different if you wanted.
[01:03] In order to get this to work, you'll need a few things, the first being my starter folder, OBS Studio, the free Source Clone and Audio Move plug-in, and Sammy. If you used my previous version, you'll remember it was very poorly optimized.
[01:17] You needed to downgrade an OBS encoder and use a plug-in that apparently went paid. Not only that, but for a lot of people, it unfortunately lags sometimes or flickered between frames. Luckily, that's not the case anymore, and you can use current OVF and none of these plugins are paywalled!
[01:33] This isn't a Sammy or OVF tutorial, so you'll need to get that set up on your own, but I will include a link to the official guide on how to hook Sammy up to your OVF. To get started, after installing Sammy and the three OVF plugins, extract my starter folder to the base of the Sammy folder,
[01:49] So it should look something like this. Make sure that OBS was opened after installing the plug-in and currently connected to SAMI. Next open up the example deck file and copy the text Go into SAMI Yours will probably be a lot more barren than this Right click this little plus and select paste deck It should create a tuber option Open it up and
[02:10] click the settings and config button and change this variable to whatever your default mic is called in OBS. For most setups it'll probably be something like mic flash aux one or whatever. Be sure to keep the quotations around it though. Hit save and okay and then open the first run
[02:25] button with OBS active and as the comments suggest, click the run button in the bottom right. If everything was done correctly, it will automatically create the Toontuber scene plus the initial sources and filters. If you want to resize the example Toontuber, feel free.
[02:39] Double check that everything looks like this. You should be able to try talking to your mic at this point and see if the Toontuber activates. It's very important that the Toontuber scene itself has the freeze and green screen filters. The freeze filter is essentially
[02:52] how I got it working with current OBS. If you didn't know, around OBS version 20, the media encoder changed, and whereas it is more effective at loading files, it changed it so when swapping, it would unload the source for a moment. This caused a flicker, whereas older OBS just swapped.
[03:09] The freeze filter is to essentially hold the change over post while the files flicker to load the new one. The reason I use source clones instead of just using the talking and beating sources above is because having them active allows file changing to be smoother, whereas
[03:23] if you just use the sources, they probably have a frame or two left over from the previous emote when swapping. Next, you'll probably want to toy with the mic settings. Open up the filters for the mic you're using and mess around with the threshold and easing
[03:36] to fit your mic. The default settings should be okay for most setups. The important thing to note is that peaking should have a much higher threshold over talking so that it only activates when you're loud. If you don't see these filters in your bass mic, you didn't label your mic name variable correctly in Sammy.
[03:52] You can always delete the scene, rename it, and try again if it fails. Now, if you want to add any emotes, you'll need to copy and paste the example button. Name it whatever you want and change the appearance so you know what what I recommend starting most custom buttons with Tuber You can also feel free to increase the size of the deck or resize the buttons Inside you need to change the text inside the quote to whatever the emote is Keep in mind that your two Tuber files must be named
[04:16] in the following format. For instance, you'll notice the base files are set normal, idle normal, talk normal, and peak normal. If you wanted a happy emote, you just swap the normal for happy, and then in the button, you change this variable to happy. My files personally are webum, but you
[04:31] can use anything that OBS uses as a media source. If you're using something other than a webm, be sure to go inside the settings and swap the file type variable to whatever you're using. Whenever you change these variables, you must keep the quotes around them. Finally, you'll need to add
[04:46] a trigger to every emote. You can set this to simply be the hotkey or even have it trigger if someone follows you on Twitch or something, but that'll require hooking standing up to your Twitch. I personally use a stream deck and foot pedal to trigger all of my emotes. If you want to add a
[05:00] custom animation that doesn't revolve around talking, you can use the custom animation template button. Copy and paste it, and then simply fill in the name with the custom animation file. Change this time to however long your animation is. If you don't want it to go back
[05:12] to the normal emote afterwards, just delete it or change this command. To add any costume changes, you can copy this template button. To have a costume swapped, you'll need a separate folder inside your current Toontuber folder with the alternate file's name the same way.
[05:26] Upon triggering this button, it'll swap to your normal emote with your new costume. You can feel free to have it trigger in the effects in OBS beforehand if you like. To swap between the costumes, simply trigger those buttons. Keep in mind that the costumes can be entirely new characters if you want.
[05:41] They just need the same emote files. Like, Phoenix Wright is technically a different costume. It helps to load all of your animations at once to avoid flickering, since a session's first swap will take a second longer to change.
[05:53] So I suggest adding every emote to this scroll button and to have it trigger upon connecting to OBS. You can just copy and paste these two commands and swap each one to whatever emote you have. An important thing to note is the timing and settings of this example deck is based around my ToonTuber animations You don have to copy them one of course But if you like different timing head into the Animate button
[06:16] and change the delays in the green and yellow areas to fit your animations. The green area decides when your talking peak can be activated again, since normally they get shut off during a swap so that the emote plays smoothly.
[06:28] The yellow area is basically just when your swap animation ends, with a little extra added to the second command. The settings in the blue should be good for everyone, so you don't really have to mess with that. It's important to note that all of your files must include a background that you can see.
[06:43] It doesn't have to be green, but you'll need to add your own settings to the tuber scene itself. I had a lot of people message me in the first tutorial because they applied the green screen to every individual source.
[06:55] It might seem a bit daunting at first, but XAMPP is a pretty easy to learn program. I mean, I learned it. This version should definitely be a lot more user friendly, and just the fact that there are no more downgrades or paint walls is a huge update.
[07:09] I hope some can use this to make whatever they desire as a vtuber. As I said in my last tutorial, I'm honestly not super tech savvy, so I'm not sure if I can fix any issues you run into. Truth be told, I hadn't originally planned on others using the Toontuber,
[07:24] since it was heavily leaned towards only really working on my setup and held together with Bubblegum and Band-Aid. But I think this new version should be good on other people's setups. If you like this idea, it'd be great if you could share this video around,
[07:38] and if you want to see it tuned over in action, you can always check out my streams on twitch.tv slash god underscore falco. That's also probably the best time to get any support if you need it, since I can respond in real time. You can also follow me over on Twitter for any little updates that I make here or there.
[07:54] Good luck everyone, and I hope to see some amazing creations! Thank you.