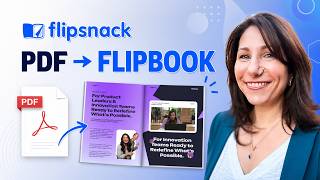

Turn PDFs into Interactive Flipbooks
44sDirectly addresses a common pain point and promises a solution, hooking viewers who want to modernize their documents.
▶ Play Clip"The title accurately describes the tutorial's content, delivering a step-by-step guide on converting PDFs to interactive flipbooks, though it's a sponsored video with some promotional tone."
This video is a sponsored tutorial by Flipsnack, demonstrating how to transform a static PDF into an interactive digital flipbook. The presenter walks through the entire process, from uploading a PDF to customizing its appearance, adding interactive elements like links and videos, and finally publishing and analyzing the flipbook's performance.
The video introduces Flipsnack as a tool for converting PDFs into interactive flipbooks, emphasizing its features like branding, interactivity, collaboration, and performance tracking.
To begin, users can upload a PDF from the homepage and create a free account. Various plans are available for individuals, teams, and enterprises.
Flipsnack showcases examples from small businesses to brands like Estée Lauder and Electrolux, used for catalogs, magazines, brochures, and booklets, highlighting the credibility boost from modern digital formats.
Users can create a flipbook from scratch or upload an existing PDF. The tutorial demonstrates uploading a PDF file.
Users can customize the flipbook's branding by adding a logo, changing accent colors, and adjusting the background. The appearance tab allows control over page transitions (flip, slide, scroll), page shadows, and menu controls like download/print options.
The edit tab allows replacing the PDF file and republishing, ensuring customers always see the latest version without multiple copies circulating.
Add-ons include Google Analytics integration and accessibility features (AI-generated descriptions for screen readers). The business version supports lead forms to capture emails after a certain page, with options for compliance messages.
In the design studio, users can add interactive elements like links, videos, slideshows, quizzes, and shopping carts. The tutorial demonstrates adding a link button, embedding a video, and creating a photo slideshow.
Users can set visibility (public, private, unlisted), schedule go-live/expiry dates, share via link, QR code, embed on websites, or email. Trackable links and multiple unique URLs are available for campaign tracking.
The analytics dashboard shows viewer sources, lead responses, time spent per page, and link clicks. This data helps optimize the flipbook by identifying underperforming pages or elements.
Users can re-edit, rename, replace, move to workspaces for team collaboration, or delete flipbooks. The link remains the same when replacing, ensuring everyone sees the updated version.
Flipsnack allows further branding by moving the flipbook to a custom domain, enhancing brand consistency and polish.
Flipsnack transforms static PDFs into engaging, interactive digital flipbooks that can be branded, tracked, and shared, ultimately improving customer engagement and business credibility.
What is the primary function of Flipsnack?
To convert static PDFs into interactive digital flipbooks.
What are the three visibility options for a published flipbook?
Public, private, and unlisted.
09:24
How can you add a lead form to a flipbook?
In the Add-ons section, toggle on 'use lead form' and set the page where it appears.
04:50
What analytics data does Flipsnack provide?
Viewer sources, lead responses, time spent per page, and link clicks.
10:56
How can you ensure customers always see the latest version of a flipbook?
By replacing the PDF in the edit tab and republishing; the link remains the same.
04:03
Real-world credibility
Shows that using digital flipbooks enhances business credibility by keeping up with technology.
01:14Accessibility features
Highlights the importance of making flipbooks accessible with AI-generated descriptions for screen readers.
04:18Interactive elements
Demonstrates how adding links, videos, and slideshows transforms a flat PDF into an engaging experience.
05:37Data-driven optimization
Emphasizes using analytics to identify underperforming pages and improve the flipbook.
10:56[00:00] Do you currently send your customers, employees, or team PDF files and wish they were a little snazzier and modern? Have you ever wondered if anyone actually reads it? Well, in this video, in partnership with Flipsnack, I'm going to walk you through the only tool since 2011 that lets you
[00:17] upload, design, brand, add interactivity, collaborate, and track your Flipbook's performance. This gives you the tools you need to know what your customers are actually interested in, worried about, loving, and spending their time looking at. If you ever wanted to modernize your
[00:32] business or communications, I'm going to show you how with Flipsnack, the most complete flip book maker on the market. Let's get started. To get started, I'm going to head to flipsnack.com. Now,
[00:44] right away on the homepage, you can upload your PDF to get started, and you'll be prompted to create a free account if you don't already have one. There are different plans you can look at based on your needs. And they do have those plans for individuals and for teams and enterprises.
[00:59] I'm going to go ahead and go back to the homepage because if I scroll down, I want to show you that if you need some inspiration, this is actually a great way to see some real world use cases. And you can flip through all of these examples all the way from smaller businesses to name brands like
[01:14] Esteé Lauder and Electrolux. You can flip through and see examples of this in use. for example, as a catalog or a magazine or a brochure in a booklet. Because using a digital flip book is
[01:26] going to give you more credibility because you're keeping up with the technology and your customers will appreciate you making it easier on them to do business with you. I'm going to go ahead and create a flip book. That's what we're going to do together today. I already have an account,
[01:39] so I'm going to go ahead and click sign in on the top right hand side of the screen. Now, this is going to take you to the same place it will once you sign up for an account. And you'll see even for larger organizations, you can use single sign on for your employees because flip books also make
[01:53] fantastic training modules. I'm going to go ahead and click sign in with Google because that's where my account is. And if we're keeping with the puns, I'll catch you on the flip side. Once you sign in, you're brought to the main landing page for your account. And you'll see any and all flip books
[02:07] that you've already created here along with their status. For example, this one is not published and this one is. We're going to go ahead and create one. So on the top right hand side of the screen, I'll click create. Now I absolutely can create one from scratch, but I already have a PDF file
[02:22] that I want to convert to a digital flip book. So I'm going to go ahead and select upload files and then browse from my device to find it. I'll select my PDF and click open.
[02:34] Here is where we can start customizing this flip book. At the top of the screen, I can toggle back and forth between the experience my customers will get, whether they're looking at this on a desktop or a mobile device. At the bottom of the screen, I can navigate quickly through the pages,
[02:48] or I can also use these arrows on the side. On the left hand side, we might want to update the branding of the flip book. I can add my logo, which will place it in the top lefthand corner of the screen. I can change the accent color. This is the color of the bar across the bottom of the
[03:03] screen. I might want to change that to match my branding. I can also change the background behind my flip book. And if I don't want to see it at all, I can choose transparent. I'll choose a color. That looks good. And I can also save this option for any future flip books that I create.
[03:18] But now, let's head to the appearance tab on the left hand side where there's a lot of decisions we can make about how this looks to our customers. I can decide things like page transition. Do I want it to flip? Do I want it to slide? Or do I want it to scroll? I can add page shadows,
[03:36] which makes it look like an actual book. See what it does in the middle of the screen. I can choose the menu controls, such as allowing the viewer to download this as a PDF or print it. These options can depend on how accessible you want this flip book. Maybe it's training materials that weren't
[03:51] free versus a sales brochure in which you want it to be available to as many people as possible. Moving to the edit tab, you can completely replace a PDF file and republish a flip book.
[04:03] If I add products to my catalog after it's been shared to my customers, they will always get the most current version. So, I like that I won't have to have copy after copy of this floating around, not knowing who has the most current one. There will always be the right one that everybody has.
[04:18] Now, before we go and add some interactions to our flip book, I want to click add-ons right here down on the bottom left hand side. Now, later in this video, we'll track how customers are viewing our flip book, but I can add my own Google Analytics here also. And I'm going to click accessibility.
[04:35] I'm also going to toggle on use accessibility here to show you that you can use AI to generate descriptions for screen readers or you may already have your own accessible version and you can upload that here as well. There's full support for it. The business version of Flipsnack allows
[04:50] you to insert a lead form. My flip book might be a training guide or a brochure, but only the first few pages I'm going to give you for free. After that, the customer can enter their email address to get the rest of it. And I can choose what page that occurs on. I'm going to toggle on use lead
[05:05] form. So, if you're running a leadgen campaign, instead of the entire ebook hidden under that lead form, you can choose to make this free to flip through up to a certain point. I can even add the title if I want. I can edit the submit button text and I can choose what page I want this to occur
[05:21] on. I'm going to make it on page 5. And if you are in a country that requires certain compliance laws, you can toggle on the required message. Let's hit the back button. I'm going to go back to the edit tab. And now I'm ready to click edit flip book to go into the design studio. I'm
[05:37] now in design studio. And here's where I can add interactive elements to my flip book. At any time, I could add a new page, duplicate an existing page, or delete one. I can scroll through and see
[05:49] all the pages in my current flip book. I can also zoom in and zoom out using these buttons down here at the bottom. On the left hand side, I'm going to click interactions. I want to add elements to what I already have on this flip book. I'm going to select a page that I want to add an element to. On
[06:04] page two, I want to put a link over this text so that viewers can click on it and visit my website. If you scroll through the interactions list, I'm going to see all the things that I can add to this flip book. Things like slideshows, shop carts, embedded objects, engagement things like quizzes
[06:22] and questions, navigation buttons, social media links, even carts and checkout items. Let's add a link button. The link button appears and now I can stretch it and drag it over where I want that link button to be. I'll put in my URL. It can be anything I want. It can even be a special link
[06:38] to take viewers somewhere on my website. I can change the tool tip so that when they hover their mouse over it, it says what I want it to say. In this case, I'll tell them where it's going to go. Visit our website to learn more. I can choose whether it opens in a new tab or the same tab.
[06:53] And all the way on the top right hand side, I'm going to click opacity and I'm going to set this to zero. From here, I'll click preview. And let's take a look at our link. There it is. Visit our website to learn more. I've made this interactive. I'll click the X and this time let's add a video.
[07:10] I'll find a page that I want to put my video on. This is a great size. I'm going to put a video over this photo to make it more interactive. So, still in the interaction section, I'll click video embed. Here it is. Now, if I did click the wrong thing, I can always click on any element,
[07:26] rightclick, and choose delete. But in this case, I'm going to resize it so it fits the area that I want my video to go. That looks good. can tweak it a little more. And on the left hand side, I can
[07:38] either enter a YouTube or Vimeo or my own URL, or I can click to upload a video. In this case, I've already copied one from YouTube, so I'll right-click and choose paste. I can decide what I want that video to do. I do want it to autoplay, and I am going to loop it. If I don't want the
[07:55] audio to play, I can keep mute selected, which is the default. I can also choose where I want the we can see what that looks like again by clicking preview. Here's my video. That looks great. Click
[08:09] the X. And by the way, if you want interactive elements, but you don't have your own video, you can always click on elements and browse some stock videos to insert. But let's add one more interactive element. I really want a photo slideshow. So, I'll go back to interactions
[08:25] and I'll browse to a good page to put a photo slideshow on. This one looks good. that you can see how these different elements are suited for different types of flip books that you can have. For a product catalog, you would want these shop areas in the shopping cart. For a training guide,
[08:40] that's where you would probably want a quiz or a question. Now, as this is a brochure, I want to focus on making it really eye-catching, thus all the photos and videos. And the nice thing about a slideshow is that I won't need to add pages, so it saves room. I'll click on slideshow, and just
[08:56] like the video, I get a placeholder. I can click and drag it exactly where I want it on my flip book. Now I can upload some images. I'll click on upload media. I'll add my files. I'll place check
[09:08] marks next to all three of them. And I'll insert three items. And again, we'll preview it and see how it looks. That looks great. This isn't a flat PDF anymore. We've made it eye-catching and engaging. And later, we can see if people are spending time on this page to know if we need to
[09:24] make any changes. We're ready to share this out to our customers. I'll click share. Now, I need to decide if this is public, private, or unlisted. Now, this really depends on what type of flip book it is. For example, is it marketing material or is it more private and confidential that is meant to
[09:40] stay internal. Now, if you click private, you can set the visibility and you can even share this using a company SSO based login. I'm going to leave this one as unlisted so anyone who has the link can view it. I feel like I have more control over it this way, even knowing other people can
[09:56] send my link around. If I click this down arrow, I can also choose a go live date or even a date that the link won't work anymore. Now, I don't have those constraints, so I'll click publish. There's a lot of ways I can get this into the hands of my customers. The link is right here, and I can
[10:11] always click to copy it, but on the right hand side, I can share it by a QR code. I think a great use of this is if you're using this as a digital program for a theater or conference. You can print out signs and let your attendees scan it if it's hanging on the wall to see the program. I can also
[10:27] embed it onto my website or send it via email. All the way at the bottom, I can even include trackable links if I want to trace who is sending it where. And I can even add multiple unique URLs. Maybe I want to share this with different audiences or track certain campaigns. Now,
[10:42] at the top, that pencil icon is still there. So if I change my mind later and say, I wish I had made that indexable to search engines, I can click this and edit the visibility and change it. Now that it's done, I'll click flip snack on the top left hand side of the screen to get
[10:56] back to this main dashboard. If I hover my mouse over my flip book, I get some options. The first thing I'm going to do is click analytics. This is my analytics dashboard. Over here on the left, I can navigate through these options. For example, I can see where all of my viewers are coming from.
[11:13] We put a lead capture form on this. I can click responses and see how many leads and all of them that I've captured. From here, I'm going to go back up to overview. If I scroll down, I can see all sorts of data, including how long they've spent on each page. This is useful to me because
[11:29] if I look and see that they aren't visiting a page or aren't spending a lot of time on a page, that tells me that I either need to update it or get rid of it because it could cost me viewers if they close out of it on that page. I can even see if they're clicking on my links on the page.
[11:43] For example, I know on page two we put a link and I can see here that they aren't indeed clicking on it. If no one's clicking it, I can go in and edit this to do a better job of making it visible. Maybe they just aren't seeing it. So, that's why knowing all of this information can help
[11:59] me make a better flip book. I'll click the flip snack icon again to go back to the main view of all my flip books. At any time, I can click to re-edit, customize this. I can go back into the analytics. I can share it. And if I click on the three dots, I can do things like rename it. And I
[12:15] can also replace it with a brand new version. And remember, the link stays the same. So everybody will see the new version. I can move it to a workspace. Maybe I want to bring in my team to collaborate on this. Maybe I want the whole marketing department in here or even legal to take
[12:29] a look at it first. And finally, I can move this to the trash and repeat the process and create a new one at any time by clicking create again here at the top right hand side of the screen. I think this came out great. Flipsnack has been around since 2011 and I'm finally in the modern era with
[12:46] a real flip book that lives entirely as part of my brand and all that from one flat existing PDF file that started it all. In fact, down here on the bottom left hand side of the screen, I can take this further. If I click brand, I can go into settings and I can even move this to my
[13:02] own custom domain. I'm confident that my customers will respond well to this and as it reflects that my business also looks polished and updated, this is going to lead to real conversions. If you want to modernize your PDFs, try it for free on flipsnack.com. The link is in the description.


⚡ Saved you 0h 13m reading this? Transcribe any YouTube video for free — no signup needed.