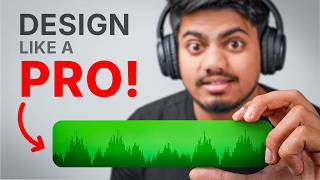

The 50% audio mistake killing your retention
54sDirectly calls out a common mistake, creating a 'you problem' that hooks viewers.
▶ Play Clip"Solid content with actionable tips, but the sponsor segment and repetitive explanations dilute the value."
This video reveals seven sound design secrets that can significantly improve video engagement and audience retention. It covers audio hooks, emotional background music selection, audio ducking, frequency stacking, silence usage, and more, providing practical tips for YouTubers and video editors.
The human brain processes audio before visuals, so the first audio impression is crucial. If it's generic, viewers will close the video instantly.
Start the video with no background music until the hook line is spoken. This makes the video stand out because everyone else adds music immediately.
Place a sound effect before the hook line to grab attention. MrBeast uses this technique.
Start with a build-up and riser sound effect, then a music drop, followed by the hook line. This is powerful for documentaries and challenge videos.
Background music should guide emotions, not fill emptiness. Using one track throughout makes the video monotonous and reduces average view duration (AVD).
Consider Mood, Genre, Tempo (BPM), and Instruments. Match these to the video's emotion and narration pace.
Epidemic Sound offers over 55,000 music tracks and 1.5 lakh sound effects, with an AI assist feature to find the right audio quickly. Sponsor segment.
Use audio ducking to automatically lower background music when narration is present and raise it during B-roll. Keep music around -18dB to -24dB relative to narration.
Apply EQ to background music to reduce mid frequencies, allowing the voiceover to stand out without clashing.
Professional editors layer sound effects across different frequencies (bass, mid, high) to create a richer impact. Adjust pitch to change frequency.
Use reverb and fade in/out to transition between music tracks smoothly, avoiding abrupt stops.
Silence creates dramatic contrast and signals importance. Use it sparingly (max 3 times in a 10-min video), for 1-3 seconds, and only after a build-up.
Mastering these seven sound design secrets—audio hooks, emotional music selection, ducking, EQ, frequency stacking, smooth transitions, and strategic silence—can dramatically improve video engagement and audience retention.
What does the human brain process first: audio or visuals?
Audio is processed before visuals.
00:30
What is the 'cold open' formula?
Start the video with no background music until the hook line is spoken.
00:56
What are the four factors to consider when selecting background music?
Mood, Genre, Tempo (BPM), and Instruments.
03:32
What is audio ducking?
Automatically lowering background music when narration is present and raising it during B-roll.
07:19
What dB range should background music be relative to narration?
Around -18dB to -24dB.
08:35
What is frequency stacking?
Layering sound effects across different frequencies (bass, mid, high) to create a richer impact.
09:42
How can you change the frequency of a sound effect?
By adjusting its pitch: lower pitch gives bass, higher pitch gives sharp/high frequency.
10:36
What is the recommended maximum duration of silence in a video?
1-3 seconds.
14:17
How many times should silence be used in a 10-minute video?
Maximum three times.
14:42
What is the rule for earning silence?
Silence must be earned by building up to a key moment, then using silence, then continuing the music.
14:54
Audio processed before visuals
Explains the scientific basis for why audio hooks are critical for retention.
00:30Four factors for music selection
Provides a practical framework for choosing music that matches video emotion.
03:32Audio ducking
Solves a common problem of voiceover clarity with a simple automated tool.
07:19Frequency stacking
Reveals a professional editing technique that adds depth and impact to sound effects.
09:42Power of silence
Challenges the fear of silence and explains how to use it for dramatic effect.
13:24[00:02] But you people never paid attention to this 50%. And then you sit and wonder why the audience turns off the video within a minute ? I know you had added background also a pop sound effect every time a text came. But that does
[00:14] not make your video engaging, rather it makes it worse. Because you don't know the so in today's video I'm going to tell you seven secrets of sound designing premium. So let's start with the first point which is that according to
[00:30] research, the human brain processes audio before visuals. This means that the processes audio before visuals. This means that the registered first. And if the impression registered is normal,
[00:42] generic, and lacks any contrast or nobility like other videos, it will be closed instantly. And that's the reason every famous YouTuber uses audio hooks. And you don't even know about it. There
[00:56] cold open. This formula is very simple, but scary for editors. Because any music or sound effect at the beginning of the video. I know you guys have been put background music at the beginning of the video. Give me a feel, give me a vibe. But wait for a second and think, everyone is
[01:12] doing the same. And when you don't do this, your video will automatically look different. It will feel different. And the audience understood what happened. They would have been locked in before that. You don't need to add any background music until you say your hook line.
[01:36] starts after the 6 second mark and before that the hook line is spoken there is only narration. And this performed extremely well. Formula two is sound effects first. According to this formula, is sound effects first. According to this formula,
[01:48] volume. Mr. Bees is using this formula recently. Big Surprise for Everyone. [Music]
[02:04] music drop sync. This is one of the most powerful hook techniques in which the video starts with a build up and riser sound effect followed by a music drop and then the hook line is delivered. By doing this,
[02:17] Documentary creators and challenge video creators use this same formula. 10 km The explosion was heard far away and fragments flew up to 400 meters away. Whichever soldier used the mobile phone at night , he got shot [music]
[02:32] because the sniper was shooting after seeing the light. You can use any of these three formulas to build an audio hook. Only then will the audience stay on the video. Now coming to the next secret
[02:49] to fill the emptiness of the video. He decides what the AVD of your video will be. You are losing 2 minutes of retention in every video. leaving it with the same background music. Background music actually
[03:03] works for emotional direction and not to fill emptiness. Watch this scene for example. [Music] A
[03:19] with your videos too. Due to using only one background music in the entire video, the emotions disappear from the video and the video becomes monotonous. Due to which the average view duration remains less than 3 minutes. Whereas if you use
[03:32] background music according to the emotion, the ABD remains above 5 minutes because people remain emotionally now beginners make another big mistake here. They start using very music in their videos.
[03:48] contrast becomes too much and nothing feels connected. Therefore, to you have to keep four factors in mind. First will be Mood den Jonra then Temo and lastly instruments. Mood refers to the overall emotion or feeling you want to convey to your audience. For
[04:04] if you have seen the documentary of Ferns, the overall mood in it is suspenseful. Similarly, there are other emotions like inspirational, dreamy or mysterious. After that comes Zonra which means style of music or you can say category. For example,
[04:18] you will hear a lot of classical and dash in it. While others While others controls the pacing. Tempo is measured in BPPM i.e. beads per minute.
[04:33] So the more beads there are, the more pace you will feel. But obviously that thing should also match the voice over. If the voice over is in normal pace then you can use music with 100 BPM. But if the narration is as fast as mine then higher BPPM will have to be used.
[04:45] If you are creating slow educational content, then use a little less BPPM. instruments that give texture to your video. Sounds like piano, guitar, life to cinematic videos. If you
[05:00] engagement of your videos will improve significantly. But it is preferable that you do not look at these four categories separately but look at them as a circle. And where all these collide, make that segment your theme. Like in my case the mood could be
[05:13] mysterious, Johnra could be electronic, BPPM could be 110 and instrument could be strings so that I get some such background music.
[05:28] background music is not easily available. Now after applying so many filters, And that too copyright free. Well, that's our secret number three. platform that offers over 55,000 music tracks and over 1.5 lakh
[05:44] you can use in your videos without any restrictions. In Epidemic, you can find your desired audio according to mood, style, genre, category and everything. feature I like about Epidemic is its assist feature. Because here you
[05:59] working on. What kind of background music or track do you want? And literally, the suggested to you here within a few seconds. As you can see, I have Despite that, I have found music here which can be used very easily in my videos.
[06:14] You do n't need to spend hours on sound designing anymore. Even can find any sound or music. And then you can literally edit it according to your needs. Just by dragging and dropping.
[06:26] Sounds And Music. Because you won't find more creative freedom and productive tools anywhere else. Also, you can fill all your social media handles in their safe list option always remain protected for using Epidemic Sounds. So access
[06:39] Epidemic Sounds now from the link given in the description. If you use my coupon code, also get 50% discount for the first few months. And believe me I'm not suggesting you Epidemic Sounds just because it's the sponsor of the video. But actually, when I used to do
[06:52] not take any subscription to save money, I used to waste at least two days every week in finding the right music. And believe me, this thing was not at all evil. , the first thing I did was give them a subscription to Epidemic Sounds so that
[07:06] they don't make this mistake. But I know you guys are intelligent so you will not make this mistake. So let's move on to the fourth secret of sound designing which is. If you edit videos then I am sure you must have faced this problem
[07:19] that even after reducing the volume of the background music, your voice over is views. But you probably do n't know that none of these exist in real life. Or you are not getting the results you expected.
[07:32] The reason is you don't know how to hear sound. Sound is always heard in frequencies. Normally, human voice overs have more mid tones. That means the mid frequency is higher. And the
[07:44] also has more mid tones. But both the music and narration are in mid tone. That's why the mind finds that thing messy. I feel irritated. But 90% of the And he keeps cursing his own voice saying that my voice is bad and then starts
[07:58] looking for new background music. But actually there is a solution to this problem and that too in just two steps. The first step is music ducking. Instead of music ducking. Instead of
[08:10] select music ducking so that the AI will automatically detect where your narration is and where your music is. And then whenever your narration is not going on and you have placed B-roll, the
[08:22] background music will automatically increase at that moment. The end narration time will be reduced. This process is called audio ducking. You want to keep the music value around 18dB or -24dB from the narration value. This will make your background music
[08:35] no longer sound like noise and will actually complement the voice over. Your background in the same frequency. You ca n't tamper much with the voice over. Otherwise your entire video will be spoiled. Therefore,
[08:51] mid tones in the background music will be drowned and only the bass will be able to pass. Due to which the background music which was playing till now has millions of views on their reels. But you probably don't know that now it will work like this. She does. And all of these are
[09:03] AI influencers. Who just put 40-50 reels and then your voice over will not have to fight with the music to reach your ears. and live a happy life together. Yes, I kill Dad Joes. But you got the
[09:16] point. Once you pay attention to the sound effects of this video. Once you pay attention to the sound effects of this video. If you are posting [music] If you are posting [music] missing piece ji
[09:42] effects or do we have a unique premium sound effects pack? To be We have used only one secret formula frequency stacking. Maximum editors download a sound effect or two for everything.
[09:55] something happens in the video, they just keep repeating the same sound effects. But this is a very noob way of doing sound designing. Professional editors use the same sound effects but divide them according to their frequency.
[10:07] A whoosh sound effect that you have is just for the bass. A professional editor will have the same sound effect but will they will track all three together and use them. So that some such
[10:22] impact will be felt. cinematic videos use frequency striking to create a bigger impact. But
[10:36] reduce the pitch of the sound effect, you will get a low sound effect. That means bass sound effect. If you increase the pitch, you will get a sharp sound effect. Whose frequency is higher basically. Now, if you're frequency tracking,
[10:48] You can also stitch together different sound effects covering different frequencies. And when all this is done correctly, the result is something like this.
[11:15] frequency of which sound effect is providing and where it should be used. This thing is very simple. High-frequency sound effects create a sense of sparkle, sharpness, and presence. Mid- frequency sound effects provide a body,
[11:27] warmth, and character feel. Whereas low frequency sound effects create a feeling of weight, power and impact. Utilize sound effects according to frequency and next time your video will not appear chipped. Sound effects
[11:39] which I can make a separate dedicated video. So if you guys want me to make that video then write make video in the comment section. I will definitely cover this topic as soon as I get 2000 comments. Now let's move on to the next secret.
[11:54] talked a lot about music and sound effects. And I am sure you will apply all the knowledge. But one place where you will still face problems is during transition. Everyone knows how to create visual transitions. But
[12:07] out. Which, to be honest, is a very outdated and useless method. Music is a very effective and easy way to create transitions. Reverse. When your music is about to end and you have to start a new music track,
[12:20] you cannot do it immediately. By doing this, it feels as if a moving vehicle has suddenly stopped. Therefore, first of all you have to nest it, open that sequence and add something else inside it. So that the
[12:35] duration can be increased. For now, I'll add a duplicate of this here. After which you have to come back to the timeline. One is to add a studio reverb. You can try different presets. But for now, I'll
[12:47] But for now, I'll use the Great Hall here. Now this was your sound track without reverb and this is your sound track with a reverb.
[13:07] can extend the previous track over the reverb version. And then you can apply fade out and fade in to both the layers to get a similar effect.
[13:24] It's that simple. Now let's move on to the last secret of our video which is that according to The LA Film School, when the music suddenly drops, the audience becomes humans feel threatened by silence. They feel uncomfortable and
[13:38] use silence in your video, the audience gets a dramatic contrast. They get absorbed in it. Let's get serious. Their subconscious mind triggers them that something is important or something is about to happen. And it is a perfect
[13:51] moment. To make any big reveal or to put any important or serious matter in front of the audience or to leave an impact of any specific thing in their mind. Beginner writers and editors fear silence. They feel that if no
[14:03] in the video then the video will be spoiled. But in reality silence is the best sound effect you can use. But how to do this? There are some rules for this. Never use silence for more than 3 seconds. If you keep silence for 1 second then it will
[14:17] seem like there was some glitch. If you keep it more than 3 seconds, the video will look awkward. But 10 seconds is the perfect spot where audience retention will be created. Rule number two is use complete silence. When I say silence, I do
[14:29] n't mean turning the background music down to -30db. Literally nothing should happen at this moment. There should Literally nothing should happen at this moment. There should then will the real impact be felt. Rule number three is don't lose power. In a 10-minute video, it
[14:42] is preferable to use silence only three times. If you do more than this, the silence key will be lost. And the contrast feel that we want to give will be a normal feel. So it becomes more important to figure out
[14:54] where you should use silence and where you shouldn't. Rule number four is earn silence. You can't just randomly cut your music and silence a scene. Silence has to be earned. First you have to give a build up. After which the
[15:06] moment plays. And then the music continues in the same way as before. Now how to do this? It is very simple. Before any key moment, you have to is very simple. Before any key moment, you have to
[15:18] part will come and then by using music ducking you will take the scene back to normal pace. The real impact of silence will be felt only when the visuals are as strong as the sound. Because editing is also 50% visual. So
[15:30] talking head scenes. John Aris utilizes Now these were the seven sound designing secrets that can take your But still you people do not know how to make your editing 10x faster.
[15:43] So if you do n't want to waste your time then make sure to watch this video. In this video I have taught editing using AI. And not forget to subscribe to the channel. See you in the next video.




⚡ Saved you 0h 15m reading this? Transcribe any YouTube video for free — no signup needed.