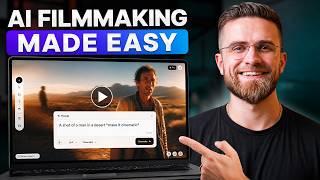

One Tool, One Canvas: The Future of AI Filmmaking
45sHighlights a revolutionary workflow that eliminates tool-switching, appealing to creators tired of complex pipelines.
▶ Play Clip"The title promises a tutorial and delivers exactly that, with a detailed walkthrough of the entire process, though it is essentially a product demo."
This video is a comprehensive tutorial on using Flick, an AI filmmaking tool that integrates the entire production pipeline into a single browser-based canvas. The creator walks through the process of creating a short film called 'Desert Crossing', covering style selection, character consistency, voice generation, lip sync, camera movement, and editing, all within one platform.
Flick uses an infinite canvas where each scene is a node, allowing you to see the entire film as a storyboard. This eliminates the need to switch between different AI tools.
The correct order is to lock in a visual style first, as it acts as a 'visual contract' for the entire film, ensuring consistency across all scenes. Flick offers over 900 curated cinematic styles.
Style search is powered by Perplexity and connects to a library of over 1 million classical film frames. You can search by descriptive terms like 'golden hour dust haze western' to find reference frames.
Character consistency is solved with a three-view reference system (front, three-quarter, side). This locked identity carries through every scene node, and you can merge different attempts for the perfect look.
The Omni reference system carries the character's visual identity into video generation. In testing across 14 scene generations, the character's face and structure remained consistent, though lighting could slightly alter clothing appearance.
Voice generation is integrated, so you can write dialogue, pick a voice, and generate audio directly in the scene node. Lip sync is handled by the C Dance model, which uses the three-view reference, video clip, and audio waveform.
For pure visual quality shots, Kling O3 Pro is the recommended model. Camera movements like slow push-in, pull out, and tracking shots can be set per scene, with the tool inferring trajectory from character position.
Flick offers three video models: Kling O3 Pro for visual quality, Kling 3.0 Pro for audio-video sync, and Seedance for lip sync and character-driven scenes. Assign the model before generating to avoid inconsistent output.
Using reference frames from the classical film search as prompt anchors significantly improves output quality. Instead of writing long text descriptions, attach a reference frame and write a short prompt on top.
Flick includes a real timeline for trimming, restacking, and adjusting audio levels, eliminating the need to export and re-import into other editing software. An image node allows for fine editing on still frames.
Export is done in 4K, with rendering on servers (a 3-minute film took ~8 minutes). The team feature allows collaborators to work on the same canvas in real time, and flick.tv is a public gallery of films and workflows.
The entire production from canvas to final export took about an hour, including 14 generations on the establishing shot and three passes on a lip-sync sequence. The tool reduces operational overhead, not creative work.
Flick streamlines the AI filmmaking process by integrating all steps into one platform, reducing the operational overhead and allowing creators to focus on directorial decisions. The tool's key strengths are its style and character consistency systems, which are supported by a vast library of cinematic references.
What is the core difference between Flick and other AI video tools?
Flick uses an infinite canvas where every scene is a node, allowing you to see the entire film as a storyboard and eliminating the need to switch between tools.
00:01
What is the recommended order for starting a project in Flick?
Start with a style, not a prompt, because the style is the visual contract for the entire film and ensures consistency.
00:57
How many curated cinematic visual styles does Flick offer?
Over 900.
01:12
What powers the style search in Flick?
Perplexity, which connects to a library of over 1 million classical film frames.
01:39
What is the three-view reference system?
A system where you describe your character and AI generates three reference angles (front, three-quarter, side) that become a locked identity for the character.
02:43
What is Omni reference?
The system that carries your character's visual identity from the static reference into actual video generation.
03:36
Which model handles lip sync in Flick?
C Dance.
04:18
What is the recommended model for pure visual quality shots?
Kling O3 Pro.
05:39
What is the practical workflow for using the three video models?
Map out your scene list, tag each scene by type (landscape, dialogue, music-driven), and assign the model before generating to avoid inconsistent output.
07:44
How can you improve output quality when writing scene prompts?
Use classical film frames as prompt anchors instead of writing long text descriptions.
08:10
What is the purpose of the image node?
It allows fine editing on still frames, such as color grading, cropping, or cleaning up details, before feeding the frame back into video generation.
09:19
How long did it take to render a 3-minute film in 4K?
Roughly 8 minutes on the server side.
09:48
What is flick.tv?
A public gallery of films and workflows built on the platform, where you can watch finished shorts and open underlying node layouts to see how others structured their projects.
12:27
Style First, Prompt Later
This principle is crucial for achieving visual consistency across an entire film, saving time and effort.
00:57Three-View Character Reference
This system solves the hardest problem in AI filmmaking—character consistency—by locking a visual identity.
02:31Kling O3 Pro for Cinematic Shots
Identifies the best model for high-quality visual shots, guiding creators on model selection.
05:39Classical Frames as Prompt Anchors
A practical technique that significantly improves output quality by giving the model a specific visual target.
08:10Production Time and Iterations
Provides a realistic expectation of the time and iteration required for AI filmmaking, emphasizing that it's still a creative process.
11:16[00:01] inside a single browser tab. One tool, one canvas, no switch in between Runway and Midjourney and Premiere. From blank canvas to finished film, here's exactly how it works. When you first open Flick, you see an infinite canvas. Every scene
[00:16] is a node, every node connects to the next, and you can see your entire film laid out in front of you like a storyboard you can actually execute on. That's the core difference from every other AI video tool I've used. No expert
[00:30] loops, no tool switching, no character drifting between scenes. Let me start a new project. I'll call this one Desert Crossing, the short film I already finished so you can follow along with the exact decisions I made. First
[00:43] decision, aspect ratio. I went 16:9 cinematic widescreen. If you're building [music] vertical option. Now, here's something that took me a minute to realize. You don't start with a prompt, you start
[00:57] with a style. That's the right order. Because your style is the visual contract for the entire film. It governs how every single scene will look. If you lock that in first, consistency comes almost for free. This tool has over 900
[01:12] curated cinematic visual styles, and I don't mean 900 filter presets, I mean 900 distinct aesthetic systems, lighting, grain, color grading, lens characteristics, air feel. Some are pulled from specific film periods, some
[01:27] from contemporary cinematographers, some are original styles built by their team. The way you search them is genuinely impressive. It connects to a library of over 1 million classical film frames, and the search is powered by Perplexity,
[01:39] so you can type something like golden hour dust haze western, and it surfaces actual frames from actual films that match that description. You're not guessing, you're referencing. For Desert Crossing, I ended up going with a style
[01:53] Crossing, I ended up going with a style I can only describe as dusty analog, warm shadows, slightly desaturated midtones, 16 mm grain texture. Here's the style card for it. You can see the reference frames it's built on. One
[02:06] thing I want to flag, you can swap styles at any point in the project without breaking your characters. That's huge. I changed the overall look twice during production and the character stayed consistent both times because the
[02:19] character system is separate from the style system. We'll get to that in a second. Okay, style locked. If you want to follow along and build your own project right now, link is in the description. Free credits just for
[02:31] signing up. Now, let's build the character. Character consistency is the hardest problem in AI filmmaking. If you've ever tried to keep a character looking the same across 10 scenes using standard image generators, you know what
[02:43] I mean. You spend as much time on consistency fixes as you do on actual creative work. That problem is solved with a three-view reference system. You describe your character, physical details, age, clothing, vibe, and AI
[02:56] generates three reference angles, front, three-quarter, and side. These three views become a locked identity that carries through every scene node in your project. For my protagonist, a lone traveler, late 30s, sun-worn face, worn
[03:11] linen jacket, it took me about four attempts to get the three-view I was happy with. Every generation is kept in your history, so you can flip between versions and compare. I ended up combining the face from attempt three
[03:24] two using the merge tool. Once you have your three-view locked, you connect it to Omni reference. That's the system that carries your character's visual identity from the static reference into
[03:36] actual video generation. When you create a scene node and attach this character, every video clip generated in that node will match your reference. Same facial structure, same build, same clothing. I tested this across 14 different scene
[03:51] generations in Desert Crossing. The character held not perfectly. There were two generations where the lighting made the jacket look slightly different, but the face and structure were solid every single time. The voice pipeline is
[04:03] integrated, meaning you don't export a clip, take it to 11 Labs, generate audio, and then try to sync it back. You write the dialogue, pick a voice from the library, generate it, and attach it directly to the scene node. Lip sync is
[04:18] handled by the C Dance model. Here's how that flow looks. I'm inside a scene node for one of the key dialogue moments in the film. I've already got my character reference attached and my visual style set. Now I click add voice. The voice
[04:32] library has enough variety to cover most character types. I went with a voice I'd describe as low, measured, slightly weathered. Fits the traveler character. You can preview every voice against a sample line before committing, which is
[04:46] the right UX decision because voice is hard to change midway through a project. Once the audio is generated, you connect it to your character and run C Dance for lip sync. What C Dance does is take the three-view reference, the generated
[05:00] video clip, and the audio waveform, and it produces a lip sync version where the character's mouth movement matches the dialogue. The result isn't perfect on the first pass. I'd say about 70% of the time it's good enough to use, and 30% of
[05:14] the time you regenerate with a slightly different motion prompt. The thing that surprised me most about this part of the workflow is that it actually stays consistent with the character. I expected the lip sync model to drift the
[05:27] face slightly. That's been my experience with other tools. With the Omni reference locked in, it held. That's not a small thing. Not every scene needs dialogue. Some scenes just need to be cinematic. For those moments, you're
[05:39] working in the camera movement system, and this is where integration with Kling O3 Pro really shows up. O3 Pro is the model I use for pure visual quality shots, wide landscapes, establishing shots, atmospheric scenes where no
[05:55] character is speaking. The output is truly cinematic at this point. I've seen people compare Kling O3 Pro frames to real cinematography, and while that's a stretch in my opinion, it's the closest AI video has gotten. You set camera
[06:09] movement on a per scene basis. I used slow push-in a lot on Desert Crossing because it builds tension without noise. Pull out works great for reveals. The tracking shot option is good when you have a character walking. This tool can
[06:24] infer the trajectory from your character position if you include a motion hint in the scene prompt. That took about 40 seconds to generate. Let me regenerate once just to show you the variation range because one of the things you'll
[06:37] want to understand early is that you're making directorial choices between generations, not just picking the good one. I ended up using the first version for the final cut, but you can see that both are usable. The style system is
[06:49] doing a lot of the heavy lifting in terms of keeping the output coherent. Flick gives you three video models, and they each do different things well. Kling O3 Pro is your go-to for pure visual quality, best-in-class output for
[07:03] landscapes, atmospheric shots, anything where you want the frame to look cinematic. Use it for your establishing shots and your visual standout moments. Kling 3.0 Pro is optimized for audio-video sync. So, when you have a
[07:16] scene with a musical score or ambient sound that needs to feel rhythmically connected to the visuals, this is the model that handles that relationship best. Seedance is your lip sync engine. Any scene with dialogue where the
[07:30] character needs to move their mouth, you're running Seedance. It also handles the omni reference lock. So, for character-driven scenes, it does double duty. The practical workflow is map out your scene list, tag each scene by type,
[07:44] landscape, dialogue, music-driven, and assign the model before you start generating. If you swap models mid-scene, you'll get inconsistent output that's hard to match in the edit. Front-load that decision, and you'll
[07:56] save yourself a lot of regenerations. I want to spend a minute on a feature that I think is underrated. The classical film search gives you access to over 1 million curated frames from classic and contemporary cinema. You search by mood,
[08:10] lighting type, era, subject, and you get actual frames that you can use as visual references for your scene prompts. What I started doing about halfway through Desert Crossing is using these frames as my prompt anchor. Instead of writing a
[08:25] long text description of the lighting I wanted, I pull a reference frame, attach it to the scene node, and write a short prompt on top of it. The output quality jumped noticeably when I started doing that. It gives the model something
[08:38] specific to aim for instead of an abstract description. Once your scenes are generated and connected on the canvas, you move into the built-in video editor, and this is the part one want to slow down on because it's the whole
[08:51] reason I stopped bouncing between apps. You get a real timeline right here inside Flick, so you trim clips, restack the sequence, adjust audio levels, and lock the narrative arc without ever leaving the tab. No exporting proxies,
[09:06] no re-importing anywhere else, no Premiere round trip just to move two scenes around. There's also an image node that quietly became one of my favorite tools in the pipeline. Any frame you generate can be routed through
[09:19] it, and from there, you get real fine editing on the still itself. You can push a color grade on a specific shot, crop into a tighter composition, or clean up a small detail before you feed the frame back into video generation. It
[09:33] sounds like a small feature on paper, but it saved me a full round of regenerations and at least three shots in Desert Crossing. Export is resolution, I went with 4K for this film, and hit render. The render queues
[09:48] on servers, so your machine isn't doing any heavy lifting. For Desert Crossing, which runs about 3 minutes, the render took roughly 8 minutes on the server side. The last piece I want to show you here is the team feature, because most
[10:01] AI film work assumes you're a solo creator, and that's not always true. Inside any project, you can invite other people onto your creative team, and they get access to the same canvas you're working on. A co-director can drop into
[10:14] your scene notes, a writer can adjust dialogue lines, an editor can jump straight to the assembly timeline. Everyone sees the same node layout in real time, so nobody is passing files around or guessing which version is
[10:27] current. If you're building anything bigger than a 2-minute solo piece, this is the feature that quietly changes the whole production model. There's also a share your project canvas with
[10:41] collaborators directly. If you're working with a director or a co-creator, they can see your node layout, add comments, and generate within the same anyone who isn't working completely solo. Okay, here's the finished film.
[10:55] solo. Okay, here's the finished film. Let it play.
[11:16] >> The desert doesn't forgive, but it remembers. canvas to the final export was about an hour. That includes the iterations, and there were iterations. I did 14 different generations on the wide
[11:31] establishing shot before I got the dust taste exactly the way I wanted it. The lip-sync sequence took three passes on one particular dialogue beat. None of that is a complaint. That's just directing. The thing that surprised me
[11:44] is how rarely I felt like I was fighting the tool. Most of my time in AI video >> [music] >> and what the tool generates. With Flick, the gap is narrower and when it exists, I can usually close it by pulling a
[11:59] classical reference frame and using that as the visual anchor instead of trying to describe the shot in words. This tool doesn't remove the creative work. It removes the operational overhead, the export loops, the consistency
[12:13] management, the paste the character reef into every new tool ritual. You're still making director real decisions. You're just making them faster inside one place with the context of the whole film in front of you. There's a separate space
[12:27] called flick.tv and it's basically a public gallery of films and workflows that other people built on the platform. You can watch finished shorts, but more importantly, you can open the underlying node layouts and see exactly how
[12:41] somebody structured their canvas, which models they picked, and how they solved character consistency on a specific scene. I spent an hour there before I built desert crossing and it saved me a whole day of trial and error. If you
[12:53] want to publish your own work later, that same gallery is where it lives. If what you saw today looks like the way you want to work, here's how to start. description. When you sign up, you get 200 free credits immediately. That's
[13:09] enough to get through character creation and a few scene generations, so you can actually test the workflow before spending anything. If you move to a standard subscription or higher, that becomes 2,000 credits, which is a full
[13:22] short film's worth of production. See you in the next one.



⚡ Saved you 0h 13m reading this? Transcribe any YouTube video for free — no signup needed.