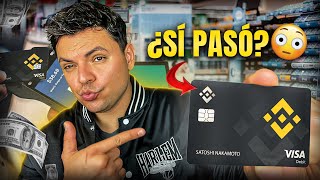

Crypto Card Cashback Secrets Revealed!
59sReveals the card's unique cashback and interest features, offering tangible benefits that viewers want to learn about.
▶ Play Clip"Delivers exactly what the title promises: a step-by-step guide to ordering, funding, and using the Binance Card."
This video provides a comprehensive walkthrough of the Binance Card, a prepaid Mastercard available in several Latin American countries. The presenter demonstrates how to order the card through the Binance app, fund it with cryptocurrencies, add it to a mobile wallet, and make a first purchase, while also analyzing the exchange rate and cashback benefits.
The Binance Card is a prepaid Mastercard available in Latin American countries including Mexico, Brazil, Colombia, and Peru. It allows payments with cryptocurrencies worldwide.
The card is a prepaid Mastercard with exchange rates typically 1% below Google's rate. It supports multiple cryptocurrencies like USDC, USDT, BNB, Bitcoin, Solana, and Ethereum.
The card offers up to 2% cashback, currently limited to $20 per month. Users can earn up to 19% interest on their balance through flexible earnings.
The card has no annual fee or opening commission. It supports Apple Pay and Google Pay, with a physical card expected later.
To order, go to the Pay section in the Binance app, select the card, enter expected monthly expenditure, accept terms, and provide billing address. Approval is quick, often within minutes.
Users can fund the card by depositing any of the accepted cryptocurrencies into their Binance Spot account. The funds are then available for spending.
To pay, add the card to Apple Pay or Google Pay by entering card details manually or scanning. A verification code is sent via phone or email.
Users can set a four-digit PIN for purchases. Other functions include payment source selection, transaction limits, freezing, and canceling the card.
The first purchase of 133 Mexican pesos was successful. The exchange rate used was 17.16 MXN/USD, which is 0.29% below Google's rate of 17.21, better than expected.
The 0.29% loss in exchange rate can be recovered via cashback. Cashback rates increase with spending: 0.5% for any amount, 1% for $80+, 1.5% for $400+, and 2% for $800+.
The Binance Card offers a convenient way to spend cryptocurrencies with favorable exchange rates and cashback rewards, making it a practical option for crypto users in supported regions.
What type of card is the Binance Card?
It is a prepaid Mastercard.
00:43
Which cryptocurrencies are supported by the Binance Card?
USDC, USDT, BNB, Bitcoin, Solana, Ethereum, and many more.
01:12
What is the maximum cashback percentage offered by the Binance Card?
Up to 2% cashback.
01:26
What is the monthly limit for cashback earnings?
$20 per month.
01:39
What interest rate can be earned on the card balance through flexible earnings?
Up to 19% interest.
01:55
How does the exchange rate of the Binance Card compare to Google's rate?
It is typically 1% below Google's rate, but in the example it was 0.29% below.
00:43
What is the process to add the Binance Card to Apple Pay?
Go to the virtual wallet, press add, select debit or credit, enter card details manually, and verify with a six-digit code.
04:25
How can you set a PIN for the Binance Card?
Go to 'Manage card' in the Binance app, enter a four-digit PIN, and confirm with security access keys.
06:25
What was the exchange rate used for the first purchase in the video?
17.16 Mexican pesos per US dollar.
08:22
What cashback rate is earned for spending at least $800?
2% cashback.
09:49
Cashback offsets exchange fees
The card's cashback can offset the commission charged when exchanging crypto, making it cost-effective.
01:26Exchange rate better than expected
The actual exchange rate was only 0.29% below Google's, much better than the expected 1-1.5%.
08:49Cashback tiers incentivize spending
Cashback increases with spending, encouraging higher usage of the card.
09:17[00:02] several Latin American countries, including Mexico. That card will allow us to pay with cryptocurrencies around the world. In this video we're going to look at its features, how to order it step by step, how to fund it, and finally
[00:16] we're going to use it to make our first purchase. So let's begin. The first thing we're going to do is log into our Binance application. If for Binance account, I'll leave the official link in the description . With this link you can
[00:29] get up to $600 in sign-up rewards. To access this card, we need to go to the home page and then to the Pay section. And here we will find this section that I made card. That card is a
[00:43] prepaid card, which means that to use it we have to fund cryptocurrencies. One thing I like is that it's a Mastercard, and Mastercard gives a very good exchange rate, usually 1% below what's on Google.
[00:58] available in several Latin American countries, including Brazil, Colombia, Peru, and now Mexico. Let's scroll down to take a look at some of its features. As I already mentioned, it's a Mastercard and you can make
[01:12] your payments with various cryptocurrencies, including all the ones you see here. These include USDC, USDT, BNB, Bitcoin, Solana, Ethereum, and many more. So there will be a great variety. One particularly interesting feature of this card is that it
[01:26] offers up to 2% cashback, which can offset the commission you'll be charged when exchanging crypto for traditional currency. That commission that Visa will charge you, which I mentioned was
[01:39] between 1 and 1.5%. It's worth mentioning that this cashback is currently limited to $20 per month, so keep that in mind. You can also have your balance are called flexible earnings. You can earn up to 19% in interest. This
[01:55] means that I can transfer the UST I have in my Binance account to generate interest, and that money will be doing two things: generating interest and also being able to use it when making purchases. Another
[02:07] card has no annual fee, no opening commission, and nothing like that. And finally, you can make your purchases using Apple Pay and Google Pay. I think they'll release the physical card later on. For now,
[02:21] After this, we will go through the application process. To do this, we're going request a card or request. Here's a small bonus: I can receive up to $2 in that token called UMA when I spend at least $. Well, it's not a
[02:36] simply ask us to enter the expected monthly expenditure in dollars. I'm actually going to here. Well, I'm just leaving it up to you on a personal note. We accept the terms and conditions by pressing these two sections and then pressing next. On
[02:51] our address, the billing address. So, I'm going to proceed entering the address, we press send. The request has now been created. Let's click on go to user panel and here we get a
[03:06] notification that our order is under review. So I'm just going to A couple of minutes passed and I received a notification, an email saying that my card had been approved. So, if
[03:19] we go back here to the card section, it's already been approved, and here under my cards we'll find our virtual card. Now let's look at the part about funding our card before paying. Here is the list of all
[03:32] cryptocurrencies you accept. There are quite a few, actually, okay? You can simply deposit any of these cryptocurrencies here and you'll be able to pay. For example, if you exit your card and go to the
[03:44] home section, you simply press add funds. If you want to add, for example, cryptocurrencies, you can select them here. I would add USDT, say, to the Binance SmartChain and you simply send it to your wallet. That USDT that you
[03:58] send will be directed to assets and will arrive here in your Spot account. The assets you send will be available here. And that's basically it. Once you're back, go to the home screen, then to Pay, then to card, and
[04:11] under this section you'll find your available balance. These are all the cryptocurrencies that are accepted. Since I already have UST here in my wallet ready to pay, let's take the next step. And to pay, the first thing we
[04:25] have to do is add the card to our mobile wallet, to our Apple Pay or Google Pay. So, for this, we go to our virtual wallet, which I have here, and press this add button. And
[04:37] here we press that section that says debit or credit. We continue. And here it asks us to scan the card or we can also add it manually, which the physical card. So, we click on add manually and here we're going to
[04:51] enter the card details, okay? What is the name and number of the card? You'll get that information from this side. Go back to your card and in the section that says "view card details", you will
[05:03] see the card numbers, the security code (which is four digits you will use to pay to show you this section because it reveals very sensitive information, but here in what
[05:16] says "view card details" you will find the card details so virtual wallet. Friends, I made a small mistake in the information I gave you. Below, under "see details," I'm already showing you what you'll find. You'll find
[05:30] and card number on the card, which is what you'll need to start adding it to Apple Pay. Then, when you press the wallet, in this case Apple Pay, it will ask for the card's subscription date and
[05:44] the information you will find here, the expiration date and the three-digit security code. You won't find the PIN here; I'll tell you later where you can generate that PIN. So, once you add
[05:57] that information to your wallet, press next, continue, and here it will receive a six-digit verification code, to your phone number or to your email address. I selected email and pressed continue.
[06:11] six-digit code that they will send you, enter it and press next and that's it. Your card will already be ready in your wallet, just like the Binance Card appears here. If I go back to the Binance app, here in this
[06:25] section that says manage your card, this is where you have the card, this is where you have the option to enter this PIN or six digits. You press it, I think it's only four. So, here you
[06:37] enter the code, that four- digit PIN to make your purchases. I'm going to put mine up. After entering the code, we press configure PIN and configuration with our security access keys. Done, the
[06:51] four-digit PIN has been configured. Here are some other functions, such as this one that says payment source. Here's where you can activate this option so you can also pay with the balance you have in your
[07:04] Transaction limit. You can modify it here. We set it at $1,000, but you can change it to whatever amount you want. Regarding resetting your PIN, which we already looked at here, you can freeze your card and you can
[07:17] also cancel your card, that is, delete it. In this case, it seems that everything is ready for us to make our first purchase. buy something. I'm going to pay by card. Okay.
[07:29] I checked if I had it in my bat and I didn't. And well, we've already made our first purchase and as you could have guessed, it was a success. Here in my Apple Pay, the expense
[07:41] of 133 Mexican pesos is already showing up. If we go back to the card and go here to this section where I made transactions, we can also look at our last purchase. We selected it and, well, let's look at some data that determines how
[07:55] good a card it is for us. We were charged 133 in our local currency and $7.75 was deducted from our USDT balance.
[08:08] USDC because I had some USDC and the remaining amount in USDT, but the total amount was $7.75. And here's the exchange rate they're using for me, which is quite important . Conversion rate
[08:22] to 17.16 Mexican pesos. So, if we Mexican pesos. So, if we multiply 775 by 17.16, it will give us a total of 133 pesos. But this is where I like to make the
[08:34] comparison with the exchange rate that's on Google to see how good an exchange rate is. And right now, if we look up how much the dollar costs, the exchange rate, it's at 17.21. And if we do the math
[08:49] quickly, we realize that it gave us stuff 5 cents below Google's exchange rate. Here we can see that Vina is giving us 99.71% below the exchange rate that is on Google. In other words, Vinas paid me
[09:03] 0.29% less than Google's exchange rate. Remember that I personally expected a 1 to 1.5% drop. So, the fact that it's only 0.29% seems even better to me. Remember, and this
[09:17] 0.29% that I'm losing in the exchange rate, I can recover it with that cashback they're going to give me. If I go back to this side, here we can see that at the moment I got a cashback of 0.5% plus the
[09:33] exchange rate for my purchase. That's where I'm going to recover that percentage I'm losing. But if I spend at least $80, I'll get 1% cashback, which will give me a positive balance. And if I increase my spending to $400, I'll get 1.5%, and
[09:49] if I increase my spending to $800, that cashback increases to 2%. So, in exceeded my expectations. I really liked that the exchange rate was very similar to Google's, which means I'll
[10:04] continue using that card for my purchases. If you have any questions, you can best to answer. Also, if you'd like to order that I thought was quite good, I'll leave the official link for pods
[10:17] continue learning and stay up-to-date with what's happening in the crypto world, I invite you to accepted. You can follow us on Instagram for short educational content or join our Telegram channel if you prefer. We also have a
[10:31] WhatsApp group where you can interact with other members. I'll also leave you'll find a couple of related videos about pods. In this one I'll beginning to end, and in this one I'll show you a complete tutorial on pods. I'll say goodbye here
[10:45] complete tutorial on pods. I'll say goodbye here for today.


⚡ Saved you 0h 10m reading this? Transcribe any YouTube video for free — no signup needed.