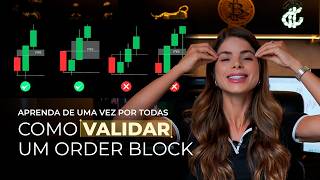

Why Most Traders Fail at Order Blocks
48sDirectly addresses a common trading pain point with a promise to reveal the secret to correct validation, creating high curiosity.
▶ Play Clip"The title promises a complete guide to validating order blocks, and the video delivers exactly that with clear steps and examples."
This video provides a comprehensive guide on how to correctly validate order blocks in trading, distinguishing between common and valid order blocks. The instructor explains the key criteria for validation, including price imbalance, lack of prior mitigation, structural breaks, internal liquidity generation, and Fibonacci context. Practical examples and entry strategies are also covered.
Many traders can identify an order block but fail to validate it correctly, leading to premature entries and stop-outs.
An order block is a region on the chart where institutional investors accumulate before a strong move; the market tends to return to this area to close pending orders.
Focus on two types: Extreme Order Block (last candle before the move) and Fair Value Order Block (candle opposing the trend within the move).
After the order block forms, the subsequent move must be aggressive, creating a Fair Value Gap (FVG) – empty space between candles not touched by wicks.
The order block must not have been touched by any previous candle; the first touch is the entry point.
The order block must cause a break in market structure, such as a new high (BOS) or a trend reversal (CHoCH).
Before hitting the order block, the market should generate internal liquidity (e.g., by taking out equal highs/lows) to avoid a direct, unsustainable move.
Use Fibonacci retracement to ensure the order block is in a contextualized zone: for buys, below 50%; for sells, above 50%.
First, identify the prevailing trend on a higher timeframe (H1, H4, daily) to increase the strength of the order block.
Touch entry is riskier with a wider stop-loss; micro alignment (waiting for flow alignment on a lower timeframe) offers a better risk-reward ratio.
Standardize the higher and lower timeframes (e.g., H1 to M5) and aim for at least a 3:1 risk-reward ratio.
Validating order blocks requires a systematic approach: ensure price imbalance, no prior mitigation, structural break, internal liquidity, and Fibonacci context. Using micro alignment for entries can significantly improve risk-reward ratios.
What is an order block?
A region on the chart where institutional investors accumulate before a strong move; the market tends to return to this area to close pending orders.
01:32
What are the two types of order blocks focused on in this video?
Extreme Order Block and Fair Value Order Block.
02:14
What is an Extreme Order Block in an uptrend?
The last bearish candle before the predominant upward movement.
02:45
What is a Fair Value Order Block?
A candle that opposes the prevailing trend within the move, located in the middle of the action.
03:16
What is the first step to validate an order block?
The block must create a price imbalance (FVG) – an aggressive move leaving empty space between candles.
04:10
What does FVG stand for?
Fair Value Gap.
04:10
Why must an order block not have been mitigated previously?
Because if it has been touched by any previous candle, it is no longer valid; the first touch is the entry.
05:10
What structural break must a valid order block cause?
It must break a structure, such as making a new high (BOS) or a trend reversal (CHoCH).
06:25
What is the fourth validation step?
The market must generate internal liquidity (e.g., taking out equal highs/lows) before hitting the order block.
07:30
How is Fibonacci used in order block validation?
To provide context: for buys, the order block should be below the 50% retracement level; for sells, above 50%.
09:14
What are the two entry strategies mentioned?
Touch entry (riskier, wider stop-loss) and micro alignment (wait for flow alignment on lower timeframe).
15:15
What is the recommended minimum risk-reward ratio?
At least 3:1.
20:48
Price Imbalance as Validation
Introduces the concept of FVG as a key indicator of a valid order block, making it actionable.
04:10Internal Liquidity Requirement
Emphasizes that the market must generate liquidity before hitting the block, preventing false breakouts.
07:30Fibonacci for Context, Not Trigger
Clarifies the proper use of Fibonacci as a contextual tool rather than an entry signal.
09:14Micro Alignment for Better Risk-Reward
Demonstrates a practical method to improve entry precision and reduce stop-loss distance.
15:15[00:03] identify a good order block, but the truth is that only a minority know how to validate it correctly, which is why they enter too early, enter incorrectly, and end up being stopped out. In this video, I want to teach you what separates a common order block
[00:18] from a valid order block so that you can, once and for all, see the market in a different way and refine your analyses. Come with me. But first of all, of course, if you're not subscribed to the channel, subscribe now and leave a
[00:35] me that you're subscribed here, that you leave a like, and if my content helps you in any way, that YouTube starts recommending my videos to other traders who are also on this journey towards consistency,
[00:51] okay? I'll also leave my Instagram here @euanatavares, my official profile, it will be a great pleasure to find you there. Well, I decided to make this video, folks, because I've seen many traders who want to
[01:05] trade SMC, who want to trade order blocks, who don't quite understand order blocks, who don't quite understand how a block works. And that 's why they often enter into operations, mostly
[01:18] meaningless ones, because it wasn't a block, it was just noise in the middle of the chart. So I really want you to leave this video, this lesson, with the feeling that you finally understood and can start improving and evolving your
[01:32] results. But what exactly is a block of order? Basically, an order block is a region on the chart, like a trail that the institutional investor leaves before
[01:44] continuing with their actual move. So it's an area of accumulation before a strong movement. An important point here is that at some point the market tends to return to this region to close those orders that were left
[01:59] open, that were left pending, and continue with its real movement. This is what we call mitigating the block of order. There are several types of order blocks, and I've even discussed this in previous videos. We have extreme order
[02:14] block, Mitigation Block, breaker block, Fair Valuey Order Block, among others. But in today's video we're going to focus on just two, the Extreme Order Block and the Fairvue Order Block. Now we're going to look at the graph because I want to show you this
[02:29] in practice to make it even easier for you to understand. To begin, let's remember what an extreme order block is and what a fairvue order block is. Extreme, as the name itself suggests, is what is at the extreme end of the
[02:45] graph, what is at the very tip. Therefore, in an uptrend, we consider the last bearish candle before the predominant movement as an extreme order block. So, this last little red candle here is what
[02:59] last little red candle here is what we call an extreme order block. Let's mark it here, put it nicely as an extreme order block. Next, in the middle of this movement, when we have a candle that opposes it, in this case this
[03:16] red candle, in the middle of the upward movement, we have our beloved Fairvue Order Block. Fervaluey, guys, it's always located in the middle of the action,
[03:28] okay? So here's a fair value order block; this can also happen in a downtrend. So in a downtrend, we consider the last bullish candle before the downward movement as the extreme order block, right? Unlike the extreme in an
[03:45] uptrend, which is the last bearish candle. So here, the last bullish candle before this downward movement is our extreme order block. If I had a little green candle here in the middle, that would be our fair value. order
[03:59] block. Beauty? But how do we validate these blocks, Ana? First step, write it down . The bloc needs to create a price imbalance. Following the
[04:11] formation of this bloc, the movement needs to be aggressive, it needs to be strong. This is what we also call FVG. Basically, what is an FVG? It's like that space between one candle and another, where we
[04:26] basically have empty space here. Note that it was not touched or affected by any wick from the next candle, nor from the previous candle. So, when we have this strong, expressive body, it acts like
[04:40] a magnet, meaning the market tends to return there and close that inefficiency. That's why it's so effective, so assertive when we have a strong order block followed by a FVG. If I have a block of order,
[04:55] but the subsequent movement wasn't strong, wasn't aggressive, and didn't generate that buzz and gap, then we don't have a valid block of order. Beauty? The second step to validate your block is that it cannot have been mitigated previously,
[05:10] meaning it cannot have been touched by any other candlestick before. So, imagine that here I have a candle that has touched, even just a small wick . This block is no longer valid because it has already been mitigated.
[05:23] Our entrance will always be at the first beat of that bloco (carnival group). Another important point is that the cleaner this block is, the better. So, for example, notice that here, in front of this block of mine, besides generating a beautiful
[05:38] FVG, right here in this region, which was wonderful, I also have a region where I didn't have any wick noise. This makes my approach even more effective. For example, let's imagine this other scenario here.
[05:54] I have an order block, which is the last bullish candle before the bearish move. Look at this last candle here, but in front of it I have a gigantic wick that mitigated this block. So it's as if it were in a
[06:10] smaller time frame, as if that block had already been mitigated. So he 's not that interesting anymore. The cleaner this block is, the more assertive it tends to be. Beauty? The third step to validate your order block is that
[06:25] it needs to break a structure, either by making a top renewal or a bottom renewal, a bullish pivot, a bearish pivot, which is what we call a boss, or a flow reversal, which is what we
[06:38] call a shock. So, for example, here I have a block of order, an extreme block of order in this region. The market reacted favorably to his move and renewed its top position, in other words, the boss's move. The market had already been
[06:51] working in an upward trend, and right after the formation of the block, it made what we call a bullish pivot, the boss, right, a break in the structure. Therefore, we consider it a valid block of order. If it were the other way around, the
[07:04] market would be coming in an upward trend, losing the last low and breaking that structure. In other words, by creating a shock, the block of order that originated this structural break, which is marked here, is a valid block of
[07:18] he absolutely needs to do this, because if the market remains sideways or doesn't break its structure, there are no valid order blocks. Fourth and final step to
[07:30] validate your order block. This, folks, is so precious, okay? folks, is so precious, okay? Inevitably, before closing, the market needs to generate internal liquidity before closing. So let's
[07:46] look at this example here. I'm here in this asset where I have this valid order block . The market is trading in a bearish trend, but I don't want it to suddenly come in and hit my block, because this could
[07:59] simply be a movement that breaks through everything. Sometimes it's news, something like that. If he comes straight at you like that, run away, don't catch him. So, what do I want? I want him to generate liquidity in this region,
[08:13] okay? For later, okay? Even to help you understand a little about the logic of we have an impulsive movement, we have a strong movement. When we have a weaker movement. So, notice, impulsive move,
[08:30] market fell sharply. The corrective leg movement tends to be the slowest. Then he comes along, and generates liquidity. Notice here, if we project, we have relatively leveled peaks, generating internal liquidity, and then
[08:46] the market simply hits my order block before, or rather, after capturing that internal liquidity. This makes my approach much
[08:58] more efficient, much more effective. But wait a minute, folks, I almost forgot the last step to validate your order block. Extremely important, okay? Let's go. We're going to use the Fibonacci sequence to give us
[09:14] context. Remember how I've taught in previous lessons that it's not enough to want to buy or sell an asset; it has to be in a contextualized region. So notice that here I have an upward trend happening, right? Our water was boiling,
[09:28] it was more or less here, I accidentally turned it off. I see an upward trend happening here and I want to buy in this region. I want to carry out purchase transactions. How would I do it? I come here, project my Fibonacci retracement, and see if it makes
[09:42] sense to buy where my building is located. So, look here, I want to buy my Fervela and order block where it's located above the where it's located above the 50% region, meaning in an expensive region, a
[09:56] region with high supply. It doesn't make sense to me to buy something if the market has already gone up too much if I want to. So what do I want? I want it to drop to a region below 50% so I can place my order. So,
[10:10] in this scenario here, for example, I would disregard my fervello and order block region, because it's in an out-of-context region. You will always use Fibonacci to give you context. Remember that I never use
[10:24] it as a trigger, but I do use it as context. So, if I have, for example, here at 79, an extreme Order Block with a Fibonacci region that is also usually very effective, I have two important price points where it
[10:39] important price points where it tends to arrive and respect that region. If I had, for example, a Fervue here in the 61st century, I would already have it in a more contextualized region. It would make sense to execute an order when the price
[10:54] reaches that level as well. Calm down, okay? If it were also within my execution filters, which I'll explain to you in a moment. So, the last way to validate my order block is to use Fibonacci to identify
[11:09] context regions. If I want to buy, it always needs to be below 50. If I want to sell, it always needs to be above 50, and so on. And to wrap up this first part of the video and move on to the most important part, where I'm going to
[11:22] teach you how to do all of this, let's recap. How do I validate my recap. How do I validate my order block? First step: the market needs to create an imbalance after the bloc is formed. Secondly, it has not been mitigated
[11:37] previously. I just want the first touch in that area. Third, you need to break a structure, boss, or shock. Fourth step, I need to secure some liquidity before I can commit my block. And lastly, it needs to be contextualized with
[11:54] lastly, it needs to be contextualized with my Fibonacci retracement area. Beauty? And now the most important part: how do we put all this together and execute it in practice? How do we operate within this entire scenario? First step: identify the
[12:08] prevailing trend. And so I want to link this to what I taught in the last lesson, in the last video on this channel, about a week or two ago, where I told you to never try to predict the top or bottom of the day, but
[12:22] to always identify the prevailing trend first. And it's always interesting to do this on a larger time frame, whether it's H1, H4, daily, for example, I'm going to use a larger time frame so that I can have more
[12:35] security. That's because a block of order in a larger time frame is stronger than a block of order in a very small time frame , okay? So, to be more certain, I switch to a larger timeframe to get a reference point
[12:49] for the structure of that day, so that I can then begin my analysis. So, for example, I'm here with the H1 chart, and I've identified this strong upward trend. I'll mark my valid order block here, right? In that
[13:03] first example, I already have our extreme order block, we also have the Fervello and Order Block. But before marking, I'm going to use my Fibonacci sequence to identify the regions of confluence. So I come here, Fibonacci retracement tool
[13:18] So I come here, Fibonacci retracement tool , project it. I've already identified that Fervé doesn't make sense because it's above a 50% region. If I purchase in a discounted area, in an area with discounts below 50%. So I need to
[13:35] prioritize these regions to have more confidence in my analysis. I've marked my order block here along with the 79 Fibonacci retracement level. Now, the next step is that the market cannot fall straight down to mitigate my block. This
[13:50] characterizes, right, it messes up the validation of this block. So what does he need ? To generate liquidity. First, I'm going to press play here so we can check it out. Look what happened, right? It already fell straight down, without generating liquidity. The
[14:04] ferveller order block was broken. Now it's starting to generate a sort of liquidity here, to generate a sort of liquidity here, with relatively leveled-off funds. We can even grab our little tool and project these
[14:17] funds here to see if they will actually generate that liquidity. And if it captures that liquidity, we already have an entry point. How can I place my trade here? I'm here with my long position tool to
[14:32] project my targets. Oh, my target will always be projected if I'm in an upward trend, capturing, right, renewing that high, always projecting trades of at least three times the risk value. And my stop
[14:46] loss, it will always be set after the order block. So, here's the end of the order block. My stop loss needs to be placed after the block to make my trade safer and avoid those "whistle" movements that take you
[15:00] out of the trade. So, I'm here with my trade positioned. I have two options, okay? Or I can pick it up by touch. What does "pegar no toque" mean? I 'm in H1. If the market pulls in, I might get in. But this is much more
[15:15] dangerous, because I still don't know how it's going to happen. Some people operate that way , but I don't recommend it. Or I can grab the micro trigger, which is what? Wait for the flow alignment to occur in the microtrend. Since I'm working with a chart
[15:29] on a larger team, I need to execute it on a smaller team. I, Ana, operate this way, and it's what I recommend you do. So, when the market reaches that region, instead of clicking away, you can do that too,
[15:42] alignment on the micro. Let's press play here to see what happens on the here to see what happens on the touch screen. Market, look at that, it captured the liquidity generated here in these small funds, nailed it down to the block with millimeter precision, and has
[15:56] already reached a new high, right? But he's got a fuse over there. Let's see if he'll continue. And look how beautiful that operation was. Leave it here, I picked the wrong place. Just look how beautiful this operation was. If you were here
[16:09] conducting this trade, you would likely take on a trade with more than three times the risk. Oh, the market kept going, continuing with its predominant trend. Beauty? Let's look at another example of a downtrend. In
[16:23] this scenario, look, he's already captured the internal liquidity, right? It's nailed here in the order block. And let's see here. He nailed it in H1. Let's see in M5. Could it be.
[16:35] Which micro timeframe do you prefer? M1, M2, M5, M15, at most up to M15, okay? Let's see what happened. Look over there. Let's see in M2. Look over there. Let's see in M2. The market has locked in the block, oh. Just look at that. It's
[16:49] nailed here in the block. Let's press play. Next, he performed the flow alignment here . There are also people who use
[17:01] for example, notice that here, look, there's a large elephant sail on the M2 team; it could be on M5 or M15. Some people enter here as soon as this candle closes. I prefer the alignment when making a shock, okay? Which I think is even
[17:16] safer, you get a much higher risk-reward ratio. So, there are perform an operation, right? For example, what did he do here? He made the impact there in what did he do here? He made the impact there in M2, and returned to a region that is also part of
[17:30] FVG. Remember when I taught you what FVG is? When he performs the micro-shock, he also has to generate a region of FVG, FVG, retest that region, and only then execute that order, because how else would you do it? Your
[17:44] inventory would be a sold operation; your inventory could be above the box here in the structure or further beyond the order block. That's why if you're going to set your stop loss on the touch, right? If it's not going to be on the flow alignment, your stop loss will
[17:59] always have to be up here, see? Let's look at both scenarios so you can understand them better. If I'm going to take the hit on the H1 timeframe, look how much more expensive that stop loss will be. Let's go. Tap, stop, outside of here a little bit after
[18:14] the formation of the block, okay? My goal is always to renew this fund, or I can manage it according to market movements. So, you can see how this stop-loss order here becomes more expensive. That's why it 's important to wait for
[18:28] flow alignment. If I wait for the flow alignment, my stop-loss order will be placed here, after the structure, you see? It becomes cheaper, and automatically the risk-reward ratio also tends to be higher. However, you
[18:43] also have a greater chance of being scammed, so it's up to you, okay? I, Ana, prefer to focus more on micro-alignment, but it's up to you. So, let's see how this market has moved here.
[18:56] market has moved here. Next, he closed the FVG there in the micro timeframe. So, guys, that's it, right? In the because those who sell OB, especially, let's put it on a larger time frame, those who
[19:09] to happen very quickly, but when you're going to operate in a larger market, like you're going to operate in a larger market, like Forex, right, commodities, indices, crypto, in general, things take longer to happen. So, an order like this
[19:23] might close in minutes, and the market could reach its target, but it could also take hours for it to actually arrive and reach that specific target, okay? So here, you guys who are transitioning, who are coming
[19:36] from other markets, need to understand this. What's the most larger markets? That's because we have a very high risk-reward ratio. So here, what you would risk, for example, 1000 to win 800 in OB,
[19:53] here you risk 1000 to win 3000, and so on. So, look at this, everyone, look how beautiful this operation was. The market came in, look, it nailed it here in the one-hour order block. I could have come in here on the touch. It's a more
[20:08] dangerous operation, with a larger stop loss, but when you wait for flow alignment—let me erase this here—when you wait for flow alignment at the micro level, you have a much higher risk-reward potential, much higher. So,
[20:23] look what happened when I say that you can get say that you can get M1, M5, M2, and eventually M15, it's because what happens in one team usually happens in the other too, right?
[20:36] market fractality. So, what I recommend is that you always standardize. So, if I'm going to standardize H1 to M5, all my operations will be H1 to M5. I'm going to standardize H4 to M15 and so on. So, standardize, that way you'll be
[20:48] able to have more consistency and clarity when executing your operations. The next important step for you to execute this order is to always remember to prioritize trades with at least three times the risk/reward ratio. Ah, Ana, but
[21:04] in this case, the market paid me much more than three times the risk- reward ratio. Yes, I could have stayed longer . So how do you proceed in this situation? You have two options. Or are you going to design your investment with the risk-
[21:18] return ratio already defined, right? Three for one, okay? This is what you do when, for example, you ca operation. Let's suppose this happened in the early morning, look. 22:15 was the time he went to get it. He went to retrieve the target around 2 or 3 in the morning, oh,
[21:34] here all night operating. So in that case, you can plan your targets and walk away. Not now, Ana, I want to stay here, I want to follow along, I want to see how far this market can go. So you can continue with the operation and
[21:47] manage it as the market moves in your favor, okay? So, uh, I folks? I've passed on all the important information about how you're going to get involved and how you're going to proceed. And it's very important that you understand this. Two
[22:02] entry-level models. First, the touch strategy allows you to analyze and execute on a flow alignment strategy is always the safest, where you can reduce the stop-loss value and significantly increase your risk-reward ratio, okay? So, that
[22:18] was today's lesson. I hope you enjoyed it . If you enjoyed it, don't forget to leave a like, a comment, and stay tuned for future videos. Thank you very much. Kisses. Free. Ah.




⚡ Saved you 0h 22m reading this? Transcribe any YouTube video for free — no signup needed.