
Compress 4K video without losing quality!
45sThe hook promises a solution to a common problem (large video files) with a surprising claim (no quality loss), grabbing attention immediately.
▶ Play Clip"Title accurately describes the tutorial; the video delivers on its promise of compressing 4K video without quality loss using FFmpeg."
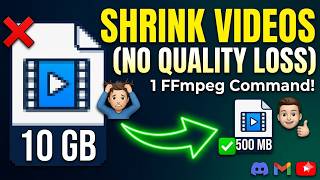
This tutorial demonstrates how to compress large video files without noticeable quality loss using a single FFmpeg command. The video shows a 6.23 GB 4K file reduced to 1.63 GB while maintaining visual quality.
Huge video files can be compressed without noticeable quality loss using a single FFmpeg command.
FFmpeg must be installed; a link to an installation tutorial is in the description.
The example video is 7 minutes long, 4K, 60 FPS, using AVC video and AAC audio at 320 kbps, size 6.23 GB.
Nvidia GPU users can use NVENC for fast encoding; CPU encoding (libx264) is slower but offers better compression.
CRF (Constant Rate Factor) controls quality: lower values (e.g., 18) give higher quality, higher values (e.g., 28) give more compression. Safe value is 23.
Two main commands: one for general use (libx264, CRF 23, preset medium) and one for very small file size. Nvidia variant uses h264_nvenc with CQ instead of CRF.
Additional flags like -a (audio codec AAC at 128 kbps), pixel format yuv420p, and conditional audio processing provide more control.
Input 6.23 GB reduced to 1.63 GB (about 75% reduction) with identical visual quality.
Using -movflags +faststart enables fast streaming/playback start.
With FFmpeg and the right command, you can drastically reduce video file size (e.g., 75% reduction) while keeping quality nearly identical. The tutorial provides commands for both CPU and Nvidia GPU encoding.
What does CRF stand for and what does it control?
Constant Rate Factor; it controls the quality/compression trade-off in video encoding.
2:00
What is the recommended safe CRF value for good quality with compression?
23
2:26
Which encoder is faster: Nvidia NVENC or CPU libx264?
Nvidia NVENC is faster; CPU libx264 provides better compression but is slower.
1:18
What flag replaces CRF when using Nvidia's h264_nvenc encoder?
CQ (Constant Quality).
2:57
What does the -movflags +faststart flag do?
It enables fast streaming/playback start by moving metadata to the beginning of the file.
6:19
Single Command Compression
Shows that a single FFmpeg command can drastically reduce file size without quality loss.
Encoder Comparison
Explains trade-off between Nvidia GPU speed and CPU compression quality.
1:18CRF Value Guide
Provides practical CRF values (18-28) and their effect on quality and size.
2:0075% Size Reduction
Demonstrates real-world result: 6.23 GB to 1.63 GB with identical quality.
5:46[00:00] So, if you have a huge video file and
[00:02] you want to compress it without
[00:04] noticeable quality loss, you can do that
[00:06] with a single FFmpeg command. And in
[00:10] this video, I'll show you how to do that
[00:13] perfectly. So, for that, you will have
[00:15] to have FFmpeg, a command-line video
[00:18] processing tool, installed. I have a
[00:20] video on how to install it. It is very
[00:22] easy and straightforward. The link is in
[00:25] the description. So, once you have
[00:26] FFmpeg installed, you can just reduce
[00:29] the size of your video without
[00:31] noticeable quality loss in a single
[00:33] command. So, here is a video I have. It
[00:36] is 7 minutes long, and the size is 6. 23
[00:41] GB. So, let's open the command prompt in
[00:45] this directory so that I can execute
[00:47] command on this file. And let's type
[00:50] Let's see the details of this video.
[00:54] So, as you can see, it is using AVC,
[00:57] means Advanced Audio Codec. This is a 4K
[01:00] video, 60 FPS, and a audio with AAC
[01:04] codec.
[01:06] Bit rate is around 320
[01:09] kbps. So, I have prepared few command,
[01:12] and those commands come in handy based
[01:16] on your
[01:18] situation. Like if you have an Nvidia
[01:20] GPU then
[01:22] you'll use Nvidia encoder, which will be
[01:26] super fast. But if you do not have it,
[01:28] don't worry. You will use processor
[01:30] source
[01:31] uh coding power, and that is sometimes
[01:34] way better. Just a bit slow, but
[01:37] compression is way better than Nvidia.
[01:39] So, the first command is for regular for
[01:43] everyone. So, here as you can see, we
[01:45] are using lib
[01:48] uh 264
[01:49] codec. So, whatever your video file is,
[01:53] the output video will have a lib x264
[01:57] codec, which is very mainstream codec.
[02:00] And then it comes There comes a flag
[02:03] called CRF. So, here in CRF, the higher
[02:07] value means
[02:09] lower quality. I mean, more compression.
[02:13] So, if the value is 18, then you'll see
[02:16] no difference. But if the value is 28,
[02:19] then video quality may degrade a little,
[02:22] but the size will be reduced a lot. So,
[02:26] a safe point is 23. Then preset medium
[02:30] for a balanced encoding, and I'm
[02:33] copying the audio codec, not changing or
[02:36] anything related to audio. And the
[02:38] second command is if you want to have
[02:41] very small file size. And again, if you
[02:45] have Nvidia GPU, then you'll use H.264
[02:49] NVENC. Same encoding algorithm, but done
[02:53] with the GPU for faster encoding. But
[02:57] uh the CRF flag changed to CQ for
[03:00] Nvidia.
[03:01] Everything else is same. 23 for a medium
[03:06] compression, and preset before is also
[03:09] for medium.
[03:10] So, the value before and CQ
[03:13] changed for Nvidia encoding, and I did
[03:17] not
[03:19] change the audio encoding here still.
[03:22] But if you want to have more control and
[03:25] a resilient command, then you can use uh
[03:28] something like {hyphen} a, means AC.
[03:32] That means audio will be changed to AAC,
[03:36] and the audio bit rate will be 120 kbps,
[03:38] which is like standard. And you'll use
[03:42] some additional uh flag like pixel
[03:45] format you've 26 uh 240 pixel, and some
[03:51] checking like if there is an audio If
[03:54] audio exists, then do the audio
[03:56] processing. If not, then don't. So,
[03:58] those are uh commands you can use to uh
[04:03] reduce the file size without losing
[04:06] quality drastically. So, I'll go with
[04:08] the last command since I have an Nvidia
[04:12] GPU. So, by the way, uh the input file
[04:16] is here, for example, input.mp4. So, you
[04:19] can replace this with your file name and
[04:22] extension.
[04:23] And whatever you put at the last as file
[04:27] name will be name of your output video.
[04:31] So, my output video will be
[04:33] output_compressed.mp4.
[04:35] You will see if everything goes
[04:38] correctly. So, I'm copying this command.
[04:40] The name of my input video is input.mp4.
[04:43] Let's go to the directory. Let's rename
[04:45] it to input.mp4.
[04:48] And let's open the command prompt in
[04:51] this directory. And let's
[04:54] zoom in so that you can see the command
[04:56] and paste the command.
[04:58] So, currently, the video is being
[05:01] processed.
[05:03] As you can see,
[05:06] it is
[05:07] using my GPU. So, yeah, video processing
[05:11] is resource-heavy.
[05:14] If I
[05:16] would use the
[05:18] processor encoding, then it would take
[05:21] even more
[05:23] even more time to
[05:25] encode the video.
[05:28] So, let's wait for it to complete.
[05:32] The video compression is processed.
[05:34] Now, let's go to the directory
[05:38] and see what is the output video look
[05:40] like. The input video is around 6.23 GB.
[05:46] And the output video is 1.63
[05:49] GB. So, from 6 GB to
[05:54] uh 1.5 GB,
[05:56] 75%.
[05:58] Okay.
[06:00] So, 4:1 means from So, initially, if the
[06:05] video size was 6.23, now the video size
[06:08] is 1.63 with identical video quality.
[06:13] So, that is how you can easily reduce
[06:16] your video file size. And here I have
[06:19] used some additional flag like MOV flags
[06:22] plus faststart. So, if you stream or
[06:25] play the video, it will start super
[06:27] fast, which is very convenient. So,
[06:30] that's it, guys. Uh if you have any
[06:32] questions or any comment, feel free to
[06:36] put that in the comment section below.
[06:37] I'll be happy to reply and see your
[06:40] opinion. So, that's it for this video. I
[06:44] will add this to the comments in the
[06:45] description and also how to install
[06:47] FFmpeg. So, that's it for this video.
[06:50] Hope you have learned something. See you
[06:52] in the next video.
⚡ Saved you 0h 06m reading this? Transcribe any YouTube video for free — no signup needed.