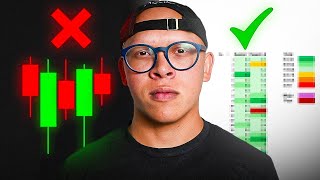

Candlestick Patterns Don't Work (5% Know This)
41sControversial claim that candlestick patterns fail 95% of traders creates curiosity and engagement.
▶ Play Clip"Delivers the promised alternative but could be more concise; some examples are repetitive."
This video argues that traditional candlestick patterns are ineffective for consistent trading profits and introduces an alternative method: using the patterns to create zones for entry rather than entering on the pattern itself. The speaker explains common failures, provides a theoretical basis for the zone approach, and demonstrates multiple examples.
Only 5% of traders succeed using candlestick patterns, indicating they are not a reliable method for long-term profitability.
Engulfing patterns often result in stop-losses or insufficient profit, as the entry is too late and the market reverses.
Using candlestick patterns at support or resistance levels often leads to false signals and losses.
Instead of entering on a pattern, use the last candle (green for sell, red for buy) as a zone to anticipate price reactions.
For a sell trade, enclose the last green candle (including wicks). For a buy trade, enclose the last red candle. Wait for price to return to this zone.
Enter when price touches the zone. Place stop loss slightly above/below the zone. Take profit at 1:2 or 1:3 risk-reward ratio.
Markets need balance between buyers and sellers. The last candle represents the final imbalance; price returns to rebalance, creating opportunities.
The speaker used candlestick patterns for 3 years before switching to zones, which improved precision and reduced losses.
By replacing direct entry on candlestick patterns with zone-based entries, traders can achieve more precise entries and better risk-reward ratios, leading to long-term profitability.
What does the video suggest using instead of candlestick patterns for entry?
Use the candle from the pattern to create a zone and wait for price to return.
06:11
For a sell trade, which candle should be used to create the zone?
The last green candle before the sell-off.
08:32
What is the recommended risk-reward ratio for exits?
At least 1:2 or 1:3.
07:50
According to the video, why do candlestick patterns often fail?
Because entering on the pattern is too late; the market needs balance and the pattern represents an imbalance that will be corrected.
10:10
How should you place the stop loss when using a zone for a sell trade?
Slightly above the zone.
07:50
What is the key difference between using candlestick patterns for entry vs. using zones?
With zones, you wait for price to return to the last candle of the pattern, rather than entering when the pattern completes.
06:11
Zone-based entry concept
Introduces a paradigm shift from pattern entry to zone anticipation, which is the core innovation of the video.
05:55Market balance theory
Provides a logical explanation for why zones work based on buyer-seller equilibrium, adding credibility.
10:10Personal testimony
The speaker's 3-year struggle with patterns and success with zones adds real-world validation.
13:07Call to mentorship
Offers further learning opportunities, indicating the speaker has a coaching program.
20:34[00:01] used candlestick patterns, you take the entry, it seems like a good entry, but in the The truth is, candlestick patterns don't work. If everyone is using the same concept and it turns out that only 5% of people are
[00:14] everyone is using is wrong and won't allow you to make money in the long run. I made this video to teach you why you should replace specific examples, and I'm sure that after watching this video, you'll stop using
[00:28] using what I'm going to teach you. How many times has it happened to you that you're using candlestick patterns that you find, for example, the most common candlestick pattern, which would be the engulfing candlestick? Let's say here we have an engulfing candlestick,
[00:42] but suddenly, while it's forming, takes you to the stop loss, or it simply doesn't go in the direction you were expecting. This happens thousands of times, and we can find thousands of examples where the
[00:57] same thing happens. For example, let's say you have a resistance level here, and you You'd be waiting for an engulfing pattern to help you take your buy entry. Let's say you take your
[01:09] buy entry, then it engulfs, which would be more or less around here. Once you finish Stop Plus here and Take Profit here, this is simply a one-to- give you enough profit to take
[01:23] advantage of the market. And once you're one-to-one, up here, letting the market flow and keep going up, but then you realize that it returns completely to the entry point, then it
[01:38] returns to the profit. And if you don't move to the entry point, then you go to stop loss. This isn't because you entered wrong or because you didn't see something, but simply because you entered late and your final target was too late. Because when we use
[01:53] use them in areas of points of interest, whether support or resistance, these concepts at support or resistance, they don't work as we would expect, whether you placed your Stop Plus here or It could have happened to you
[02:09] at that wick here, and you might say, " Ah, it was a knockout, the market took me out, the banks manipulated me." Maybe so. So, you put your stop loss here, below the support level, it doesn't matter because in the end the
[02:22] trade is reversed. It doesn't even give you a one-to-one, and besides, to get that one-to-one, it takes from 9 PM the night before until 7 approximately a whole day, just waiting for that one-to-one. But what I'm about
[02:37] much more because you won't have these kinds of entries anymore. In addition, your entries will be more precise, the stop losses won't have to be as big as you usually have them, and you'll be able to enter much, much better. And I'm
[02:50] going to give you another example. Let's look at some times when we wait for engulfing candlesticks as confirmations, and it doesn't give us the entry we're waiting for. For example, look here, in this area, we can say we have an
[03:03] we can say we have an engulfing candlestick. We can put our resistance level here, and look at our engulfing candlestick. If we enter after that... An engulfing candlestick pattern would be roughly around
[03:15] here. We would place a stop loss above the resistance level, and a take profit of at least one or two. That's what we'd be support level here, that would be the
[03:28] minimum stop loss. The take profit we're looking for, sorry, and the stop loss up here. Then we see that the entry goes a little into the profit, and when it pulls back a bit, this happens. This is what I want you to
[03:40] observe; this will fill you with hope because you say the entry then it pulled back a little, and now I have a super giant engulfing pattern that's indicating that, according to what I was taught about price action, the price
[03:54] should drop sharply here and go directly to the take profit level. that the next candle seems to pull back a bit, and literally, that candle that seemed strong is completely invalidated by other candles,
[04:09] making us understand that that specific point wasn't a good point for us to take a sell trade, and in the end, it didn't happen. Okay, and since it didn't go held our trade to the stop
[04:22] loss, we got a stop loss, but now comes the most interesting part. Let's say that after you got your stop loss, you saw that another engulfing pattern formed, a red engulfing candle that completely engulfed that
[04:34] green candle. And you were thinking, "What if this is a resistance level, and when it reaches this resistance, I can sell?" So you do the following, what every smart trader does: you put your trade in a sell position here, you put your stop loss
[04:49] up here, and you put your take profit down here, waiting for it to reach the next support level and give you a good profit. Then, as we move forward, we realize that, boom, again we were wrong, and
[05:02] support or resistance level, we decided to sell at that point. It doesn't mean you made a mistake, but possibly using the candlestick pattern increased your probability of loss and increased your confidence in something that doesn't really work in the long run. That's why I'm
[05:16] telling you not to use candlestick patterns; the truth is, it's not going to help you make money in the long run. In trading, I'm going to teach you something that will help you a little more. For example, look at this
[05:28] perfect example. I know many of you identified with this example or with that one here about selling. Often we have candlestick patterns that seem like they're going to but they don't actually do that. They're just there, making us understand
[05:42] little, but it never reaches our take profit. There might be one or two that do work, but in the long run, I promise you that if you keep using this methodology, you're not going to do well. Let's look at a concept that will help you
[05:55] candlestick pattern. So, the concept is this: I do n't want you to use candlestick patterns for your entry target, but rather to use candlestick patterns as the creation of a zone. Once
[06:11] the price reaches that zone, we're going to use that zone to sell or buy. Let's see what I mean. You know that a candlestick pattern is a red candlestick, a green candlestick, and a green candlestick that completely surrounds it. For example,
[06:23] here I... I know many of you would recognize this pattern as the Morning Star, which is a green candle followed by a doji, then a strong red candle. You're not going to use these candlestick patterns to enter a trade; that is, you're not going to
[06:38] Instead, you're going to choose whether the candlestick pattern is bearish. Then you're going to take the last bullish candle, this green candle here, and turn it into a zone. The goal is that when
[06:53] the price touches that zone again, it will react to it and do so with much greater precision. Every time you see an engulfing pattern, you're going to take the last green candle and create a zone. But this is: When you see an
[07:08] engulfing pattern, you're going to take the last red candle. Look at this other example: here we have an engulfing pattern, a red candle that completely engulfs this green candle. I'm going to engulf the last green candle and extend it, and that will
[07:22] work for me as a high-reaction zone, a high-frequency reaction zone. And I want that when the price returns to that zone, I want it to give me a strong reaction. And at that point is where I'm going to look for my buy and sell orders because what
[07:35] when the price reaches the zone, let's look at it this way, let's say I have this new zone here, a sell zone. When the price reaches this zone, I want to place a sell order. I'm going to place my stop loss a little
[07:50] above where the zone ends, and I'm going to place my take profit at least one to two or one to three, depending on what I'm looking for. Once the price reaches the zone, I'm going to place a sell order in that zone. Let's see, here it has reached the zone. Notice,
[08:03] I'm going to place my stop loss a little above the zone, and then I'm going to look for the price to do this: once the price reaches the zone, it reacts strongly in the opposite direction. Instead of using what I
[08:18] where I entered the market a little earlier because if I entered here due to an engulfing... So, notice how the price hesitates a lot before going to the point where I was looking for... what I do is use the... I'll draw an engulfing
[08:32] zone, and any candlestick pattern you can think of—whether it's the Morning Star, the Evening Star, the engulfing, or any other candlestick pattern—you'll do the same. If you're looking for a sell trade, you'll look for
[08:47] the last green candlestick before the sell-off, before it drops sharply. If you 're looking for a buy trade, you'll look for the last red candlestick. Let's look at another example here, friends. Look at this zone here. You'll
[09:00] notice we have more or less a Many would say this is a manipulation candlestick. When banks operate, they always see these wicks and say it was bank manipulation, but they do
[09:15] n't know how to explain it. All of this has its explanation; I'll explain it in another video. But notice that this green candlestick is completely engulfed by a red candlestick. So that red candlestick is an engulfing zone. I'm going to take the green candlestick and
[09:27] extend it into a zone so that when the price touches that zone again, created by the green candlestick, I'm going to place a sell trade. I'm going to place my stop-loss order. The loss is a little above the zone, and I'm going to place my Take Profit one, two, one, or
[09:42] three times, more or less. Notice that eventually the Take Profit is hit. And if we continue analyzing this point here, we can observe more zones that are created. Because the point of all this is not to enter directly
[09:56] when the candlestick pattern is created, but to use the candlestick pattern zone as a zone of strong reaction. And this has its theoretical explanation so that you can understand it. Everyone knows that green candlesticks are buys and
[10:10] red candlesticks are sells. If you notice, the following happens: the market always have the same number of people buying and the same number of buying and the same number of people selling, so that it is a
[10:24] stable market and so that it can continue to function. If here many people bought, all these were people who sold. Now we need to go back to the last person who sold in order to buy. That is, there has to be the
[10:37] same number of sales and purchases. Look, here this green candlestick represents my last purchase, but then what comes after that green candlestick is all sales. All these are sales here. This means
[10:52] there are more sales than purchases, and what the price does is return to the last We need the same amount of sales as purchases for the otherwise, there won't be any balance. This is why,
[11:10] candlestick patterns, we go back to the last pattern that formed. The best ones that will work with this are engulfing candlesticks. You see these engulfing candlesticks; they will work very well with this strategy. We could go on all
[11:22] day looking for examples. Let's look at another example. Look here, for example. Look at this area here. We basically have a resistance level that is a little higher. Let's mark that resistance level here. And
[11:35] we observe that the price is creating a higher low at that point. If we observe, there is an engulfing pattern. We have a green candlestick that completely engulfs the red candlestick. But if we engulf the red candlestick, we extend it a little. I don't
[11:48] know if you notice that further on, even later, it also ends up touching the point and having a reaction. First, it touches it here, having a strong reaction. Remember that these are zones. of strong reaction, and when
[12:01] these zones appear, once the price touches them, it won't stay in that zone for long and will move very quickly to the opposite point. That's what happened here, and we'll find these zones of strong reaction in many
[12:14] places; we just have to look for support or resistance levels where we would be looking for engulfing. Look for the engulfing pattern, the candlestick pattern we used to use to enter, and instead of entering there, enter the zone it will
[12:27] create, like this one here. It's a bullish engulfing pattern: a green candlestick going upwards that is completely engulfing the last red candlestick. I'm going to engulf the last red candlestick and use it as a zone because in the future, once the
[12:41] price reaches that zone, it will have a strong reaction. It's the same as what we see here. I'm going to place my entry. Once the price touches the zone, I'm going to place my stop loss where the zone ends, a little lower, and I'm going to look for
[12:54] a take profit of one, two, or three, depending, but generally, take profits of one, two, or three are almost always used. And the first and most important thing is... To find this, I need candlestick patterns. No, I'm personally tired of the fact
[13:07] that when I take an entry with a candlestick pattern, it takes me out, it doesn't go to direct profit, it stays too long at the entry point, and in the end, it does n't give me any entry. That's why I started changing it. And instead of
[13:19] candlestick pattern, I started using it as zones. This here is a zone. So I completely engulf the zone, and when the price touches it in the future, I'm going to use that zone to buy. In this case, it's for buying. Let's look for an
[13:33] example where we can find a sell zone because we've found many examples of buy zones. Let's look for a sell zone for an example. Let's go back a few days to see what we can find. Look at
[13:47] this example here, my dear friends. For example, if we look at this part, we can mark this last green candlestick, and I'll explain why. Because here we have the green candlestick, and then these two red candlesticks that
[14:00] Morning Star, or it could simply be an engulfing pattern. And then we see what happens Sometimes it takes much longer to... Touching it other times, not so much. Look, once the zone is created, I'm going to mark the
[14:14] green candle completely, and once that zone is created by that green candle, which would be my candlestick pattern, I'm going to take my entry. I'm going to take the entry here. Once it touches my stop, I'm going to put it a little above the zone, and I'm
[14:29] going to try to put the profit at one to two, one to three would be ideal. So what I want is for the price to do the following: once it touches the zone, my order is activated, or at least for me to enter the market and then go down towards
[14:41] the take profit. We observe that the next candle, boom, activates the zone. Basically, the order is now active. That order is already active, and we see how after being activated, it goes directly to the take profit. Let's put it here. The
[14:56] order was activated on the next candle, and after being activated, it didn't even last too long in drawdown or in negative territory, and it went directly to our take profit. So, it 's important to put the stop loss above
[15:10] the zone because sometimes we put it very close to the zone, and it doesn't mean, nor do we know, where the price is going to react specifically, whether at the beginning of the zone or at the end. Or halfway through, and since we don't know, what we have to do is
[15:22] place the Stop Loss a little above the zone, then the Take Profit 1 to 2, 1 to TR, because that's the rule for using these types of zones. We notice that here, the draw-in allows us to create a zone, and with
[15:36] that zone, take a sell trade. We can continue all day looking for examples of how this works, and here's another example: here we have the perfect Morning Star pattern, the candlestick pattern that everyone likes: a
[15:51] green candle, a doji candle, and then a red candle. So what do we do? We completely engulf the green candle, we extend it because our goal is to completely engulf it, including the wick. We extend it because our goal is
[16:05] for the price to reach that green candle and then react. A question I know you're going to ask is: do I use the wick? Do I only use the body? The correct thing is to use the whole candle, including the wick. Sometimes
[16:19] the body; that's when the wick is very long, but ideally, you should use the entire wick. And what we have to do is... Waiting for the zone to form is very easy. Once that Morning Start is created, I'm going to mark my zone. If it's
[16:33] a sell zone, I'm going to mark the green candle that was used or created with the Morning Start. If it's a sell zone, I'm going to use the red candle. So I wrap the green candle in a small square, and my objective is to wait for the
[16:47] price to reach this zone. I'm going to place a stop loss above the zone here, and I'm going to place a take profit of at least one to two. Let's see when the price reaches this zone, and we observe
[16:59] that the price finally reaches the zone. My entry opens, and then we see how the entry goes directly to the take profit. This entry, if you notice, This entry, if you notice, the zone was created, the zone was used here, and then
[17:11] the price was distributed to the next take profit. It's very simple because with this tool you're going to be able to completely replace candlestick patterns. shouldn't be one of the tools you use to confirm your entries
[17:25] because with this confirmation, you're going to help you so much that in the end you're going to lose much less, you're going to find more precise entries, and finally you're going to To get used candlestick patterns, support and resistance levels and they haven't
[17:40] worked for you, it's time to change your approach. Because by doing the same thing, we're going to get exactly the same results. Let's look at other examples of zone creation so you can see how this concept works, because the
[17:54] truth is, it works very well, especially in the long term. Look at this here: here we have a candlestick pattern, a final red candle and then a green candle that completely engulfs it. If we enclose that red candle from wick
[18:07] to wick and extend it, look, it seems like magic, literally. It just touches and goes strong. How would we place our entry at that point? Our entry here in the zone? We would place our stop a little
[18:21] below the... zone and we would look for our entry one to two, one to three approximately. There are entries like these that are one to six, but we don't know what the risk-reward ratio of the entry will be before taking it. So, to
[18:33] be cautious, what we're going to do is take entries one to two and one to three. This type of concept will help you a lot, and above all, the most important thing is that it will help you even more if you learn to use it precisely and
[18:45] can do after this run to the chart and look for these zones. You start identifying candlestick patterns, and once you find all
[18:57] the candlestick patterns, you mark them and use them as zones, whether it's a Golfing Morning Star, Evening Star, or any other candlestick pattern you use or find. You mark each candlestick pattern as a zone. If it's a sell zone, you
[19:11] look for the last green candlestick, and that green candlestick is the one of the candlestick pattern. And if it's a buy zone, you look for the last red candlestick, and that's the red candlestick important that you learn concepts like these because I It took me about
[19:25] three years to use candlestick patterns before I realized they do analyze all the information you see on YouTube. You'll find a lot of candlestick patterns, why certain formations should work, and they tell you to
[19:39] learn all the candlestick patterns. We, as analytical beings, think that once we learn them all, when we find the right one, we'll be answer is that you won't find the candlestick pattern, and you'll continue to lose
[19:53] themselves don't tell us much about the price. They're simply ways in which candlesticks form within the price action. We think we can predict the price with a candlestick pattern, an engulfing candlestick. The truth is, it doesn't mean much
[20:06] So, to make fewer mistakes with candlestick patterns, we'll use them as zones. Remember what I taught you. And don't forget the rules: if it's a sell zone, we'll look for the last green candlestick. We'll enclose the green candlestick
[20:20] a buy zone, we'll look for the last red candlestick. The red candlestick pattern is key, and I promise you that if you implement this correctly, you'll never need candlestick patterns again. I only ever lost money when I used
[20:34] many people who actually make money using them. That's why will help you earn more money, have more accurate analyses, and candlestick patterns. If you're interested in making trading your biggest source of income and having me
[20:50] personally mentor you, I'll leave a link below where you can apply to have make trading your biggest source of income this year. That's all for now. See you in the next video. Bye bye and kisses!

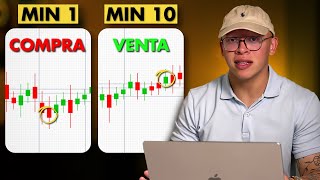


⚡ Saved you 0h 21m reading this? Transcribe any YouTube video for free — no signup needed.