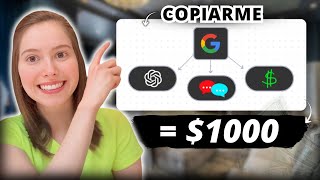

Create AI agents that earn you $250-$1000 each
42sHigh-earning potential and low barrier to entry make this an irresistible hook for anyone seeking remote income.
▶ Play Clip"Delivers a solid tutorial on creating one specific agent, but the title 'Automate Everything' overpromises; content is focused and practical, though includes a sponsored segment."
This video tutorial demonstrates how to create AI automation agents using the no-code tool N8N, specifically a business chatbot that responds to customer queries about schedules, locations, and pricing. The instructor covers local and cloud installation (using Hostinger VPS), setting up a Pinecone vector database to store company data, and integrating the chatbot into a website. The goal is to enable viewers to build and sell such agents as a service, with tips on finding clients.
N8N is a free tool for creating automation agents without coding. These agents can cost $250–$1,000+ and handle tasks like automated emails, chatbots, and social media content generation.
Install Docker and enable WSL (Windows Subsystem for Linux) to run N8N locally. Docker creates containers for N8N, and WSL is needed for Docker to function on Windows.
After setting up Docker and files, run 'docker compose up -d' in PowerShell, then access N8N via http://localhost. Local installation requires the computer to stay on 24/7 for agents to remain active.
Hostinger VPS is recommended for 24/7 uptime. The cheapest plan is $5.99/month, but with code 'Ori BPS' it becomes $4.39/month. This cost can be passed to clients.
After purchasing the VPS, configure the server, select the N8N application, create a password, and wait ~5 minutes. Then access the admin panel to register and activate the free license.
The chatbot answers questions about hours, locations, services, and quotes. It uses two flows: one to load company data (via Pinecone vector database) and another for the chat interface.
Use a manual trigger, add Pinecone node with API key, create an index with dimensions 1536, and connect OpenAI embeddings (model: text-embedding-3-small). Then add a document loader (binary, custom splitting) and Google Drive node to fetch PDF.
Create new flow with chat trigger, add AI agent node with system message (generated by ChatGPT), connect OpenAI chat model (GPT-4.1 Mini for cost efficiency), set simple memory, and link Pinecone as tool with description of data.
Save and click 'Open Chat' to test. Example questions: 'What kind of windows do you install?' and 'What are your hours?' The chatbot responds accurately using the loaded data.
Activate the chatbot and get the integration code. Paste it into the website's HTML editor. For Hostinger, ChatGPT can adapt the code if needed. Replace the production URL correctly.
To change welcome message and header to Spanish (or another language), ask ChatGPT to modify the integration code using the official N8N documentation link. The updated code is pasted into the website editor.
Instead of freelancing platforms, create a system that searches for companies via Google Search API and sends automated messages through their forms. The instructor warns against spam and suggests using it as a demo.
Building N8N automation agents opens remote work opportunities and allows you to offer valuable services to businesses. The key is to master the no-code workflow and use cloud hosting for reliability.
What is N8N?
A no-code tool for automating tasks and connecting applications, used to create AI agents like chatbots.
01:29
Why is a VPS recommended over local installation for running N8N agents?
A VPS ensures 24/7 uptime without consuming local resources or requiring the computer to stay on constantly.
04:20
What dimensions must the Pinecone index have for this tutorial?
1536 dimensions, matching the OpenAI embedding model 'text-embedding-3-small'.
10:08
What is the purpose of the 'system message' in the AI agent node?
It defines the chatbot's role and behavior, instructing it to answer based on company data.
13:51
How do you integrate a chatbot built in N8N into a website?
Activate the chatbot workflow, get the integration code, paste it into the website's HTML editor, and replace the production URL with the N8N webhook URL.
16:32
What model does the instructor recommend for the chatbot to balance functionality and cost?
GPT-4.1 Mini, described as 'super functional and economical'.
14:51
What type of data splitting is used in the document loader for the PDF?
Custom splitting using 'recursive character text separator' with fragment overlay of 200 characters.
11:39
What is one client acquisition method mentioned besides freelancing platforms?
Create a system that searches for companies via Google Search API and sends automated messages through their forms (used as a demo, not spam).
21:02
N8N as a No-Code Automation Tool
Introduces the core tool that enables non-programmers to build AI agents, opening remote work opportunities.
01:29Cloud vs Local Installation Trade-offs
Explains the practical need for 24/7 uptime, making cloud hosting essential for production agents.
04:20Business-Centric Chatbot Design
Showcases a real-world use case: a chatbot answering company-specific queries, which is directly sellable to clients.
07:29Cost-Effective Model Selection
Recommends GPT-4.1 Mini for balancing performance and cost, a practical tip for freelancers.
14:51Proactive Client Acquisition
Offers an alternative to freelancing platforms by targeting businesses directly via automated outreach, though warns against spam.
21:02[00:02] how you can work from home with a so far. The best part is that it can be used for free and allows you to create
[00:14] automation agents or robots that companies pay for. These agents can cost from $250 to over $1,000 and are made in a few days depending on what they do. For example, you can create agents that send
[00:29] automated emails, chatbots for WhatsApp or Telegram that answer queries, such as quotes, or even systems that automatically create and upload videos to social networks, among many other uses. In this video,
[00:44] I'm going to explain how to make a highly functional agent that you can replicate so you can see how these agents help companies save time and money, which is precisely the reason why they buy them. The idea is to learn how to create them
[00:59] and offer them as a service. The best part is that all they need is a computer and an internet connection to start developing it. If you're new here, on this channel I teach online jobs that I use to make a living from
[01:13] home. If you're interested in the topic, subscribe and give me a like to get started. I'm also going to teach you how to get potential clients, and it won't be through Fiber or similar platforms. There are two ways to create these agents with
[01:29] this artificial intelligence called N8N, a tool that allows you to automate tasks and connect applications without knowing how to program. For example, you can have Chat GPT automatically reply to
[01:42] your customers' WhatsApp messages without you having to type them one by one. N8N can be installed on your computer locally or in the cloud. During the process you will see which option suits you best. Let's start with the local installation. First we install
[01:57] Docker, which is the program that creates the containers where N8N will run. Don't worry about technicalities in this installation. Follow the step-by-step instructions; the important thing is to learn how to create the flows later on. We go to the
[02:11] official website and download the version according to our type of computer. In according to our type of computer. In most cases it is AMD64, which is Windows X86. We installed it as administrator and restarted the
[02:25] computer when prompted. Then we activate WSL, which is the Windows subsystem for Linux. Why does Docker need this to function? If it appears
[02:37] that the engine does not start, open PowerShell as administrator and paste the update commands that I leave in the description. We restart again and that's it . Docker should now open without errors. Next, we created a folder on
[02:53] errors. Next, we created a folder on the C drive called N8N local and inside this another folder called data. We also created a file or a punb document
[03:05] that will contain the username and password variables in order to use N8N. And we also created another file called dockerrayacompose.
[03:20] container. We removed the dotx extension from the documents. If it was added by mistake. Finally, we open PowerShell. We go to the path of that folder, that is We go to the path of that folder, that is , to N8N local slash and run the
[03:34] , to N8N local slash and run the Docker Compose commands UP slash D so that it downloads and starts. When it finishes, we go from the browser to finishes, we go from the browser to http2/localhost
[03:51] and we already have n8N and we can create our account. We simply enter the requested information for this registration and then we can access N8N and create our flow or agent. But keep in mind that if you create the agent locally, your computer
[04:06] must remain on 24 hours a day for it to remain active. This implies a constant consumption of energy and unnecessary wear and tear on equipment resources. And if you turn it off, you lose all the work you put into creating the agent.
[04:20] And this is where the cloud becomes the best option for creating our agents. In this case we will use Hostinger because Hostinger offers the BPS service which is basically a virtual private server that remains on
[04:36] day and night. This allows the artificial intelligence agents we host there to remain active at all times and be able to respond automatically. The most comprehensive and economical plan costs 5.99
[04:50] per month. You can purchase it for a month, although it's really not worth it. I always buy the 24-month or the 12- month one. And if you use my code Ori BPS,
[05:02] you get a 10% discount and the month is $.39. In practice, this cost is ultimately covered by the customer, and acquiring it from Hostinger is much cheaper than doing so from the official website.
[05:17] The link to access the hosting is in the description. Once you have contracted the service, which is done super fast, let's move on to the installation of N8N on Hostinger. So, now that we're inside Hostinger, let's look for a VPS. Let's
[05:33] click on configure. This will allow us to select the server that is closest to the country we are in. In my case, the one that works best for me is the United States, Boston. Next, we need to search for N8N to
[05:49] proceed with the installation. It's in the application process and here, here we have it. So we selected it and selected it again. Now we need to create a password and save it. So let's create one. Done,
[06:05] the key has been assigned. So now click on finish setup. This takes about 5 minutes, so I'll come back when it's finished. Okay, the
[06:17] configuration is complete. Now I'm just going to go to the BPS administrator. Then it asks us what we are going to use this private server for, whether it is for profit or for personal use. So you can fill it in according to what
[06:31] you are going to do. Ready? Now what we have to do is go to where it says administrator application and here, as in the local installation, it will ask us to enter our email, name, surname and a password. In other words, it will
[06:46] be the same process as when you register on any platform. Okay, I've registered, so now we need to customize N8N, so do it according to what you want. Then we're going to ask them to
[06:58] send us the free license, even though request it so it arrives in our email. Once it arrives, we stick it here to activate it. We're already on the canvas to create our first
[07:14] agent, but I want to tell you that you can change the background from the personnel settings . And well, that's how it would be. Now we can start working. We're going to create a highly functional chatbot for businesses, not just a simple chat that
[07:29] simply responds, "Hello, how are you?" And that's it. This will be a chat that will answer questions about schedules, locations, services, provide quotes, prices, in short, it will provide answers with important information about the company. And
[07:41] for this example, my company is going to be one that installs acoustic windows. Two agents or two flows need to be created. One is to load the company's data so that the chat
[07:54] can provide accurate, automatic answers with information about the company. So, in N8N I'm going to create a workflow by clicking here. Now, click on add first step and let's select the
[08:09] manual trigger. This trigger, as its name indicates, its name indicates, begins to respond. Now, by clicking on this plus, we're going to
[08:23] add another node, that's what they're called. So, we looked for Pinecone. This is a vector database that basically helps us organize company information so that, for example, when someone asks what
[08:38] the locations are, they can look in the documentation for the paragraph where that information is located and start answering. Well, we have offices in Mexico, greetings to everyone watching from all those countries and more. And let me know
[08:51] in the comments which one you're watching from. That said, from Google we access Pinecone, this is the page where they register. It's very simple, since we agreed, it's going to ask us some questions about the type of project we
[09:06] small project to create artificial intelligence agents. It is important to select that the data we have is in PDF format and also select the type of artificial intelligence we are going to use. Here we already have what
[09:20] going to use. Here we already have what N8N asks for, the Pinecone API to be able to make the connection with the flow. We copy it and go back to N8N where it says credential, we click on new credential and paste the app here, click on
[09:36] save or save and it says that it connected correctly. Now in operation mode we need to insert documents and now we have to select an index. To do this, back in Pinecone, we search for
[09:50] database, then click on indexes and then create index. They can call it whatever they want, flow stripe data. In settings we look for small text flow three. It's important to select 1536 in the dimensions field.
[10:08] Otherwise, you'll have problems later on and the workflow won't run smoothly. We scroll down and click on create index. Back in N8N we look for the index and it appears here and we select it. Back to the canvas. We can see how
[10:25] the flow is already taking shape. Now we click on document insertion and select open embeds there. Ready. So, here we need to create a credential, that is, we need an open credential there to make the
[10:40] connection with the flow. We go to Open there and access API and click on create secret key. We give it a name, then click on create secret key, copy this key and paste it into N8N where it says API key and
[10:57] save. In the model, the small text embedding option three should be selected. Now we're going to add a new node and select the preselected document loader. Therefore, in terms of data type we look for
[11:12] binary, since vector databases work best with this type of data. And in the text division we select custom so that the company information that we load into the flow is divided logically, that is, by sections
[11:27] or paragraphs. That said, and going back to the flow, this now makes the text node appear, where we must enter to make the PDF with the
[11:39] company information be divided into small sections so as not to lose relevant information. That said, we select the recursive character text separator and in fragment overlay we enter 200. Now, from
[11:54] the flow trigger we will connect the Google Drive node. This will allow us to download the PDF with the company information. Then we select download file. Here in the credential section we must do the same step
[12:09] we did with Pinecone to activate or connect the app. I've included this explanation of the Google Drive node in the description. It's easy to make. Once this connection is made, you should select "download here" and since you
[12:24] are already connected to Drive, it is important to have the PDF with the company information uploaded there . I already have this one here that describes all the activity of the same. Now I'm going back to the flow, and then we need to
[12:38] connect the Google Drive node to the vector store, that is, to Pinecone, as I'm showing you on the screen. And that's it. We run the flow to see if everything is okay. It takes a few seconds. Perfect run. So we have
[12:54] the data right and this flu is perfect. We already have the company's information. Now we will build the chatbot, which you will see is very easy to do, and then we will connect this chatbot to the client's page. That step is very easy,
[13:09] and from there we'll be able to test the chat and you'll see that it will start responding with the information contained in this data flow that we just created. Let's start with the chatboard. We create a new flow and in
[13:21] the first step we are going to select the text trigger, that is, when a user sends a message in the chat, this will be the signal to activate the flow. From here we can make the flow public at once, and for
[13:37] now it can stay like this, as it's just for testing. We can change the chat welcome message from here right away or later using GPT chat. Back to the canvas, let's add a new node. So, I need to
[13:51] find the artificial intelligence agent that can answer. Here in options we have to add a system message which we will put here. So, in GPT chat, I asked them to help me create the message. I
[14:06] explained what the chatbot I 'm building is about, and GPT chat made this message that explains to people what its function will be or what it's going to be about. So I'll copy and paste it here. Back to the canvas, now we need to
[14:22] connect from the plus the chat model. We will be working with Open there, which will fulfill the function of generating intelligent and contextual responses; that is, it will be the conversational engine of the
[14:36] artificial intelligence agent. In the Open AI credentials, I'm going to select the one I had already created previously. Next, we need to select the model we want to work with. I'm using GPT 4.1 Mini, which is
[14:51] super functional and economical, because it's true and I should clarify that you need to have Open credits there to be able to make this connection with the API, but the truth is that it's very economical. Next, we need to select our
[15:05] chat memory, which will be a simple one. And now the only thing left to do is connect the tool's memory. Remember that we are working with Pinecone as a context memory. It asks us for a description that serves to explain to Pinecone what
[15:19] type of information or data the database contains. I asked chat GPT to database contains. I asked chat GPT to help me make it, so I'm copying and pasting it. Ready. Now we need to reselect the index. Ready. And we return
[15:33] to the canvas. The insertion still needs to be done. Let's select the open embedded option there. And we continue working with the small text embedding system three. Ready. And we return to the lien. We have now finished
[15:47] the chatbot construction process. The next step is to test it to see if it 's working properly. So I've saved the changes and I'm going to test it by clicking on open chat. This activates the flow and then I can
[16:02] write to him to test it. So I say to him, "Hi, what kind of windows "We install acoustic, sliding, airtight windows with all the characteristics of the type of windows they install and if I want to know
[16:17] details about any specific one. I've already verified that the chatbot works. Now all that remains is to take it and install it on the client's website. Uh, please keep in mind that this page I'm showing you here is a
[16:32] test page. This company does not exist. So, now for the integration on the website it is very important that we activate our chatbot. So, it 's already active from here. We're going to access the chat activator and in the mode we're going
[16:47] to select that it's integrated instead of hosted. Hosted is how I tested it on of hosted. Hosted is how I tested it on 8n and integrated is to be able to activate the chatbot on the website. So, I'm going to click here and this will take me to
[17:01] get the installation code which is over here. I'm going to copy it and I have to paste this code into my website editor. I created my page using my website editor. I created my page using
[17:16] already showed you how to do it super fast, but if you created the page with WordPress or, well, with another website service, the process is basically the same. Once in my page editor, you need to look for the
[17:30] HTML embedding section. In my case, the Hostinger editor does not receive this code as is. Then I ask chat GPT to adapt this code for the
[17:42] Hostinger page editor. So I paste it, wait a bit, and I have the new code. I copy it and now I paste my code. Ready. Now, importantly, in this part that says your WBook production URL, I must replace it with the one that
[17:58] production URL, I must replace it with the one that activates the chat. So, I'll copy and paste it here. Okay, we save the changes, I refresh the page, wait a bit and that's it, the chatbot is now active. If I open it, as you can see,
[18:14] the header and the welcome message are in English. I told you a moment ago that this welcome message could be changed all at once in N8N, but the header does have to be done with code, but it's very easy.
[18:29] So I'm going to translate all of this from a single process. For this, I ask Chat GPT to help me with this. So I have this soon translate this chatbot to messages before interacting with it appear in English. I need them to be in
[18:43] is the code I used to integrate it into Hostinger. Modify it, and to do so, take into account the documentation on the official N8N website. So I'm going to put the link to the documentation page first, which is this one. It's important to
[18:56] include this link. Otherwise, GPT chat won't give them the correct code. And then I will paste the code I used to integrate the chatbot into Hostinger. So GPT chat does its job and in a few seconds I already have the HTML code
[19:13] that I have to copy, ready to take and paste into the Hostinger editor. I save changes and update. I'm going to check the website. And now, look,
[19:25] the header and welcome message are in Spanish. I'm going to start interacting with this chatbot so you can see how well it works and the answers it will give. So I'm going to write to them, "Hi, what kind of windows do you install?" And here he
[19:39] is answering. Look how fast he does it and says, "We install acoustic, sliding, airtight windows." In summary, it describes all the characteristics install. So I'm going to ask you a new question. And it will be in which
[19:53] cities they offer the service and the chat answers me, we are mainly in Bogotá, Medellín, Cali, Bucaramanga. Do you want to know about installation or availability in a specific city? Then I'll write to them to find out
[20:07] headquarters. He tells me the opening hours would be from 8 am to 6 pm. He asks me if I want any particular address, so I'm going to say yes. And here he is answering, giving me the directions and also asking if I
[20:21] want the contact information. So I keep telling him, give me the number to call, and he sends it to me. I'm going to ask you another question. I would like to know how much an acoustic window costs per meter, and here it gives me the price per meter and
[20:36] type of materials. And that way I can continue asking him different types of questions, like the ones a real customer would ask. And the chatbot will continue to answer all the questions a user presents, even
[20:48] convincing them to hire the service. What we created is a very popular and easy-to-make agent compared to other types that can be made, but it's a good starting point for beginners to learn
[21:02] about this system. Now let's move on to getting customers. One of the ways to get clients is through this same system. Instead of waiting for someone to find us to hire our services on
[21:16] freelancer websites, which might work and is valid, we can go a step further and create a system that searches for companies on Google using a search API and sends them an automated message through their forms, making it clear that they
[21:31] are talking to an artificial intelligence system that will be responding and that there will be no human interaction. However, ideally it should only be used as a demonstration without resorting to spam practices. So
[21:45] in this way they can use the system both to get clients and to offer it to companies that are also looking for clients. Having learned to create agents with N8N is already a huge step because it opens the
[22:00] doors to new remote work opportunities, financial gains, and projects that few master. Furthermore, you learned that acquiring N8N from Hostinger is the most economical and professional option for automating businesses. I'll continue teaching
[22:14] valuable skills for working online, so subscribe to keep learning, turn on notifications, and leave a like if you found this information helpful. Here are some other videos that I know will be
[22:28] very helpful if you're looking for online work from home. Goodbye online work from home. Goodbye digital entrepreneurs.




⚡ Saved you 0h 22m reading this? Transcribe any YouTube video for free — no signup needed.