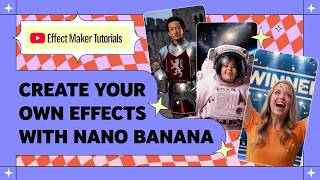

Turn One Photo Into a Timeline of Transformations
43sThe dramatic 'one photo to many looks' idea hooks viewers instantly as a visual magic trick.
▶ Play Clip"Exactly what the title promises — a straightforward, step-by-step customization tutorial with no filler or bait."
This tutorial shows how to customize the AI Timeline template in Effect Maker, turning a single photo into a sequence of transformations. The creator demonstrates rebranding a year-based timeline as a temperature progression (frozen to hot) by updating UI labels, editing prompts, choosing art styles, and adjusting dynamic variables. The video also covers submission requirements, including thumbnail specs and the review process.
The AI Timeline template in Effect Maker turns a single photo into multiple transformations (life stages, style changes, progressions) using multiple prompts, with each timeline option representing a different transformation.
The effect uses a tap-to-record interaction: users tap to start, tap again to stop at a random timeline point, or let it stop automatically. A restart button lets users try again without restarting the whole effect.
The example replaces a year-based timeline with a temperature progression (frozen, cold, mild, warm, hot), where each tap represents a different climate level.
Change the '1986' text to an ice cube emoji and '2026' to a fire emoji, then adjust font size and position to balance the visuals.
The template uses the 'precise' transformation type powered by NanoBanana for realistic results while preserving identity; 'fast' type is for stylized/non-photorealistic outputs.
Edit prompts add/remove elements from the existing image (e.g., add a disco ball); transformation prompts keep the user's look and generate a new scene (e.g., astronaut suit). Specific prompts are crucial; vague or negative descriptions cause inconsistency.
Rename the prompt to 'hot', write a clear, exaggerated description to push intense heat, and use the Preview AI Image button to test results across different scenes and people.
Switch from the default 'school portrait' style to 'from description', which works well when the prompt defines the visual direction. Keep the style consistent across all prompts.
The on-screen timeline text is controlled by a variable ('years list'). Rename it to 'temperature list' and update the values in the project's variable editor.
Click Submit, upload a square thumbnail under 2 MB, add a title and optional description, then submit for review.
By following this workflow, creators can adapt the AI Timeline template to any progression-based concept, from climate states to life stages. The keys are writing clear, specific prompts and leveraging preview tools to ensure consistent, high-quality results before submitting.
What is the AI Timeline template in Effect Maker?
A template that turns a single photo into a sequence of transformations (e.g., life stages, style changes) using multiple prompts, where each timeline option is a different transformation.
00:01
What are the two transformation types mentioned, and when should each be used?
'Precise' (powered by NanoBanana) for realistic results while keeping likeness; 'fast' for more stylized, non-photorealistic outputs.
02:50
What is the difference between an edit prompt and a transformation prompt in NanoBanana?
An edit prompt adds or removes elements from the existing image; a transformation prompt keeps the user's look while generating a new scene.
03:16
What UI change converts the year-based timeline to a temperature progression?
Replace '1986' with an ice cube emoji and '2026' with a fire emoji, then adjust font size and position.
01:43
Why is it important to be specific with prompts?
Vague or negative descriptions can lead to inconsistent results.
03:47
What is the purpose of the Preview AI Image button?
It previews the AI output across different scenes and people to catch issues before submitting.
04:26
What is the file size limit for the thumbnail when submitting?
Below 2 megabytes.
07:57
What type of image is recommended for the thumbnail?
A square image.
07:57
What variable controls the dynamic text in the timeline template?
A list of text values, originally called 'years list'.
06:21
What should you do if there are unresolved errors during review?
Fix them before submitting because unresolved errors will cause issues during review.
04:41
Template-based transformation workflows
Shows how multi-prompt setups can create rich, interactive effects from a single photo, providing a scalable approach for creators.
00:01Precise vs. fast transformation types
Choosing the right transformation type is critical for effect quality: precise for realism, fast for stylization.
02:50Edit vs. transformation prompts
Clarifies the two modes of NanoBanana, helping creators decide which fits their effect concept.
03:16Preview before submitting
Using the Preview AI Image button catches issues early, saving time and preventing review rejections.
04:41[00:01] how to use the AI timeline template in Effect Maker to create fully customizable visual transformations. With the AI timeline template, you can turn a single photo into a sequence of transformations, like different stages
[00:13] of life, style changes, or even progressions like skill, lifestyle, or mood. Instead of generating just one fixed result, the effect is built with multiple prompts, and each option in the timeline represents a different
[00:28] transformation. All right, so let's take a look on how the template works. On the the effect templates and find the AI timeline. created. I'll resize the preview window here, so
[00:43] we can better see what's going on. So, basically, they use a tap record to start the effect. Then they can tap that to stop at a let it stop automatically, which is pretty fun.
[00:58] different point in the timeline is selected. So, there is also a restart So, the user can try again without having to restart the whole effect. So, cool, but templates are meant to be customized, right?
[01:14] completely different to add in your own creativity. Instead of using years, let's turn this into a temperature progression, uh going from frozen to hot, okay? So, that means each tap will represent a different
[01:29] each tap will represent a different level. Like frozen, cold, mild, warm, Now, the first thing we are going to do is update the UI, so it matches this new Let's start by changing the timeline labels.
[01:43] In the objects panel, select the text that says 1986, and instead of year, let's use something that fits our new concept. So, how about a nice cube emoji here? Yeah, I think that looks pretty nice here. And let's
[01:57] do the same for the other side. Select 2026 and replace it with a fire emoji. So, now we can also adjust the font size to make them more visible.
[02:11] And finally, let's tweak the position a bit so everything feels more balanced in Just move the text slightly down until it looks good.
[02:23] update them to match our new idea. First, go to the assets tab. And here, you'll find all the assets used in this template, including the prompts you can edit. You can find any size folder.
[02:37] panel will open on the side with customization options. Okay? And now, notice that this template is using the new transformation type called precise, which is powered by NanoBanana.
[02:50] This type is designed to create much more realistic image while making sure the person is still look like themselves even when applying different styles. Keep in mind that the types behave differently. For example, precise works
[03:03] well for realistic results, while fast type is better suited for more stylizing and non-photoreal outputs. So, in this case, precise is the best choice for us. Now, let's start updating each prompt.
[03:16] NanoBanana can handle both image edits and full transformations. If you choose to edit, your prompt will add or remove elements from the existing image. For example, add a disco ball and party lights.
[03:34] transformation, your prompt will keep the look of the user while generating a For example, the user is wearing an astronaut suit while floating in space. Just make sure to be specific with your prompts. Vague or negative descriptions
[03:48] can lead to inconsistent results, okay? So, first, let's rename this one. Just double-click on the prompt and let's rename it to hot.
[04:01] description and create a new one. Before writing it, it's very important to be very clear with your description, especially since we're separating different climate states. So, for this hot step, I'm going to
[04:13] exaggerate a bit and really push the feeling of intense heat. the kind of result you're looking for. Now, we can use a really useful feature
[04:26] in Effect House to preview the AI output across different scenes and people. Let's just click on preview AI image button and wait for the results. >> Oh, I I really like this result. If there are any issues with the
[04:41] it's important to fix them before submitting because any unresolved errors during review. Now, let's go back to the project. Another cool way to customize our effect is through the art style.
[04:57] school portrait style, which works actually pretty well for the timeline concept like this, but for our idea, we can switch it up, okay? And I will go into the list of art styles and choose this one from description. This one
[05:11] works really well when your prompt is already defining the visual direction, which is exactly what we're doing here. So, let's preview it again. Yeah, this looks great. So, you can try a few options and see
[05:25] what works best for your idea, okay? Now, I'm going to repeat the same process for all the remaining prompts, updating the descriptions, renaming them, and keeping the art style consistent across all of them.
[05:44] let's test the the again. The effect looks like it's working, but there are still a few small adjustments we can make to better match our idea. You might notice there are still a text element on the screen, and this is a
[05:56] the visual script. showed the year of each step in the timeline, but since we changed the concept, we need to update this as well, okay?
[06:08] To change this, it's actually pretty simple. This text is defined by a variable, more specifically a list of text values. To access the project's variables, click on the X icon here. You'll find a whole set of variables you
[06:21] which is great if you want to customize the template even further, but for now, let's focus on what we need. Look for the variable called years list and click on the edit icon. So, let's rename it just for better organization,
[06:36] okay? So, I'll call it temperature list. to match our new concept, so let's do it.
[06:49] the X again. Now, let's also update the fonts of this text. First, go to the objects panel and select this text object. This one is controlled dynamically, so I'm just going to enable it temporarily so we can
[07:02] see it on the screen. Let's also rename it from year to something like climate, just to keep things consistent. In the text settings, uh we can also change the font. So, right now, the project is using the
[07:14] font, but we can try something different. I will switch to this one, We can also adjust all the properties here, like alignment and positioning. For example, I will center the text so it looks more balanced. Once that's
[07:28] done, we can disable it again since we'll be activated dynamically later Now, let's test this one more time just to make sure everything is working properly.
[07:43] And now we have the effect ready to go. Now that everything is ready, let's submit the effect. To do that, just click the submit button here. First, upload a thumbnail. And I recommend you using a square image
[07:57] and make sure the file size stays below 2 megabytes. Then click continue and add a title for your effect. You can also include a description if You can also include a description if you want. And this part is optional.
[08:11] And once everything looks good, just click submit to send your effect for click submit to send your effect for review. >> [music] >> From here, you can experiment with
[08:24] different prompts, art styles, and structures to bring your ideas to life. Thanks for watching and don't forget to subscribe for more updates, tutorials, subscribe for more updates, tutorials, and new effect maker features. Bye.
⚡ Saved you 0h 08m reading this? Transcribe any YouTube video for free — no signup needed.