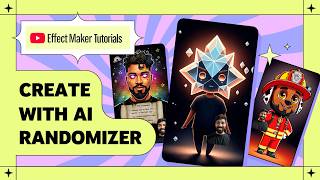

AI Randomizer Turns Selfies Into Spirit Animals!
56sThe opening promises a viral AI filter that gives a different result every time, making viewers curious to learn the trick.
▶ Play Clip"Exactly what it says on the tin—a clear, step-by-step tutorial that delivers a working AI randomizer effect without fluff."
Learn how to create an AI-powered randomizer effect in Effect Maker that transforms a selfie into a spirit animal portrait. The video walks through the AI randomizer template, customizing icons and prompts, and publishing the finished effect to YouTube.
The effect cycles through different options, randomly picks one, and generates an AI portrait based on that choice. Ideal for personality quizzes, random character generators, and surprise transformations.
Open Effect Maker in the browser, select the AI randomizer template from the gallery, and a card explains the effect and customization options.
Main panels include the objects panel, assets panel (with images and prompts in folders), visual script panel (the effect's logic), and preview panel for real-time testing.
Icons cycle, user taps, flash triggers, selfie is captured, loading screen appears, and the AI-generated portrait fades in, varying based on the randomly selected option.
The camera snapshot captures the selfie and sends it to the create AI image node. The background image, color filter, and loading spinner create the loading state.
Both the cycling and tapped icons appear blank in the scene view because they are dynamically assigned by the visual script.
Use same-resolution PNGs for new icons to ensure they fit perfectly, then replace each icon in the icon list variable.
Open the prompts folder, rename entries (e.g., broccoli to croc), and adjust properties like post similarity, art style, and retain likeness.
The 8-section script handles recording start, icon cycling, tap detection, random selection, snapshot, loading phase, and final fade-in. No customization needed.
Provide a clear before/after split thumbnail, name, description, and ticker, then submit for YouTube review and publication.
The AI randomizer template works out of the box—only the visuals and prompts need customizing. After a quick review, your effect goes live on YouTube.
What is the core function of the AI randomizer effect?
It cycles through different options, randomly picks one, and generates an AI portrait based on that choice.
00:02
Name three example uses for the randomizer template.
Personality quizzes, random character generators, surprise transformations.
00:29
Which panel in Effect Maker handles the effect's logic?
The visual script panel.
01:22
What happens when the user taps the screen in the demo?
A flash appears, the user's image is captured, a loading screen shows while AI generates the image, then the transformed image fades in.
01:50
How are the cycling and tapped icons assigned?
They are dynamically assigned by the visual script.
03:22
What does the body segmentation object do?
It captures the user's reaction as the AI generates the image.
03:50
What tip is given for uploading custom icons?
Use the same resolution for all PNGs so they fit perfectly without adjustment.
04:31
How does the icon tapped asset choose an icon?
It uses a random number, and each number maps to a unique icon.
06:13
What is recommended for the effect's thumbnail?
A clear split image showing before on one side and after on the other.
08:22
What happens after you submit the effect?
It is published to YouTube once reviewed and approved by the YouTube team.
08:49
Default effect demo shows the magic
Clearly illustrates how random selection controls the final AI result, making the template's value immediately obvious.
01:35Why users come back
The AI result changes based on the randomly selected item, which is the key engagement mechanic of the effect.
02:04Same-resolution PNG trick
A small practical tip that prevents layout issues when swapping assets.
04:31Visual script works out of the box
Creators don't need to touch the script, lowering the barrier to publishing a functional AI effect.
05:44Thumbnail clarity matters
A split before/after thumbnail makes the effect's purpose instantly understandable to users.
08:22[00:02] show you how to build an AI-powered randomizer effect that transforms your selfie into a spirit animal portrait. We'll be using the AI randomizer the end of this video, you will have your own randomizer AI effect ready to
[00:16] publish on YouTube. Here's how it works. The effect cycles through different options, randomly picks one, and based on that choice, an AI portrait is generated. You can use this template to create personality quizzes, random
[00:29] character generators, or even surprise transformations. Basically, any effect where people will get a different result every time they try it. Let's dive in and customize. First, open Effect Maker on your browser and here select the AI
[00:43] randomizer template from the gallery. Once you open the template, you'll see this card pop up that tells you about the effect and ways to customize it. workspace. On your left, you'll have your objects panel, where you'll see all
[00:56] the objects in your effect. And here some objects are visible and some are hidden. You see the visible objects in the scene view. Just beside that, we have the assets panel, which has all the images and prompts neatly organized in
[01:10] folders. This is where we'll customize the prompts, adjust the image generation properties, and also update the icons to match our theme. Below the scene view, you've got the visual script panel. This is the brain of your effect. Click on
[01:22] this X icon to see all the variables. You can toggle the visibility of this panel by using the change in your button on top, right. And finally, here we have the preview panel where you can test everything in real time. Let me show you
[01:35] the default effect first. Here at the top, we see the vegetable icon cycling and the title says vegetable portrait. I hit record and tap the screen. Immediately, we see a flash and it stops on a vegetable. Here the user's image is
[01:50] captured. Then we get a loading screen while the AI is generating the image. Once generated, the transformed image fades in and the coolest part about this is the AI result changes based on the vegetable that got randomly selected.
[02:04] This is what makes people try this effect again and again. Now, let me show you what's happening behind the scenes. I'll scale down the preview panel and jump to the objects panel. Here, the first object we have is the camera
[02:16] snapshot, which captures your selfie and sends it to the create AI image node. This is hidden until the photo is taken and the visual script controls when it background image, which is currently
[02:29] invisible. That is because its opacity is set to 0%. It is just a black image whose opacity slightly increases during the loading phase to visually tell the user that the AI is generating the image. Next, we have the color filter,
[02:42] which is also hidden by default. I will enable it and adjust the color grading here. Watch what happens when I drag the saturation all the way to the left. We get a black and white image. I'll adjust this to give me a vibrant color effect.
[02:56] Below that, we have a loading spinner. It rotates while the AI is generating the image. Its opacity currently is set to 0%. If I increase it, you can see the loading spinner. Let's change it to match our theme. To change it, select
[03:09] the object, click on add asset, and here upload your new loading spinner. I made this one using the nano banana pro model on the Google Gemini app. Once uploaded, it will be automatically applied to the loading spinner object. Next, we have
[03:22] icon stabbed and icon cycling. If I enable icon stabbed, it's blank because its asset is being dynamically assigned by the visual script. This is the same for icon cycling. It looks blank here in the scene view, but we see the icons
[03:36] shuffling in the preview panel. That is because its assets are also being dynamically assigned in the visual script. Next is the AI image. This is where you'll see the transformed image appear. It's hidden by default and only
[03:50] fades in once the generation completes. Below that, we have body segmentation, which is used to capture the user's reaction as the AI generates the image. And finally, we have got our title text and a flash image.
[04:04] The flash image is just a white image whose opacity goes from zero to one and back to zero, mimicking a camera flash. I'll modify the title to match our spirit animal?" Once written, I'll reposition it using
[04:17] Time to swap these vegetables for our cute animals. To do that, I'll go to the assets panel, click on upload asset, and upload my new icons. A quick tip here is when you are creating these new icons, check the
[04:31] make your new PNGs in the same resolution, so that the new icons fit perfectly without any adjustment. Once uploaded, I'll open the variables panel, find the icon list variable, and here, replace each vegetable icon with
[04:47] here, replace each vegetable icon with my animal icons. text, and even the color filter to match our theme. It's time to edit the AI
[05:00] image prompts. To do that, I'll go to the assets panel, and here, open the prompts folder. Select the first one, which currently says broccoli, I'll rename it to croc, short for crocodile. Then I'll customize its properties.
[05:17] post similarity, art style, retain likeness, go watch my AI transformation tutorial where I've covered all of this in detail. It will be linked in the description down below. Now, back to the video. I've updated all the seven
[05:31] prompts to generate images that match my theme. Now that we are done customizing this effect, let's quickly take a look at the visual script. The visual script has eight sections. This is the part where the recording starts, and it sets
[05:44] the is recording output to true, and fades out the title. Here we have the cycling loop for icons. This continuously shuffles the icons till the user taps. The continuous shuffling is being handled via the frame update node.
[05:59] And then here we have the main logic which checks if the user has tapped. Once the user has tapped, it will set the tap variable to true and it will also disable the icon cycling and enable the icon tapped.
[06:13] This icon tapped asset is dynamically using a random number and each number using a random number and each number maps to a unique icon. start using the start node and it takes the length of the cycling icons and
[06:28] randomly selects one number in that range. And that same number is used to decide which prompt should be sent to the create AI image node. When the icon tapped is enabled, it also takes a user snapshot using the camera snapshot node
[06:43] and sends it to the create AI image node. Once the creation has started, this set of nodes enable the loading phase. First, they will trigger a flash, then enable the body segmentation and color filter. The loading spinner is
[06:55] faded in along with the background. Now, once the image is generated, this set of nodes here at the bottom take the output from create AI image node and it will set the generated image to the AI image canvas asset. Once set, the AI
[07:11] image canvas is also enabled, then its opacity increases from zero to one to give it that fade in animation look. As soon as it is faded in, the background loading spinner, icon stabbed and the color filter, all of them are hidden.
[07:26] And finally here we have some more of these scripts. This little section allows us to drag the body segmentation around on the screen and the logic just below that rotates the loading spinner using the frame update node.
[07:39] That is the logic flow. You don't need to customize any of this, it just works. And now, before you submit, test it on different models in the preview panel. Here, click on view video button and select different models that you want to
[07:51] select different models that you want to test the effect on.
[08:09] clicking on the preview on phone button and scan this QR code. Once everything works as expected, click on submit and it will prompt you to upload a thumbnail for your effect. For AR effects, use clear split image that shows before on
[08:22] one side and after on the other. This makes it super obvious for the user to understand what your effect does. Click on continue and I'll name it spirit animal. Next, for description, I'll write what the effect does. This effect
[08:36] transforms your selfie into an artistic portrait infused with your spirit animal. And for the ticker, I'll leave it at record and tap. Once done, I'll submit and that's it. Your effect will be published to YouTube once reviewed
[08:49] and approved by the YouTube team. For more information on using Effect description below and thank you so much for watching till the end. Don't forget to hit the subscribe button for more news and tutorials just like this.
⚡ Saved you 0h 09m reading this? Transcribe any YouTube video for free — no signup needed.