
3D Model Performance Limits in Effect Maker
59sCreators need to know the hard limits for triangles and file size to avoid broken effects.
▶ Play Clip"Delivers exactly what the title promises: a complete, practical walkthrough of creating a safari 3D effect in Effect Maker."
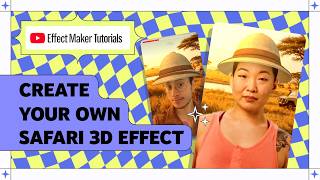
This tutorial walks through creating a safari-style 3D face effect for YouTube Effect Maker. The video covers downloading a head reference, importing and optimizing a 3D hat in Blender, then adding a background, lighting, and polish in Effect Maker before submitting.
3D allows immersive effects like hats, glasses, objects, characters, and full environments. These can be used for fashion, travel, adventure, and game effects.
In Effect Maker, go to Face Effects > Face Accessory and download the head reference. This is critical for positioning and rotating the 3D model correctly on the face. Extract the zip to get a GLB file and a Blender file.
Double-click the .blend file to open the head reference in Blender. The GLB file can also be used in other software; it is free and open source.
You can model from scratch or download a model. Effect Maker supports up to 20,000 triangles and 5 MB or less per model, but it's best to stay well below that. The tutorial aims for close to 5,000 triangles.
Enable statistics in the Blender viewport overlays to see the triangle count in the top-left corner of the screen.
The tutorial uses a model by creator Doragon from Sketchfab, licensed under Creative Commons Attribution. The model has around 37,000 polygons, far above the target, so it needs optimization.
Drag and drop the GLB file into Blender, or use File > Import > GLB if drag-and-drop doesn't work. Blender's layout includes the viewport, Shader Editor, Outliner, and Properties panel.
Select everything and press S to scale the model appropriately. Delete unwanted parts with X > Delete to simplify the asset.
Add a Decimate modifier and reduce gradually. A factor of 0.5 cuts polygons in half. The goal is around 5,000 triangles without visible artifacts or stretched triangles.
Shift-click both meshes, right-click, and choose Join. Clear parent and keep transform, delete empty objects, rename the hat, and set origin to geometry.
Press G to move, G+X/Y/Z to lock movement to an axis, and R to rotate. Use the gizmo to switch between side, top, and bottom views for precise alignment.
Select the hat, go to File > Export > GLB. Enable Selected Objects and Apply Modifiers, and disable Animations.
In Effect Maker, go to Face Effects > Face Accessory and click Add 3D Model. Adjust scale and position using the transform controls or shortcuts W (move), E (rotate), R (scale). Use right mouse button to orbit and middle mouse button to pan.
The tutorial uses a Gemini-generated image. The total file-size limit is 5 MB, so compress the image if needed. Add it via Camera > Segmentation > Body Segmentation > Add Body and Background.
Add a 3D light from the side menu. Use environment light with presets, adjust intensity and rotation. Sunset works well for a safari background.
Create a black-to-transparent gradient PNG (512x512). In Blender, add a UV sphere, select two loops, separate them, delete the rest, and position the ring under the hat. Apply the gradient as a material, fix UVs, and replace the model in Effect Maker.
Use Effect Maker's Color Filter in Digital Effects to adjust saturation and warmth, making the effect more consistent with the environment.
Create a soft yellow circle with a blurred center in an image editor. Import it as an image, set blending mode to Linear Dodge, lower opacity if too strong.
Click Submit to send the effect for review. It goes live once approved by the YouTube team, following creator and community guidelines.
What are the maximum limits for a 3D model in Effect Maker?
20,000 triangles and 5 MB or less per model, but it's best to stay well below that.
01:47
What triangle count does this tutorial target for the safari hat?
Close to 5,000 triangles.
01:47
What Blender modifier automatically reduces polygon count?
The Decimate modifier.
04:07
What does a decimate factor of 0.5 do?
It cuts the polygons in half.
04:35
How do you join two meshes in Blender after shift-clicking them?
Right-click and choose Join.
05:18
How do you clear parenting while keeping the transform in Blender?
Select the hat, go to Parent, and select Clear Parent and Keep Transform.
05:46
What does the orange point in Blender represent?
The origin, which anchors the position, rotation, and scale of the model.
06:13
What are the Blender shortcuts to lock movement to an axis?
Press G followed by X, Y, or Z to lock movement to that axis. Rotation uses R plus an axis key.
06:28
What GLB export settings are recommended for Effect Maker?
Selected Objects ON, Apply Modifiers ON, and Animations OFF.
07:13
In Effect Maker, what are the shortcuts for move, rotate, and scale?
W to move, E to rotate, R to scale.
07:51
How do you orbit and pan in the Effect Maker viewport?
Right mouse button to orbit, middle mouse button to pan.
08:05
What is the total file-size budget for the image and model in Effect Maker?
5 MB total, so the image must be compressed to fit along with the 3D model.
08:43
How do you fake a soft shadow from the hat onto the face?
Use a black-to-transparent gradient PNG applied to a ring mesh positioned under the hat.
10:07
What blending mode is used for the sun glow image?
Linear Dodge.
13:45
Where do you add a background image in Effect Maker?
Side menu > Camera > Segmentation > Body Segmentation > Add Body and Background.
08:56
Always start with the head reference
The head reference is essential for correctly positioning and rotating a 3D model on a face, saving many alignment headaches later.
00:41Respect the performance budget
Knowing the 20k triangle and 5MB limits upfront shapes every modeling and optimization decision in real-time AR.
01:47Decimate for fast polygon reduction
The Decimate modifier turns a 37k-polygon model into an effect-ready asset in seconds, with a simple factor to balance quality and performance.
04:07Fake shadows with gradient textures
A cheap gradient ring under the hat creates a believable soft shadow, adding realism without expensive real-time shadow computation.
10:07Use color filters and glow to sell the scene
Small touches like a color filter and a blurred sun glow pull the 3D object and background into one cohesive visual.</li><li>
13:31[00:02] you through using 3D to create a cool safari 3D effect using Effect Maker. So, why use 3D? 3D allows you to create much more immersive effects with things like more immersive effects with things like hats, glasses, objects, characters, and
[00:16] even full environments. You can use these for all fashion theaters, experiences like travel or adventures, and game effects. [music] In this tutorial, we are going to create a safari style effect using a 3D hat and
[00:28] a background. Let's get started. So, first thing's first, open Effect Maker. rename it. Now, let's set up the base 3D world. 3D
[00:41] Go to face effects. Then face accessory. And finally, download the head reference. This is very important because it help us position and rotate our 3D model
[00:53] correctly on the face. After downloading, extract the zip file. downloading, extract the zip file. Inside, you will find a GLB file and a Let's open the blend file in Blender. Just double click.
[01:07] And boom. Here's our head reference. You can use the GLB in other software, it's free and open source. Now, let's create our safari hat. At
[01:19] this point, we have two options. We can either create a model from scratch or download one from the web. If you want to model your own asset, you can start simple. There are different ways to model. You can start from a reference
[01:32] image and begin with a sphere or simple shape like a cylinder or a plane. You can delete faces, extrude, and shape into your accessory. While you create, always keep performance in mind, okay? Effect Maker
[01:47] supports up to 20,000 triangles and 5 megabytes or less for a model, but to effect and keep things running as smoothly, it's best to stay well below that, okay? For this tutorial, our goal is to reach close to 5,000 triangles. To
[02:03] check triangles, you can just enable statistics on the viewport overlays. appear in the top left corner of the screen. For this tutorial, I will use a downloaded model. There are many
[02:16] models. This model was created by the creator Doragon that I downloaded from Sketchfab and it's licensed under Creative Commons Attribution. Before check the polygon count, which you can usually find on the model's page.
[02:32] In this case, this model has around uh 37,000 polygons, which is way above what we want for real-time effects, but that's totally fine. I will show you how to optimize it in Blender in the next steps. Once you're ready, download the
[02:46] 3D model and choose the GLB format, since it usually comes with textures and it's ready to use in Effect Maker. Drag and drop the file into Blender. And if for some reason it doesn't work, go to file,
[03:00] go to file, then import, and select the GLB format. Here in Blender, layout is divided into four main parts. The first one is the viewport, where we see our models. Second, Shader Editor at
[03:14] the bottom. And third, on the side, we have the Outliner, where we see the objects and collection in layers. And below, the Properties panel. We will use this a lot later.
[03:27] Let's get started. This model is very small. This kind of behavior is common with online models. Sometimes models may appear larger or much smaller compared to our Effect Maker reference. To fix this, select everything and press
[03:41] To fix this, select everything and press S to scale. clean up. For example, I don't need this part here, so I will delete it.
[03:53] it, press X, and then delete. Now, let's talk about optimizations. There are different ways to reduce polygons. For example, retopology, which
[04:07] is manual, more precise, but slow way. And decimate, which is automatic and For this tutorial, since it's a simple effect, we will use decimate.
[04:19] It's much faster and works well for this kind of asset, okay? So, select the hat mesh. Click on this small icon to add a Click on this small icon to add a modifier and search for decimate.
[04:35] reducing gradually. For example, 0.5 cuts the polygons in half. We want to reach around 5,000 triangles without noticeable chance. If you reduce it too much, you will see
[04:50] some artifacts. You see? We want even triangles across the surface. But when we reduce too much, the triangles become stretchy and cause distortions. So, just find a balance, okay? Now, let's select the
[05:03] outer part of the hat and repeat the process. Done. Now, we have our model optimized for effects. Now, select both meshes. To select multiple objects, hold shift and click.
[05:18] and click. Now, right click and then join. Okay. Now, we have only one object. Much more organized, right? But we still need to fix the hierarchy. Some models come with empty objects,
[05:32] which are invisible objects used only for organization, grouping, or positioning the scene. You can see them in the hierarchy here. We don't need that for this project, okay? So, select the hat,
[05:46] go to parent, and select clear parent and keep transform. Now, let's delete the empty objects.
[06:00] Let's also take this moment to rename our hat. Some models come with the origin in the wrong place. This is a small orange point is responsible for anchoring in the position, rotation, and scale of our
[06:13] model. Let's fix this so the origin is centered. Select the model, right click, then click set origin, and then geometry to origin. We're almost there. Now, we just need to
[06:28] position the hats on the head. Now, press G to move. I have a quick tip. Use G plus X or G plus Y or G plus Z to lock movement to an axis. The same goes for rotation using the shortcut R.
[06:45] Now, just align it to the hat. If you want to see side, top, or bottom views, you can click on the axis in the gizmo, right here.
[06:59] Now, it's time to export the model. Select the hat model, go to file, then Select the hat model, go to file, then export, and then select GLB. Make sure these options are enabled. Select objects on,
[07:13] Select objects on, apply modifiers on, and animations off. Back in Effect Maker, go to face effects, then face accessory, and click
[07:25] add 3D model. Select your file and wait for it to load. Nice, that already looks really good. Effect Maker. You can adjust the scale and position of
[07:38] your model. To do that, select the object and use the transform controls here in the top left corner of the viewport. For example, you can move the hat up or down to better fit the head. Or to scale it
[07:51] to match the size properly. A faster way to do this is by using shortcuts. Press W to move, E to rotate, and R to scale. If I want to take a
[08:05] closer look at how the model sits on the head, I can navigate the viewport. It's really simple. I use the right mouse button to orbit around, then the middle mouse button to pan,
[08:18] out. You can also test with different face for different people. The good part is you can make these small tweaks here without needing to go
[08:31] back to Blender and export again. Now, let's add a background. I generated this image using Gemini. This image is 2 MB, and our total limit is 5 MB. Our 3D
[08:43] model is already using part of that budget, so we need to optimize it. If your image is too large, you can compress it to reduce the file size, okay? So, you can use tools like Photoshop or other image compression
[08:56] available for this, okay? Once you compress the image in Effect Maker, go to the side menu, then camera, and segmentation, then body segmentation, and add a body and background. Now,
[09:10] select your image file. Well, let's improve the lighting. By light, but we can enhance it. Go to the side menu, then 3D, then light, and add a light.
[09:26] This gives even lighting. In the light settings, you can adjust different settings, you can adjust different properties like intensity Let's explore environment light. This simulates a full environment.
[09:40] You can try different presets, adjust intensity, and also rotate the light, okay? I will use the sunset since it matches the background. This light coming from the left really looks nice here. At this
[09:53] point, we could already stop here, but we can use a simple trick to improve our effect inside Effect Maker. So, this is the result we have right now, and this is where we can get with a few improvements. They're just small
[10:07] difference in the final look. So, let's start. Let's fake a shadow from the hats onto the user hat. First, we need a gradient texture. software. It's just a black to transparent
[10:22] gradient. Export this as a PNG with transparency, and make sure the image size is optimized before exporting. For this project, I recommend using 512 by 512 pixels.
[10:35] Now, back in Blender, press Shift A to add a new object, and choose UV sphere. Go to edit mode, double-click on one of the rings in the middle of the sphere to select a loop, then hold Shift and click on another
[10:49] ring to select the second loop. If the loop selection doesn't work properly for some reason, go to edit and then preferences, input, and enable the option emulate three-button mouse. Now, press P and choose selection to
[11:03] separate into two new objects. Go back to object mode, and delete the rest. So, we are left with just the ring. If you want an X-ray view, press Z and choose solid mode, then press Alt Z.
[11:21] Position it under the hat like a band around the hat. Now, make sure it doesn't intersect too much of the head, okay?
[11:34] So, let's do it. Now, press Z and switch to material preview. In the shader editor, create a new material for the mesh, okay? And now, you import the gradient PNG by dragging and dropping it.
[11:46] Now, connect the color output to the base color and connect the alpha output to alpha input. At this point, it might look like it should already be working, but the texture looks too large compared to the
[12:00] band. That's because the UVs, which are the coordinates that map textures to the model, are not properly aligned. So, let's fix it. Go to UV editing. let's fix it. Go to UV editing. Select all faces by pressing A.
[12:16] Now, adjust the UV. Press S and Y to scale vertically. You'll be start to see the gradient forming as a soft shadow. Nice.
[12:28] Now, tweak the position, scale, and the UV until it looks natural. This is a super simple trick, but it adds a lot of realism because now they have actually cast the soft shadow on the face. Now, let's
[12:41] select the models and let's export again with the same settings that we used it with the same settings that we used it before.
[12:53] right-click on the model, and click replace. looking much better with a fake shadow inside Effect Maker, but we can still
[13:05] improve it even more. Effect Maker has a really nice feature called color filter. really nice feature called color filter. So, to make that, go to side menu and select digital effects and then color filter.
[13:18] color filter. Now, adjust saturation and warmth. And that's it. It's quite simple. Now, the effect feels much more consistent with the environment. Now the final
[13:31] touch. Let's add a light to simulate sunlight like a glow effect. In any image editing software, create a soft yellow circle with a blurred center. Export this image and import it into Effect Maker.
[13:45] Go to the side menu, select image and video, then go to images, add image, and select your glow backs. Set the blending mode to linear dodge. corner. You can lower the opacity if it feels
[14:01] too strong. Okay, once you're happy with your effect, click submit to send it for Your effect will go live once reviewed and approved by YouTube team. Creator guidelines and community guidelines. For more information on how
[14:18] to use Effect Maker, check the links in the description. Thanks for watching and don't forget to subscribe for more tutorials and updates. Bye.




⚡ Saved you 0h 14m reading this? Transcribe any YouTube video for free — no signup needed.