
How to Make a Viral Avatar in 60 Seconds
50sDirectly addresses a high-demand question with a promise of a quick tutorial, appealing to viewers seeking to replicate a popular style.
▶ Play Clip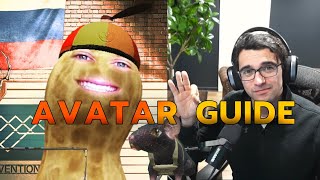
"Delivers a complete, step-by-step tutorial that matches the title's promise, though it's longer than necessary and includes some rambling."
This tutorial demonstrates how to create a 3D avatar in the style of TheBurntPeanut, using Blender for modeling and rigging, Lens Studio for face tracking and effects, and OBS for streaming integration. The creator walks through the entire process from downloading a free 3D model to exporting and setting up the avatar for live use.
The video aims to show how to make a Peanut-style avatar, which has become popular. The creator believes they've figured out the process and will demonstrate it concisely.
The process requires a 3D model, Lens Studio, and OBS. The creator used a rat model from a sketch app, downloaded as an FBX file.
Open Blender, delete the default cube and camera, then drag the downloaded FBX file into the scene. The model includes an animation rig with many bones.
Delete all the armature bones from the model to start with a clean slate. This is done by selecting the armature and deleting it.
Remove all vertex groups from the mesh to avoid conflicts. This is done in the object data properties by selecting 'Delete All Groups'.
Add a single bone (Shift+A) and scale it down. Then create a second bone connected to the first, naming them 'body' and 'head' for clarity.
Select the mesh and armature, then set parent to 'With Automatic Weights'. This binds the bones to the mesh, but may require weight painting adjustments.
Use weight paint mode to manually assign which parts of the mesh are controlled by each bone. Paint the body for the 'body' bone and the head for the 'head' bone.
Set the mesh's origin to the geometry center (chest area) to ensure proper positioning in Lens Studio. This is done in object mode with 'Set Origin' > 'Origin to Geometry'.
Export the model as an FBX file, ensuring only the mesh and armature are selected. Apply transformations and avoid adding leaf bones.
In Lens Studio, import the FBX file. Materials may not transfer perfectly, but it's close enough for this purpose. The model appears with its bones.
Add a head binding and attach the head script to it. Set the tracking target to 'Head' and adjust smooth speed for desired responsiveness.
Add a body effect that targets the head binding, making the body sway naturally as the head moves. Adjust the scale to fit the model.
Add face inserts for the mouth and eyes. Set their texture to 'Device Camera' to display the user's actual mouth and eyes on the avatar.
Change the camera background to green in Lens Studio, then add a window capture in OBS. Apply a chroma key filter to remove the green background.
Import additional 3D models (e.g., a plate carrier) and attach them to the body or head bones. Scale and position them as desired.
Complete Process Revealed
The creator claims to have figured out the exact method used by TheBurntPeanut, providing a clear roadmap for viewers.
00:26Rig Removal Technique
Deleting the default rig simplifies the model, making it easier to set up custom bones for avatar tracking.
02:36Weight Painting for Control
Weight painting is essential for ensuring the head and body move independently and correctly.
07:45Origin Setting for Lens Studio
Setting the origin to the chest prevents misalignment issues when importing into Lens Studio.
10:23OBS Integration with Chroma Key
Using a green background and chroma key is a simple yet effective way to overlay the avatar in live streams.
22:23[00:01] going to show you guys how to make a Peanut style avatar as he has exploded does he make it? I want to make an avatar like that." And there's no real bit of hints here how we think he does it. There's some programs that are like
[00:14] their avatars. And I was like, "How does learn and I'll put on the screen somewhere what I made. I used a rat, so like like it doesn't look as good. We'll get into that, but overall I believe
[00:26] this is how he does it and this is how I created this one. so you can make one the entire step, the entire process. I'm going to try to be as concise as I possibly can because truth be told, I recorded this video once and it was 31
[00:38] minutes long. So, if we can make it shorter, we're going to Let's get into going to be going over a few different things. We're going to need a 3D model. to need Lens Studios. And we're going to need OBS. And we're going to make some
[00:50] that. It's going to be quick, precise. I'm going to go through every single model. I don't care if you make your own in Blender. I don't care if you download for the channel I made to do this on came off a sketch app. And all I did was
[01:04] rat, I looked around and the one I ultimately settled on is right here. on one, let me move myself out of the way here. You will see that it says free download. And I can click download 3D model and an FBX file. Download is the
[01:17] one we want. We want an FBX file because that is a 3D model file. So that's what extracted and everything. So once I had all that done, let's just go ahead and You're going to open Blender. If you've never opened Blender before, this is
[01:29] Blender before, there's going to be some repeats in here. Sorry. So, what we're like anywhere on the screen. It gets rid of that popup right there. And right off everything in the screen. We're not going to need any of that stuff. What we
[01:42] just downloaded. So, go ahead and unzip it and do whatever you got to do. Let me this raw. We're doing it quick. Mine's going to be right here. And it's going to be inside this file right here. Black rack. It's gonna all 3D object models or
[01:57] and that's what this is and I'm just going to drag it in. Once I drag it in, I'm going to get this popup. I know this is an animated file because in the and all that. I don't want any of that. So, we're going to get rid of animations
[02:10] going to bring it into Blender. Now, you're welcome to make your own or you can do exactly what I did. Once in Blender, here's your model. Right here anything like this before, like I said, I don't want to assume anything. It can
[02:24] happening on this model? So, all these little things you see sticking out is They're made for animation. They're made for rigging. Um, we're actually going to use all these. So, instead of finding, we're just going to delete them all. And
[02:36] just like that, the rig for this is gone. They call it rigging. So, that's does look different than mine, right? But it's the model I said I use. See how that's because this rat black fur model, I just got rid of that, too. So this is
[02:49] saw me and the only difference I made which I will not be doing today is the it. In order to close it, it was very simple. I just highlight this by different modes here. We're going to want to go to edit mode and we can click
[03:03] it here or we can just click tab. Tab goes between edit and regular mode. And in edit mode I just grabbed the vertices there and I used a G to grab them all can use S to scale them up and down.
[03:16] that, but if you need to make some quick edits, that is a way to do it. Okay, so the way, in order to view this, if you wanted to view it, I simply hold down Z let's go back solid real quick. Now, what we need to do here is we need to
[03:30] add two bones to it since we deleted all 300 whatever in this. And we want it to deal. We could probably do that pretty quickly here. So, the first thing I want totally clean model. So, I'm going to go through that in case you didn't make
[03:43] first thing do I'm going to go to modifiers here. This modifier, I didn't God bless his heart for making it, but we don't want it. All right. So, we're look at our verse groups or our vortex groups. As you can tell, there's a ton
[03:56] to be existing anymore. So, instead of trying to go through them all, I'm just where it says data. That little triangle there, it's green object data project. arrow and we're going to say delete all groups. And they're gone. Just like
[04:09] that. Boom. Cooking right along. Now, we should be good to go, I believe, at this we're not going to talk about. It's got to do with materials. But now we're ready to make some bones to go inside this. So, in order to make a bone, alls
[04:22] ahead and hit shift A, and you're going to get this uh menu here, and you're You're going to click on this, and we're going to do a single bone. Now, as you what we need. Uh, so we're just going to hit S, and it'll scale it down. Now, one
[04:35] to note to make your life a little easier, is you notice when I hit S, I started scaling down. That wasn't by accident. And if I hit S this close, it's much harder to control versus out here. So that goes for all like, you
[04:48] know, transforms inside OB or inside uh Blender here. So just so you guys know, life easier. Food for thought, you're going to want to be farther out before make it small. We're going to make this one the body. We only need two cuz we
[05:00] we're going to make this the body. So we need it to be long ways up to about Right? So we're going to hit G. We're going to grab it. We're going to do this and zoom out a little this. Now we're going to hit R and rotate it down and h
[05:14] Right. So, the way to make this easier, you don't run this exact I can't see it. What you're going to do is with your armature um selected in your scene back down to this little green guy that's running. It says data right
[05:26] viewport display and you're going to click in front. Now, you can see the And remember, this is a 3D space. You're going to want to zoom around and make tell, this one's not good. But if you looked at it from the side, it it looked
[05:38] but it's not good. So, we're going to have to edit it a little bit more. We're right there. We're going to rotate it right here. Now, let's say you're like quite where I want it. Now, I'm actually pretty comfortable with that, but let's
[05:50] do is when you grab it, hit G, and let's say I just wanted to move it up and down and nowhere else. If you hit G, then Z, it it's just that axis. Vice versa, if you hit G, then Y, it's just that axis. And finally, X is going to be the same
[06:03] where this bone is right now. I'm fine with that. This isn't going to be anything too crazy. Maybe we back it up just a little bit. Right. Right about there, perhaps. Yeah, that looks pretty good to me. Now, we're gonna need a
[06:15] second bone. And we need them to be connected. So, a quick easy way for us ahead and we're going to click on the armature right there. And we're going to go over to edit mode. Right. So, now, as you can see, this is now a threepart
[06:28] click on the end of it here with it selected. You can see by the orange it's going to try to drag it to where we need this is a bad angle. Why force it?
[06:40] be worth it, right? So, and if you're wondering how I just did that, I just clicked on this little gizmo right here in order to get it. Okay. So, okay, this out.
[06:52] okay cuz we're just going to hit G again. We're going to hit Z and we're going to lift it up to about right there. Perfect. Now, this is maybe all model. So, once we have it like that, we're going to come over here. We're
[07:05] notice when I high first off, hold on. Pause. Let's go back to object mode. this armature. Then we're going to gel. That's exactly what we want. From
[07:18] you're going to set to parent with automatic weights. Once you click that, one isn't going to work. So, we're going to cover what happens next. If you have you're going to go into pose mode now. And you can simply click on this and
[07:33] you're going to hit R. And when you rotate, the model's neck's going to not the case here. Well, what the heck? How do we fix that? Well, we're going to weight paint. Weight painting is not hard. It's quick. It's easy. It just
[07:45] intimidating and look more intimidating. It is. Now, if you're going to weight different conversation. But for what we're doing today, it shouldn't be a this. says that this is the parent. You have a drop down menu and you can see
[07:57] right there. So, let's go ahead and click on our actual mesh there. And See that object there? Boop. Way paint. And you can see everything's blue. Nothing's being controlled. Here at the top, we have bone one and bone two. Now,
[08:11] I actually don't like these names to be honest with you. I I messed up already. So, let's go and back up. Let's um let's back this up a little bit. Huh? Let's Let's go here and let's change these names. Right. What if bone one was named
[08:24] the body and let's name bone two head? Right? That way we're not confused and this will help us in the future as we go along. So now in here. Let's go and select this again and let's go into way painting. And we
[08:37] have body and head. Much easier much easier to understand for the rest of the We're going to adjust the radius however you want. And you're just going to paint be blue anymore cuz you want it to move with this. Um, and this is going to
[08:50] scripting and moving things around. We want to make sure it has the ability to just painting. I'm just clicking and painting. No big deal whatsoever here. neck where I want to be. So, let's just bump that down a little bit so the
[09:03] there. Maybe a little bigger than that. It's a little small, huh? guys. I don't want this video to be too long, you know? Like, nobody wants to you I just I I wish I could give you the answers, but there's so many steps that
[09:18] now, all we're going to do is switch the head, nothing is selected again. Now, from the head here, we're going to go good. And we're just going to paint the head. Make sure you get these whiskers.
[09:31] be a little fishy on something like this, I don't know what your avatar is drag and it'll be messed up in a little bit. So, take the extra second, get better angle here. I'm really beating myself up with his angles. There we go.
[09:44] So now we have head to set like this. It's body set like this. Cool. Now, did ask ourselves. Well, sure. We can check. Let's go click back on the armature. There's actually quicker ways to get to pose mode, but it doesn't matter. Just
[09:57] use this. It's unless you know what you're doing. Then we're going to hit R again for rotate with this front bone selected. And look at that. Now we're check the backbone real quick. Yep, that moves the entire thing. Excellent.
[10:10] thing I want to adjust, and truly I should have done it beforehand, is if I armature because you can see that little dot there on armature. We're okay with that spot, but we're not going to be okay is when we click the actual mesh,
[10:23] down there? That's the origin. And that's going to be a problem when we're in Lens Studio later. So, we're not going to do any big motions. All we're going to do is object mode. That's selected. Go into object here. Set
[10:35] geometry. And boom. It set it right there in the middle of the chest. Perfect. That'll work well. And that is going to be it for Blender. We are now ready to start exporting. So to export this, we're simp. We're going to go in
[10:47] know what? Before you export, let me just cover something real quick. I'm not doing any kind of um what's it called? Uh textures or shading or anything that like that in this. And the reason is is a I'm not good enough to tell someone
[11:01] doesn't need it. So we'll talk about that more here in a second. I just don't by accident. It's intentional. So, okay, we're going to go FBX here. Um, we'll just save this to our desktop and we'll call it test one. Right, cool. Um, for
[11:16] selected objects and our visible objects. We only want the amateur in the there. U, we want to apply any transformations we have. We want to don't ever want to add leaf bones in this situation. And we don't want any
[11:30] objects, I need to make sure everything's selected, right? Like should be good there. And we're just going to click export. And that should be it. Let's uh let's head over to Lens Studio. Here we are in
[11:42] people start to get lost. So, I'm going to try to be very precise with what I will answer them. I'm going to be looking for a few months at these comments. So, feel free to ask them. When you launch Lens Studios, this is
[11:55] what you're going to see. And it's worth noting that I'm in Lens Studios 4.14 or just going to exit this little pop-up menu. I don't really care about that. going to go preview and we're going to go second uh little icon in and we're
[12:09] Now I got to turn it off in OBS. So it's going to take a second. Okay. And there clicked, you're going to see it's set up just like this is default layout. I going to go ahead and click and drag and bring this down here. When I see this
[12:21] that. And I can drag it just like that. And look how much more space I have for what we're doing. I like this layout a lot more. So all right, Lens Studios. We're not going to get lost in the weeds here. It's a weird program, but we're
[12:33] at the bottom and this little plus. And we're going to import asset. And we're going to import is for me test one. That is our FBX we took out of Blender. We're give you this pop-up window. Leave it all as is. And just click accept for
[12:46] This is your log down here. Don't be too alarmed if stuff starts popping up like we'll we'll worry about that later. So right here, test one. This is going to in. And this is what I was talking about earlier with uh materials and why I kind
[13:01] earlier with uh materials and why I kind of just skipped it. So see these uh grayed out folders here. What how can I explain this? OBS I'm sorry Lens Studio and Blender are not one to one when it comes to materials. So not everything
[13:14] you do in Blender is um compatible with Lens Studios. So Lens Studios will try to get as close as it can to what you already have and it'll make like these importing. It's close enough on this model. Sometimes it's not close at all.
[13:28] going to have to go into Blender and like redo your materials yourself or you can do them inside Lens Studio. I'm not going to be covering that in this video situation cuz it's kind of a headache to be honest. But anyways, here's our rat
[13:42] like the submodel of the model. We're going to take that and we're going to right there in the middle there. Right. Cool. That's our rat. We seen it. Looks exact same. Um this green right here is our bone. It represents them. Come over
[13:54] know, our body and our head and our actual model itself. Perfect. That's Everything went well. And uh it does look a little different. It's less shiny, but I'm fine with that. So, we're good. Their lighting, we're not going to
[14:07] going to leave that there. And now, our goal inside Lens Studios here is accomplish three things. We are going to accomplish getting our face, our eyes, and our mouth like showing on the model itself. Head tracking, so when I turn my
[14:19] then finally, we're going to make it so the body sways as well, so it looks more that someone like the burnt peanut does day. So, you'll see as we go through this, uh, the pluses and the minuses,
[14:33] and we'll cover a couple things as we go by. Okay. So, the first thing I'm just going to do temporarily is disable this so there's not a rat just sitting on my going to do is we're going to add our scripts. So, I will put these scripts in
[14:46] copy and paste them both in. Uh, it should make your life very easy. Um, so sign. And then we're going to go down to scripting and we're going to go to this one head, right? And we're going to go ahead and duplicate that one. And
[14:59] we're going to name this one body. Very good. So if we double click head, you script editor. I actually like this up here, especially because I'm recording easier. And inside the head one, we have two scripts here, right? So we're going
[15:12] to go ahead and take let's take this one right here. And again, these will be in easy as possible. We're going to add that one right there. And then we're going to go to body here and take Oh, we need that for sure. Oh,
[15:25] there we go. We're going to go to the body here and we're going to copy this. that's fine. We'll go in body. And you can see there's subtabs here. So, inside And we're going to go ahead and delete that because I didn't need any of that
[15:37] first line. Um, if you have no experience coding or anything like that, don't worry. This should just work. Now, here's the caveat with this. And uh I going to go ahead and save this project. And we're going to save it as um uh I
[15:52] Right. Save. Okay. And the reason I'm doing that is if you guys Let's exit it. Now, if you guys have ever used any kind of like coding software at all, you push updates, right? You click run or you build it or whatever. I don't know how
[16:06] to do that in this program, but I do know if I save it and reopen it, it'll kind of push and run those updates for us. So, we're going to go ahead and open this back up so you can see me. Hello. But now when I click inside head, I have
[16:18] before, which is perfect. That's exactly what we are looking for. Now, we're look at this big old rat on my face for a while because we're going to make them correctly now. So, from there, we got our scripts here. We got our model in
[16:31] here. Now, let's go in here and let's go face inserts and we go to headbinding, need a headbind. We're not going to need the face oludder. So, go ahead and headbind. And then from there, you're going to take your head script and
[16:44] head binding. That's important. From there, go ahead and click on head or the window, which is this window right here, you're going to see some options here. Head binding. Well, what what does the head binding do? Well, we're going to go
[16:57] ahead and look at both our options, right? The headbinding is head binding, right? Let me double check just to make sure I'm right. Yeah. And then this what do you want tracking it? Well, we want the head tracking it, right? So now
[17:10] And you might think that's a little slow. I wish it was faster. Or maybe you wish it was slower. Smooth speed is where you live, right? So if I go, you know, was that 010? Maybe I go point, I don't know, five. And now look, it's
[17:23] there. Or you can just straight up go 1.0. And this is in real time now. So as now. The problem is the body doesn't move at all. So it's like, well, it it looks a little stiff. So, in order to make it less stiff, we're now going to
[17:38] just under effects. It's not going to be under the anything other than just the big effects tab, right? So, actually, you know what? That is all under effects. Um, and you can see have subbranches for what belongs to one.
[17:51] Like, so effects body. Now, we click on this in the inspector window. Again, what is the target? Well, the target here is going to be that binding and the body is going to be the entire model. So now see it got small but as I move it
[18:05] well I don't I don't want it that small. I want my thing to be full size. And here. See where it says test one. Click on our model. We click this chain here before. So I know 2.5 is going to be a good size. And if you're not sure,
[18:19] you're going to have to play with that a little bit. Right. So now it looks good. If we look in our preview, as I move the body moves, the head moves up and down. it's good to go. Now I'm just going to do a little clean up here. I'm going to
[18:31] And inside here, I'm just going to kind of move this to where I want it cuz I I you start adding more things later on. So now that's where it sits. So now we have two of the three done. Last thing we need to do is face insert. It's no
[18:45] in here. We're going to go back into the plus sign under the hierarchy and we're this is going to give you a face insert binding and a face insert. So let's rename the face insert itself to mouth. And we want the mouth to follow the
[18:58] head. So, we're going to drag it and put it under head. Now, this whole face insert upper part, we'll just delete it. We don't need it at all. Now, let's look it's way over here. Or maybe it's not on your preview at all. You're like, whoa,
[19:11] I don't know where it is. If you zoom out inside this scene here, let's just it. I don't see it. If you click on it and zoom out and hit W, you'll get these brackets, and then you have the ability to move it where you want it. And as you
[19:25] blue overlay here. So, you can kind of drag it right wherever you would line it pretty good spot. It doesn't have to be perfect. That's a little forward. Let's back it up a little bit. And if you click R, I'm sorry, E. If you click E,
[19:39] This guy's mouse down a little bit. So, maybe maybe about right there. Yeah. And as you can see now, it's right there. But if you notice, there's a foot. you guys right now. So, with mouth selected and we go to inspector, we go
[19:53] texture? We're going to switch that to device camera. And boom. Now the mouse's gone. There's my mouth itself. If you want to reframe how big the borders are, what goes on here. As you can see, it just kind of edits everything nicely for
[20:07] want to see. Now, that's perfect. We're going to do duplicate this again. We're duplicate. F2. And we're going to name this left eye. I don't know why I spel
[20:19] we have a left eye, we're going to go and drag that up there. And as you can see, all the way right about there. And from here, we're going to go into the down till we can choose. Let make sure I'm on the right one. Okay. Yep, we're
[20:32] on left eye. And we're going to choose the right one, which is mouth. No, we're going to want left eye, right? So, as you can see, it's way out there and it looks kind of weird. So, here's one of the weird caveats. It's the left eye,
[20:44] because it mirrors just the way it looks back. It mirrors, right? So, we're going eye. And you can see it's like it's way off. So, in order to get it right, how far off it is. Again, 3D space, you need to make sure you are using it
[20:56] correctly. So, let's just back it up a little bit. No big deal there. I'm not just showing you how to do it. Somewhere right around there should be all right. going to turn it out a little bit like that. Um, I can tell you right now it's
[21:10] should be pretty close, right? Pretty good. Now, uh, for eyes, again, you want to adjust this however you would like it. I personally like it somewhere right this model, that's a little small because you can see the the back end. So
[21:24] lot. There is no third axis for this, right? So let's just say let's just make this um five, right? And we'll make this one 75 because y-axis is up and down. So it
[21:37] better that is there now. So now we're just going to duplicate that eye. We're just going to duplicate that eye. We're going to name this one right eye. Boom. And uh same thing. Drag it across. Put it exactly how you want it. Boom.
[21:49] it. Here, try I'm trying to go quick for you guys. I know this video is already you guys. I know this video is already dragging on. It's just it is what it is.
[22:10] see the teeth above my mouth a little bit, and I could adjust it further, but just trying to show you the controls so you can make your own. So, the final part is going to be how do we get it from this to OBS?
[22:23] going to do is this is the downside. Lens Studio stays open the entire time. open. I play our creators Battlefield. I stream. I do all that with it open. So, we're going to do from here is we're going to go to camera object. You'll
[22:37] you're going to go ahead and scroll down till you see clear color option. It's under camera here. And it says none. Go ahead and change that to color. And then ahead and change this background color to green. Now, from here, it's pretty
[22:50] the steps. I bet you can guess what happens next. We're going to go into OBS itself. Let me switch over. Within OBS itself, we're going to come over here. to go window capture, and we're going to make this test, right? We'll just create
[23:02] want to capture? Well, we want to capture Lens Studios. And voila, there I have an ultra wide, but that's we're No big deal. Something like that. And all you're going to do is grab these and
[23:14] pull them. If you've never done this, you hold down alt and left click and you pull them to the green screen, right? Something like so. So now I just have this weird green block, right? Again, no big deal. Come in here, filter, add
[23:26] filter, and we're going to add a chroma key. And it defaults to green. So boom, immediately, yep, that looks great to me. And there it is. Let me pull this out of the way. And as you can see, we have a rat. And you can now do whatever
[23:38] Make them smaller. Do whatever you please. That is it. Oh, you know what I funny. You know what? I missed one step and I'll go over for you guys real and I'll go over for you guys real quick. I didn't switch
[23:53] quick. I didn't switch this eyeball, right eye. Boom. Future screen. Just a couple small things. One, you might be like, well, the eyes look like his are. That has a lot to do with the fact that I'm using a uh long
[24:07] that's more human round shaped, you'll have that better. And the eyes look a little weird because I wear glasses. So they instantly look better the second I take them off. As you can tell, less of reflection. And finally, um just one two
[24:19] things here. Um throughout his streams, you will see stuff like guns and things that. I was going to show you that, but it's a little more complex, but I'm just the different hats and stuff on. So we go in here and let's just pick I don't
[24:31] many times. So we bring in this plate carrier, right? It's a 3D mesh I one. Um, where did I go? Right here. Play carrier. Cool. Yep. Looks great. Let's drag it into my actual scene here. Now, it's going to be much larger cuz I
[24:46] going to do here, we're just going to take this play area and let's just make it 10% of the normal size, right? That we're going to have this play carrier attached to the body because if it's a
[24:58] body around. So, now the only thing left to do, line it up. So, make sure we're clicked on it. Let's just drag it over and drag it down. Let's see if we can't get it in the screen a little bit here.
[25:11] I'm a little zoomed out a little bit far because of the way it's anchored. Okay, you get the idea. You just got to play with a little bit to get it quite where you want it. I don't want this video to be any longer than it already is. But
[25:23] the different models on there. You pick which oneever you want or you create use that and you just put them appropriately. So, the player carrier body around where the body goes. If I wanted it to be a hat, I simply put it
[25:37] head goes. You can already see the back of it twisting because it's now connected to the head. So, that's it. The last thing I will say, which I'm not haven't done it yet myself, is throughout streams he outfits change all
[25:50] on their own. Um, I've never looked into how he does that, so I don't want to sit do it, blah blah blah." Uh truly I I don't know, but if I had to guess, if I had to look into it, he's using a script inside Lens Studio and it's just turning
[26:06] on whatever ones he has pre-selected and that should do it. So that's going to be stuff like that, if you're curious about all that too, he's using voice meter and some kind of macro stream deck or something. So I hope you guys found this
[26:19] useful and valuable and um subscribe if you liked it so I'll make more of them. you liked it so I'll make more of them. See you.
The creator immediately references a popular streamer's avatar and claims to have figured out the method, creating curiosity about the 'secret' process. This encourages viewers to stay to learn the technique.
Want to create [POPULAR AVATAR STYLE]? Here's the exact method I used to [ACHIEVE RESULT] — no [COMMON OBSTACLE] required.
AI-generated clip ideas for Shorts based on the transcript
Directly addresses a high-demand question with a promise of a quick tutorial, appealing to viewers seeking to replicate a popular style.
▶ Play ClipShares a practical tip on sourcing free models, offering immediate value and a shortcut for beginners.
▶ Play ClipSolves a common technical problem in 3D avatar creation, providing a clear solution that viewers can apply immediately.
▶ Play ClipDemonstrates the key feature that makes avatars engaging, showing the moment the avatar comes to life and follows the user's movements.
▶ Play ClipReveals the final production step that integrates the avatar into live streams, a crucial insight for aspiring streamers.
▶ Play ClipSnapshot 2026-11-18
Every observation TubeSum recorded, plotted as measured.
The vertical axis starts at 336K, not zero, so later observations stay readable.
Based on 17 observations · last observed Nov 18, 2026 · solid lines connect consecutive measurements (≤2 days apart); dashed lines span days TubeSum did not measure. · vertical axis focused on the observed range (starts at 336K)
Based on 17 observations · last observed Nov 18, 2026 · solid lines connect consecutive measurements (≤2 days apart); dashed lines span days TubeSum did not measure. · vertical axis from zero
Exact daily observations; gaps mean no observation was taken that day.
| Date | Views | Avg views / hour | Channel median |
|---|---|---|---|
| 2026-11-18 | 368,988 | 44.2 | — |
| 2026-11-17 | 365,431 | 44.0 | — |
| 2026-11-16 | 364,380 | 43.9 | — |
| 2026-11-15 | 362,093 | 43.8 | — |
| 2026-11-14 | 359,934 | 43.6 | — |
| 2026-11-13 | 358,354 | 43.6 | — |
| 2026-11-12 | 356,966 | 43.5 | — |
| 2026-11-10 | 353,769 | 43.4 | — |
| 2026-11-09 | 352,102 | 43.3 | — |
| 2026-11-08 | 349,888 | 43.2 | — |
| 2026-11-07 | 348,481 | 43.1 | — |
| 2026-11-06 | 345,906 | 42.9 | — |
| 2026-11-05 | 344,254 | 42.9 | — |
| 2026-11-04 | 342,800 | 42.8 | — |
| 2026-11-03 | 340,464 | 42.7 | — |
| 2026-11-02 | 339,401 | 42.6 | — |
| 2026-11-01 | 337,487 | 42.5 | — |
Audience reaction — separate from the performance metrics above.