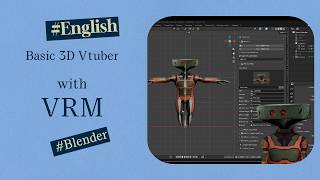

Create a 3D VTuber Avatar in Blender!
45sShows the complete process of setting up a 3D VTuber avatar from scratch, which is highly searched and visually engaging.
▶ Play Clip"Delivers exactly what the title promises — a straightforward, step-by-step guide to creating a custom VTuber avatar."
This video is a step-by-step tutorial on creating a custom 3D VTuber avatar using Blender and VCFace. It covers installing the VRM add-on, setting up materials, rigging the model with bones, and exporting it for use in VCFace for real-time motion tracking.
Install the VRM Format add-on from Blender's Preferences > Get Extensions. This add-on is essential for exporting models in the VRM format used by VTuber software.
Set up VRM materials for the body and head. Assign a lit color texture and adjust the shade color to control the shadow color and cel-shading look.
Use the 'Create VRM Model' feature to generate an armature in a T-pose. This is the starting point for rigging.
Position the bones to match the model's joints. Use wireframe view for accuracy, and enable symmetry on the X-axis to save time.
Parent the mesh to the armature using 'with automatic weights'. Test the rig in pose mode to ensure it moves correctly.
Fill in VRM metadata like thumbnail, title, author, and license. Then export the model as a VRM file.
Download VCFace from vcface.icu. Set up the camera and add your VRM file. Enable mirror motion for natural movement.
For streaming, make the background transparent in VCFace and use Game Capture in OBS to overlay the avatar.
Install the VRM add-on
This is the foundational step that enables Blender to export VRM files, making the entire process possible.
00:44Create VRM model for armature
Using the 'Create VRM Model' feature automatically generates a T-pose armature, saving time and ensuring correct bone structure.
03:52Use wireframe for bone placement
Wireframe view is crucial for accurately aligning bones to the model's joints, which is essential for natural deformation.
05:10Parent with automatic weights
This step binds the mesh to the armature, allowing the bones to deform the model correctly, and is a standard rigging technique.
09:11Use with OBS for streaming
This shows how to integrate the avatar into a streaming setup, making it practical for content creators.
16:56[00:00] Alright, we have our avatar ready. This will be a custom avatar. You can use any character you like for your avatar.
[00:15] For anyone who wants to create a 3D style avatar or a 3D Vtuber avatar, let's get started. We'll be working with a model and a T-pose, so go ahead and prepare your model.
[00:31] First, go to Edit, then Preferences, and from there go to Get Extensions and search for VRM. You'll find the VRM Format add-on here.
[00:44] This extension helps us export models and set up bones in the VRM format, which is essentially what a 3D VTuber uses. You can also visit the add-on page at the link shown here.
[01:00] Click on the extension.blender.org link right here, then go ahead and click the Get Add-on button. Click to open it. You can also drag and drop it in like this.
[01:14] Once the add-on is installed, it will appear in the right side panel. You can search for VRM and it will show up here. The panel will look like this.
[01:30] Additionally, if you go to the material properties, you'll also find a VRM material section. You can click enable here to activate it. Our material will have a two shaded look.
[01:43] Okay, first let's go ahead and delete the old material. Remove the old material first. Now click new to add a new material. This one will be for the body. I'll name it body underscore VRM like this.
[01:57] Then scroll down to the VRM materials section and take the enable checkbox. The first thing we'll focus on is the Lick Color Texture slot. Click here and find the texture you want to use. Mine will be this one.
[02:13] Next, for the shape color in 3D, the shape color represents the shadow color cast on the character. You can adjust it here, you don't even need to assign a texture.
[02:26] You can simply pick a color directly. It will become the shadow color that falls on your character. And here you can adjust the tiny strength, how cartoon-like you want the shading to look.
[02:43] I'll just leave it at the default value. Other than that, there's nothing more to adjust since I only have one map, which is the lit color. The other parts won't need much adjustment.
[02:55] Now let's move to the head. Add a new material and name it head underscore VRM. Do the same thing. Scroll down and click enable under VRM materials.
[03:11] There's not much else to do here, feel free to adjust to your preference. Totally up to you, feel free! For the shade color, I'm using the texture itself.
[03:24] Try it out and see, you might want to reduce the color value a bit. Check which look you prefer. You can adjust it freely.
[03:39] I'll keep tweaking this until I'm satisfied with how it looks. This model doesn't have bones yet, so we'll add them now.
[03:52] Click on Create VRM Model like this and you'll get an armature. Notice it comes out in a T-pose.
[04:04] The next step is to select the VRM version. I recommend using version 0. Okay now click on the armature then go to the right panel under object properties and scroll down Go to viewport display and take the in front option so the bones are clearly visible Then scale the armature down by pressing S and begin positioning the bones
[04:31] Go to edit mode, then I'll change the pivot point to active element.
[04:45] This makes it easier to align. Now select bones from the tip upward, with the thigh being the last one. Also remember to apply symmetry on the x-axis, otherwise both sides won't match.
[04:58] We'll only need to adjust bones on one side, so don't forget to take that option.
[05:10] Then go ahead and position the bones. Align them to the positions you need. you'll want to enable wireframe view to see the wireframe overlay, so you can place the
[05:22] bones accurately at the joints. For the knee, it should be positioned slightly forward like this.
[05:34] Okay, there's not much for this step, just align the bones to the joints you've already placed. This section here extends downward for the hip area.
[05:47] Across this downward, this one is the neck bone. The head bone comes with eye bones by default, but our model doesn't have separate eyes.
[05:59] That's fine, just stretch it upward. Place it where you expect the neck to be. I'll set the head slightly. As for the eyes, technically my model does have eyes, just flat sticker style ones that don't move.
[06:15] But we'll set them up anyway. Okay, adjust everything according to the model's proportions and body shape.
[06:29] Offset slightly like this. This next one is the collar bone. Place it at the correct position. Then extend the wrist bone outward.
[06:52] This is the elbow, tilt it slightly inward like this. Try to follow the wireframe positions for best results. the bones to the correct joint positions.
[07:13] And this here is the collarbone, stretch it outwards.
[07:26] the shoulder bone and for the hand place it around the wrist area. For the thumb place it here. Select three bones like this.
[07:42] Okay from here the process of rigging will be quite repetitive. I'll speed things up so we don't waste time and it doesn't get boring.
[07:56] Thank you.
[08:26] Alright, the bone placement for the character is done.
[08:42] Now for the root bone this is the central bone You won touch it just leave it where it is Just leave it right there Now let me turn off the wireframe view
[08:56] Go to Deport Overlays and turn off wireframe. Now we'll create the parent relationship. Start by clicking the armature, then press A to select all the mesh objects.
[09:11] and press Ctrl P and choose with automatic weights. Now let's check our rig. Let's verify that the bones are working as expected. Go to pose mode, then click on any bone and try moving it like this.
[09:32] Okay, um, so today, um, so many times, um, this is just a rough setup. Try testing to see if it moves the way you want
[09:45] Check if any areas are sticking or clipping If there are issues, you'll need to fix them using weight paint For this example, it looks like there are no major problems So we can go with automatic weights for now
[10:02] Let me stay first Now let's go to the VRM meta section. Here we can add a thumbnail image for our model, but first we need to prepare that thumbnail.
[10:15] To set a thumbnail, go to the UV editing workspace at the top.
[10:27] Then click browse to load your thumbnail image file. After that, go back to the layout workspace and find your thumbnail image. I'll set it to my profile image like this.
[10:44] For the title field, enter the name of your model. You can name it whatever you'd like. For the version, you can enter anything, like 0.1 for example.
[10:58] For author, enter your name. For allowed user, I'll set it to only author, meaning single user only.
[11:14] Other than that, nothing else is needed. For the license, if you're not distributing the model and it's just for personal use, you can go with the first option.
[11:28] Next is the VRM Humanoid section. If you're using the Create VRM Model feature, this section shouldn't have any issues.
[11:44] Basically you don't need to set it manually, it will be set automatically. For the VRM Blend Shape section, if your character has facial expressions, you can configure them here. I'll cover that in more detail in a separate video.
[11:58] For now, let's keep it basic. Okay other options include spring bone, for example, hair that bounces and jiggles.
[12:16] You can set that up here. You can also set up collision detection in the Collider Group section. We'll go more in depth on that in another video. For now, this is the basic overview.
[12:34] Okay, let's save first. To export, press A to select everything, then go to File, Greater than Export, and choose VRM. Select it right here. Navigate to the folder you want, enter a file name, and click save.
[13:00] Sometimes you may see a notification appear on the right side here Sometimes there will be a warning but in this case it just an info message so you can go ahead and save
[13:19] Okay, all done. Now let's go use it in VCFace.
[13:44] Alright now let's go to the VCFace website at vcface.icu if you're on. Windows you can download it directly from here. But if you're on Mac or Linux, go to the running on Linux section and follow their instructions.
[14:01] It may be a bit more complex. For Linux users, you might also try using Line to help run it. Once the download is complete, it will be a zip file.
[14:15] When you open it, once you extract it, you'll get files like this. you can simply click to run. It's not an installer, it's click and play.
[14:33] When VCFace opens, you'll see this interface. The very first thing you need to do is set up your camera, because this program tracks your head and facial movements. You can use a webcam or the built-in camera on your
[14:47] laptop. Click to select your camera here. For the settings, the resolution doesn't need to be very high.
[15:05] HD is sufficient. Set the frame rate to around 30 fps, that's enough. You can also select your microphone here, but for this tutorial, I'll leave it at the default. Okay, now.
[15:23] Let's add our avatar. Click on Add Avatar and select the avatar you want to use. Navigate to the folder where you exported the VRM file.
[15:37] Select the VRM file, then click Open. The thumbnail will be the image we saw earlier. Click to select the avatar.
[15:50] You'll see the title, the name reset, along with the version and other details. Now click start. Great, it's working.
[16:07] You can see that when you turn your head, the avatar follows. However, by default, the motion is not mirrored.
[16:19] It will be reversed from your actual movement, so click on mirror motion here. Then press out plus enter to toggle full screen and scroll the mouse wheel to zoom. Pressing out plus enter and clicking the middle mouse button will enable panning.
[16:40] We'll skip Leap Motion since we don't have it. You can remove that section. If you do have Leap Motion, it allows hand talking, but since we don't have one right now, we'll just use a regular webcam.
[16:56] If you want to use it with OBS, you can click here to make the background transparent and then use it alongside OBS like this.
[17:12] If you have OBS, you can select. Choose Game Capture and select the VZ Phase Program. Then you can capture it.
[17:24] And you'll have your avatar overlay ready like this. Okay, our avatar is ready. This is a fully custom avatar. You can use any character you like.
⚡ Saved you 0h 17m reading this? Transcribe any YouTube video for free — no signup needed.