
Create RefMods in Under 10 Seconds!
50sQuick tutorial showing how to set up and generate a RefMod in under 10 seconds, perfect for viewers looking for fast AI video tools.
▶ Play Clip"Delivers on the promise of creating refmods with clear examples, though some sections feel padded with setup details."
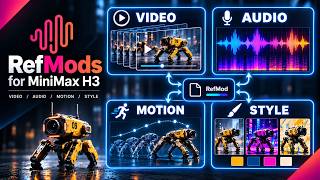
This video demonstrates how to create reference models (refmods) for video, audio, motion, and style in ComfyUI, using the Minimax H3 refmod. It covers installation, configuration, and practical tips for combining different refmod types to control generation.
The video explains how to create refmods for video, audio, motion, and style using a single custom node, with an optional node to speed up generation.
To install, clone the custom node from GitHub into the ComfyUI custom nodes folder using 'git clone'. Update with 'git pull' in the node folder.
Search for 'create h3 refmod master' and 'load h3 refmod folder' nodes. Connect audio, video, and VAE nodes as needed.
Paste the folder path for videos/images. Increase 'max items' for >32 items, and 'max edge' for better quality (increases generation time).
Upload an audio file and connect it to the audio input for audio refmods.
Refmods encode reference info into a latent representation, unlike training new weights. They don't require re-encoding references each generation.
Shows generation with visual refmod only vs. combined visual and audio refmods, highlighting the differences.
Uses Captain America throwing his shield as a motion reference. Enable 'motion only' to capture just the motion, but note that original references may bleed through.
Select the motion refmod in the generation workflow. It can be stacked with other refmods. Describe the movement without declaring a reference.
Generates two videos with a fixed seed (with and without motion refmod) to show its effect, noting it's not perfect but impactful.
Create a style refmod using 8-bit images as references. Change concept type to 'style' and disable motion if following along.
Load the style refmod in the generation workflow. It can be used alone or stacked with other refmods.
Style and identity refmods can compete. Increasing style refmod copies (e.g., to 2) helps maintain style dominance.
Increase style refmod copies or lower identity refmod strength to prevent drift toward realistic look.
Shows that without style refmod, identity refmod pulls toward realistic look; with both, 8-bit style is preserved.
Stacking different refmods (identity, audio, style) allows combining aspects, though tuning is needed as they're not always independent.
Credits NodeGo search creator; encourages checking GitHub and commenting for future content.
Refmods in ComfyUI offer powerful control over generation by combining different reference types, though they require tuning to avoid conflicts. The video provides practical steps for creating and using them effectively.
Refmods vs. Training
Clarifies the fundamental difference between refmods and training, which is key to understanding their use.
07:40Countering Style Drift
Provides a practical solution to a common issue when combining style and identity refmods.
11:21Stacking Refmods
Highlights the power of combining different refmod types for greater control, a key takeaway for advanced users.
12:46[00:00] In this video we are going to look at how to create refmods for video, audio, motion, and style. To do this you will need a single custom node and an optional node to speed up generations with minimal quality loss.
[00:12] First open the terminal to wherever you have ComfyUI installed, change directories to the custom node folder, then back on GitHub, click the green code button, and copy the URL.
[00:24] Then back in the terminal type git clone, followed by the URL. This will install the custom node. I already have it installed which is why I get this message. If you need to update the node, change directories into the nodes folder and simply type git pull.
[00:43] Now in ComfyUI, double click anywhere on the canvas and search for create h3 refmod master. Next search for load h3 refmod folder.
[00:55] If you want to include audio for your refmod, place the load audio node. And finally place two load VAE nodes, one for video and one for audio.
[01:11] And connect them to the inputs of the master node. Now in the load h3 refmod folder node, paste the path to the folder that contains your videos or images. If you have more than 32 items in the folder, increase the max items field.
[01:24] If your videos are longer than 240 frames, also increase that. The Max Edge field determines the dimensions of the media used. If you're having issues with image quality, try increasing it. But do note that increasing this will also increase generation time.
[01:37] Then connect it to the Ref's bundle input. If you're just using a single image or video, then connect them to Ref Image 0 and Ref Video 0 respectively. Now for the audio, just click to upload your audio file and connect it to the audio input.
[01:54] In the master node, change the concept field to the name of your refmod. In this case, I'm going to change the mode to full reference for higher fidelity.
[02:07] For things such as motion, compressed reference might be a better option. We will go over that later in the video. In this case, since we are creating an identity refmod, switch the concept type to identity.
[02:20] Now to give a high-level overview of some of these other settings. Background attention controls how strongly the background reference is preserved. Higher values retain more of the original environment. Ref resolution sets the resolution used when processing the reference images or videos.
[02:35] Higher values can preserve finer visual detail at the cost of longer generation times and more VRAM usage. This works in combination with the max edge field from the load refmod folder that we looked at earlier. Pool H and Pool W sets the dimensions of the pooled reference feature grid, affecting how much spatial detail is retained.
[02:53] Latent Frames controls how many latent video frames are used when extracting information from the video reference. Refinement Steps sets how many steps are used when creating a ref mod. More steps generally takes longer, but can improve convergence.
[03:06] Merge determines whether multiple supplied references are merged together or kept as separate stacked reference signals. Motion Only determines controls whether a video reference contributes only motion information or also contributes appearance or content information In this case we are leaving that off but we will enable it when we make a motion refmod later
[03:24] The multiplier adjusts the overall strength of the refmods influence during generation. Max tokens sets the maximum number of reference tokens that can be retained, limiting how much reference information is passed to the model.
[03:36] Raising this can potentially increase quality at the cost of longer generation times. The description is an optional text describing a reference or concept. It is typically used as metadata or additional guidance depending on the workflow.
[03:49] Save determines whether the generated ref mod is saved for later reuse. Audio Max Seconds limits how many seconds of reference audio can be processed. Audio Max Tokens sets the maximum number of tokens that can be allocated to encoded audio information.
[04:03] Audio Budget Policy determines what happens when the audio exceeds its allowed token or time budget, such as throwing an error or trimming it. Audio concept type specifies what aspect of the audio should be extracted, such as the speaker's voice.
[04:16] Max total tokens sets an overall token ceiling across the reference inputs. Zero typically means no additional global limit. Extraction preset chooses a predefined reference extraction configuration.
[04:28] Manual lets the settings in this node control extraction directly. Subfolder specifies an optional subfolder where saved refmod data files should be stored. Budget Policy determines what happens when the reference exceeds the available token budget, such as truncating excess information.
[04:44] Save Layout controls how saved RefMod components are organized on disk, such as storing components in separate files. Now finally, just place any node to feed the output, such as preview as text, and then run the workflow.
[05:00] And as we can see, it generated a video and audio RefMod in just under 10 seconds. Now we will move on to actually generating content with the RefMon. Here's a high-level overview of the workflow.
[05:16] Starting at the top left, this float node controls the duration of the video. Beneath that are the typical audio and video VAEs that you'd use for Minimax H3 along with the clip. In this example, I am using the basic Ref2VA model, but you can use other quantizations
[05:35] or fine tunes of the model. The random noise controls the seed for generations. If you set the seed to fix, the same video will be generated across multiple runs assuming
[05:47] the prompts and other settings remain the same. K-Slam for select is where you change your sampler. I found that ResMultiSec works quite well, but by all means experiment with different options to find the best fit for you.
[06:00] Resolution selector is pretty self explanatory. Just select the aspect ratio and how many megapixels you want. Make sure to set the multiple to 32, as minimax h3 generates content in that multiple, otherwise you might run into errors.
[06:13] And finishing up the left side we have the load h3 refmods node. This is where you select multiple refmods. As you can see I have both the audio and visual refmods set with a strength of 1.
[06:26] Here at this Apply H3 RefMod node is where you actually connect the RefMod Quick note if this is giving you any errors try the Apply H3 RefMod Simple node There seems to be quite a few variables to cause this error such as operating system hardware comfy UI version among other things
[06:47] So if you do have any problems, please let me know in the comments and I will try my best to help. This patched Sage Attention node along with the Spectrum node are ways to speed up generations
[07:00] with minimal quality loss. However, the patch node requires Sage Attention to be installed. You can disable either of these nodes and the workflow will still work the same. And over here we just have some of the nodes responsible for generation.
[07:12] The main thing here is you want to keep the FPS at 24 frames per second, as that is what Minimax H3 generates at natively. This image to video node is where you write your prompt. I tried to match the prompt closer
[07:24] to the one we generated in the last video so we can compare how the addition of the audio refmod improves the generation. While this is generating, I wanted to clarify a few things that I saw people commenting on in the last video. A refmod and a LoRa are fundamentally different. A LoRa has to
[07:40] be trained, creating a small set of learned weights that modify how the base model behaves. A refmod doesn't train new weights, it encodes reference information into a reusable latent representation and injects that during generation. One advantage is that once the ref mod is created,
[07:54] the VAE doesn't have to re-encode those references every single generation. Both methods have their own use cases. This isn't meant to say one is better than the other. Which one is better for your workflow is ultimately for you to decide. Now that the generation is done, I will show both the
[08:12] generation from the last video using only the visual ref mod, and the new generation with both the visual and audio ref mod. This is a demonstration of the EIE Minimax H3 ref mod. This is a demonstration
[08:26] of the Minimax H3 ref mod. Now we are going to create a motion ref mod. To demonstrate this I collected a few clips of Captain America throwing his shield just since it seemed like
[08:40] an exaggerative movement that is hard for the model to replicate. So, just as before, Provide the path to the folder containing your videos or images.
[08:58] Change the concept type to pose motion. And most importantly, make sure to enable the motion only option. This will attempt to capture only the motion of the references, though to be honest in testing I have noticed the original references bleed through if you are not specific enough
[09:13] with your prompting. Once everything is set, you can run the workflow. Now back in our generation workflow, just select the motion refmod. This can be stacked with multiple refmods.
[09:27] In this example, I'm using it with the visual refmod we just created. Here's the prompt I will be using. In the spirit of this video, and to show that the motion refmod has versatility beyond the object used in references, I will be using a graphics card instead of a shield.
[09:41] Here you don't have to declare a reference, like with the visual and audio refmod. You can simply describe the movement and it will apply. Also note that I use phrases such as keep the same subject same room etc That is because as mentioned before sometimes the original reference visuals bleed through despite being motion only There are ways to aid this such as lowering the strength but honestly I haven found the perfect combination besides prompting it
[10:03] To demonstrate that this has an actual effect I will generate two videos using a fixed seed, one with the rough mod and one without. It's definitely not perfect, many things that can be improved on and settings that
[10:20] can be tweaked, but it does at least have a meaningful impact on the final generation. For our last example we will be creating a style ref mod. I generated a few 8-bit images to use as references. Just like the previous examples, provide the path to the folder.
[10:40] Then change the concept type to style. Most of the other settings remain the same. Just make sure to disable motion only if you were following along with the previous motion refmod.
[10:53] With everything in place you can run the workflow. Back in the generation workflow, go down to the load h3 refmods node and select your style refmod. A style refmod can be used on its own or stacked with other refmods, like I'm doing here.
[11:09] One thing to keep in mind is that style and identity refmods can compete with each other. In my testing, the generation would start in the 8-bit style, but gradually drift back toward the more realistic appearance carried by the identity refmod.
[11:21] One way to counter that is to increase the number of copies for the style refmod, setting it to two repeats that reference conditioning in the sequence, giving the style refmod more relative influence compared with the identity refmod.
[11:33] It's not literally doubling the strength, but it can help the style remain dominant throughout the generation. Or alternatively, you could lower the strength of the identity refmod. Here is the prompt I will be using to generate it.
[11:46] Again, I will generate two videos using the same prompt and seed, with and without the refmod, to show the effect that it has.
[12:08] Now that both of them are done, we can look at the comparison. This is a demonstration of the Minimax H3 Reef Mod.
[12:21] This is a demonstration of the Minimax H3 Ref Mod. So as you can see, without the Style Ref Mod, the Identity Ref Mod kept pulling the generation back toward a realistic look, even when I explicitly prompted for 8-bit.
[12:33] But once I stacked the Identity, Audio, and Style Ref Mods together, the model was able to preserve the identity and voice while also applying the 8-bit style. And that's really where ref mods get interesting. You can stack different references for different aspects of the generation
[12:46] and combine them into a single result. They're not always perfectly independent, so some tuning is still required, but the amount of control you can get from combining them is pretty impressive. I hope you enjoyed the video and found it helpful for creating the different types of ref mods.
[13:01] All credit for the NodeGo search creator, so definitely check out the GitHub page and show them some support. If there's anything else you'd like to see me test or cover, let me know in the comments. Thanks for watching.
⚡ Saved you 0h 13m reading this? Transcribe any YouTube video for free — no signup needed.