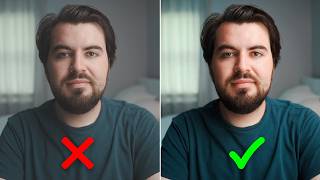

The 180 Degree Shutter Rule Explained
43sThis segment reveals a common mistake that makes video look choppy or blurry, and the simple fix is highly actionable for anyone shooting video.
▶ Play Clip"Delivers on its promise with universal settings, though heavily centered on Sony cameras."
This tutorial walks through essential camera settings to achieve sharp, professional-looking video. The presenter demonstrates using a Sony ZV-E10 Mark II, covering resolution, frame rate, exposure, white balance, and picture profiles. By the end, viewers will know how to set up their camera for optimal video quality.
Switch your camera to video mode to access relevant settings.
Set file format to 4K for sharpest quality and flexibility for cropping.
24 fps gives a cinematic look, 30 fps is standard, 60 fps allows slow motion. For talking heads, 24 fps is recommended.
Set shutter speed to double the frame rate (e.g., 1/48 or 1/50 for 24 fps) for natural motion blur.
Wider aperture (lower f-number) creates background blur; higher f-number keeps more in focus.
Lower ISO reduces noise and grain. If too dark, increase light or use an ND filter to maintain settings.
Connect via USB-C to use camera lenses and lighting for remote interviews, podcasts, or live streams. Software like Riverside records locally to avoid Wi-Fi issues.
Use manual white balance to prevent color shifts during long recordings. A gray card can help achieve accurate skin tones.
Creative looks bake in colors for simplicity; picture profiles like S-Cinetone or S-Log 3 offer more flexibility for color grading. S-Log 3 maximizes dynamic range but requires post-processing.
By systematically adjusting resolution, frame rate, exposure, and color settings, you can dramatically improve video quality. Experiment with picture profiles and consider color grading in post-production for even more professional results.
What frame rate is recommended for a cinematic look?
24 frames per second.
00:53
What shutter speed should you use when recording at 24 fps?
1/48 or 1/50 second (double the frame rate).
01:36
What does a lower aperture number (e.g., f/2.8) do to the image?
Creates a shallower depth of field, increasing background blur.
02:20
What is the main downside of raising the ISO too high?
It introduces noise and grain into the video.
02:46
What accessory acts like sunglasses for your lens?
An ND (neutral density) filter.
03:23
What software is recommended for using your camera as a high-quality webcam?
Riverside.
04:17
How does Riverside prevent loss of footage if Wi-Fi glitches during a remote recording?
It records locally on each guest's device.
04:30
What tool helps you set an accurate white balance?
A gray card.
05:56
What is the main advantage of using a picture profile like S-Log 3 over a creative look?
It provides more dynamic range and flexibility for color grading.
07:18
Which picture profile gives the most dynamic range on Sony cameras?
S-Log 3 (picture profile 11).
07:54
24 fps for Cinematic Feel
Establishes the standard frame rate for a cinematic look, a key creative decision.
01:09Shutter Speed Rule of Thumb
The double-frame-rate rule ensures natural motion blur, a fundamental principle in videography.
02:05ISO Noise Trade-off
Highlights the importance of keeping ISO low for clean images, a core exposure concept.
02:58Gray Card for White Balance
Practical tool for accurate color reproduction, especially for skin tones.
05:56Creative Look vs. S-Log 3
Explains the trade-off between simplicity and flexibility in color grading.
08:21[00:01] cleaner, and more high-quality, it starts with the right camera settings. through the settings you need to know to get the best video out of your camera. Now, I'm using the Sony ZV-10 Mark II to demonstrate these settings, but these
[00:14] camera. So, the first step we're going to do is make sure our camera is set to the video mode. On this camera, there is a little switch to go between photos, I'm going to set mine right in the middle for the normal recording mode.
[00:28] Next, we're going to jump into and change our camera's resolution. So, I'm going to go down to file format. This is where I can choose between 4K or regular HD. I recommend shooting in 4K as this gives you the sharpest image quality
[00:41] possible out of this camera, as well as gives you more flexibility if you want to crop into your footage later on. The next setting we want to adjust is our video frame rate. So, we're going to dive into the menu, go down to movie
[00:53] settings, click on record frame rate, and here we have a few different options. You can I choose between 24, 30, or 60 frames per second. Most videos are shot at 24 or 30 frames per second. I personally prefer 24 frames per second
[01:09] motion to it. Or, you can choose a higher frame rate like 60 frames per second if you intend to slow it down. Let's say you're filming b-roll, then rate. Since we're setting up for a standard talking head YouTube video, I'm
[01:23] Now, let's jump out of the menus and go to the main shooting mode, and we're going to adjust a few exposure settings that way our image is looking proper. control how much light enters your camera. You have shutter speed, your
[01:37] aperture, and your ISO. Let's first start off by adjusting our shutter speed. So, if I were to increase this number, the image will get darker. But, as you notice, the image starts looking very choppy and not very natural. If you
[01:52] lower the number down here, you can see that allows more light in. But, if we go too far, things start looking very stuttery and too much blur between frames. So, in order to properly set our shutter speed, we want to double our
[02:05] recording frame rate. So, we chose 24 frames per second for this video. So, double that would be 1/48 or 1/50 if you don't have that option. shooting 30 frames per second as well as 60 frames per second. Set it to these
[02:20] shutter speeds for the proper amount of motion blur. So, now that is set, we're is going to control how much of the image is in focus. A wider aperture, or the lower the number, is going to create more of a background blur, and a higher
[02:34] number is going to allow more of the frame to be in focus, and you will have I'm just going to set my aperture as low as it can go, which is F2.8 on this lens. Now, you may notice that our image
[02:46] is too bright, and this is where we want to control our third exposure setting, which is our ISO. The higher the ISO number is, the brighter the image appears to be, but you'll also start to see more noise and grain within your
[02:58] video. In order to get the sharpest and cleanest look, you typically want to set your ISO as low as possible. So, I'm going to start lowering down this ISO number until we have an image that looks nicely exposed, where things aren't too
[03:10] bright. Now, you don't want to go too low where things are under exposed and right here looks pretty good. Now, your image still looks too bright, then you may need to pick up an additional
[03:23] entering the camera. And you can do that with an ND filter, which is basically like sunglasses for your lens. And this is just another way to control how much light is entering your camera, so you can still have the settings you want
[03:37] while still having an exposed image. If you want to check out this ND filter, down below. So, now that we have the proper exposure settings, we still need to adjust a few color settings that we'll touch on in just a second. But, I
[03:50] using your camera. You can actually connect it to your computer and use it as a high-quality webcam. With the Sony ZV-E10 Mark II, I can just connect it over USB-C and use my actual camera lenses and lighting with the proper
[04:05] exposure settings instead of relying on my small webcam that's built into the computer. And this just unlocks your camera to do things like remote interviews, podcasts, or live streams. And the software that we like to use
[04:17] Riverside. With Riverside, you can do things like record remote interviews, podcasts, or even live stream directly from the software. And what's great about Riverside is that it records locally to
[04:30] each guest device. So, if you ever had your Wi-Fi glitch out and you think your that's not the case because you still have the file recorded directly to each download and begin editing. And not only that, but Riverside also has a full-on
[04:46] video editor. So, after you are done recording, you can edit and remove vertical clips that you can share on social media. From recording to editing and posting your videos, you can pretty much do everything within Riverside. So,
[04:59] a link in the description down below. And if you use code Think Media, you can get 1 month free of the Pro Plan. So, now I'll talk about a few color settings because this can be dramatic in how the final image actually looks and feels.
[05:14] skin tones and colors? So, let's first off by adjusting our camera's white balance. By default, your camera is probably set to an automatic white balance, which is fine for short clips. But, if you're doing long talking head
[05:27] during your recording. So, I prefer to set mine manually. So, for this current lighting setup, I'm using daylight color temperature lights. So, you could go down to the daylight profile and just use that. Or, if you want to get a
[05:41] little more accurate, you can go all the way down here to this K, where you can actually manually set the individual Kelvin color. Now, this is still kind of So, if you want to get even more accurate colors, I recommend using
[05:56] something like this gray card. They can actually manually custom set the white balance, too, and you can get the true and accurate white balance. I'll leave a this little thing. It's super handy and allows you to get the most accurate
[06:09] white balance and skin tones for your videos. And here's just a quick example of the automatic white balance settings versus the custom white balance we did Now, there's a setting that many people overlook, and that is choosing a picture
[06:23] profile or a creative look. And choosing a picture profile is extremely important depending on how you plan on editing your video later on. If you just want camera, and you don't really want to tweak the color and exposure in your
[06:37] choosing a creative look that has all the colors kind of baked into the video. to color and tone, go to creative look, and you can choose from a list of all these different creative looks depending on the look
[06:51] very basic look, then I recommend choosing the first one, which is standard, and you can actually go in and adjust things like contrast, sharpness, literally want something easy, you can just choose standard at the default
[07:05] good. But, I recommend experimenting with a few of these other creative looks. I often choose this FL or this film look one. That's actually what I'm shooting right now on the Sony FX30, and I think this looks pretty good. Now, the
[07:18] downside of these profiles is you do lose some information that could be useful for color grading. So, if you prefer having more control over your image and really want to apply some cinematic color grades to your video,
[07:30] then I would go down to the picture profile icon and choose either between S-Cinetone or S-Log 3, which on this camera is either picture profile 10 or picture profile 11. Much like the
[07:42] creative looks, S-Cinetone is going to kind of meet you halfway where you don't have to necessarily apply a LUT. You can just do very minimal contrast and exposure, and you have a decent-looking image, but with a little bit more
[07:54] latitude. Shooting in S-Log 3 is going to give you the most flexibility and dynamic range. It's really going to give you the best image quality possible out not going to want to use log directly out of the camera. It looks very flat
[08:07] and gray. And so, you'll need to learn how to properly color grade your videos definitely want to choose the picture profile or creative look depending on shooting a YouTube video, I actually prefer shooting in a creative look as it
[08:21] keeps things simple and actually saves me time rather than have to worry about But, when I am doing more professional videos or shooting a short film or wedding, I'm always shooting S-Log 3 because I want all that dynamic range.
[08:34] If you want me to dive in deeper on the different picture profiles looks of this below, and I just might make a full video about it. Now, with all these exact same equipment, but you can see a big difference in the before and after
[08:49] just by properly setting a few settings can really change how the overall image looks. Now, there is one more thing you can do in your editing software to improve the look of your videos, and that is color grading. I actually made a
[09:01] full video walking step by step on how to color grade within DaVinci Resolve. never done it. You can check out the video on screen right up here.


⚡ Saved you 0h 09m reading this? Transcribe any YouTube video for free — no signup needed.