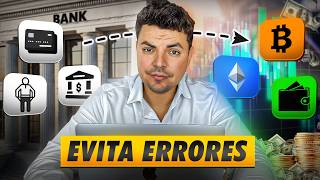

4 Steps to Start in Crypto
48sClear, actionable roadmap for beginners; high educational value and shareability.
▶ Play Clip"Delivers exactly what the title promises: a clear, step-by-step beginner's guide to crypto, with practical demonstrations on Binance."
This video is a beginner's guide to investing in cryptocurrencies, presented in Spanish. The creator outlines a four-step process: choosing a platform, funding the account, buying the first cryptocurrency, and storing it securely. The tutorial focuses on Binance as the primary exchange, demonstrating various funding methods and trading options.
The creator summarizes the entire process into four steps: choose a platform, fund your account, buy your first cryptocurrency, and store your cryptocurrencies securely.
Use CoinGecko to find crypto exchanges. The largest is Binance, but availability varies by country. For Latin America and Spain, options include Binance, Vivit, and OKX. For the US, Coinbase, Kraken, or Crypto.com are recommended.
Check the exchange's proof of reserves. Binance publishes this, showing that they hold more than 100% of user funds in wallets. You can download the wallet data to verify.
The creator uses Binance for the tutorial. Creating an account requires an email or phone number and verification with official ID and facial recognition.
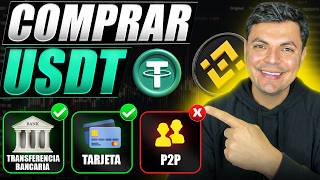
Three ways to fund a Binance account: plastic card (2% commission), bank transfer (no fees), and P2P trading (0.2% commission). Bank transfer is recommended as the most cost-effective.
In the deposit section, select your national currency and choose the bank transfer option. The platform provides the beneficiary details (your name, bank code, etc.). The transfer is free, minimum 50 units, and instant.
P2P trading allows buying crypto from other users. Select the 'P2P trading' option, choose the fiat currency and amount, then select a seller with a good reputation. After making the bank transfer, notify the seller and upload proof. The seller releases the crypto.
In the 'Buy Crypto' section, select Visa/Mastercard as the payment method. Enter the amount (min 360 pesos, max 200,000 pesos), choose the cryptocurrency, and enter card details. The commission is 2%.
Use the 'Convert' function to easily swap fiat or USDT for other cryptocurrencies. It has no fees but the exchange rate is slightly worse. For large amounts, use the 'Trade' section with a 0.1% fee and better rates.
The 'Trade' section (Spot) allows trading between users, offering better rates. Place a market order to buy or sell instantly. Use symbols like BTC for Bitcoin, ETH for Ethereum, and MXN for Mexican peso.
Two approaches: leave on the exchange (for small amounts or active trading) or move to a personal wallet. If leaving on the exchange, enable security features like Google Authenticator and biometric access.
Hot wallets are software apps connected to the internet (e.g., Exodus). Cold wallets are hardware devices (e.g., Tangem) that work offline and offer higher security. The phrase 'Not your keys, not your crypto' emphasizes the importance of self-custody.
To withdraw, go to the withdrawal section, select the cryptocurrency, paste the wallet address, verify the network, enter the amount, and confirm. With biometric authentication enabled, the withdrawal is processed in 1-3 minutes.
The video provides a comprehensive, step-by-step guide for beginners to start investing in cryptocurrencies, emphasizing the importance of choosing a reliable platform, using cost-effective funding methods, and securing assets in personal wallets for long-term storage.
What are the four steps to start investing in crypto according to the video?
Choose a platform, fund your account, buy your first cryptocurrency, and store your cryptocurrencies securely.
00:02
Which exchange is recommended for users in the United States?
Coinbase, Kraken, or Crypto.com.
02:09
What is the commission for buying crypto with a plastic card on Binance?
2%.
04:21
What is the commission for P2P trading on Binance?
0.2%.
04:33
What is the phrase that emphasizes the importance of self-custody in crypto?
Not your keys, not your crypto.
18:30
What is a hot wallet?
A software wallet connected to the internet, like Exodus.
19:10
What is a cold wallet?
A hardware wallet that works offline, like Tangem, offering higher security.
19:52
Why is the 'Trade' section recommended for large amounts instead of 'Convert'?
Because even though 'Convert' has no fees, it sells the asset slightly more expensive than the market. 'Trade' has a 0.1% fee but offers better exchange rates.
12:59
What security features are recommended to enable on the exchange?
Google Authenticator (two-factor authentication) and biometric access (fingerprint or facial recognition).
17:38
Four-Step Framework
Provides a simple, memorable structure for beginners to follow.
00:02Proof of Reserves
Explains how to verify an exchange's solvency, a key trust factor.
02:22Fee Comparison
Clearly compares funding methods by cost, helping users save money.
04:21Not Your Keys, Not Your Crypto
A fundamental principle of cryptocurrency ownership and security.
18:30[00:02] we made our first investment in Bitcoin. Since then I've been literally immersed in the industry; I live and breathe crypto every day. And if I had to start from scratch today, it all boils down to four steps. Step one,
[00:19] choose a platform to invest on. This is where you will convert your fiat money, such as pesos, dollars or euros, into crypto money. Step number two is to fund your account. This is where you will deposit your
[00:33] example, bank transfer, P2P trading, or card. Step number three is to buy your first cryptocurrency. You choose the cryptocurrency you want and make your first purchase. And step number four is to store your
[00:48] cryptocurrencies securely. This is where you protect your investment by moving your funds to a wallet. If you complete these four steps, you've already made a good start in the crypto world. You can try to do it on your
[01:03] own, or stay here and we'll do it together. Let's begin. Starting with step number one, you go to a page like Coing Geeko, where you can find all the information you're looking for about cryptocurrencies, and you're going to
[01:16] click on this section that says crypto exchanges and on this side you'll find the platforms with which you can invest in cryptocurrencies. It will be organized starting with the largest, which is Binance, which has the highest
[01:30] trading volume, and then we will go down successively. When choosing a platform to buy your cryptocurrencies, the most important thing is that it is available in your country. And here I'm going to focus on three areas. I'm going to
[01:42] focus on Latin America, and I'm also going to focus on the United States and Spain. For example, the largest one is pods. This is the best option and is available in all Latin American countries. You can also
[01:55] use it if you live in Spain. Other options for Latin America and Spain include, for example, Vivit and OKX. If you live, for example, in the United States, things change, because Vainas doesn't operate in the United States.
[02:09] The best option there is to use Coinbase, or if you prefer you can also use Kraken or even Crypto.com. Another thing you also need to consider is whether it's a reliable platform. All the companies that appear on this list are basically the
[02:22] largest and most reliable in the industry. But if you want to go an extra step, you can also verify their proof of reservation using Binance as an example . Here they publish their proof of reservation. This means that the
[02:34] platforms are holding onto the cryptocurrencies they claim to have. For example, here at Binance you will find what is the account balance and the balance in wallets. If the proportion is 100% or more, it means that the exchange
[02:47] has more than 100% of users' funds stored in wallets. You can even download the wallets to verify for yourself, and once you download them, you can see exactly which wallet and balance
[03:00] each one has. So, by using any of the major exchanges you see on this list, you'll be safe. For the purposes of this video, and since Vinance is the platform I personally use and
[03:13] recommend the most, I'm going to use pods for the rest of the video. It is currently the largest and already has more than 300 million users. In the description I'll leave you the official link where you can get up to $600 in
[03:26] registration rewards, and that way you'd also be supporting the channel. This is at account is quite simple. You will only need your email address or a phone number and then complete the verification process. For this
[03:40] official ID and then perform facial recognition. This process is quite simple, but if you have any problems, I'll leave a video above. Now let's move on to step number two, which is to fund your account with Fiat. You
[03:54] can fund your pod account in basically three ways. One of them is to buy the crypto you want directly with your plastic card. Another option is to make a bank transfer here in Mexico; it's called
[04:07] Space transfer. And the third option is to do it through P2P commerce, that is , buying from other people. Here I've organized it for you from easiest to most recommended. The easiest option would be a plastic card, but the challenge with that
[04:21] is that you'll pay a commission of around 2%. So, in this video I'm going to do what's most recommended. The best option is to make a bank transfer first because it does not generate any fees. Next is P2P trading
[04:33] because it only generates a 0.2% commission. And finally, I'm also going to show you the plastic card even though it generates a 2% commission. The only challenge with Latin America they are only available for Mexico, Colombia, and Argentina. I
[04:49] think I'm missing some other countries, and of course, it's also available in , don't worry, we will use POSP commerce for that. So, starting with the bank transfer, you're going to
[05:03] click here on deposit and here your national currency will appear, the Colombian, Mexican or Argentine peso. They make you deposit, the Spay transfer will be selected will vary slightly from country to country, and then you press continue. And here it will give you
[05:16] the information you need to make the bank transfer. It will show you the beneficiary's name, which will be you, the bank code, the bank and the institution with which you will be making the deposit. Here in Mexico, these
[05:29] intermediary called... It will probably ask you to create an account if it requests it. Here in this video I'm going to show you that process. That transfer will not cost you anything . The minimum amount is 50 and the
[05:42] maximum is unlimited. That transfer will be available instantly, and I also want to clarify that you cannot send from a third-party account; you have to send from your own bank account. So, what you do is
[05:54] log into your bank, enter this information, and make the transfer. Once you deposit the desired amount, go to this wallet icon and click on what says spot wallet. And here in Spot Wallet
[06:07] your national currency will appear. In my case it's 1,000 Mexican pesos. Now I'm going to show you the second method of funding your account, and that is with P2P trading. Click here where it says deposit and here you will find this section that says
[06:21] P2P commerce. This P2P trading is trading between pod users. In other words, I'm going to buy cryptocurrencies from another person in my country, and Binance will be quite safe and I'm going to show you how to do it step by step. The first thing you need to do is
[06:36] press this section I made quickly, and in this quick way we will buy UST with Mexican pesos. USDT is a cryptocurrency that is equivalent to US dollars. This UST is the most traded cryptocurrency on
[06:50] all platforms and it is the one we will be buying. Here, first of all, your national currency will appear, and it is worth mentioning that here you will find national currencies of the countries of Latin America. That one will already be selected
[07:03] by default, but if not, you can find it here. Then you will enter the amount you would like to buy. In this case I am going to buy 1,000 pesos in UST. I will be buy 1,000 pesos in UST. I will be buying the UST at approximately 17.95
[07:16] and it will generate a commission of 0.2%. Then I press select payment method and here I choose the payment method that works best for me. In my case, I will make the transfer from BBVA bank and I will select it. If not, then you
[07:30] your bank doesn't appear here. These payment methods might vary slightly from country to country, but in my case this is the one that works best for me and I'm going to select it. Then I press select ad and the best offer is this one that sells it to me
[07:43] for 1874, which is great. And this trader has almost 2,000 orders and has completed 100% of them, which speaks very highly of him. So, I'm going to click here where it says enter order and at this moment an
[07:57] order has been created. I have approximately 15 minutes to make the bank transfer. Here I see the amount I need to transfer to this institution and here is the account number. That's all I need to
[08:09] make the transfer. What I'll do is pause the video and then come back. And well, at this moment we have already made the payment. I forgot to mention that you should read the terms and conditions once. That person told me to
[08:21] put "payment to Solution Stech" in the description, which I did. So, take a look at that person's terms and conditions. It is also important to send as proof. And here I'm simply going
[08:34] to press this button that says transferred, notify seller. And here it asks me to upload proof, in this case the screenshot. In my simply click this button that
[08:46] I made the transfer from my own account and here we press confirm. And at this moment that screenshot is sent to the seller, the same one that I uploaded that is here. So at this point we're just going to wait for this
[08:58] person to check their bank account and verify that they already have the 1,000 pesos there. Once the person has the 1,000p in their bank account, they will release these 53.26 US to me. And as you can see, while I'm
[09:12] speaking, he's already released the money to me. So this transfer was successful and everyone was happy. Even here I made myself look balanced. I can click on view balance and now that balance appears in this account called funds. I
[09:24] already have the UST here, and it's that simple to fund yourself with P2P trading. Now I'm going to show you the last method, which is to buy your cryptocurrencies with a plastic card. To do this, you will need to go to the section that says "buy crypto". And
[09:38] here the first thing is to select the payment method. You're going to go to this section that says payment method, you're going to click on it and select the section that says Visa or Mastercard. Confirm and you're done . Now the next step is to select
[09:51] how much you want to spend, how much you want to buy in cryptocurrencies. The minimum is 360 pesos and the maximum is 200,000 pesos. The next step is to choose the crypto you want to buy. The best thing to do here is to buy the
[10:05] cryptocurrency you want directly. In this case, Bitcoin or any other that you are interested in. You enter the amount. Let's say, if I want to buy 1,000 pesos worth of Bitcoin, for those 1,000 pesos I would be receiving this amount of Bitcoin.
[10:17] I press buy BTC and here it shows me a summary of the purchase. And this is our card details. That card also has to be in our name, the application date, security code and also include an address,
[10:32] address. And after that, that would be it. You would be spending 1,000 Mexican pesos and you would be getting this amount of Bitcoin. The only detail here is the commission you will pay, which will be 20 pesos per 1000, which would be that 2% I
[10:46] mentioned at the beginning. And that money you bought with cards and you go here to wallets, will also appear here in your Spot Wallet. Now I'm going to show you how to do step number three, and that is buying your
[10:58] first cryptocurrency. What I'm going to do next is show you how to convert your national currency, in my case the Mexican peso, into Bitcoin or some other cryptocurrency, and also how to convert the UST that we buy in
[11:12] P2P trading into Bitcoin or any other cryptocurrency. All the exchanges you make on this platform will be carried out in this wallet that says spot. Do you remember that the money we bought on El Comercio P2P arrived in this
[11:25] wallet that says funds? The first thing I'm going to do is transfer this UST, the 53, from the funds wallet to the spot wallet. To do this, I'm simply going to click on this transfer button I made. Here I change
[11:38] the arrows to transfer from funds to spot and I'm going to select the cryptocurrency which will be UST and I'm going to send everything I have and confirm the transfer. And that's all. Now I'm going here to the spot wallet and here I already have the
[11:51] UST, what I had previously and what we sent from the funds wallet. When you want to buy cryptocurrencies with Fiat or UST, or switch from one to the other, you have two options. You can use a function called convert. For
[12:05] example, if I want to convert this USDT, I click here on convert. I'm going to switch from UST to any other cryptocurrency I want. Here I'm going to select Bitcoin and nothing else, I'm going to convert 1.5 UST and press
[12:19] convert. Here it shows me a summary that I am switching from UST to Bitcoin. This transfer does not generate any fees. If I agree, I click confirm and that's it. And that's basically it. In this example we have already gone from having UST to
[12:33] can also do the same with the Mexican peso, click on convert and convert from Mexican peso to any cryptocurrency Bitcoin. And here I'm just going to exchange about 20 euros and I would receive this
[12:47] amount of Bitcoin and I click on convert. And that's basically it. This is the easiest way to convert your fiat money to Bitcoin or any cryptocurrency. Although it's the simplest option and they don't
[12:59] charge commissions, I don't use it much or not for large amounts. Because? Because even though you don't pay commissions, they do sell you the asset slightly more expensive than it costs on the market. I only recommend this option
[13:11] seems too complicated or if you are going to exchange small amounts. But for exchanging large sums of money, the most advisable thing is what I'm going to show you next. And this means that you go to this section that says trade and use this
[13:25] option that says spot. With this option you can also switch from one cryptocurrency to another, but here the exchanges are between pod users, so you get a better exchange rate. There's a fixed commission of 0.1% here,
[13:38] and even with this small commission, making exchanges using this feature is the best thing you can do. For example, here you exchange in we deposited can be exchanged
[13:50] are available here. By the way, we only use symbols here. As you can see, the symbol for Bitcoin is BTC, the symbol for Ethereum is ETH, and so on. That's why in exchanges you'll always look at the
[14:05] symbols. The symbol for the Mexican peso is mxn. So, I have Mexican pesos and here I select which cryptocurrency I want to exchange it for. I'm going to exchange it for Bitcoin and here's the pair I'm trading. Then I'm going
[14:18] to slide down. Okay. And this is where the commands are executed. To do it simply, I'm going to place a market order that will be executed immediately. I won't go into too much detail about the types of
[14:31] video doesn't get too long, but if you want to learn all the details about the pod platform, I'll leave this video up here. Here you'll see the buy Bitcoin. You enter the amount you want to buy, or if you want to buy
[14:45] everything, you simply slide this bar to the right and you would be spending all the Mexican pesos you have , exchanging it for Bitcoin, and then you press buy. And that's it, that was all. It was quite simple. At
[14:58] this point we were already going from having Mexican pesos to having Bitcoin. Now, do you remember that we also had UST that we bought on the P2P market? Well, right here you're going to swipe to the right and you'll find
[15:11] the pairs that are with the UST, which is the cryptocurrency that is equivalent to one dollar. Once you're here, you're simply going to search for, for example, BTC, which is Bitcoin, and here you'll see BTC with UST, which is this second one
[15:25] here. Similarly, here it shows us the pair we will be exchanging, which is Bitcoin with UST. Similarly, we slide down. Simply put, we place a market order, and this tells us what we will be doing,
[15:38] which is buying Bitcoin. And here's the UST we have available. For example, if I want to buy 50 UST, I simply enter the amount and press buy. And that's basically it. If I then go to my wallet and
[15:52] go to spot, as you can see, I no longer have Mexican pesos and I have less UST, Then, if I want to sell this Bitcoin for Mexican pesos or for some other cryptocurrency, I do this, but in reverse. I'll go here to trade, I'll go
[16:06] to spot, here I'll simply look for BTC, here are all the pairs it 's available with, or if I simply want to exchange it for Mexican pesos, I'll go here to Mexican pesos and here's the Bitcoin with Mexican peso pair that's up here
[16:19] . I'll select it and instead of buying Bitcoin, I'll click on selling Bitcoin. I'm going to sell 50% of what I own, okay? and I simply selling it. Similarly, if I want to sell it for UST, I go here and here
[16:34] is Bitcoin with UST, I also swipe down and here it tells me what I would be selling Bitcoin. And just like that, in the same way, down here in the wallet, we'll have all our assets. Once you have the cryptocurrency you
[16:47] want to buy, let's move on to one of the most important steps, which is how to store your cryptocurrencies securely. When it comes to storing your cryptocurrencies, there are two approaches you can take. You
[16:59] in basically two ways. One of them is simply to leave them here on the platform. I would leave money here on the platform under two circumstances. One, that they be small amounts, amounts that do not represent a
[17:12] large sum of money for me. Another way I would leave money here on the platform is money that I'm going to be using, that is, money trading, or constantly moving. If I'm going to leave
[17:25] money here on the platform, what I recommend you do is have some security features enabled. To do this, go here to the user icon and press this section I made account and here
[17:38] go to the security section. And here in security there are two essential things that you have to have activated. One of them is the authenticator application, and this is Google Authenticator. This is an application that generates a
[17:51] six-digit code that changes every 60 seconds. If you have this function activated, every time you want to withdraw money, it will ask you for that code. Another feature I also recommend you have enabled is
[18:03] access keys. On iOS devices you can activate facial recognition and on Android devices fingerprint recognition. This is so that when you log into with your fingerprint or facial recognition and not have to enter
[18:17] asks for. With these two functions activated, then you can confidently save every penny. But if you want to store cryptocurrencies long-term or larger amounts that
[18:30] you won't be moving for a while, it's best to send that money to a wallet. In the crypto world there is a well-known phrase, "N your kisss, not your crypto." If they're not your keys, they're not your cryptocurrencies.
[18:43] This is because in the crypto world you have the possibility of being your own bank and having 100% control of your money. If you leave them here in Vainas, Vainas has that control, but you can also move them to a place, to
[18:56] a wallet where you are 100% responsible and you control that money. In this video I won't go into too much detail about wallets, but if you want to learn more about cryptocurrency wallets, here's a link to this
[19:10] hot wallets. These are software wallets connected to the internet. They are simply applications that you download to your mobile phone. For example, one of those, which is called Exodus. This is a wallet that
[19:24] I use quite often to store small amounts of money and also amounts very easy to use. You simply download an application to your mobile phone, then install it saving your recovery frames, and that's
[19:38] basically it. Then we have another type of wallet, and these are cold wallets. These are hardware wallets that work offline and offer greater security. Basically, cold wallets are the safest thing
[19:52] you'll find in the crypto world to store your assets. Because? Because you also download an application, such as this one called Tangem. Those types of wallets, besides requiring you to download an app,
[20:04] also come with a physical device, like those cards you see here. These are much safer because every time I want to withdraw money, I have to use the physical device to verify the transaction. Those types of
[20:16] physical wallets, like the ones I showed you, aren't free; they already have a cost. The one I showed you costs about $70 and comes with a set of three cards. But if you're interested, I'll give you a couple of codes so you can get it at
[20:28] a discount, and it's currently costing you $5. You'll also learn more about this wallet. But if I wanted to save that Bitcoin that I have in either of these two wallets, I would simply go to the
[20:42] wallet, for example, Tangem, and select Bitcoin and then press receive. And here you can show me the QR code, which I can simply scan from another device, or if I want to do it from the computer, I'm
[20:55] just going to copy this address that says copy. I can send that address to myself by email or however I want, and then I'll go to where I have the money here in junk. And if I want to send this Bitcoin that I
[21:07] this withdrawal section. And here, I'm simply looking for the currency that will be address; this is the address we copied into the wallet. You simply paste it, verify that the address is the same as the one shown in your
[21:21] mobile app or any wallet you are using. This network, the Bitcoin network, will appear automatically here. On this side you enter the amount you would like to withdraw. I'm going to set the maximum here to withdraw everything I
[21:33] have. And the next step is to press withdraw. Here it shows me money and the commission I would be paying, which is close to what I think. Then I press continue and on this side, since I have
[21:46] the access keys activated, it asks me to place my fingerprint to process the withdrawal. If I place my fingerprint, that withdrawal will go through and in 1 to 3 minutes the money will arrive in my wallet just as it
[21:58] looks right now. That physical wallet I showed you is this one, and I only use it to record videos. That's why I do n't have a balance, but I have some other physical wallets where I do keep money, but for the videos I
[22:11] use that test one I showed you. I know I did in detail because it would make the video quite long, but I is the correct way to invest in cryptos: from choosing a good
[22:26] platform and funding that account with your fiat currency, then exchanging that fiat currency finally storing your cryptos. You can leave them on the platform, but for greater security it is also recommended that you send them to a wallet.
[22:41] leave them in the comments. I always do my Also, if you'd like to continue learning about cryptocurrencies, I Seven Income community. You can also follow us on Instagram for short
[22:55] educational content, or you can join our Telegram channel if you prefer. We also have a WhatsApp group where you can interact with other people. I'm mentioned, including the community links, the pods link, and the
[23:08] also see a couple of videos up here. In this video I teach you how to use pods from beginning to end, and here I show you this video where I talk in detail about wallets. I think that was the only part I didn't cover in
[23:22] depth in this video. I'll say goodbye here for today.
⚡ Saved you 0h 23m reading this? Transcribe any YouTube video for free — no signup needed.