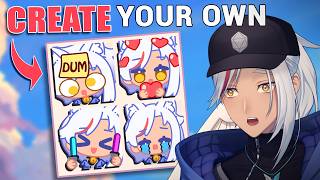

Make Custom Emotes Without Drawing!
43sThe hook directly addresses a common pain point (expensive commissions) and promises a cheap, easy solution, making it highly clickable.
▶ Play Clip"Delivers exactly what the title promises: a quick, no-drawing method to make custom emotes, though the 5-minute claim is optimistic."
This video demonstrates how to create custom Twitch emotes without drawing or commissioning an artist, using the Steam application Emote Lab. The host provides a step-by-step guide covering the interface, customization, texture editing, and export settings, along with important tips for users.
Custom emotes from artists can be expensive, so the video offers an alternative: making them yourself using Emote Lab, without drawing or generative AI.
Search for Emote Lab on Steam and buy it for $8, which the host considers a steal for the features offered.
The app opens with a licenses section, a previewer to view emotes, a character list for saved models, and an animation tab to play animations.
The customization tab is split into two: one for swapping individual parts and another for editing colors. Color editing has three states: white box (color everything), half white (tint editing), and empty (disabled).
Emote Lab allows editing current textures and creating new ones. To edit, open the custom textures folder, find the desired piece, and draw on it in an image editor, being careful not to draw outside boundaries.
Export settings include dimensions in pixels (larger = crisper but slower), and frame rate (higher = smoother but too high can cause issues). For Twitch animated head, select the appropriate preset.
Emote Lab lacks autosave, so save frequently to avoid losing work. The app is in early access, so users can provide feedback via Steam reviews or #emotab on Twitter.
Emote Lab is a powerful, affordable tool for creating custom emotes without artistic skills, and it's expected to improve with early access feedback.
What is the cost of Emote Lab on Steam?
$8
00:31
What are the three states of the color editing box in Emote Lab?
White box (color everything), half white (tint editing), empty (disabled).
01:43
How can you create your own textures in Emote Lab?
Open the custom textures folder, find the desired piece, draw on it in an image editor, and save.
02:09
What is the recommended export preset for Twitch animated head?
Select the Twitch animated head preset in export settings.
03:31
Does Emote Lab have an autosave function?
No, it does not have autosave as of yet.
04:00
Expensive Custom Emotes
Highlights the pain point of commissioning emotes, making the tool's value clear.
00:02Color Editing States
Explains a key feature that allows detailed customization, essential for users.
01:43Texture Creation
Shows how to go beyond presets and create fully custom textures, expanding creative possibilities.
02:09No Autosave Warning
A practical tip that can save users from losing hours of work.
04:00[00:02] an artist. And unless you want to use the same emotes that everyone else is using, then commissioning one can be a little bit of an expensive endeavor. So, what can you do? Well, you can make it yourself. Not by drawing, and certainly
[00:15] not by generative AI. That can go in the bin, but by pressing a couple of buttons and I help make streaming and VTubing accessible for everyone. And in this make your very own emotes to use on streams, content, Discord, or anywhere
[00:31] else you want in just 5 minutes using Emote Lab. Let's get it. First thing you need to do is search up Emote Lab on Steam and slap that buy button because trust me, this eight bucks is going to be a steal for what you're getting out
[00:45] of this behemoth of an application. Once you open it up, you're greeted with intimidating as it looks. Just follow my lead. Up here, you have your licenses. with the app. And if you click on it, the rest of the appears like magic. Next
[01:00] is a previewer that previews your emotes. If you hover your mouse on the can use these controls to move your little model however you want. Right next to it, you have your character list. This houses all the pre-saved
[01:14] well as any that you've created and saved. Just below the previewer is the animation tab. Click on any of the many animations to play it. And don't worry We'll get to that later on. Now, this part of the screen here is the juicy
[01:29] vast majority of your time, the customization tab, which is split into two. The first allows you to swap individual parts of your model and then tab allows you to edit the colors of individual parts. And if you click on
[01:43] this box, you can enable and disable that editing. Just make sure you pay white box means that it'll color everything. A half white box means that tint editing is enabled. This means that you can adjust both the primary colors
[01:57] and the secondary colors of your model, which is actually this little black gradient here. And finally, an empty box just means that editing is disabled. Finally, at the very bottom, you have your texture buttons. This program is
[02:09] super awesome in that it allows you to not only edit the current textures of each individual part, but also create your own if you wanted to. Let's go over how to do that real quick. First, open up the custom textures folder. Next, you
[02:21] to edit. Coffee Bean, if you're watching this, please give us a way to find the textures easier because it took the combined brain cells of me and my chat like 10 minutes to look for this one hairbang, which was deceptively chunky.
[02:34] brain cells, but it still took us 10 minutes to find it. We found it. YES. BUT once you find your desired piece, go ahead and open up your drawing Photoshop, but you can use whatever you want. Before you draw on it, make sure
[02:50] you don't draw outside of the boundaries as it might mess with the other parts. Alternatively, if you want to create your own parts, look for these images with the grid lines. Make sure to draw within the colored area and then hide it
[03:03] within the colored area and then hide it afterwards. looking oh so cute and lovely, we'll want to export it. Let me show you how the export settings work. It ain't hard, but make sure you pay attention. If you
[03:18] you'll be brought into the settings page where you'll see export settings on the right side. This is the dimensions of your model in pixels. The larger it is, the longer it'll take to export, but also the crispier it'll look. You can
[03:31] Higher numbers will give you a smoother animation, but too much can actually is right in the middle. But for this video, let's select the Twitch animated head back to the main page. Make your way over to the animation tab. Select
[03:47] and hit export emote. Now go ahead and do that for every animation that you want. And once you're done, it'll all show up in a nice little folder ready for you to use. Pretty easy, right? Now, before you go ham and start making a
[04:00] million emotes, please remember a couple of really important things. First, Emote Lab doesn't have an autosave function as of yet. Make sure you save. Do not make the same mistake that I did. Please. I had to redo like half an hour worth of
[04:14] work. And finally, please keep in mind that Emote Lab is in early access, which means that this is merely the start of what this program has to offer. It already has a lot, but if you're like me and want more things, give the devs some
[04:28] feedback by leaving them a review on Steam or by letting them know by using # emotab on Twitter. No, I refuse to ever call it X. It's a stupid name. Bite me. [laughter] Customizable emotes are an incredible evolution of customizable
[04:41] VTubers. Emot Lab is the first of its kind and I look forward to seeing what the devs will add to it. So tell me, will you use Emote Lab? And if you already have, how did you find it? Let me know down in the comments. Ciao.
⚡ Saved you 0h 04m reading this? Transcribe any YouTube video for free — no signup needed.