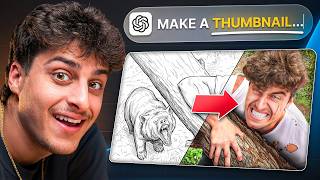

AI Thumbnails: My Exact Workflow
45sThe opening promises a step-by-step tutorial with a big claim about AI changing thumbnail design, hooking viewers interested in YouTube growth.
▶ Play Clip"A practical, step-by-step guide that delivers on its promise to show a professional thumbnail workflow with AI, even if the 'biggest creators' claim is unverifiable."
In this video, a seasoned YouTube thumbnail designer demonstrates a complete AI-driven workflow for creating high-performing thumbnails, using ChatGPT, Freepik, and Photoshop. The process is shown live on a real project, emphasizing speed and ease while highlighting pro tips like feeding generated images back into ChatGPT for iterative refinement.
The designer, with years of experience working with top creators, claims AI has revolutionized his thumbnail design process. He introduces a 3-tool workflow (ChatGPT, Freepik, Photoshop) and reveals that the video's own thumbnail is the project being created.
The first step is to feed ChatGPT reference images of the creator or client along with a basic prompt request. This yields a detailed, ready-to-use prompt for the AI image generator, establishing the concept and style.
Using the prompt generated by ChatGPT, the designer uses Freepik's image generator. A key tip is to select the 'Google Nano Banana Pro' model for photorealistic results and to set the aspect ratio to 16:9 for YouTube thumbnails.
A highly effective pro tip is to take screenshots of the AI-generated images and paste them back into ChatGPT. The designer asks what's wrong with them or provides the visual context, leading to more precise and iterative prompt revisions.
The chosen base image is imported into Photoshop. The designer merges assets from multiple generated thumbnails (e.g., a foreground arm from one, a laptop from another) to achieve the perfect composite composition.
The designer uses Photoshop's AI 'generative fill' to seamlessly remove unwanted elements (like the creator and laptop from the base) and to expand the background. This speeds up and automates a previously tedious manual task.
To improve the appearance, the designer uses a head tilt to adjust composition and paints back shadows on the desk and body to maintain realism after edits, showing a meticulous approach to detailing.
A screenshot of a YouTube thumbnail is placed on the MacBook screen, and the designer adds finishing touches like a level to darken the shirt, hue/saturation adjusments, and a color balance layer. Text is then generated in ChatGPT and added in Photoshop.
The final step is exporting the completed thumbnail. A key point is that a realistic thumbnail was created without using a real photo of the creator’s face, relying on AI generation and prompting with reference images.
What are the 3 core tools used in this thumbnail design workflow?
ChatGPT for concepts, Freepik for AI image generation, and Photoshop for final editing.
00:43
What is the 'Pro Tip' for iterating on AI-generated images?
Take screenshots of the generated images from Freepik and feed them back into ChatGPT, asking it to 'fix' or analyze them for a better prompt.
02:45
Which AI model does the creator use inside Freepik for thumbnails?
Google Nano Banana Pro.
01:40
What technique is used in Photoshop to swiftly remove the creator and the laptop from the base image?
Using 'Select Subject' and applying AI generative fill with an empty prompt.
04:38
How did the creator ensure the arm from a different generated image fits perfectly into the base thumbnail?
Because all the image used similar prompts, the lighting and overall appearance were consistent, so the arm blends in smoothly.
05:44
What settings must be enabled in Freepik for thumbnails?
16:9 aspect ratio and 'AI Prompts' enabled.
01:40
How does the creator use Photoshop's generative fill to create a 'text box' on the thumbnail?
He uses the AI to expand the canvas, leaving the area for future text, and later adds the text in over the expanded background.
08:42
Lean Workflow with AI tools
Provides a real, practical framework combining three tools to create high-quality thumbnails quickly, moving from a purely manual process to a semi-automated one.
Iterative Loop: Feedback via Screenshots
A concrete, commonly overlooked Pro Tip enhancement. It shows a major benefit of text-AI: its ability to see and annotate the exact image being processed, significantly improving prompt output.
02:45AI-generated output without a real face
The entire process can be accomplished without a single original photo avatar, reducing the need for a studio shoot and fully relying on the AI's ability to extrapolate from a few images.
11:30[00:00] I've been designing users thumbnails for years and I've worked with some of the biggest creators on the platform and I can confidently say AI has completely changed how I design thumbnails. In this video I'm going to show you the exact workflow I use to create high performing thumbnails
[00:16] faster and easier than ever before. I'm going to walk you through all the tools I use on real client projects and I've never broken it down as simple as this. By the end of this video you'll
[00:28] be able to copy my exact process to create better thumbnails faster than ever. And by the way the thumbnail you clicked on in this video is the one we're going to be creating together live. So if you want more thumbnail education videos like this then subscribe.
[00:43] Now we are only going to be using 3 tools, ChatGPT, FreePic and Photoshop. Let's first start with ChatGPT and build the concept for the thumbnail. Once inside ChatGPT go ahead and add in reference images of yourself or your client.
[00:58] Simply come to the plus, click add photos and I'm going to add in three photos that are found on my YouTube channel. Since we're designing a thumbnail for this video let's go ahead and give chat some details about our video.
[01:10] So first I'm going to start off with I need a prompt for free pick. Now once we have this prompt written out to ChatGPT let's click enter and see what it gives us. After just a few seconds, ChatGPT gave us a full prompt that we can use inside of Freepik.
[01:26] So let's jump over to Freepik and generate some images. Once inside Freepik, we can head over to the image generator. Now this is the cool thing about Freepik, you can choose from a ton of different AI image models.
[01:40] For this example, we're going to be using Google Nano Banana Pro. And as you can see, the results are so realistic. It's insane. Make sure we're on 16 by 9 and we have AI prompts enabled.
[01:52] Now let's head over to upload and upload our reference images in the same order that we uploaded them into ChatGPT. And now as you can see here we have image 1, image 2, and image 3.
[02:04] Let's go ahead and paste in our prompt and generate. Alright so these were the results that FreePic gave me. And at a first glance they're not bad but they're just not exactly what I want.
[02:16] So let's go back into ChatGPT and revise our prompt a little bit. Alright, after some simple revisions and a couple more seconds, ChatGPT is giving us another full prompt that we can throw into FreePix.
[02:28] And let's go ahead and paste it in and generate four more images. Okay, I like these first two the most. This is a cool perspective, but I don't think it's going to work for this. This just feels a little too grand.
[02:42] This feels a lot more dynamic. So let's go back to ChatGVT and revise the prompt just a little bit more. Okay, I gotta be honest, I'm not a fan. Let take a screenshot of the images that were generated let scribble these ones out and then let throw this into ChatGVT Now this is a pro tip that i don see a lot of people doing is taking screenshots of the generations by free pick and throwing it
[03:07] back into chat gpt and asking what's wrong with these images or giving chat gpt a visual to see what you're actually talking about it seems to help a lot so once again let's copy this prompt and paste it into free pick all right once again not a fan of these images i'm actually going to
[03:24] take this thumbnail and feed it back into chat gtt and see what we can do with that. So now I'm going to say use this image as at image one. Now we can go back into freepix and upload
[03:39] just this image. Paste in our new prompt and let's see what results it gives us this time. Okay I'm going to go back to these two thumbnails. I'm going to download them both and now we're
[03:52] we're going to go into Photoshop. Quick pause, if you want me to personally help you with your thumbnails, I offer one-on-one consulting calls where we go through your channel and fix your thumbnails together. The link to book a call or work with me directly is in the description. Also,
[04:07] make sure you're following me on my other socials for more tips and breakdowns I don't post here. Back to the video. Okay, so this image is going to be our base for the thumbnail, but I want to take some assets from this thumbnail and just merge them together. So the first thing I'm going to do
[04:24] is just drag everything down a little bit. Let's go ahead and select subject on our base. Now I can simply use Photoshop's AI generative fill to remove me and remove the laptop since we just cut
[04:40] myself out. Once the area is selected we can click generative fill and just leave it blank and hit generate and as you can see it perfectly removed every asset from the image. Now let's go to this
[04:52] image and do the exact same thing select the subject and it should select me as well as the laptop perfect and all I want from this image is honestly just my hands here in the foreground.
[05:10] So I'm going to remove everything else using a mask.
[05:26] And there is just my arm. Now if we turn this back on and reposition the arm to be about there, that almost already looks perfect. And just like that the arm fits in perfectly because we're using the same prompt.
[05:44] So all the images are going to be similar. Now I believe the laptop is facing a little bit too much away from the camera. So let go back to freepik and see if we can find a picture that has the laptop facing more towards the camera Now I like this image here because of how colorful all the apps on the bottom are compared to this one So let download this image and cut out just the laptop
[06:16] There we go. Now we can position this right about where we want it. go ahead and remove this one.
[06:31] And that simply you can already see such a big difference.
[06:51] Now let's go ahead and add in some of this shadow back. I'm just painting on the mask and adding some of these shadows back into the image just so that it stays realistic.
[07:03] And once again I'm going to paint back in these shadows on the surface of the desk that are made by that are made by my body
[07:25] and there we go the shadows make it look so much more realistic now what I want to do is I want to actually tilt my head a little more straight up
[07:42] So I just simply cut out my head and rotated it slightly to the angle that I want.
[07:56] Now I'm going to mask out my other head. Just like that. And now I'm going to select the area left over.
[08:14] And the part connecting my neck. And we're going to click generate and see what this does for us. Hopefully it removes the head in the background, but also makes my neck
[08:29] connect to the head that I added in. I mean that looks pretty spot on. As you see it didn't change the shape of my face too much.
[08:42] Kept the hair but just made the neck actually connect. Beautiful. Now of course let not forget to expand the background up here Perfect I also going to expand this out a little bit to the left just so that everything can be a little more centered and a little bigger get some
[09:10] guidelines to make sure I'm doing this correctly and that looks pretty good composition wise to me now the next thing I want to do is actually add in one of my thumbnails onto the MacBook here. Alright now I added one of my
[09:25] thumbnails to the MacBook screen let's go ahead and add some finishing touches. Alright let's create a level. Make this the mask and let's darken my shirt a bit.
[09:45] Let's also create a hue saturation with the same mask and turn down the saturation.
[09:57] Now I feel like the darker shirt just doesn't clash as much with the MacBook which I like. Let's also add a color balance layer to the whole image and just slightly adjust the colors
[10:10] to our liking. Okay, let's export this image and go back to ChatGPT. Let's upload our image and say use this image as app image 1.
[10:22] Don't change anything about the image. Just add a text box above the laptop that says image generated.
[10:36] and let's just say give me prompt and see what we can do with the prompt that it gives us. Again don't forget to upload your reference image and let's generate.
[10:48] Oh okay I already like how these two are looking. Wow okay this one is really good. I'm going to save this one. Let's open it in Photoshop. What we're going to do is just cut out the notification just like that.
[11:03] Let's position it so that it's bigger and let's also scale it so it looks like it is flushed with the laptop and just like that this already looks so good.
[11:16] Let's go over this with a little green glow and see how that looks. It's honestly insane how all of this was built just from a few AI tools and the crazy thing is I didn't even have to use an actual picture of my face.
[11:30] Let's go ahead and add the final touches to this thumbnail. This is ready to be exported and uploaded. And that's it. That's exactly how I make thumbnails with AI in 2026.
[11:44] If you learned something subscribe for more thumbnail videos like this and check out my links below to contact me. Thank you for watching I'll see you in the next video.
⚡ Saved you 0h 11m reading this? Transcribe any YouTube video for free — no signup needed.