
Stop Coding Everything from Scratch
45sChallenges the common developer mindset of building everything from scratch, offering a relatable and contrarian perspective that sparks debate.
▶ Play Clip"Delivers a working free scheduler as promised, though some setup steps are glossed over."
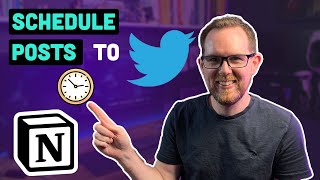
The video demonstrates how to build a free Twitter scheduler using Notion as a kanban board and n8n, a self-hostable automation tool. The creator walks through setting up the workflow, from creating a Notion integration to posting tweets via the Twitter API, and emphasizes the benefits of using low-code tools over building from scratch.
The creator wanted to schedule tweets to reach a global audience (US and India) without paying for a subscription service. They considered building a custom solution but decided to use low-code tools.
n8n is described as a self-hostable automation tool similar to IFTTT or Zapier but more powerful, allowing custom code and API calls. It can be self-hosted for free, avoiding the £20/month cloud plan.
n8n allows you to call your own APIs and integrate with any service, making it highly flexible. The main drawback is the need to set up developer accounts and API keys manually.
The workflow uses a Notion kanban board with columns: Idea, Ready, and Published. An n8n automation reads tweets from the Ready column, publishes them to Twitter, and moves the card to Published.
The workflow has five parts: schedule trigger, read tweets from Notion, format data, post to Twitter, and update Notion. The creator uses Blackmagic to find optimal posting times.
For the creator (UK-based), the best times were 3-4 AM and 7 PM. These times vary by audience, so users should analyze their own engagement data.
Create an integration in Notion under Settings > My connections > Develop or manage Integrations. Copy the internal integration token (API key).
In n8n, add a Notion API credential using the token from Notion.
Use a cron trigger to run the workflow at specific times. Example: '0 15 * * *' for 3 PM daily.
Create a new board in Notion and rename the statuses to Idea, Ready, and Published. Add properties for created time, published time, and tweet URL.
Create a test card with content 'I love n8n' and move it to the Ready column. Ensure the Notion integration has access to the board.
Use the Notion node in n8n to query the database, filtering for status 'Ready' and sorting by created time ascending, limit 1.
Since the Notion node doesn't return content, use an HTTP request to the Notion API to get the page content, including the tweet text.
Use a Code node to extract the tweet text from the Notion API response, handling multiple paragraphs and newlines.
Use an HTTP request node to POST to the Twitter API v2 endpoint, with OAuth 1.0 authentication. The tweet text is sent as JSON.
Use a Notion node to update the card: change status to 'Published' and add the tweet URL (constructed from handle and tweet ID).
By leveraging n8n and Notion, you can build a free, self-hosted Twitter scheduler that saves money and offers full control. The workflow is customizable and can be extended to other social platforms.
What is n8n?
A self-hostable automation tool similar to IFTTT or Zapier but more powerful, allowing custom code and API calls.
02:15
What are the three statuses in the Notion kanban board?
Idea, Ready, and Published.
04:07
What is the cron expression for 3 PM daily?
0 15 * * *
07:19
Why is an HTTP request node needed to fetch the tweet content from Notion?
The default Notion node does not return the content of the page, so an API call is required.
11:53
What authentication method is used for the Twitter API in this workflow?
OAuth 1.0.
15:13
What is the format of the tweet URL?
https://twitter.com/{handle}/status/{tweet_id}
17:34
Embrace low-code solutions
Highlights the value of using existing tools instead of building from scratch, saving time and effort.
01:48n8n's power and flexibility
Explains why n8n is superior to simpler automation tools due to its ability to call APIs and write custom code.
03:09Workflow components
Breaks down the automation into five clear parts, making it easy to understand and replicate.
04:35Optimal posting times
Shows the importance of analyzing audience engagement data to schedule tweets effectively.
05:38Automated status update
Demonstrates how to update Notion automatically after posting, keeping the board organized.
16:21[00:01] so one of the cool things I love about being a software developer is the fact want the thing is software developers have a tendency to want to create everything from scratch and I understand I like writing code I like creating
[00:13] is often the more efficient solution is to make use of some of the cloud tools write everything yourself one of my goals for 2023 was to be a bit more quite a lot but I'm often more consuming content than I am creating it and when I
[00:28] do come up with something interesting to say they generally come in short bursts come up with 10 things at once that I think are quite interesting but rather as soon as I think them it's often better to sort of drip feed those
[00:42] thoughts as you go along now I find from looking at my analytics that most of my audience is either based in the US or they're based in India now me based in to be a bit different to them so for me
[00:54] tweets throughout the day so at least there's some chance that my audience are my thoughts whenever I think them chances are that most of my audience aren't going to be awake and therefore it's easier for me to put them in a list
[01:07] chance that people are going to be able to see my tweets there are many tools available that let you schedule your tweets but generally the free versions only let you schedule 10 tweets at once and the paid ones are you know 20 30 40
[01:20] a month so when I thought about doing this I didn't want to pay for a monthly use Twitter that much but I just wanted a way of scheduling my tweets so that I course of the week it's my initial thoughts were great I'm going to build
[01:34] this myself I'm going to create a dynamodb table full of tweets I'm going schedule and sends out the Tweets via the API of course that would have taken probably wouldn't have been the best use of my time so I decided to embrace no
[01:48] code or at least low code Solutions and see if I could build a tweet scheduler hasn't got anything to be able to schedule tweets by itself so I needed something that would be able to read the the tweets that I put into notion and be
[02:02] what I have a notion to say that it's gone out so it doesn't get sent out twice and for this I'm using a tool called n8n so what is n8n you probably haven't heard of Nan at least I hadn't until a couple of weeks ago it's
[02:15] basically equivalent to if this than that or zapier but on steroids and the bonus thing is you can self-host it now Nan does offer a cloud plan but it's around 20 pounds a month and as I said I want to try and save some money in the
[02:28] wasn't going to play out for their Cloud hosting plan but because you can it for free now I've included a link in the description below how you can self-host Nan for free so check it out if you want to set this up for the rest
[02:41] already got Nan running somewhere will it be on the desktop in the cloud or on your Raspberry Pi for example so na10 is a bit more complicated than if this and that and zapier it's not just a case of connecting a few Services together you
[02:55] you often have to write a little bit of code as well but that's what makes it so powerful you can call your own apis you can call other apis you can interact Integrations for and you can really just link together anything you want without
[03:09] which is really good so even though it's a bit harder if you are a software find it too difficult so one of the main panes with Nan which you don't have with set up the developer accounts and the API Keys yourself now if you're a
[03:24] too difficult but it is an added extra that you need to do now with Twitter developer account platform takes about three days to set up I don't know what literally there proving everything himself but it does take a little while
[03:39] ahead and do any of this go and create a developer account I'm not going to go developer account with Twitter I'm going to assume you've already got that set up how to do that there's a link in the description below it's very simple but
[03:53] that approved and email come through so what we're going to build here is a Twitter scheduler based on ocean kanban board so when you create a kanban board in notion it will typically come with three states of to do in progress and
[04:07] using those three states but I'm renaming them to idea ready and that when you come up with an idea for a tweet you can put in the idea column and then you can spend a little bit of time to make sure that it's correct before
[04:21] then on a schedule our NAA and automation is going to come in read that tweet from your kanban board and then publish it to Twitter and then move that card over to the publish column so Nan is based on workflows and the workflow
[04:35] basically five main parts to it so the work out when we want to send out these tweets so I use a tool called Blackmagic it's developed by a fellow Indie developer called Tony din he's quite
[04:47] look he's really good he's quite some really good tools such as Dev view tools with Blackmagic is it shows you when your most engaging times are if you do have black magic you can go and see and see exactly when you're times are if you
[05:00] of scheduling it a few times throughout the day the second part is obviously reading your tweets from notion having a look in that ready column finding out which ones are ready to go out and then reading the data from notion we then
[05:13] notion in a way that's going to be understood by Twitter we then are going to send out that tweet via the Twitter API now hopefully you'll have your point but you can always set it up and then add in your developer Keys once you
[05:25] have it and then lastly we're going to update our notion board with a URL to it was sent out and we're going to move that card over to published so for me based in the UK I found that my most engaging times with my audience were
[05:38] o'clock in the morning between three o'clock and four o'clock in the and seven o'clock in the evening now if you're not based in the UK or you've got going to be the case you're probably going to find that your engagement times
[05:52] going to assume that you have a Twitter developer account or at least you're in the process of getting one and you already have notion and an and set up if look in the description and there's a link to instructions on how to set
[06:04] everything up okay so the first thing we need to set up in notion is our API key so we go to settings and members we then go to my connections followed by develop or manage Integrations so this will take you to your Integrations page now you
[06:17] up but we'll set up another one just so you can see how you can do it so you click new integration I'm going to call mine nan2 and then you can give it a bother and then from there the rest of the settings we're just going to leave
[06:30] as default so click submit this is going to give you an internal integration token which is your API key so if you click show on this it will give you an option to copy it and let's copy that so next we need to go to Nan which I assume
[06:42] you have set up click add credentials type in notion you'll see we've got notion API or notion hour of two so we're just using the notion API in this case click continue put in the API key and then click save and here we can see
[06:54] we're going to do is we're going to create a schedule trigger that is going to allow us to run this workflow at a certain time each day so we're going to the plus there's a bunch of options you can use here for how the workflow is
[07:06] like this where you can add in the different trigger rules now you can set here intervals between days and months for me I think the easiest thing is just set up a custom con job so you can see it's got a an idea for an expression
[07:19] running every day so if you want it running at say three o'clock in the afternoon we've got some do 15 star star and that's going to give us three a few more options if you want to to specify different times of the day but
[07:34] for now I'm just going to specify these ones so before we go ahead and create the next node we need an actual board in notion to be able to talk to so in we're going to click the plus button so we need to give it a name let's call it
[07:46] Twitter and then we click on the board option and we're going to create a new database so this is what the board looks like when we first create it I want to rename what these are called so rather than to do in progress and complete I'm
[07:58] going to have idea ready and published so to do that we go to here we go to here and we're going to change what each of these are called so here they've actually got not started in progress and done if we click this let's change this
[08:11] to idea we're going to change this one to ready I'm going to change this one to published now you can see these haven't shown up change this and go to group Group by and then just pick status again
[08:27] all updated with the new items so the next thing we're going to do is add a few more properties in which we're going to update in n810 so things like when it was created when it was published and the URL for the tweet that we sent out
[08:40] cards we're going to do add property so let's add in the created time we'll leave it as created time we're going to add in a new time which is going to be published and I'm just going to change this to a 24-hour clock because that's
[08:53] what I like to see and then we're going to add in another property which is so again this is all just going to be blank but it'll be pointing to the tweet that was sent out automatically so that's our board all set up but what I'm
[09:06] of these cards and put in information let's call this just Twitter test so the we're going to put the contents of the Tweet into the body of this card I'm just going to call this I love Nan and just leave it like that and then we're
[09:20] going to drag this into ready when we add our integration into non we're just column so we're not going to see any of the other tweets that we're either out so the last thing that we need to do in notion is give permission for Nan to
[09:36] the steps that I always need to forget and I wonder why it's not working so on these three dots up in the corner click on ADD connections and then we're going to search for our Nan connection that we added so I've got two here I'm
[09:50] just going to add in my first one click on confirm and then Nan will now have access to this Twitter board so back in n810 we're going to go to back to canvas this case we're going to search for notion so we want the notion API we need
[10:03] to pick your credentials I've got two set up but you should only just have one and then go to resources you need database page for this one the operation you need to select the board that you set up so here's Twitter on this case we
[10:18] going to do a bit of filtering in a minute but we are only going to have one to run to pick up the oldest tweet that's the one we're going to send out so we'll limit this to one we're going
[10:31] to undo the simplify option I'm going to change the filter I'm going to put in Json here if we expand this I'm going to copy in some Json if you have a look at my post in the description you'll see a full blog post showing the details of
[10:44] that we're going to use so it's quite a only got one thing that we're searching on anyway property is status and the status needs to equal ready so that's just selecting our middle ready column
[10:58] so we need to add the salt property here so we can select and in our case we want sort by we're then going to tick timestamp because it is a time and then I'm going to change the direction to ascending so if you actually do execute
[11:11] so we've got some data back you can see it appears at the table but if you click on Json you can see it as a Json object so this is the API response that we've important points that you'll notice is that we don't actually have that I love
[11:25] Nan message in here the only thing we are displaying is the properties of that on this one is we're going to change the name of the node so you can actually reference the nodes by name in the later node so it's going to be easy if we can
[11:39] see what this one does so let's change this one to get ready tweet and then I'm next thing we need to do is we need to create another node that is going to read the information that's inside the card now annoyingly the notion node that
[11:53] you've got by default the one that comes in when we type in notion doesn't have anything that's going to give us that data but we can do an API call to get that so if we do HTTP request they're going to create a new one so we're going
[12:05] to put in the URL here so we've got here we've got an ID that we're going to need URL in again you can look at the blog post to get the actual full URL that you need to use so here you can see if we change this to expression we're getting
[12:19] the ID from the Json object from the previous node and you can see here what the actual output is going to be like so for authentication we're going to use already got notion set up and we change this to notion and then we can select
[12:32] our credential that we had previously set up and then lastly we need to send some headers through because that's what the API is expecting so for the notion API they're expecting a notion version header and the value needs to be 2022 06
[12:46] 28 so if we execute this we should get some data back there we go if we scroll some information with Rich text and the I love Nan so now we've got that need to format that Json into something we can send to Twitter so we click back
[13:02] to Canvas and then we're going to add in a node called the code node so I said is the fact you can write your own code which means we can pretty much do anything that we want to do so there's a few options when you have this there's
[13:16] either run once for all items or you can run once for each item in our case we're because we're only ever going to have one item anyway so again I'm going to written earlier and I'll explain what it does so here we're getting the results
[13:29] from that previous node everything that comes in from an Nan node is always in first object from that page and get the Json results we're going to build up a tweet from the information that we have from that Json object so here if we
[13:43] scroll down to paragraph We have this I love Nan and in fact you're going to have like multiple paragraphs of texts potentially that you need to put in so here we're going through each of these results and we're finding the ones where
[13:55] the type is paragraph and then for each of them we're finding that rich text we or anything else we just want the plain and we're adding it in and then we're putting a slash n which is a new line
[14:08] character if we have something that's a paragraphed but it doesn't actually have any text in it we're going to add in just a new line character only if it's not the last bit of text on your cart and then lastly we need to return the
[14:20] Tweet we need to do in a bit of Json so if I execute this you'll see what it comes out as so you can see here we just get tweets and then I love Nan and again have everything is going to be in an array but we're only going to ever have
[14:32] one thing here so for our next step we need to send our tweet to Twitter now Nan has got a node ready that you can use for this but when I try to use it it didn't work so to do this I'm basically using the HTTP request node again which
[14:47] is then going to call Twitter so again we click on plus and we're going to do HTTP make a new HTTP request obviously we need to change this to post because we're going to be posting to Twitter I'm going to change this node name to
[15:01] post to Twitter so we need the URL which I got from the Twitter API documentation and we need to do authentication now as I mentioned at the start of this video that information so if you have it already then you can put it in if you
[15:13] later so here we're going to do General credential type so the auth type we're to select our credential so we can do create new and set up an oauth credential this is where you put all your information in again have a look at
[15:28] the blog post it's got which details you need to put in there so we can click Twitter or auth1 and that's all my Twitter authentication details so obviously we need to send a body here so we click Send body Json is fine and I'm
[15:41] just going to keep the using filter below now Twitter has just one parameter text and then we can just drag and drop our tweet in from here and that's what's going to get sent out so I'm going to click execute node and this is going to
[15:55] send I love Nan to my Twitter account which I'm going to completely once it's out there so if you're following me on Twitter and you happen to be watching at notification Bell on then you might see the I love Nan come up and now you know
[16:08] why so let's click execute node and see what happens great so we can see here that it's sent and we have some data there as well so we have the ID that is well so what I'm going to do is I'm going to pin this which means that we
[16:21] can use it again later without having to rerun this note so if I click back to left so the last thing we want to do is update that notion board so that card moves from ready into published and we can also include some more information
[16:35] onto that card so we know where that tweet is we can then click on the plus again we're going to use the standard notion node again and again we select our credentials we're going to change this to database page and this time our
[16:47] operation is going to be to update so we need to pick an ID here so we're going to go back to get ready tweet and this is the ID of the page and we just drag you can see here we've got node get ready tweet and then Json and then we're
[17:03] some properties that are actually going to update so we click add property and from our notion board so here we want to change the status so the status is going to change to published and we are going to add in a property which is URL so the
[17:19] be different depending on who you are so what we're interested in is on this poster Twitter node so we want this ID so this ID appears in the URL of all your tweets but we need to build up the URL string ourselves so for me my
[17:34] Twitter handle is ax hire Dev so that's what I've got in here please follow me on Twitter but of course yours is going to be a bit different but the format is always going to be https twitter.com your Twitter handle forward slash status
[17:46] and then the ID so you can see here what it's actually going to be when we do it and test that this works great so we've got back output which means it's worked foreign we can see that this card has moved from
[18:01] ready over to published and that's it and now you can experiment with the amount of times that you send it out and you can put as many things into that notion board that notion can handle without having to pay 20 30 40 pounds a
[18:14] month for a Twitter scheduler if you like this video then please like it algorithm that helps this video be seen thank you for watching and I'll see you thank you for watching and I'll see you in the next video




⚡ Saved you 0h 18m reading this? Transcribe any YouTube video for free — no signup needed.