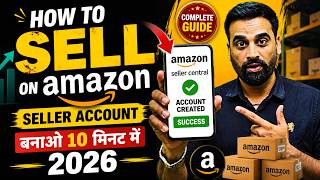

How to Create Amazon Seller Account in 10 Minutes
45sDirectly addresses a high-intent query with a promise of quick results, making it highly clickable and shareable.
▶ Play Clip"Delivers a solid step-by-step tutorial, but padded with repeated requests to like/share and a sales pitch at the end."
This video provides a step-by-step guide on creating an Amazon seller account, aimed at individuals who want to sell products on Amazon and generate revenue. The presenter walks through the entire process, from searching for the Amazon Seller Central website to completing the final registration steps, including GST verification, store setup, shipping preferences, and bank details.
The video is intended for those who want to create an Amazon seller account and earn money by listing products. The presenter introduces himself as an entrepreneur and business owner.
To start, go to Google and search for 'Amazon Seller'. Click on the appropriate link (e.g., Amazon Seller Central India for Indian users).
Click on the 'Start Selling' button to begin the seller account creation process.
A basic Amazon shopping account is required. If you don't have one, click 'Create Your Amazon Account' and fill in your name, mobile number, and password.
Solve a puzzle to verify you're human, then enter the OTP sent to your phone to complete the shopping account creation.
The seller account creation involves five steps: GST number, store name, pickup address, shipping method, and bank details.
Enter your GST number, verify it, upload your GST certificate, and submit the documents.
Enter your store name (auto-filled from GST) and add a pickup address, including pin code and street address.
Choose between Easy Ship (Amazon handles delivery) and Self Ship (you or a third party delivers).
Option to join local shops for faster delivery; can be skipped for now.
Decide whether to pay shipping costs yourself or include delivery charges for customers. Set local and national delivery charges (e.g., ₹49, ₹56, ₹7).
Enter bank details that must be linked to your GST and PAN. This is the last step before dashboard access.
Select GST Standard 18% as the default rate, then click 'Add Products' to complete registration and obtain a seller ID.
Take a screenshot of your seller ID. Click 'Add Product and Start Selling' to access the Seller Central dashboard, where you can manage catalogue, inventory, pricing, and ads.
The presenter concludes by offering a paid service (₹1500) to create seller accounts for viewers and hints at a future video on product listing.
Creating an Amazon seller account involves a straightforward five-step process: GST verification, store setup, pickup address, shipping preferences, and bank details. Once completed, you gain access to the Seller Central dashboard to start listing and selling products.
What is the first step to create an Amazon seller account?
Go to Google and search for 'Amazon Seller', then click on the Amazon Seller Central link.
01:29
What is required before creating a seller account?
A basic Amazon shopping account.
03:05
What are the five steps to create an Amazon seller account?
GST number, store name, pickup address, shipping method, and bank details.
04:52
What is the default GST rate to select?
GST Standard 18%.
11:37
What are the two shipping methods offered by Amazon?
Easy Ship (Amazon delivers) and Self Ship (you or a third party delivers).
07:56
What must bank details be linked to?
GST and PAN.
11:11
Five-Step Process
Clearly outlines the entire seller account creation process in five manageable steps, making it easy to follow.
04:52Shipping Method Options
Explains the difference between Easy Ship and Self Ship, helping sellers choose the right delivery method.
07:56Default GST Rate
Specifies the standard GST rate (18%) that sellers should select, a crucial detail for tax compliance.
11:37Seller ID Importance
Emphasizes saving the seller ID, which is essential for account management and support.
12:22[00:02] video. Look friends, today's video is going to be most important for all those people video is going to be most important for all those people who want to create their seller account on Amazon and
[00:17] and want to generate revenue by listing the products. Look friends, my name is am an entrepreneur. I am a business owner. And today in this video I am going to teach you step by step that brother, how can you also create
[00:32] brother, how can you also create an Amazon seller account in the right way within the next 10 minutes and after creating an Amazon seller account, how can you earn money by listing products there. In this video today, I will
[00:44] In this video today, I will I will guide you step by step through the entire process. So friends, if you too are a person who wants to sell your product on Amazon and
[00:57] earn money from Amazon, then definitely watch the video till the end. I would like to make a request to all of you. If you want to watch more such videos continuously and want to learn with me, then like and share this video. Also, to join me,
[01:10] and share this video. Also, to join me, begin today's video. [Music]
[01:29] create a seller account on Amazon, then first of all you will have to go to Google Baba and here you will have to type Amazon Seller and simply friends, you have to click on the search button. Friends, as soon as you click on the search button, you will have to
[01:43] scroll down a little here. And look here friends, the link will appear in front of you here Amazon seller central.in, so simply friends, what do you have to do ? If you are creating an account from India then you have to
[01:55] click on the Payin link here. If you want to create a dot pe then click on .com or if you are creating it from any other country then So I will click on this link here. Like friends, you will
[02:11] click on this link. Now look here friends, the Amazon website from where you can create your Amazon seller account has opened in front of you here. And look here friends, you can also see the button given to you for start selling.
[02:24] So now if you want to create a seller account on Flipkart and sell your products, then your process starts from here. Now what do you have to do friends, you have to click on the button given for start selling.
[02:38] Like friends, you will click on the start selling button. Now here the process of creating your Amazon seller account starts from here in a way. Friends, let me first clear one thing to you in this video. See, whenever you
[02:52] create an Amazon seller account, friends, here first you should have a basic Amazon account, which we call a shopping account. If you have it, then you can directly login here and
[03:05] through it you can create an Amazon seller account. If you don't have an Amazon shopping account, what do you have to do? Here you will have to click on Create Your Amazon Account. So friends,
[03:20] I am creating this seller account for one of my customers. Friends, if you also want to create an Amazon seller account, then you can call my team. We will create an Amazon seller account for you and give it to you. So I am creating this account for one of my customers.
[03:33] And here I have to start their process from the beginning. So I will click on Create Account and first of all I will
[03:46] account. So what is there to do here? You have to enter the name first. You will have to enter your mobile number and password. So let me fill all these details here friends, here you can see that I have entered the name of the customer here. The
[04:00] phone number has been entered. After that you will have to enter a password. So I have also put the password here. And after that, you have to simply click on the button given for verify phone number. after that, you have to simply click on the button given for verify phone number.
[04:13] button. Now look here friends, a puzzle comes to you from Amazon. So you will have to solve this puzzle to verify whether you are a human or not. So here you are being told to pick the starfish and the
[04:26] option is coming to you. So you might be seeing starfish here. So simply click on this and click on the done button. Then the verification will be completed. After that friends, your OTP will be sent to you. Like friends, you will click on Create Your Amazon
[04:38] Account. Now your Amazon shopping account gets created. And friends, your Amazon shopping account becomes complete. Now look at you, from here the process of creating Amazon seller account starts.
[04:52] So look here friends, you will have to create your Amazon seller account in about five steps. So first of all, here you will have to enter your GST number. So look, I have the
[05:05] GST number of the customer. So I enter the GST number here. So friends, here you can see that this is the GST number of the customer. So let me copy this from here. And here you will have to come and paste GST. Like
[05:18] friends, you will paste GST here, you have to click on Continue to Verify. Like friends, you will click on Verify GST. Now look here friends, you will have to enter your email address and phone number. You have to
[05:31] you will have to enter your email address and phone number. You have to that you can complete your GST verification. So here I enter my email address and phone number once and after that I
[05:45] Friends, as soon as you click on the Continue to Verify button. Now friends, here you can see that the complete details of your GST are available here, which you can verify by checking once. After that, friends, here
[05:59] you will see the option of uploading GST documents. So I click here and whatever GST certificate you have, you will have to upload it here. So friends, I will upload the customer's GST certificate here once.
[06:11] Ok. So friends, here you can see that I have uploaded the GST certificate of the customer here. And after uploading the GST certificate, you have to click on Submit GST Documents.
[06:23] Like friends, you will click on Submit GST Documents. Now see here that your GST verification is still in process. You have to click on Continue Registration. Like friends, you will click on Continue to
[06:36] Registration. Now here your next step opens. In which what do you have to do friends? You will have to enter your store name. So friends, here the store name which is above our GST,
[06:50] see it has been added automatically here. And after that friends, what do you have to do now? after that friends, what do you have to do now? Now friends, the next step is coming to you regarding the pickup address. So
[07:04] enter it here. So look here friends, some pickup addresses are Friends, what I will do is I will click on Add New Address here and here friends, I will add a new pickup address here. So friends, whatever customer
[07:19] 's pickup address I have, I add it here once. If your address here is already matching then you can use the same address here. Otherwise, if your address does not match here, you
[07:31] can also enter a new pickup address here. So here you can see friends that finally I have added the pickup address of the customer. First of all you have to enter the pin code. automatically selected here. And whatever your street address is,
[07:44] area, any building number, you can enter it here at the end. And finally you have to click on the Save and Continue button again. Friends, as soon as you click on the button. Now friends, the next step has
[07:56] opened in front of you. And in this step friends, Amazon is asking you to choose your shipping method. Look friends, Amazon gives you two shipping methods here, in which the first one comes to you as Easy Ship and the second one comes to you as Self Ship. Firstly,
[08:10] by using EGS Ship here, Amazon itself will pick up your item and also deliver it to the customer. If you use EGP. Friends, here you have self ship in which you can send your product to any customer yourself.
[08:24] Any third party company that can pickup your order will take your order and ship it to your customer. So here two options are given to you friends. You can choose any of the two options.
[08:40] So friends, if you do not want to do any delivery here yourself, then you can use Easy Ship here. In this, Amazon will do all your work itself. And after that friends, you have to
[08:54] friends, you will click on the Save and Continue button. Now here you have another option, go to a physical store, join local shops and you will get this option here. Friends, you can use this option for fast delivery. So
[09:08] look here, you have the option of Join Local Shop right now. Here you also have the option of Skip for this for now. If you have a local store from which you are making deliveries etc. then here you can click on Join Local Shops.
[09:22] And if not, then you have to click on the Skip This For Now button given here. So right now my customer does not have any local shop. So let me skip this here. Like friends, here you will click on the skip option
[09:35] button. Now look here friends, you will see the option of shipping fee here. Now friends, you have two types of options in this. friends, you have two types of options in this. Firstly, here you can pay by yourself, in which
[09:48] if you are doing any shipping etc. then you will have to you are doing any shipping etc. then you will have to option you have is to include delivery charges for customers. You also have this option. So
[10:03] see here, if you want to give free delivery to the customer then you can use this method here. Or friends, if you want to add delivery charges for the customer, then you can also use this option here.
[10:17] So friends, look here, now you will have to select how much you will pay in local and how much you have to pay in national delivery charges in the states, you can select it here. So in local, as it has shown here,
[10:31] So in local, as it has shown here, Amazon has ₹49 and ₹56 and here you must be seeing the option of ₹7. So simply you have to enter this and after that click on the Save and Continue button again. Like friends, you will
[10:44] click on the Save and Continue button here. Now look here friends, the last step is opening for you. In which you are being told here that brother, you will have to add your bank details. So friends, whatever bank details of the customer I have,
[10:57] friends, as you add your complete bank details etc. here, your Amazon seller account gets created here and after this your dashboard will open. Before that, let us add the bank details here once. Okay,
[11:11] finally I have also entered the bank details etc. of the customer. And friends, keep one thing in mind here, whatever bank details you enter here should be verified or connected with your GST and PAN. Only then you can enter your GST,
[11:25] sorry, your bank details etc. here. So here I entered the bank details. After that, now you have to click on the Save and Continue button again. Like friends, you will click on the Save and Continue button. Now here another information is being
[11:37] told to you that brother, you will have to select the default GST rates here. So here you have to select GST Standard 18%. And after that friends, now you have to click on Add Products here. Like friends, if you
[11:52] click on Add Products here, your Amazon seller registration gets completed here. Your seller ID is created here. Let me take a look at the seller ID and take a screenshot of it.
[12:06] Look at it this way. Ok? I have taken a screenshot of it and once I download the screenshot here. Ok? Friends, whatever your seller ID is, please take a screenshot of it and download it.
[12:22] And after that, friends, see, here you have to click on the button of Add Product and Start Selling. here you have to click on the button of Add Product and Start Selling. will click on it and see here that our request has been successfully completed.
[12:34] our request has been successfully completed. And after that, see friends, you are seeing the option again here. Click here to add products. Friends, as soon as you click on this, now you
[12:48] can see that your Amazon Seller Central dashboard opens here and now look at the option of listing the product, friends, you will also be able to see this here. Now
[13:02] friends, what can you do here? You can add your products etc. in your Amazon seller account and after that friends, you can start selling your products. Look here, your entire dashboard is for Amazon
[13:15] seller, this is its complete management which includes catalogue, inventory, price, You can manage your advertisements from here. There is growth, there are is performance. You will be able to see all these options in the management menu here.
[13:30] So friends, till here if you have completed your process then your Amazon seller account is ready. Now friends, here you can ready. Now friends, here you can
[13:43] So friends, this was today's video in which I have taught you step by step how you can create an Amazon seller account step by step and correctly in the next 10 minutes. I hope friends, you too must have
[13:55] created your Amazon seller account. If you have any doubt or confusion, please comment. And one more thing I want to share with you. Look, if you are not able to understand how to create an Amazon seller account, then you
[14:08] contact our team. You will find the number in the description. Our team will create your Amazon seller account for you. We have only a small charge of ₹1500 for creating an Amazon seller account. If you want to create an Amazon seller account with our team, then
[14:22] contact our team, make the payment and send us all your details. Our scheme will create your Amazon seller account and give it to you. And apart from this, if you want the video of the listing on Amazon, you can also comment me.
[14:34] also make a video for you on how a product gets listed on Amazon and share it with you. And I hope you enjoyed the video. If you like the video then like and share it. And if you want to connect with me, want to watch more such interesting and knowledgeable videos
[14:49] subscribe to the channel and press the bell icon button. Let's meet with some new information. My heartfelt thanks to all my dear friends for watching today's video completely and supporting and subscribing to me and my channel. supporting and subscribing to me and my channel.


⚡ Saved you 0h 15m reading this? Transcribe any YouTube video for free — no signup needed.