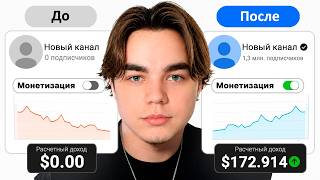

Why 90% of Russian YouTube Channels Fail
43sHigh curiosity gap by highlighting a common problem (phone number requests, channel death) and promising a solution, appealing to a frustrated audience.
▶ Play Clip"Title promises a working method, and the video delivers detailed technical steps, though the content strategy part is a soft sell."
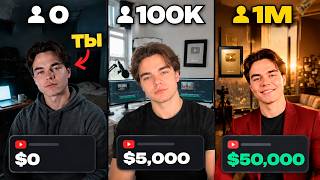
This video provides a step-by-step guide for creating a YouTube channel without requiring a phone number during registration, especially for users in Russia or the CIS. It covers account setup, enabling monetization, and avoiding common pitfalls that cause channels to fail. The key insight is that 90% of channels die before monetization due to poor content strategy, not technical issues.
Users in Russia/CIS face issues with Google asking for a phone number, slow advanced features, or channel death before recommendations.
The video promises a method to create a channel without phone number requests and enable monetization, highlighting that 90% of channels die before monetization.
Turn on VPN to avoid phone number prompts during Google account registration. If it fails, change country or VPN.
Enter any first/last name, date of birth, gender, and username. Use a backup email for recovery. No phone number asked if done correctly.
Enable two-step authentication with a real phone number (not virtual) and Google Authenticator for security and monetization eligibility.
Log into YouTube, go to Creator Studio, set channel name and alias. Create a second brand channel under the same email for transferability.
Set currency (USD), country (US recommended), keywords, and advanced settings. Confirm advanced features using a virtual phone number via SMS-activate or 5sim.net.
Confirm advanced features via a six-second video selfie using QR code on phone. This unlocks A/B testing, more uploads, and monetization application.
90% of channels fail due to lack of content strategy. The creator offers a system with niche databases, script templates, and trigger research via Telegram bot.
Set default title, description, and tags in Video Upload tab. Use universal tags and set access to 'by link' to avoid premature publishing.
Use Resolution tab to invite team members with roles like editor or manager, granting limited access without sharing account credentials.
Add banner, profile photo, description, and email (different from account email). Avoid clickable logo in videos. Set up playlists for sequential viewing.
Creating a YouTube channel without phone number issues is possible with VPN and proper steps, but success depends on content strategy. The creator offers a system to avoid the 90% failure rate by focusing on proven niches and triggers.
What is the main reason 90% of YouTube channels die before monetization?
Lack of content strategy, not technical issues.
10:08
What is the first step to avoid phone number prompts during Google account registration?
Turn on a VPN.
00:43
Why should you use a real phone number for two-step authentication instead of a virtual one?
Virtual numbers can be reused and compromise account security.
02:44
What is the purpose of creating a second brand channel under the same email?
The brand channel can be transferred to another email, useful for selling the account or management.
04:39
Which two services are recommended for purchasing virtual phone numbers to confirm advanced features?
SMS-activate and 5sim.net.
06:32
What does video verification via selfie unlock on YouTube?
Advanced features like A/B testing, increased uploads, and monetization application.
08:09
Why should you avoid adding a clickable logo to your videos?
Viewers may click the logo and exit the video.
14:03
What is the recommended setting for video upload access to avoid accidental publishing?
Set access to 'by link'.
12:08
90% Failure Rate
Reveals that most channels die before monetization due to content strategy, not technical issues.
00:30Two-Step Authentication Importance
Critical for monetization eligibility and account security.
02:32Brand Channel for Transferability
Allows channel transfer to another email, useful for selling or management.
04:39Video Verification Unlocks Features
Enables A/B testing, more uploads, and monetization application.
08:09Content Strategy Over Niche
Emphasizes that adaptation and triggers matter more than niche selection.
10:08[00:01] even if you're in Russia or the CIS and Google constantly asks for a phone number. Just asks for a phone number, or takes a long time to open advanced features, or the channel dies even before the first recommendations. [music] And most
[00:15] going wrong at the very beginning. You've probably heard that in Russia you , monetization doesn't work, and many people get frustrated right at the account registration stage, without even realizing what they're doing wrong. In
[00:30] this video, I'll show you a working method for creating a channel so it doesn't ask for a phone number and you can enable monetization. And finally, I'll explain the key point that causes 90% of such channels to die before they're even monetized. First
[00:43] we need to turn it on. This is essential to ensure that phone number when registering a Google account. Also, if suddenly it does n’t work for you, then I advise you to either change the country or change to another one. After we have turned it on,
[00:56] our task is to go to the browser. I do this in incognito mode so that there is no account, click accept or decline Google account. Next, create an account. Here we enter absolutely any first and last name. Click next. Here we need to
[01:10] enter the date of birth and gender. You can do absolutely anything, but the most [music] Gender: Male. Click next. Also, next we need to enter the username. This is what your mail will look like. I entered optimus
[01:23] 222gmail.com. Click next. This name is already in use. Then I'll introduce something else. Let's say we have a Gmail like this. write it down or remember it so you don’t forget it later. Next we enter the password. After
[01:36] Here we are asked to add a backup email address. This is necessary so that if we suddenly forget our password or want to restore our account, the backup email address we enter here. You can skip this step, but it is
[01:51] better to enter it. So, I entered the email. Click next. Optimus Prime PR 692. Also click next. One- step setup. Here we press accept everywhere. Here I also click confirm. I accept. All. In fact, they didn’t even ask me for my
[02:04] phone number. If you were suddenly asked for a phone number during registration, then I advise you to try in a different browser, and also try in incognito mode. But if even this doesn’t work, then I advise you to simply change the virtual machine. The
[02:17] Holland or just try different countries, and then you should most likely succeed. . All. Once we have created a channel, our task is to
[02:32] we need to enable two-step authentication. Click on it. And phone number. We can easily indicate in Russian. But the most important thing at this
[02:44] use virtual disposable numbers, because in case of numbers, because in case of . Therefore, we make sure to use our phone numbers here.
[02:56] Click next, confirm, save. That 's it, we've confirmed the phone number. We have two-step verification enabled. Now we need to enable Google the authenticator and click "Set up an
[03:08] we will have a QR code. To do this, we need to download the Google Authenticator app, and then scan the QR code in this Google authenticator will be connected to your Google account. I connected Google authenticator
[03:23] account security and to boost the We have fully enabled two-step authentication . This point is important for connecting monetization. Now we move on to YouTube. Once we go to YouTube,
[03:36] we click on the top right corner to log in. Our account is logged in. We click on "YouTube Creator Studio". And here our any name and nickname, because they can be changed later in any case.
[03:49] The alias is what our link will look like. For example, after creating . youtube.com Optimus77. Click create channel. We are being redirected to YouTube's creative studio. Here we
[04:01] click next. And the most important thing that many people forget about or don't even know about is creating another account, this time for a brand. To do this, we click on our account icon in the upper right corner and click change account. But after that
[04:14] we return back to YouTube. And here we need to click on our account icon. After that, change the account. And here press the button to watch all channels. And here we need to create another channel under this mail. Let's
[04:26] create it first, and then I'll explain why. I'll call him Maxim PM. Click create channel. Now, after creating a second account under the brand, we will have two channels under one email. The point is that the first channel we
[04:39] created is completely assigned to this email, and the second channel we are creating will be the main channel for management, because the brand channel can be transferred to another email. This is necessary for selling an account or simply if you
[04:51] . However, if you want to transfer the main channel to another because it is assigned to the main email. And this way you can create a huge number of channels in one mail. But I don't recommend doing this
[05:05] , because if you create, say, 3,510 channels, and then at least one of them gets blocked, then there is a chance that absolutely all channels on this email will be blocked. Now that we have created a channel
[05:17] for hosting, we move on to it. This will be our main channel where we go to YouTube's creative studio, click next and settings. Here we can choose the currency that is most convenient for us. I usually use dollars. After this,
[05:30] need to select the country of residence. In some countries, the ability to So, to be on the safe side, you can simply select the United States. This is the most proven option. In the Keywords tab, you can specify
[05:44] keywords or tags. That is, these are words through which a viewer can potentially find your channel. I'll write, for example, Maxim Prime. Well, and absolutely any other ones related to your channel and the topic in general. After
[05:56] this, go to advanced settings. Here it is important for us to indicate: “No, my channel is ,” even if you film children's Below you can leave everything exactly the same as I have. After that, go
[06:08] to the Feature Availability tab. This tab is one of the most important. First, we need to confirm the advanced features. They are needed to add your own covers, to launch live broadcasts and to upload
[06:20] videos longer than 15 minutes. Here we click confirm phone number. And here, we can confirm using a disposable virtual phone number, because it
[06:32] doesn't affect account security in any way and is only needed once. There are different services and websites for this. The main ones are SMS activate and 5sim.net. I'll show you with an top up your balance. And then we select the service. Here you can click here Google,
[06:48] [music] YouTube. After that, we select the country. Well, I usually use US. Click on USA. Here we choose the operator. I advise you to choose where the percentage is higher. Confirmation. Click on them. That's it
[07:01] , we've purchased the number. We copy this number and paste this number here. But before that, it is very important to select the country from which you are using the number. In my case, it's the USA. United States. I insert the number. I click next.
[07:15] After that, they send an SMS with a six-digit code to this number. We take him, here he came. Copy and paste to confirm. Click "Send". Congratulations, you have verified the advanced features. But what if suddenly
[07:31] no SMS arrives on this virtual phone number ? This happens from time to time. And on the website you will have a button that will say something like "no SMS received." And then your phone number will simply be updated , the money will be returned and
[07:43] until a simple phone number goes through and your account is confirmed. After this, we also come back and see that the we need to enable advanced features. They open up a lot of
[07:57] possibilities. For example, A-testing, that is, testing three covers at once on one video. The number of videos published per day has been increased. And the most important right is to apply for monetization. And here we have three
[08:09] video verification. This is the simplest one. The second is to confirm with a photo or passport. Here, in our case, this is not particularly applicable. Well, and thirdly, as you manage the channel, these functions will be connected automatically. If you
[08:22] suddenly don’t have this here and there is no button to access the functions, it means that you did some step incorrectly. In this case, you have only one option left - simply enter the content stably, and the advanced features
[08:35] will connect automatically. Or create an account and channel again and do absolutely everything the same to confirm it with video footage. It takes a minute at most. To do this, click the button to access functions. Here we select "I'll take a
[08:48] six-second video selfie" and click " Next". Here we can either scan the QR code directly or receive an email. I recommend will appear. To do this, we take the phone in our hands and scan this QR code. But the most
[09:01] important thing is that your phone should also be turned on. It will say that this cannot be done in your country. So , I scanned the QR code. Click , I scanned the QR code. Click accept. That's it, let's log into our account.
[09:21] Click save. Skip. All. video verification. Click I accept. Here we have instructions on how to Click next to allow. That's it, after this we click "Start".
[09:42] video version is being tested. Usually they check there for a maximum of a couple of minutes, dash an my advanced functions were already connected within a minute. This is one of the most important functions, so I highly recommend confirming it right away.
[09:55] If this doesn't work out, then the channel can simply gain a little longer than it would take with advanced features. At this stage, channel created without blocking, without
[10:08] unnecessary risks, and with advanced features. But then comes the point where 90% of people merge. They have a ready-made channel, but they don’t understand what exactly to film on it so that it actually gets views and generates income. That's
[10:21] why people have questions like, "What kind of topic should I shoot? What's trending right now? What if I choose something rubbish and it gets no views at all, and I've wasted my time?" I've been through this myself. That
[10:33] video about niches in my last video, so you don't have to guess and choose blindly. By the way, choose blindly. By the way, via Telegram using the link in the description. And I'll tell you straight away, just in case, niches are
[10:46] important thing is how you adapt it, what format you choose, what triggers you use, and how you build the scripts and presentation. Our focus is not on niches, but on the system. That is,
[10:59] we provide databases, ready-made scenario templates, logic for researching triggers, and a clear profitability, rather than simply launched. That is why this system is called ready-made. Our people don't spend months experimenting, they don't wonder whether they'll get pregnant or not
[11:13] , but rather they follow a proven path. And if anything, you can familiarize yourself with this system in the same bot where you get the list of niches. Well, now let's get back to setting up the channel. After that, go to the Video Upload tab. Here
[11:25] we can enter the title, description and other parameters. This feature gives you the ability to fill in this data in terms of title, description and tags once. And when you publish a video, all the data you entered here will
[11:40] always be automatically entered. I usually never universal description here, one that applies to every video. And the most key thing is tags. You can also write universal
[11:54] channel and your niche. Let's say you can enter half here, and enter the remaining half strictly based on the content of the video. I recommend setting access parameters to access by link so that when you upload a video, it is not accidentally
[12:08] published. And then, once it's fully uploaded, processed to good quality, and checked for content ID and copyright, you can publish it or schedule it for publication, which is even better.
[12:20] After that, click on advanced settings. Here you can select a category YouTube will automatically determine it for you . And we leave everything else the same as I did . Next we go to the Resolution tab. It is needed to
[12:33] assign roles with disabilities to our contractors and team members here. Here we can click the "Invite" button, enter our employee's email and select a role. We usually give the workers,
[12:45] that is, the contractors who create the content, an editor, and the manager. They can view any information, conduct broadcasts, publish videos, but they cannot manage the settings or delete materials and
[12:57] videos, and so on, which is actually very convenient. You can also assign the workers and contractors who create content. And now he can information, manage channel access settings, delete videos, and so
[13:10] on. This means that when you create a team, you don't need to give them access to your account. You can simply give them a role on the account via their email, which is very convenient. And after that, with limited functions, they will manage
[13:22] get huge views and earn huge amounts of money purely thanks to the team that creates content for us. And through this feature, we give them actually makes working with the team a lot easier. Next is the community moderation tab
[13:36] , that is, comments. Here you can add moderators or add words that will be automatically blocked in comments. That's it, click save. After this, we go to channel settings or
[13:50] personalization. Here we can add a banner to our channel, as well as a profile photo. Here we can also change the channel name and change the nickname. We can also add a logo that will be visible in the videos. But I
[14:03] don’t recommend installing it, because it is clickable on its own. When a viewer watches your click on your logo to exit your video, just take my word for it, never put the channel logo, and everything
[14:17] will be clear for you. Here we indicate the channel description, that is, what your channel is about, who you are, and so on. And, accordingly, you can also add email for communication. But make sure that the contact email and the email from your channel account are
[14:30] different in order to completely protect yourself from any hacking. There is also a main tab here, you can enable it. And here it will be convenient for viewers in that when they go to your channel, they will immediately see either a
[14:43] channel trailer or specific videos, which you can customize for them in these widgets. If we leave everything as is, the viewer will simply be recommended the most optimal videos for him, then
[14:55] videos, short videos, and so on. Personally, I advise leaving the first tab and deleting all the others. Click on add section, and here you can add either add a playlist, or several playlists. And here you can select the
[15:08] playlists themselves. This is necessary so that if a viewer visits this playlist, they will not watch just one video, but rather these videos will be played in order. This means that
[15:21] your channel's promotion. In principle, you can customize this You can even make a channel trailer for a specific video and add it here. After that, click publish. The channel is ready. What decides next is not the creation, but
[15:35] what and how you run it. I left a list of books under the video.
⚡ Saved you 0h 15m reading this? Transcribe any YouTube video for free — no signup needed.