
The 70% Volume Rule for Better Mic Audio
37sSimple tweak many don't know that instantly improves audio quality.
▶ Play Clip"Delivers a solid filter setup that improves audio, but 'expensive' and '2026' overpromise slightly; still a worthwhile tutorial."
This tutorial demonstrates how to dramatically improve microphone audio quality in OBS Studio using a series of filters. The process involves adjusting Windows and hardware settings, then adding five specific filters: noise suppression, a three-band equalizer, compressor, expander, and limiter. Proper ordering and threshold calibration are critical for achieving professional-sounding results without clipping or background noise.
Set microphone input volume to 70% in Windows sound settings. On Mac, move slider similarly.
Adjust hardware gain knob so audio peaks in the yellow zone of OBS mixer.
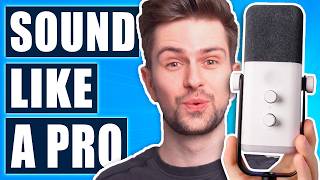
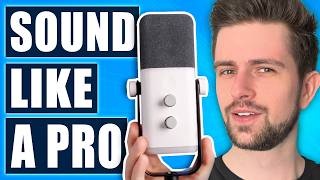
Speak into the correct side of the microphone (e.g., top for FIFINE AM8).
Click speaker icon or go to Advanced Audio Properties to enable monitoring, then set output to headset.
Add noise suppression filter. Use RNNoise for decent PC, Speex otherwise. Adjust slider until background noise is reduced.
Set highs to 0, mids to -3, lows to 1. Adjust mids left for nasally tone, right for fuller sound.
Ratio 3:1, attack 1ms, release 100ms. Set threshold by speaking quietly and moving slider so quiet sounds reach mid-yellow, then shout and adjust so peaks hit top of red without clipping (-23 dB works for presenter).
Ratio 3, attack 1ms, release 100ms. Move threshold right until keyboard taps become inaudible (-50 dB sweet spot).
Set threshold to -3 dB (move slider all right then one click left) to prevent peaking.
Ensure order is: noise suppression, equalizer, compressor, expander, limiter. Adjust equalizer if voice tone needs change.
By following these steps and carefully calibrating each filter, you can achieve high-quality microphone audio in OBS without expensive gear. The key is balancing compression, expansion, and limiting to maintain consistent volume while eliminating noise.
What Windows input volume percentage is recommended for the microphone?
70%
01:02
What are the recommended settings for the three-band equalizer?
Highs: 0, Mids: -3, Lows: 1
02:21
What ratio and attack/release times are suggested for the compressor?
Ratio 3:1, attack 1ms, release 100ms
02:34
How do you set the compressor threshold?
Speak quietly, move threshold until quiet sounds reach mid-yellow; then shout, adjust so peaks hit top of red without clipping.
02:46
What is the purpose of the expander filter in this setup?
To suppress background noise like keyboard taps without affecting speech.
03:27
What is the final limiter threshold setting?
-3 dB
04:05
What is the recommended filter order?
Noise suppression, equalizer, compressor, expander, limiter.
04:30
Windows Volume at 70%
This setting prevents clipping from Windows before filters are applied.
01:02Compressor Threshold Calibration
Specific procedure using quiet and loud speech ensures dynamic range control without distortion.
02:34Expander for Background Noise
Addresses intermittent noises like keyboard taps that noise gates can't handle smoothly.
03:27Limiter at -3 dB
Provides a safety ceiling to prevent digital clipping without affecting normal volume.
04:05[00:01] how to make any microphone sound much better in OBS, but be careful because it's a very specific process and if you miss one of the steps, the whole thing won't work. I will keep the video below 5 minutes, so let's start. The first
[00:13] thing you want to do is go to the settings, then to the audio tab, and that your microphone is selected. I will take the FIFINE mic because they're the sponsor of this video. I'm not going to ramble about it because the video is
[00:25] about OBS, but if you're looking for a microphone, this kit is absolutely amazing. I'm using it right now. We will set up all the filters in OBS Studio for your mic specifically, but if you're looking for one, the AM8T is an amazing
[00:37] option. Hello, hello, test, test. This is what it sounds like. It sounds good by default, but we're going to make it sound much better with specific filters. I will link it in the description. But back to the tutorial, make sure that you
[00:49] see your mixer moving right here. Make sure the volume is set to the maximum. the options and then change it right here. The first thing to do is to go to your Windows sound settings. So, you can go to it like this, more volume
[01:02] settings, and then you want to scroll down until you find your microphone. Click on the arrow, and then scroll down and set your input volume to 70. If you're on Mac, you can also go to your mic settings and then move the slider.
[01:14] And then lastly, if you have a gain knob on your microphone, which the FIFINE AM8 does have, then you want to look at the audio mixer in OBS, and then you want to adjust the gain until you're about in the yellow here. And I need to mention
[01:26] this, make sure you speak correctly into your microphone. Look up the mic how you should speak into it. For the AM8, many people speak into it from the front, but might be doing it wrong for your mic, just check it out. And then now is the
[01:39] time to click on this icon here to enable mic monitoring. If you have an old OBS version, go to options, advanced audio properties, and then turn it on this button, you can't hear yourself, go to the settings, then go to the audio
[01:53] tab, scroll a bit down to advanced monitoring device, and then make sure that you select your headset right here. And then now to add the first filter, filters, click the plus icon on the bottom left, and then just choose noise
[02:06] suppression. Click on okay. If you have a decent PC, all our noise is great, otherwise choose speaks, and then listen to yourself and adjust the slider until sounding weird. The next filter we want to add is a three-band equalizer. Let's
[02:21] click on okay. This slider determines how crisp you sound. This slider studio-like you sound. And this slider good starting point is zero for the highs, minus three for the mids, and
[02:34] then one for the lows. And then after that, it is time to add the compressor filter. This is very important. You set the ratio to three to one, move the threshold slider all the way to the right, set the attack to 1 ms, the
[02:46] release to 100 ms. So, what you should do is talk very quiet, the quietest you would ever talk while recording videos or streaming. And then you want to take move it to the right while looking at your audio mixer until quiet sounds are
[03:01] about reaching the middle or the end of the yellow, the top of the yellow. It different for you. And so, what you want to do now is you want to move the threshold slider to the left while shouting until you reach a point where
[03:14] when you shout, it goes to the top of the red, but it doesn't completely peak. I tested a bit, for me minus 23 seems to work. So, when I talk pretty quiet, my voice is kind of boosted, but when I shout, test, it doesn't peak into the
[03:27] zero. The next filter we're going to add is the expander right here. Let's click three, threshold all the way to the left, attack we set it to 1 ms, release
[03:39] we set it to 100 ms. So, what you want to do is you want to take the threshold some noise in the background like tapping your keyboard, for example. And moving your threshold to the right, and you find a point where the tapping on
[03:53] your desk or your keyboard is not really making noise anymore. So, I will do it making noise anymore. So, I will do it right now.
[04:05] some testing. For me, minus 50 is the sweet spot. It's very mild. For some might be too aggressive. Just test it out yourself. And then we want to click on the plus icon, and we want to choose the limiter. Just click on okay. Move
[04:17] the threshold all the way to the right. Click the down arrow once. Make sure the order for you is the same. If you want to move it, just click on something and if you want to change the tone of your voice, go to the three-band equalizer
[04:30] Moving the mids to the left will probably make you sound more it. If you decide that you don't like your microphone, this AMAT is an amazing option. As you can hear, I will link it in the description. And if this video
[04:44] fully detailed tutorial right there. It's the exact same thing, just with more information and in a slower way. Thank you so much for watching. I appreciate any one of you, and I hope that I will see you in one of my next
[04:57] videos. Have a nice day.



⚡ Saved you 0h 04m reading this? Transcribe any YouTube video for free — no signup needed.