
Free Snap Camera Filter Hack!
45sReveals a workaround for the discontinued Snap Camera app, offering a free solution that viewers will want to try immediately.
▶ Play Clip"Delivers exactly what the title promises: a simple, 8-minute method to create the Burnt Peanut avatar on PC, without Blender."
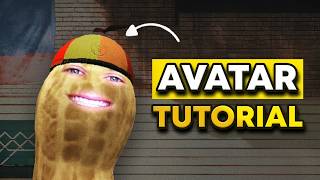
This video provides a straightforward, 8-minute tutorial on recreating the viral Burnt Peanut Snapchat filter on a PC using OBS Studio. The method leverages the discontinued Snap Camera app, a community-created patch to restore its filter library, and a simple chroma key setup in OBS.
The Burnt Peanut filter is popular on TikTok and YouTube Shorts, and many viewers have requested a PC/OBS version. The creator aims to provide the simplest method, avoiding complex Blender or Lens Studio tutorials.
Snap Camera provides access to hundreds of free filters, many with green screen elements, making it ideal for recreating the Burnt Peanut effect. The app was discontinued in 2023, but a community patch restores functionality.
Snap Camera is no longer on official sites. The creator recommends Uptodown as a safe source, but warns to avoid ad-filled download buttons and use the specific 'Download Free' link (163.86 MB).
Run the installer, accept defaults, and note the installation path (C:\Program Files\Snap Inc\Snap Camera). The version should be 1.2.0.
Without a patch, Snap Camera opens to an empty interface with no lenses or filters, rendering it useless.
A GitHub user named Jaku created a patch that reverses Snap Camera's shutdown by patching the executable. The patch tool requires selecting the Snap Camera application file (Snap Camera.exe) and applying the patch.
The patch downloads a new .exe file. Save it to the desktop, then move it to the Snap Camera installation folder, replacing the original file. After this, all filters are restored.
In OBS, add a new 'Video Capture Device' source, name it 'Snap Camera', and select 'Snap Camera' from the device dropdown. The filter will now appear in OBS.
Many filters, including the peanut, have a green screen version. In OBS, add a 'Chroma Key' filter to the Snap Camera source, select green, and adjust as needed. This allows the filter to be layered over other content.
The method allows using any filter in the library. Advanced users can build custom sets with foreground images and background videos. The creator notes that the real Burnt Peanut uses Lens Studio for more complex effects, which may be covered in a future video.
This tutorial delivers a practical, step-by-step method to recreate the Burnt Peanut filter on PC using Snap Camera and OBS, making it accessible to beginners. The key is the community patch that revives the discontinued app, enabling a wide range of creative possibilities.
What app is used to access the Burnt Peanut filter library?
Snap Camera
00:30
Why is Snap Camera not available on official sites?
It was discontinued in 2023.
00:44
What is the recommended safe source to download Snap Camera?
Uptodown
01:00
What is the default installation path for Snap Camera?
C:\Program Files\Snap Inc\Snap Camera
01:55
Who created the patch to restore Snap Camera filters?
A GitHub user named Jaku
02:54
What does the Jaku patch do?
It reverses Snap Camera's shutdown by patching the executable file.
02:54
What type of OBS source is used to add Snap Camera?
Video Capture Device
05:41
What OBS filter is used to remove the green background from Snap Camera filters?
Chroma Key
07:30
What is the file size of the Snap Camera download from Uptodown?
163.86 MB
01:28
What version of Snap Camera is recommended in the tutorial?
1.2.0
01:55
Snap Camera as a Free Filter Library
Provides a simple, free alternative to complex 3D software for creating viral effects.
00:30Community Patch Revives Discontinued App
Demonstrates the power of community-driven solutions to keep software alive.
02:54OBS Integration via Video Capture Device
Shows a straightforward method to bring Snap Camera into OBS for streaming or recording.
05:41Chroma Key for Green Screen Filters
Enables seamless layering of filters over any background, a key technique for content creators.
07:30Advanced Users Use Lens Studio
Reveals the professional workflow behind the Burnt Peanut effect, hinting at more complex possibilities.
08:37[00:03] He's all over Tik Tok. He's all over YouTube shorts. And a ton of people have been asking how to do is [music] burnt peanut Snapchat filter on a PC inside of OBS. The truth is that there are advanced ways to build this inside of
[00:18] Blender and Lens Studio. But instead of a long technical tutorial, I wanted to show you guys the simplest possible method to achieve this. So this won't be like a 30-minute tutorial. It's going to be like an 8minute tutorial. We are
[00:30] using Snap Camera to access a full library of hundreds of filters, all completely free. And most of these filters also have a green screen element to them. So now you can use them just how the burnt peanut uses them. I
[00:44] just be more helpful to newcomers who just love burnt peanut setup. And the actual app Snap Camera was actually discontinued in 2023. So if you were to there would be no filters. you couldn't really use it at all. But there's a
[01:00] of the filters back and I'll walk you through the whole setup using a simple patch. So step one, we are actually going to go in and download Snap Camera. Now you can't find Snap Camera on a ton of a ton of websites now, but Uptoown is
[01:15] the best website that I have found that doesn't have it has a ton of ads on it. Yes, I know. But it doesn't come with any spyware. It doesn't have extra apps you essentially what you're downloading is what you're downloading. Uh so if you
[01:28] scroll down here at the bottom, don't click on any of these download buttons. You'll find the one down here, this screen when it'll say download free 163 uh 86 megabytes and then it will have a little download icon here. You're going
[01:41] to click on that guy. For now, let's just put this on our desktop. I actually going to hit cancel, but you guys can put it wherever you want. Put it on your desktop and hit save. Now, we're going to click on the setup here, and it will
[01:55] open up the Snap Camera setup wizard. We're going to hit next. Oh, by the way, We're going to hit next. Oh, by the way, it should be 1.2.0. download to program file, Snap, Inc. Snap Camera. We're going to I'm actually
[02:08] we're here. We're going to want this address in a second. And hit next. Then hit next. You can choose if you want a desktop shortcut or not. Then hit next again. And hit install. And now this will install on our computer. So if we
[02:25] this, but I'm just going to show you real quick what it looks like. If you don't have the patch built in, Snap Camera is actually going to uh look like this. There are no lenses. There are no filters. There's nothing here. You can't
[02:40] settings, but that's about it. Uh so we're going to hit cancel on this guy. The next step is actually a method that comes from a user named Jaku on GitHub. He's awesome. Go check out his Twitch and I will link it below. Jaku actually
[02:54] created this snap camera. It's a Snapchat reverse u where you can basically reverse snap camera and the shutdown that happened um by basically creating a patch file of the actual
[03:08] executable application. That's a lot of tech jargon to say. He he found a way to what you're going to do is you're going to find snap camera file. This is where we're going to actually choose our application. Uh so the thing that you
[03:22] handy here. So we're going to hit choose file and then if you go up to the top address bar here, you can actually paste where the u the address that we copied a bring you to this folder. I already had it open um but it'll bring you to this
[03:38] whatever reason, it's in this PC. Windows C program files snap inc camera or snap camera. And if you scroll all the way down here to the bottom, you'll
[03:50] see Snap Camera. This is the application. We don't want the uninstall. We want the application. We're going to hit open. And now I know that we downloaded 1.20 rather than 1.21. This will be fine. Just leave it
[04:03] at 1.21 here. And then hit apply patch. This is going to download a new .exe file that we're going to put in that same spot. Um, but sometimes if you try to save this straight to that folder, um, Google
[04:20] Chrome or Windows will be like, "Hey, do you want to do that?" So, I'm going to going to get rid of this little tagline here at the end. Then, I'm going to hit save. So, now what we can do is we can open up File Explorer. And up here, we
[04:34] can actually paste this again. This will bring us back to where we need to paste this guy. And because I saved it to my desktop, if I minimize this, you'll see we now have snap camera up here. I can move this into this folder and then
[04:49] replace the file in this destination. Hit continue. And now the new patched snap camera file is here. If we were to double click on this, you'll see now we actually get all of our filters back. All we had to do was was add this patch.
[05:02] different lenses in here, which we will do in a second. Um, but first what I'm going to do is set my camera up in this guy so you guys can see me inside of Snap Camera. So now you guys can see my
[05:14] camera inside of Snap Camera. I'm going to close this guy behind it. Uh, and we can see all of our lenses are here. Now I can click on any of these guys and start using it immediately. Um, which is kind of cool. Uh, if you tap on the
[05:27] screen, it'll actually give you like different variations. And then we can search in here. If we want like a potato, we can do the potato effect. So, that's cool, but how do we actually get this inside of OBS? Well, let's move on
[05:41] window real quick. And what we're going to do is we are going to add a new source into our scene. We're going to choose a video capture device. We can call it snap camera. Hit okay. In the properties for snap camera, you'll see
[05:54] right now it's on Elgato virtual camera, but if you hit the drop down, you'll see snap camera shows up. So, if we hit that now, my camera pops back up. You can hit okay. And let's drag the snap camera back up to the top here. And now we can
[06:06] go and use our filter. So if I were to show my screen again real quick. So now you guys will be able to see whatever I click on in here. So if I click on that potato again, now I'm inside of OBS and I can turn off my window capture. And
[06:21] now the potato is fully on the screen. Uh if I want to, I can go and actually click on Let me bring this back. I can click anywhere in this window uh right here and it will actually change it to something that you can cut out, add an
[06:35] ultra key to or a a color key or a chroma key to and then um be able to use this filter. Let's choose another one. Let's say we wanted a peanut like the this peanut right here. The lighting on this one I is not the best.
[06:50] [laughter and gasps] It's like a peanut in the dark, but it is a peanut. Uh, and you can click on the peanut and also get an ultra key or a green screen color key. So, if I were to turn this window capture off real quick and then, um,
[07:03] the potato one a lot more. There's also different like versions of the potato. That's kind of cool. That's kind of cool. Um, and then let's turn this window off. Let's turn this to green screen. And then we're going to go into
[07:17] the snap camera. I'll just show you guys what I'm doing real quick. So, what we're wanting to do is we're wanting to add a green screen like color key to our little bit smaller in the corner here. If I go into snap camera and I go to
[07:30] filters, it'll bring up this guy. I can go into the video filters and do a chroma key. And if you just choose green, it will automatically choose a you want it to. If you need to adjust it for whatever reason, you can. Um, but
[07:45] for mine, leaving it around where it was is is probably the best. And then you can make yourself bigger and move yourself around in the scene wherever you want. And that is how [laughter] that is how it's done. That's how you do
[07:59] basically what the burn burnt peanut does. But very very simplistic. Uh very simple. The cool thing about this, like I said, is that you can go in and choose just whatever you want. Like you can go in um any filter here that you want to
[08:12] use, you can use. Some of these are actually pretty good. Uh some of them options that you can mess around with up building cool like little sets like
[08:24] this. If you have a foreground image and a background video or a background ends up looking like this. This is actually a background that we built for John C. Stout. So shout out to him. It's very, very cool. You can build your own
[08:37] actually how Peanut does it. He'll have different layers inside of OBS. and then he'll use Lens Studio rather than Snap Camera, which I will end up probably making a video on how to do every like all of this from scratch. Go pick your
[08:51] there's some other tutorials out there that you can also watch for that, but I figured that a simple simplistic tutorial that gets you the basics and exactly what you need in under 8 minutes would probably be appreciated by some of
[09:04] the people out there. So, if you like this tutorial and you enjoyed it, please And I will see you guys in the next video. video. [music]
⚡ Saved you 0h 09m reading this? Transcribe any YouTube video for free — no signup needed.