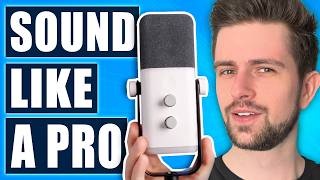

2 Million Views Audio Trick
45sHigh-authority hook with proven step-by-step process promises a dramatic audio upgrade.
▶ Play Clip"Delivers exactly what it promises: a thorough tutorial that can improve mic sound, but the 'expensive' claim is relative and requires effort."
This video provides a step-by-step guide to calibrating and applying audio filters in OBS Studio to make any microphone sound professional. The process covers microphone positioning, gain setting, noise suppression, equalization, dynamic range control, and using virtual audio cables for other applications.
Go to Settings > Audio and add your microphone as the first audio device.
Check the microphone's polar pattern (often top-address) and position it correctly to capture clear audio.
Use the mic's gain dial or Windows sound settings to ensure your voice peaks in the yellow zone (around -12 dB) in OBS mixer.
In advanced audio properties, set the mic to 'Monitor and Output' and choose the correct monitoring device to hear the filtered audio.
Add the noise suppression filter (Speex, RNNoise, or Nvidia) as the first filter to clean background noise before other effects.
Adjust lows, mids, and highs to enhance voice warmth and clarity. Avoid extreme boosts that cause distortion.
Set the expander threshold so quiet speech triggers the microphone but keyboard clicks do not, then adjust output gain to bring quiet speech to normal level.
Set ratio around 3:1, attack 2 ms, release 100 ms, and adjust threshold to limit loud peaks to around -5 dB.
Set the limiter just above -1 dB as a final safety to prevent any clipping.
Use VB-Audio Cable to send OBS-filtered audio to other apps like Discord or games by changing the monitoring device to 'Cable Input'.
By following this exact filter order and calibration steps, anyone can achieve broadcast-quality audio from any microphone using OBS Studio.
What is the correct order of filters in OBS for microphone audio?
Noise suppression first, then equalizer, then expander, then compressor, then limiter.
06:22
What is the purpose of the expander filter?
To reduce background noise when not speaking and to boost quiet speech while keeping keyboard/mouse clicks silent.
11:59
What should you set the input volume/gain to aim for in the OBS mixer?
Your voice should peak in the yellow zone, typically around -12 dB.
02:43
Which noise suppression options are available in OBS (without external plugins)?
Speex (low CPU), RNNoise (AI-based, more CPU), and Nvidia noise removal (requires Nvidia GPU and plugin).
07:07
How do you solve a robotic voice when using VB-Audio Cable?
Set the virtual cable output to mono (1 channel, 24-bit, 48000 Hz) to match OBS's mono output.
20:25
What is the recommended ratio and attack/release times for the compressor?
Ratio around 3:1, attack 2 ms, release 100 ms.
15:03
What is the final fail-safe filter to prevent clipping?
The limiter, set just below 0 dB (e.g., -1.0 dB).
16:33
How do you hear the filtered audio from OBS in other applications like Discord?
Install VB-Audio Cable, set OBS monitoring device to 'Cable Input', then in Discord select 'Cable Output' as the input device.
17:06
Noise suppression order is critical
Noise suppression must be the first filter; otherwise, later filters amplify background noise.
06:22Expander vs noise gate
Expander reduces noise during silence without abruptly cutting off audio, providing smoother transitions.
11:59Compressor levels loud and quiet speech
Compressor automatically reduces loud peaks and boosts quiet passages for consistent volume.
15:03Limiter as safety net
Limiter prevents any accidental clipping from extremely loud sounds, protecting listener ears.
16:33Virtual cable extends OBS filters to any app
VB-Audio Cable allows using OBS's superior filters in Discord, games, or recording software.
17:06[00:02] video or this process I'm about to explain works so well and that my previous video on this got 2 million views, I figured out a very specific step-by-step process that will take your audio and that will calibrate the whole
[00:17] thing to get a really clean, leveled, good sounding output for everyone that watches this video. But it's a step-by-step process. And if you skip messed up. I promise you that the end
[00:30] result will be worth it. So take your microphone. Open OBS Studio and I will explain you step by step how to make your microphone sound super professional. So my microphone is connected to OBS Studio, we can see that
[00:42] the audio mixer is moving already. So when I go to the settings in OBS Studio and then to audio, you will see that right here as the first device I added my microphone and then now I can see it moving right here. Your volume might
[00:56] calibrate the whole thing. But the first step in this process is making sure microphone. You would be surprised how many comments I get of people saying, "I thought this was a redundant step." However, turns out I was using my mic
[01:10] wrong. What you can do is looking up your microphone on Amazon and either as part of one of the pictures. This one here kind of shows that the audio enters from the front, but if you check the video, then at some point they show a
[01:22] really clear visual that shows the mic is recording from the top. And again, because the first time I checked out this mic, I assumed that the buttons were supposed to be aimed towards you and that you speak into the mic like
[01:34] that look like this also work. However, out it records like this. The microphone I'm using for this video is from Fifine and they agreed to sponsor this video if
[01:47] filters and stuff. It doesn't really matter for your use case. You can use your microphone and apply the same filters. Now, I'm using it together with the mic arm that's included in their kit. If you buy one of their mics with
[02:00] an arm included, it's way cheaper for the arm itself instead of buying it separate. I also chose to include this specific model of microphone because I love the RGB ring here. It looks perfect together with my studio. You can change
[02:13] the color. You can also just turn it off. It's a USB and XLR microphone, so monitoring jack if you want to hear yourself live while you're talking change your monitoring volume and then also your microphone volume. And lastly,
[02:29] microphone. Now, depending on when you watch this video, there should be Prime in the description and I will make sure to update the links with any other promo codes like Black Friday at the end of the year and things like that. Now that
[02:43] you found the optimal position for your microphone, we will calibrate everything. And so this step of setting up the input volume or the gain of your mic is crucial before we add all the other effects or we might be working
[02:55] with a lowquality sound from the beginning. There are two things to watch right now to set up the gain of the mic. The first one if you have one is a gain dial on the microphone. A lot of mics have it. This one as well. Yours might
[03:07] not, which is not a problem. And then the second thing is the Windows sound sound settings, more volume settings. And apparently I haven't activated this Windows yet. You want to go to input and then find your microphone and then go to
[03:21] the settings. However, I can't do it since I have to activate Windows, but I think I can go to all sound devices and then input devices, fifth and looking out for is the input volume right here. If you do have a gain dial
[03:34] right here, you want to set this input volume to 100. If you do not have a dial like this, the only thing you can do to increase or decrease this volume, which is what OBS will be working with, is changing this input volume right here.
[03:47] The only thing you're doing when you move it to 100 to anything below that, you want to do is you want to check the audio right here. See, when it's moving, volume, like you would on stream or in a video, then your voice should appear
[04:03] about in the middle of the yellow, not really above it. So mine could use a knob. And as you can see when I do it too much, I will go into the red. And that's not the goal. So I will turn it down a lot. I will keep talking and then
[04:16] increase it. Increase it. Increase it. Increase it a bit more. And yes, I think this right here is about what I'm looking for. And that's what you should gain knob, then you just put this at 100. You start talking. If it goes into
[04:30] the red, you move this to the left. And you keep doing it till your voice is yellow. If you put your Windows volume to 100 and it's still not loud enough, then what you can do is clicking here, going to filters, which is where we will
[04:45] be applying all our filters and that one filter that other people will not have to add, which is the gain filter. And then you can artificially add gain like this and make your microphone louder. Keep in mind that this is a last resort.
[04:57] Don't use it to reduce your volume or just play around with it. do it with the settings. I will just keep it at zero for the rest of the tutorial. So you see the filter, but for me it's not doing anything and probably also not for you.
[05:10] All right, so we nailed the positioning of the microphone. We nailed our gain, our input volume. That means we are ready to add all the filters. And doing that will make sure that our voice will sound warmer, more full. When we talk
[05:22] quiet, it will get boosted. When we shout, it will get pulled back. The background noise will be removed. your keyboard clicks and stuff won't be the last thing we need to do before adding all of these is making sure that
[05:35] you can hear yourself while setting up all these filters. Now, if your microphone has a monitoring jack, don't use that because that will use the source audio from the mic and not the thing that's being sent through OBS. So,
[05:47] that we're about to apply. And so, what you should do to hear your microphone is two things. The first thing, click these three dots, go to advanced audio properties. You will see your mic right here and then you change monitor off to
[06:01] monitor and output and also make sure that track one is selected. Just click possible that you still don't hear yourself which means you need to go to the settings then go to audio and then on the bottom you can see monitoring
[06:15] device and you might need to change this to your specific device that you want to use to hear your mic from. Then the next thing we want to apply is a noise suppression filter. So you click the three dots for your mic filters. Click
[06:29] on the plus icon and then choose noise suppression. Click on okay. And keep in mind that the order of these filters is very important. They go from top to bottom. So currently we are first adding gain in case your microphone wasn't loud
[06:42] suppression. And that's actually wrong. The noise suppression should be the first thing in your filter. So select this and then click on this arrow here to move it to the first position because you want to take your mic audio. then
[06:55] clear it out in terms of noise, make it a clean sound and then add all your effects on top of that because otherwise we are adding our effects that will boost volume at the moments and stuff and then we're also boosting the noise.
[07:07] For the noise suppression, there are I think three options. I can see two right now because this is a pretty new PC and I haven't installed the Nvidia AI uh plugin for OBS Studio. So, if you have an Nvidia GPU, you can download that
[07:20] plugin. Now, make sure you're not downloading the broadcast app. Instead, effects and then you will find download resources. If you scroll down, you will find sound effects right here. And then you can just select your series. Mine is
[07:33] a 4D series GPU. So, I will download this and I will install it. I just installed the plugin. And right now we have speakers which we had before and noise and then Nvidia options right here. You should try all three of them.
[07:46] headphones. The noise removal is really good. Play around with it. Depends on your environment. Just know that in terms of what to select, speaks is the simplest one. If you have a really weak PC, you can barely stream, you should
[07:59] select speaks or nothing, and then play around until your noise is just removed without it affecting your voice. If your PC is decent, but you don't have an Nvidia GPU, you select RN Noise, which is an AI trained model, I read, but it's
[08:12] a very simple model that requires a decent CPU, but not an Nvidia GPU or any advanced things. And then if you have an Nvidia GPU, it's just better to select noise removal. So you should really check what you really need and don't
[08:26] overdo the intensity because the more noise removal you add in any way, the more it will impact the sound of your voice and it will muff your voice if you do it too much. Okay, now you're going to love the next filter. It's the three
[08:38] band equalizer. And this filter will give you three sliders that will allow you to change how your voice sounds. If I boost the lows, then my voice will start to sound very, very bassy. And this is obviously way too much. But if
[08:52] you've ever seen one of these types of curves, which is an EQ curve, this is basically a simplified version of having this whole curve that you can tweak exactly like you want. With these sliders, you will decide how crisp you
[09:05] want your highs to sound. The mids you can usually use to sound a bit more broadcasty. Like if you do it too much to the right, which you usually never really do, you will sound hollow like you're in a big room. So usually the
[09:17] mids are pulled down a bit and then the lows. This usually heavily depends on your own voice. If you think that your voice is way too deep and you want to get rid of that, you can reduce the lows a bit and you will sound more clear in
[09:30] general and the heavy lows, the bases will be gone a bit. However, if you think your voice is way too thin or you like the really warm boommy broadcast sound, then you can increase the lows a bit. But again, it heavily depends on
[09:43] your own voice. Also, definitely or maybe even more your microphone. For example, the Fifine AM8. I've heard that the highs are pretty crisp with this microphone. There are other mics that sound really bassy and low, and there's
[09:56] not much crispiness in the high ends. And with those mics, you might want to microphone, I would even say I want to reduce it. Hello. Test test test. Okay, that's good. So, this is not changing the mids. This is the mids minus three.
[10:10] Okay, I'll say minus two. And this is not changing the lows. Let's do it a lot. Test test. That definitely sounds broadcasty. Like, this is too much. Two might be fine if you like this kind of sound. Let's try minus one. Test test
[10:24] one. Test test. I've decided on this right here for this specific microphone. If you're getting the same one, the 59M8 from the sponsor of this video, I think this sounds pretty good. And these are also general adjustments. The highs, you
[10:38] can always disable one of these effects. Test test without effects. Test test difference is not that much. You probably hear it yourself. But that's also the goal with this threeband equalizer. You don't want to completely
[10:53] change your whole sound. you just want to change it a bit so that it sounds a bit better and it fits your voice or your microphone a bit more. All right. Now, the next filters are the most important ones of this video and they
[11:05] require a bit of introduction. It's the compressor and the expander. And both of these filters will work together to level your voice, meaning that when you talk really quiet, your voice will be boosted. So, it's the same volume, the
[11:19] normal volume. And when you shout, your voice will be pulled down. So you always stay within a specific range. We will try so that your voice is between minus 10 and minus5. Whether you're whispering or shouting, these filters will make you
[11:33] always the same. And on top of that, when you're typing on your keyboard, for talking, your microphone will not trigger. That's something that the filters will also do. So from the moment you talk, which is way louder than any
[11:46] other sounds around you on the desk, then your microphone will say, "Okay, that's a loud volume. That's the voice. we need to start recording and then the But if you don't talk, then your keyboard clicks in the background when
[11:59] you stop talking. They will just go away because the microphone will stop activating or recording. The first of the two effects that we're going to add is the expander. And while this filter might look complicated, it's actually
[12:12] very simple to set up. Just move this threshold completely to the left. And I will move the window a bit because looking at the audio mixer is extremely filter. You don't necessarily need to
[12:24] listen to it if it's confusing. You just need to talk and then look at this audio mixer to just calibrate this filter. So we will have two steps. The first one is threshold setting and then secondly we will adjust the output gain so that our
[12:38] then right now what you want to do to perfect position is you want to talk the quietest that you would ever talk on stream. There could be moments where you're gaming and you're saying, "My
[12:51] want these quiet things to be heard by the stream. Then that is the volume you need to use to calibrate this mic because we want to find the point in this threshold here where these quiet sounds are triggering the microphone or
[13:05] loud enough to trigger. but while simultaneously when you're tapping on your keyboard or clicking your mouse will not trigger the microphone because it's going to be too quiet. The easiest thing to do is to spam three keys and
[13:17] while doing that you will move this threshold slider to the right while want to find the point where the audio mixer is basically not moving anymore will do it live right now and you will see the effect.
[13:37] that on stream. It's being pushed down heavily. And then now the real test is I need to talk very quiet and hope that it will still trigger the microphone. Okay, this is a test. Okay, it's definitely being triggered, which is normal. This
[13:51] right here is way louder even when I talk quiet than my keyboard behind the microphone. Okay, so I did a tiny bit more tweaking and I found out that minus 25 is actually a great setting for my use
[14:04] case. Even when I'm tapping my desk now or I'm heavily typing the keyboard, it I talk very quiet, it is still triggering it.
[14:21] find this perfect balance is that you need to change the output gain. Because as you can see, even our normal talking now is reduced here to minus20 dB cuz the filter is generally pushing down everything a bit. And so what you need
[14:34] quiet. And then you want to boost this output gain. You want to move it to the right till you're again reaching about right here. So I will talk quiet right now. It is very much to the left. I will increase the output gain more and more
[14:48] while talking at the same volume. Very quiet. And right now it is definitely boosted. Let's listen to this. Okay, even a bit too much, I think. Let's move it to like uh 13 maybe. So, my very quiet sounds are still reaching into the
[15:02] will peak the microphone. And that's where the next filter comes in, the compressor, because this will take our very loud sounds and then pull them because we did a lot of calibrating already with the expander. Let's
[15:16] definitely change this ratio. 10 is way too much. Let's reduce it to three. This to be. And since we're talking in various volumes, we don't want it to be like, okay, this is too loud. Let's cut it off minus 10 dB. We want it to be
[15:31] gradual. We're going to set the release to 100 milliseconds. The attack 6 milliseconds. Let's move this to 2 milliseconds. And now, the only thing we need to find the perfect position for is a threshold slider again, but now we're
[15:43] want to do now is very simple. You want to shout into your mic and then you want to move the threshold to the left till you see that when you shout it's not peeking here into the red anymore and maybe your shouts are moving to like -2
[15:57] minus one. Let's move it for example to minus 20 and check now. Hey, I can't even make it go past this here which is like minus 8. So let's try min -5 maybe. Definitely make sure you have some room here on the right. There is no way I can
[16:13] make the speaker. I will type my keyboard to see if it triggers. Nope. Then when I talk very quiet, it is still very loud. Then this is normal volume. And then when I shout, hey, you can hear me shouting, but it's just not extremely
[16:26] because your viewers can adjust their volume and you will always be about the same volume for them. Okay. Now, the last filter that we need to add is one that acts like a fail safe, which is the limiter. What you should do is you
[16:39] should set this completely to the right, then press this down arrow once. If you shout extremely loud and it still pushes through, at that point the limiter will just cut everything off. So basically with all these filters, your audio will
[16:52] never surprise people in terms of volume. So as I promised in the effects anywhere else. You do have to keep OBS Studio opened on your PC, but it's not a big deal. You just open it, you minimize it, and you're done. By the
[17:06] way, I hate asking for it, and I usually never do, but subscribing still really helps. If you found this video valuable, definitely subscribe. If you want to use these effects in another program, you go to Google and you search VB audio cable.
[17:19] On top, make sure you are at virtual audio cable and that you download it right here. Inside you can find the setup and then usually you have to settings on the right, then you go to audio and then on the bottom you will
[17:33] change your monitoring device. So basically how this works, it's literally a virtual cable that has an input and an output. And we can use this virtual cable to connect OBS audio to another program. And the way we do this is we
[17:45] use the monitoring device. Instead of sending it to your headphones, you will send this microphone audio source to the cable. So under monitoring device, you click the drop down and then you find cable in. You go to advanced audio
[17:58] properties. Make sure that your audio monitoring is enabled. Then you can connecting it to a program, I'll tell you exactly how the whole thing works. So your microphone is recording your voice. It sends your audio to your PC.
[18:13] And how you accept this in OBS is right here in the audio tab. You select your microphone right here. So that's the clean audio without any effects. It arrives in OBS Studio and it arrives right here. But then before the audio is
[18:25] being sent to your stream or sent anywhere else, OBS is applying any filters that you select right here. Then after all of these effects are applied, then you see the result right here in the audio mixer. And then after this,
[18:38] OBS decides what to do with it. And you can see this in the advanced audio properties. Right here is the end result of the 5M8 after the filters are being applied. And so here you can select to turn this audio monitoring off, which
[18:52] means that your microphone will only go to OBS Studio to your stream. And if you select track one here or track two or any of these tracks then if those tracks are selected for your stream or for your recording then it will be actually
[19:06] recorded and sent there. The other option is monitor only mute output and this means that the audio is being sent to your monitoring device. So in the beginning we selected our headsets to monitor our audio. Now, we changed it to
[19:19] the audio cable because we want the audio monitoring to go to that cable so we can plug it into Discord or your game. Or if you select this one right here, you do monitor and output, which means that it will go to OBS Studio,
[19:33] which is the output, and it will also go to your monitoring device. And this is what many people use because if you select this, then our audio with all our filters applied will go to the output, so to OBS, to anything you do right
[19:45] here. And it will also go to the monitoring device which is what you selected in the audio at the bottom here as the monitoring device. So our monitor source goes to the input of the cable. And so now you can go to any program.
[19:58] For example, here in Discord I see it selected my Fifine microphone. However, I can also select cable output VB audio virtual cable. Let's check right here and I'm talking. You will see that this is the microphone that is coming here
[20:11] from OBS Studio. And so this is how the whole flow works. You can do the same in microphone like anywhere else, you can now use this output of the cable. Now, if you have problems with your voice sounding robotic, there is one thing you
[20:25] because the reason could be that in OBS Studio, you see here the sample rate is 48 kHz, but the channel is mono instead of stereo. And by default, the virtual cable output is stereo, which means it outputs two tracks. However, OBS is only
[20:41] sending one. And it's possible that the splitting of those introduces a tiny delay which might unsync the audio and make you sound robotic. So how to fix that is very easy. You just go here to your audio settings. You go to more
[20:53] volume settings and then I will scroll down and click on all sound devices and change because this takes what it gets from OBS which is mono one channel. However, the output that you can change right there you see that it's two
[21:08] channel 24bit 48,000 htz. However, you will scroll up and you will look for one channel 24bit 48,000 htz. And so setting it to this will make sure that it's exactly the same settings from your mic to OBS to the virtual cable to Discord.
[21:24] And there's a big possibility that this will fix your robotic voice. Now, this was a big explanation. Again, if you enjoyed it, definitely subscribe. It really helps for the algorithm. Also, my mouse pads came out a while ago,
[21:37] The link will also be in the description. I am using the wallpaper of the mouse pad right there. I think all the wallpapers look super clean in Definitely check that out. Also, I really love the microphone. They were
[21:51] the sponsor, but the Fifine M8. I like the looks of it. I think the RGB got turned off. Oops. Looks much better now with this background. Thanks a lot for watching, and I hope that I will see you in the next video. Have a nice day.



⚡ Saved you 0h 22m reading this? Transcribe any YouTube video for free — no signup needed.