This ONE interrupt can save your M+ run
58sHigh-stakes mechanics that require coordination, relatable for M+ players.
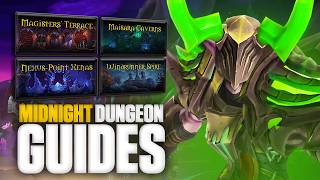
▶ Play ClipThis video provides a comprehensive guide to the four new dungeons in Midnight Season 1 for Mythic Plus: Magisters' Terrace, My Saurids' Caverns, Nexus-Point Zenith, and Windrunner Spire. It covers boss mechanics, important trash packs, defensive usage, and healing cooldowns.
Arcane Magisters cast Polymorph that must be interrupted. Arcane Sentries use Arcane Beam (channeled laser), Ethereal Shackles (tank buster), and Crowd Dispersal (knockback).
Tome provides 5% haste for 30 minutes. Avoid librarians. Pyromancers cast Ignition (permanent rot) and Pyroblasts (one-shots).
Arcanotron Custos uses knockback and energy drain phase. Collect orbs to reduce damage, use immunities. Intermission every 50 seconds.
Suppression Zone silences players. Runic Mark dot removed by stepping into zone, but causes group damage. Wave of Silence one-shots outside zone.
Void Terrors cast Terror Wave (mass fear). Shadow Rift Void Callers spawn adds and AoE damage. Devouring Tyrants have heal absorb tank buster.
Gemellus triplicates twice. Players must remove absorb shields by touching their assigned jellyfish. Avoid being pulled in.
De Jentrius requires splitting group into four quadrants to soak Unstable Void Essence. Tank must take over if a player dies. Disperse tank buster dot carefully.
First pull includes head hunters, elephant (roar), berserkers. AoE CC and interrupts needed. Elephant is priority target.
Free eight prisoners. Soup in huts gives 3% leech and avoidance. Skip hexbound guardians. Bears require kiting. Ritual hexers hex, dread soul eaters throw frogs.
Murkidan and Nekrax must die simultaneously. Murkidan throws freezing traps and knockbacks. Nekrax uses AoE disease and charge (negate with trap).
Undead adds: grim skirmishers (purgeable shield), restless gnarlwood (AoE melee), restless warriors (dread slash, reanimate), tormented shades (spirit realm).
Rokzal has purple avenger and ritual sacrifice (place player on altar). Can be immune or dispelled with root removal.
Bound defenders have AoE melee, reflecting funnel, tornadoes. Avoid souls (root) and bats (AoE silence). Hollow soul render casts frost nova.
Fordragon: Rest Phantoms require ghosts to touch. After even casts, boss jumps to middle for AoE. Break shield to end intermission. Avoid Unmake frontal.
Skip section before mini boss. Mini boss throws orbs that knock off bridge. Final boss Rock Tool uses Crush Soul (totems), Spirit Breaker (knockback), and Soul Rending Roar intermission.
First pull has scrounders (jump to other mobs), shadow guard defenders (armor decrease), arcanists (transference), lingering images (tank buster).
Circuit seers empower barrels to explode—kill barrel ASAP. Flux engineers drop debuff that damages when moving. Don't cross lasers (rogues/engineers can disable).
Core Right Kaz'raj uses Lay Line Array (remove with Reflux Charge), Flux Collapse (circles), and 100-energy ball (knockback, heal absorb).
Void wing: kill smudges to prevent dreadflails from waking. Grand nullifiers (nullify), cursed void callers (creeping void on death), null sentinels (dread bellow).
Core Warden Nassarian spawns after three waves. Uses eclipsing step, null vanguard. 300% damage amp phase 30 seconds in. Stand in light scar flare for buff.
Light wing: light rods spam bolts and debuffs. Bats explode on death. Swarms of bugs fixate players. Wraith Scene boss identified by no horns.
First pull includes restless stirs (spirit bolts, dispel debuffs), dutiful groundskeepers (sheer armor), spellguard magus (arcane salvo, 99% damage reduction at 50%).
Territorial Dragonhawks use fire spit channel (hard stop needed). Arachne/crab section with poison sprays. Mini boss Apex legs has tank buster and leap.
Emberdon uses flaming updraft (bait tornadoes to edge) and burning gale intermission (use defensives). Tank buster searing beak leaves dot.
Wind runner soldiers (precise cut), ardent cutthroats (poison blades), devoted warbringers (pulsing shriek), flesh behemoth (fetid spew, tank buster).
Callous and Latches must die simultaneously. Use Latches' hook to interrupt Callous' debilitating shriek. Latches uses splattering spew and bone hack.
Swiftshot archers (small circles), chokewheel riders (break rank charge), spectral axe throwers (bleeds), phantasmal mystics (chain lightning), lingering marauders (beyblade).
Commander Kro'lok uses reckless leaps (furthest player), intimidating shout (stand near another player). Intermission at 66% and 33% health with adds.
Restless Heart uses Squall Leap dot (remove by touching arrow), Bull's Eye Wind Blast (use arrow to get over wave), Arrow Rain (aim at wall), tank buster with knockback.
"The title accurately describes the content as a comprehensive guide to the four new dungeons for Mythic Plus in Midnight Season 1."
What spell do Arcane Magisters cast that must be interrupted?
Polymorph
0:34
What buff does the tome in the library maze provide?
5% haste for 30 minutes
0:59
What two dangerous abilities do pyromancers use?
Ignition (permanent rot) and Pyroblasts (one-shots)
1:16
What is the name of the ground effect that silences players on Saranal Sunslash?
Suppression Zone
2:58
What ability do void terrors cast that almost always leads to a wipe if it resolves?
Terror Wave (mass fear)
3:29
What is the key mechanic for the first boss duo in My Saurids' Caverns?
They must be killed at the same time.
7:32
What ability do arcanists in Nexus-Point Zenith use to redirect healing to themselves?
Transference
11:34
How do you deal with the empowered barrel from circuit seers?
Kill the barrel ASAP.
12:19
How do you identify the real boss during the Wraith Scene intermission?
The one without horns.
16:41
How do you stop Callous' debilitating shriek in Windrunner Spire?
Use Latches' hook to hit her.
19:55
Interrupt Polymorph from Arcane Magisters
This is a critical mechanic that can wipe the group if not handled immediately.
0:34Suppression Zone mechanics on Saranal Sunslash
Understanding this mechanic is essential for surviving the boss fight.
2:58Void Terrors' Terror Wave
This mass fear is a wipe mechanic that must be interrupted or CC'd.
3:29Synchronized kill on first boss duo
Both bosses must die at the same time, requiring coordinated DPS.
7:32Transference from Arcanists
This ability redirects healing, making it a high-priority interrupt.
11:34Identifying the real Wraith Scene boss
The boss is the only image without horns, a key visual cue.
16:41Using Latches' hook to stop Callous' shriek
This is a unique intermission mechanic that requires precise positioning.
19:55[00:00] With the first season of Midnight just
[00:01] one week away, now is the perfect time
[00:03] to learn the mechanics of each dungeon
[00:05] to get a head start for when Mythic Plus
[00:06] releases. In this video, I will be going
[00:08] over bosses, important trash, when to
[00:10] use defensives, healing cooldowns, and
[00:12] generally what packs to pull and avoid.
[00:14] I go over the four new dungeons that
[00:16] will be a part of the rotation in season
[00:17] one, those being Magisters' Terrace, My
[00:20] Saurids' Caverns, Nexus-Point Zenith,
[00:22] and Windrunner's Spire.
[00:24] Starting off with Magisters' Terrace, we
[00:26] have a nifty new dungeon based in
[00:27] Silvermoon City. The first pull in
[00:29] Terrace notably has two Arcane
[00:31] Magisters, which are adds that reoccur
[00:33] throughout the whole dungeon. Magisters
[00:34] will cast Polymorph on a random target.
[00:36] So, this needs to be interrupted and
[00:38] focused down, or the dungeon might be
[00:39] over before it begins. You'll also be
[00:41] facing an Arcane Sentry, which will cast
[00:43] three notable spells. Arcane Beam is a
[00:46] channeled laser that will follow the
[00:47] target player and leave behind pools.
[00:49] Ethereal Shackles is a channeled tank
[00:51] buster that also roots. And lastly, they
[00:53] have Crowd Dispersal, which is a
[00:54] knockback which I'll talk about later.
[00:57] In the library maze, there is a tome
[00:59] that provides the group 5% haste for 30
[01:01] minutes. So, make sure to pick that up
[01:03] since it should last the whole dungeon,
[01:04] hopefully. Avoid librarians, which is
[01:06] just good advice in general, and make
[01:08] your way to the first of many
[01:09] pyromancers. Try not to pull this guy
[01:11] until the full group is through the maze
[01:13] and until all the animated codex are
[01:14] killed. These adds will cast ignition, a
[01:17] permanent rot damage dot, while also
[01:18] throwing out pyroblasts that are one
[01:20] shots. So, make sure not to miss these
[01:22] kicks.
[01:23] In this next area, be hyper aware that
[01:25] there are more Arcane Sentries that will
[01:26] use Crowd Dispersal, which like I said,
[01:28] knocks players back a fair amount, and
[01:30] you can accidentally back pull if not
[01:31] careful. Additionally, Sunblade
[01:33] Enforcers will gain Arcane Blade,
[01:35] dealing massive tank damage that should
[01:36] be purged if possible.
[01:39] Before Arcanotron Custos, the first
[01:41] boss, there are these Spellwoven
[01:43] Familiars that burst on death,
[01:44] increasing damage of nearby enemies and
[01:46] dealing AoE damage. This is especially
[01:48] dangerous with the nearby pyromancers.
[01:51] Speaking of Arcanotron Custos, we are
[01:53] now onto the first boss. He will cast
[01:55] the same knockback as the Sentries, but
[01:57] also leave a pool of arcane damage. Make
[02:00] sure to tank him in a corner to spread
[02:01] as little of this as possible. This also
[02:03] allows you to negate the tank buster
[02:04] knockback. He starts at 100 energy that
[02:07] drains until it hits zero, at which
[02:08] point he will stand still sucking orbs
[02:10] closer to him which deal massive AoE
[02:11] damage if he touches them. Collecting
[02:13] orbs will do increasingly more damage,
[02:15] so use immunities and defensives to grab
[02:17] as many as possible without offing
[02:18] yourself by accident. Collecting these
[02:20] orbs will also drop small pools, so be
[02:22] aware of crowding the area too much.
[02:24] During this intermission, the boss takes
[02:26] 20% more damage and the first
[02:27] intermission happens about 50 seconds
[02:29] into the fight and every 50 seconds
[02:31] afterwards, so plan cool downs
[02:32] accordingly.
[02:34] The section after the first boss notably
[02:36] has a new add, rune spellbreakers, which
[02:38] will cast a cleave frontal that easily
[02:40] topples DPS or healers, so be careful
[02:42] not to get hit by this and tanks try and
[02:44] face them towards the wall. They also
[02:45] leave nasty dots from runic cleave which
[02:47] does a little bit of splash damage, so
[02:49] pre-spread a bit. After going through a
[02:51] few familiar faces, you're on to Saranal
[02:54] Sunslash, the second boss. The mechanics
[02:56] of this boss mainly revolve around
[02:58] suppression zone, an AMZ looking ground
[03:00] effect that silences players within. Two
[03:02] players will be hit with runic mark and
[03:04] need to remove this dot by stepping into
[03:06] the zone. When removed, it will deal
[03:08] massive group-wide damage, so they
[03:10] should be staggered. Wave of silence is
[03:12] a long cast that will one-shot players
[03:14] outside of the suppression zone when it
[03:15] resolves, so make sure to be in the zone
[03:17] a few moments before the cast goes off.
[03:19] After this boss, channel the table above
[03:21] him and start making your way back
[03:22] through the dungeon.
[03:24] The second half of the dungeon
[03:25] introduces entirely new add packs with
[03:27] the most notable enemy being void
[03:29] terrors who will cast terror wave, a
[03:31] mass fear that will almost always lead
[03:33] to a wipe if it resolves.
[03:35] No, no, no, no, no, no, no. Wait, wait,
[03:37] wait wait.
[03:38] Wait, wait, wait, [screaming] wait,
[03:39] wait. They also put out consuming void
[03:41] debuffs. These guys are prio CC, kick,
[03:44] and kill targets. Shadow rift void
[03:46] callers will spawn adds and deal massive
[03:48] AoE damage with consuming shadows. This
[03:50] ability can be LoS'd, so if you want,
[03:52] you can take him in a corner so your
[03:53] group can hide.
[03:55] The last big add in this area is the
[03:56] Devouring Tyrants, which have a massive
[03:58] heal absorb tank buster. They also throw
[04:00] out void bombs that deal AoE damage
[04:02] around chosen players, so keep a safe
[04:03] distance from friends. Once clearing the
[04:05] room, Gemellus will appear. This
[04:07] oversized jellyfish will triplicate
[04:09] twice throughout the fight. Once in the
[04:11] three targets at the beginning of the
[04:12] fight, and again at 50% health to five
[04:15] targets. These adds will occasionally
[04:17] put on a massive absorb shield that need
[04:19] to be removed by the players with
[04:20] Norgannon's link. Each player is tied to
[04:22] one specific jelly indicated by a red
[04:24] arrow on the floor. Move over to your
[04:26] indicated jellyfish and touch them ASAP.
[04:28] Usually not good advice.
[04:30] The jellyfish will also attempt to pull
[04:31] players in, but there's no indication
[04:33] which jellyfish will target you, so try
[04:35] not to be too close to any of them.
[04:37] Headed into the final section, we have a
[04:39] nasty pull with two void callers before
[04:41] the final boss. Try and mark one to
[04:43] focus down to reduce the AoE damage.
[04:45] Degenerate, I mean, De Jentrius is the
[04:48] final and most punishing boss of the
[04:49] dungeon. The room is sectioned off into
[04:51] four quadrants. It's important to have a
[04:53] DPS in each of three sections and a tank
[04:55] and healer in the fourth. Splitting the
[04:57] group up is crucial for dealing with the
[04:59] main mechanic, Unstable Void Essence,
[05:01] which bounces from zone to zone and
[05:03] needs to be soaked by the player in that
[05:04] area before it drops. Basically, a
[05:06] volleyball fight. This boss requires a
[05:09] lot of personal responsibility, and if
[05:10] someone dies, it is absolutely necessary
[05:13] for the tank to take over that player's
[05:14] section to continue soaking.
[05:16] Additionally, players will spew out
[05:18] entropy orbs in the indicated direction.
[05:20] So, it's important to try not to snipe
[05:22] someone who's soaking. If you do get hit
[05:24] by an orb, it's okay. It's much more
[05:26] important to not miss the soak. Lastly,
[05:28] the tank will receive a nasty dot
[05:30] through the tank buster, Hulking
[05:31] Fragment, which needs to be dispelled.
[05:33] But, since it drops area denial, wait
[05:35] until the tank backs up a bit before
[05:37] dispelling them.
[05:39] Next up, we have My'sara's Caverns, and
[05:41] let me tell you, they really did not
[05:42] hold back with enemy diversity. There
[05:44] are so many different types of mobs, and
[05:46] right off the bat, we of course have a
[05:48] big lust pull. This first pull is wildly
[05:51] chaotic, and things can often get out of
[05:52] hand super quickly. There are head
[05:54] hunters disengaging to cast hook snare
[05:56] and throw spear, and an elephant who
[05:58] casts roar, a massive AoE damage button
[06:00] that also interrupts and silences
[06:01] casters. Additionally, berserkers will
[06:04] of course, well, berserk, dealing lots
[06:06] of tank damage, which is a good soothe
[06:08] target. AoE CC, stuns, interrupts, and
[06:11] grips are absolutely needed here, and
[06:13] the elephant should be your main prior
[06:15] target.
[06:16] From this first pull, you can either go
[06:17] left or right, with the main goal of
[06:19] freeing eight of the prisoners on your
[06:20] way to the first boss.
[06:22] Both paths have the same adds just with
[06:24] different layouts. Notably, there are
[06:26] hexbound eagles with a channeled frontal
[06:27] and shredding talons, so make sure not
[06:29] to stand in this. This visual is not
[06:31] easy to see, so look out for the cast
[06:33] and channel bar to help locate the bird.
[06:35] Regardless of which side you or your
[06:36] tank chooses to go, I recommend
[06:38] incorporating these huts in the route.
[06:40] Inside, there is soup, which each player
[06:42] can drink for 3% leech and avoidance.
[06:44] Nice. Likewise, each side has a hexbound
[06:46] guardian, which I would recommend
[06:47] skipping. They cast magma surge, which
[06:50] blasts a fiery beam towards a player and
[06:52] anyone in between. They also have an
[06:53] aura which blasts out damage constantly,
[06:56] and a dispel.
[06:58] Bears here will stack damage on the
[07:00] tank, so kiting will definitely be
[07:01] required at higher levels. Oh, kite
[07:03] tanking, when will you ever go away?
[07:06] Ritual hexers have, well, a hex cast.
[07:09] Hexers hex, berserkers berserk, makes
[07:11] sense. Umbral shadowbinders are another
[07:13] caster. Didn't they say they were going
[07:14] to be less casters? Anyways, these guys
[07:17] channel shrink onto a player who will
[07:19] get crushed if stepped on by another
[07:20] party member. Lastly, there are dread
[07:22] soul eaters that will throw out frogs.
[07:24] That's right, frogs, that need to be
[07:25] avoided. Finally, after going through a
[07:28] Super Smash Bros. roster of characters,
[07:30] we roll on to our first boss. This duo
[07:32] does not share health and must be killed
[07:34] at the same time. Murkidan will throw
[07:36] out freezing traps at players, so dodge
[07:37] these. He will also cast a frontal
[07:39] targeted at player, so isolate whoever
[07:41] is targeted. Murkidan will also
[07:43] disengage and knock back the tank, so
[07:45] make sure not to get hit into a freezing
[07:46] trap. His bird bud, Nekrax, will throw
[07:49] out AoE disease rot damage. Nekrax will
[07:51] also cast carrion sweep, in which he
[07:53] will charge at a player and knock them
[07:54] comically high into the air.
[08:04] The main target of this ability can step
[08:06] into a freezing trap to negate the hit
[08:07] and stun the big dumb bird. Remember all
[08:09] those ads we learned about in the first
[08:11] section? Forget about them. We have an
[08:13] entirely new set of undead ads after the
[08:15] first boss. Grim skirmishers have a
[08:17] purgeable shield worth half of their
[08:19] health, but be careful with mass dispel
[08:20] as they do do group-wide damage when
[08:22] depleted. Restless gnarlwood does AoE
[08:25] damage on each melee hit and has a tank
[08:27] buster. Restless warriors will stack
[08:29] dread slash and will attempt to
[08:30] reanimate upon death, which needs to be
[08:32] interrupted. This area is super
[08:34] dangerous for your tank, so healers,
[08:36] beware. Lastly, there are tormented
[08:38] shades which will cast spirit realm,
[08:40] which should be interrupted and
[08:41] dispelled. We then come across the mini
[08:43] boss of the dungeon, Rokzal, who has two
[08:45] main abilities. The first is just purple
[08:47] avenger, so avoid this, and the second
[08:50] is ritual sacrifice, which will place a
[08:52] player on the altar and attempt to
[08:54] sacrifice them. Brutal. This can be
[08:56] immune or dispelled via root removal,
[08:58] such as freedom or tyrant's lost. The
[09:01] next set of ads includes a new bound
[09:03] defender with another insane amount of
[09:05] abilities. They have an AoE damage on
[09:07] each melee hit and will also cast
[09:09] reflecting funnel as well as tornadoes
[09:11] that will knock you back in the most
[09:12] annoying way possible. In this area, try
[09:14] to avoid the souls as they will root you
[09:16] in place, as well as the bats as they
[09:17] will cast an AoE silence.
[09:19] The last enemy we have here is the
[09:21] hollow soul render, which will cast
[09:22] frost nova that roots nearby players.
[09:25] From there, we have the second boss,
[09:26] Fordragon, which I will let my good
[09:28] friend Blair explain.
[09:29] You got to make your ghosts kiss. Not
[09:31] all at once. Thank you, Blair.
[09:33] Players targeted by rest phantoms need
[09:35] to make their ghosts touch each other,
[09:37] which applies two dots. Once that falls
[09:39] off, the other two targeted players
[09:41] touch their ghosts. After every even
[09:43] cast of Rest Phantoms, the boss will
[09:45] jump into the middle and channel AoE
[09:47] damage and throw around balls. Break the
[09:49] shield to end the intermission, and the
[09:51] only other mechanic is Unmake, which is
[09:52] a frontal, so make sure to avoid it.
[09:55] For this next part, I recommend skipping
[09:56] as much of this section as possible, as
[09:58] the mini boss at the end of the bridge
[10:00] throws down orbs that can easily knock
[10:02] you off.
[10:03] WHAT AN IDIOT.
[10:06] GOD DAMN IT. ONCE YOU GET CLOSER TO HIM,
[10:09] he'll deal massive sonic damage, so kill
[10:10] him quickly. Afterwards, we are on to
[10:13] the final boss, Rock Tool. Rock Tool
[10:15] deals passive damage and spawns circles
[10:17] throughout the fight. His main mechanic
[10:18] is Crush Soul, in which he will leap to
[10:20] three targets quickly to drop three Soul
[10:22] Bind Totems, which will channel damage
[10:23] into players and drag them closer. Make
[10:25] sure to drop these close enough to
[10:27] cleave down. Tanks deal with Spirit
[10:29] Breaker, which will knock you back and
[10:31] drop a massive area denial. Make sure to
[10:33] drop this in the corner to both prevent
[10:35] the knockback and keep the area open.
[10:37] The intermission of the fight happens
[10:39] when he casts Soul Rending Roar, which
[10:40] deals increased damage for each alive
[10:42] totems, making them even more of a prio
[10:44] kill. You will be sent, once again, back
[10:46] across the bridge. Interrupt adds along
[10:48] the way to clear the way and gain a
[10:50] speed buff and damage buff. Rush back to
[10:53] the boss and blow him up.
[10:56] Next up, we have Nexus Point Xenix,
[10:57] which starts in a big open room, and
[10:59] that's it. You guessed it, a great first
[11:02] pull up.
[11:03] This strangely shaped dungeon is split
[11:05] into Arcane, Void, and Light. And the
[11:07] first pull has representatives from all
[11:08] three. The Void enemy is Scrounders,
[11:11] which are incidental adds that will jump
[11:12] onto another mob at half health,
[11:14] granting them an absorb shield, and can
[11:16] be removed via CC. For our Arcane
[11:19] representatives, we have Shadow Guard
[11:20] Defenders, who will stack armor decrease
[11:22] and heal absorbs with each melee through
[11:24] Null Sunder. These stacks can be removed
[11:26] by healing off the absorb, so healers
[11:28] might need to pay a special attention to
[11:30] their tanks in this first pull. right
[11:32] Arcanists have a super important cast,
[11:34] transference. This will cause all
[11:36] healing done to a player to be
[11:37] redirected to the Arcanist, which is
[11:39] obviously very bad. Not being able to
[11:41] heal the affected player means they
[11:43] might need external defensive {slash}
[11:45] absorbs. Lastly, we have our light
[11:47] representative, the lingering images,
[11:49] aka mini Aluraxion. These guys throw out
[11:52] dots and a really dangerous tank buster.
[11:54] This can be especially dangerous with
[11:56] stacks of null sunder, so make sure to
[11:58] plan defensives accordingly. From this
[12:00] first room, you can either head left or
[12:02] right first, but you'll need to go both
[12:03] ways eventually, so let's just head left
[12:05] to the arcane section for now. We have
[12:07] our familiar defenders and Arcanists
[12:09] from the first pull, but also a new
[12:10] lieutenant add, the circuit seers. These
[12:13] guys will cast core spark overload,
[12:15] which will empower a nearby barrel to
[12:16] explode after 10 seconds, almost
[12:18] guaranteeing a wipe. This barrel needs
[12:20] to be killed ASAP, as it cannot be CC'd
[12:23] or interrupted in any other way. They'll
[12:25] also channel AoE damage with arcing
[12:27] damage, that's what it's called. Nope,
[12:30] that's not what it's called, it's called
[12:31] arcane mana. Whatever, I'm keeping it
[12:33] in. The other new notable mob in this
[12:35] area are the flux engineers, who drop a
[12:36] debuff that deals damage when the player
[12:38] moves. So, if you have this, stand
[12:40] still. They also drop barrels. The last
[12:43] notable part of this section before
[12:44] moving on to the boss is don't cross
[12:46] these lasers, obvious, but less obvious
[12:48] is that warlock gateways don't work.
[12:50] However, rogues and engineers can
[12:52] disable them permanently, so that could
[12:55] vary up the route.
[12:56] These core sparks deal massive damage if
[12:58] you stand in them and grant haste, but
[13:00] straight up they are not worth it, as
[13:02] they'll just kill you before you get any
[13:03] meaningful buff.
[13:05] Core right Kaz'raj, the first boss, will
[13:07] section off the area quickly with lay
[13:09] line array, which needs to be removed by
[13:11] whatever player gets the reflux charge
[13:13] debuff. When active, the debuff player
[13:15] will see the pink lines change to blue.
[13:17] If you're color blind,
[13:19] um
[13:21] I don't know.
[13:23] Good luck.
[13:24] Make sure to hit the most amount of
[13:26] lines possible, so stand in the
[13:27] intersection of any lines.
[13:29] Flux collapse will also shoot out
[13:31] circles underneath the targeted player
[13:32] and leave behind arcane spill, so move
[13:34] out of these as they spawn underneath
[13:36] you. Once the boss reaches 100 energy,
[13:38] he will throw a massive ball at a
[13:40] player, so try and bait this into a good
[13:42] spot as it will knock all players back a
[13:44] significant amount and you want to avoid
[13:46] anyone getting hit into the lasers. It
[13:48] will also leave a huge heal absorb on
[13:50] players, so healers plan accordingly.
[13:52] After the boss is downed, players need
[13:54] to channel the conduit behind the boss
[13:55] to be returned to the first room where
[13:57] you can start heading to the next wing,
[13:58] the void wing.
[14:00] In this section, when some ads die, they
[14:02] will spawn smudges that will inch
[14:04] towards dormant dreadflails and channel
[14:06] whatever health they have remaining into
[14:08] them. You do not want these guys to wake
[14:10] up, so kill the smudges ASAP. Grand
[14:12] nullifiers are the main casters in this
[14:14] wing who will cast nullify that will
[14:16] chunk DPS, so make sure to kick it. They
[14:18] also spawn these circles that will, hmm,
[14:21] let me see. Oh yeah, fear you. Hence the
[14:24] giant fear symbol. Cursed void callers
[14:26] burst upon death with creeping void.
[14:29] Dust crate herald will post dark
[14:30] beckoning which sends out tiny void
[14:32] walkers that float outwards dealing
[14:34] damage upon contact with players. They
[14:36] also channel damage with entropic leech
[14:38] which can be ended early if the healing
[14:40] absorb is removed. Null sentinels will
[14:41] cast dread bellow which is an AoE damage
[14:44] curse and a knockback, so make sure not
[14:46] to get knocked in the nearby packs. They
[14:48] also have a tank buster. The last enemy
[14:50] is a dreadflail and you'll see why we
[14:52] don't want these Hades looking Mfers to
[14:53] wake up. All melees are frontals and
[14:56] flail storm turns him into a beyblade
[14:58] that hits a player and is definitely not
[15:00] a melee friendly mechanic. After three
[15:02] waves of enemies, core warden Nassarian
[15:04] will spawn with 60% health. She will
[15:06] cast eclipsing step which does damage in
[15:08] a huge radius, so run this out of the
[15:10] group. Additionally, she will use null
[15:12] vanguard that spawns a dreadflail and a
[15:14] nullifier. This is especially dangerous
[15:16] since the boss also has a tank buster
[15:18] that will leave you vulnerable. There is
[15:19] a massive 300% damage amp phase 30
[15:22] seconds into the fight and every 1
[15:23] minute afterwards, so plan accordingly.
[15:25] This happens when the wraith scene
[15:27] attacks the boss. Do not stand in this
[15:29] initial hit as it'll disorient and
[15:31] damage you, but stand in the light scar
[15:32] flare afterwards for the buff. This also
[15:35] does a ton of damage so healers might
[15:36] need big cool downs here. After the boss
[15:38] is dead, channel into the same conduit
[15:40] but don't hold your breath as you will
[15:42] immediately have to channel into another
[15:44] conduit. Oh yeah, gameplay. In this
[15:47] section you pretty much go from mini
[15:49] wraith scene to mini wraith scene with
[15:51] the most notable new ad being the light
[15:52] rod. These guys spam bolts like crazy
[15:55] and should be interrupted at any chance
[15:57] you get. They also throw out two magic
[15:58] debuffs which should be dispelled and
[16:00] healed. There are also these bats that
[16:02] blow up upon death dealing damage to
[16:03] players and healing enemies in the
[16:05] circle. Additionally, swarms of bugs
[16:07] will fixate players and melee them, so
[16:08] try to kite them through the pack.
[16:13] Once the two lingering images are killed
[16:15] on the platform, the real wraith scene
[16:17] will spawn. The main mechanic of this
[16:19] fight revolves around brilliant
[16:20] dispersion that spawns two fractured
[16:22] images on three different players for a
[16:24] total of six images per cast. These ads
[16:26] will occasionally use flicker to dash
[16:27] towards a player indicated by a circle
[16:29] and running into these images at any
[16:31] point in the fight will cause them to
[16:32] claw at you dealing damage and knocking
[16:34] you back. The intermission causes all
[16:36] fractured images to channel AoE damage.
[16:38] You must find the boss hidden within the
[16:40] images. The boss is the only one without
[16:42] horns. Additionally, hunters mark will
[16:44] stay on the real boss, but this might be
[16:46] patched out. Don't interrupt any of the
[16:49] fake bosses as interrupting the wrong
[16:52] one will cause massive AoE damage.
[16:55] Our last dungeon is my favorite of the
[16:57] four, Windrunner Spire. The initial room
[16:59] is a big open space perfect for a lust
[17:02] ball.
[17:03] The main casters in this pool are the
[17:05] restless stirs. They throw out spirit
[17:06] bolts as well as two dispel debuffs at a
[17:08] time. Dutiful groundskeepers will slowly
[17:11] build up sheer armor stacks with each
[17:12] melee. Spellguard Magus channel arcane
[17:14] salvo for AoE damage and at 50% they
[17:17] drop 99% damage reduction AoE effect.
[17:20] This is what can really stop DPS in
[17:22] their tracks as damage effectively
[17:24] cannot be done as long as enemies are in
[17:26] it. Use pushes, grips, and kite the pack
[17:28] out of these ASAP. We once again have a
[17:30] choice for which boss to go to first.
[17:32] Almost every group I've run with has
[17:34] gone to Emberdon first, so I'll go over
[17:35] that wing.
[17:37] Territorial Dragonhawks are the mob you
[17:39] need to know about and spread the word
[17:41] about. Fire spit channel will target one
[17:44] player and basically mark them for
[17:45] death. CC and kill these ASAP. This can
[17:48] only be stopped with a hard stop, not an
[17:51] interrupt. The next section is
[17:53] Arachnophobia/Crab
[17:55] Central with lots of poison sprays going
[17:57] out at once. There's also a mini boss in
[17:59] this section, the Apex legs, who has a
[18:01] tank buster and will leap to players
[18:03] dealing splash AoE damage, so loosely
[18:05] spread. Next, there is the mushroom
[18:06] section where little lashers are hidden
[18:08] around the bushes and make for a super
[18:10] fun high damage pull. Notably, there is
[18:12] a big bloated lasher that has a big AoE
[18:14] spore dispersal that buffs the nearby
[18:16] lashers. Soon enough, we're on to our
[18:18] first boss, Emberdon. This fight
[18:20] revolves around flaming updraft in which
[18:22] players will be targeted to drop flaming
[18:23] tornadoes after location after a few
[18:26] seconds. Bait this to the edge of the
[18:28] room and then move the second it comes
[18:29] out. This is important for the
[18:31] intermission for when the boss casts
[18:33] burning gale, pulling players towards
[18:35] him, pulsing heavy AoE damage, and
[18:36] rotating like a sausage to cast four
[18:38] fire breaths. This is where you need to
[18:40] use defensives, big healer cooldowns,
[18:42] and whatever you need to survive. Other
[18:44] than that, this boss has a tank buster
[18:46] with searing beak that leaves a dot, so
[18:48] be prepared for that. It's also worth it
[18:49] to mention that if you need to release
[18:51] any point before this, there's an item
[18:53] to click in the beginning that will give
[18:54] you a speed boost to get back. After
[18:56] Emberdon is defeated, click the portal
[18:57] to be sent back to the beginning and
[18:59] head down the other wing.
[19:01] In this next section, we have a few new
[19:02] adds. Wind runner soldiers will cast
[19:04] precise cut reducing healing done, so
[19:06] blood death knights beware. Ardent
[19:08] cutthroats will cast poison blades that
[19:10] cause them to stack poison on the tank
[19:11] and a nearby player, so make sure to
[19:13] interrupt this. The second interrupt
[19:15] target is the devoted warbringers who
[19:16] will cast pulsing shriek, which gives
[19:18] them a big absorb shield while they
[19:19] pulse heavy AoE damage.
[19:21] Break the shield and kick this channel
[19:23] ASAP as healers can't keep up with this
[19:24] damage. Lastly, there are flesh behemoth
[19:27] who will drop fetid spew to drop puddles
[19:28] of area denial and also have a tank
[19:30] buster. Soon enough, you're at the
[19:32] second boss, a duo encounter that once
[19:34] again does not share health, so make
[19:35] sure to cleave down evenly. Callous will
[19:37] cast curse of darkness, which is a curse
[19:39] dispel causes ghosts to fixate two
[19:41] players at a time. Kite this away and
[19:43] dispel if you can, otherwise CC these
[19:45] adds. She also spams bolt, so interrupt
[19:47] this when possible to prevent
[19:48] unnecessary damage. At 100 energy, she
[19:51] will channel debilitating shriek, which
[19:52] does increasingly more AoE damage. The
[19:54] only way to stop this cast is to bait
[19:56] the hook from the other boss to hit her,
[19:58] similar to necrotic wake. The player
[20:00] targeted will need to make sure to stand
[20:02] behind the boss and line up the arrow.
[20:04] And the tank should make sure the two
[20:05] bosses are close enough together going
[20:07] into the intermission. Anyone else in
[20:09] the path of the hook will intercept the
[20:11] hook. So, if you're not targeted, stay
[20:13] clear of the arrow. Latches other
[20:15] ability is splattering spew. Ew, gross.
[20:18] Which will drop puddles at player
[20:20] locations after a few seconds. So, bait
[20:22] these around the area. He also uses bone
[20:24] hack, a channeled tank buster, so make
[20:26] sure to have defensives for the duration
[20:27] of the cast. After the duo is defeated,
[20:30] click the portal once again to head
[20:31] back. Seriously, I feel like I'm playing
[20:33] Super Metroid with all this
[20:34] backtracking. Now, there'll be a new
[20:36] path open to the third boss. Swiftshot
[20:38] archers will shoot players in small on
[20:40] circles to avoid. The failings breakers,
[20:42] also known as chokewheel riders, will
[20:43] charge players with break rank, so take
[20:45] note of which way they are facing in
[20:47] order to dodge this attack. They also
[20:48] cast interrupting screech, which, you
[20:50] guessed it, will interrupt you. The next
[20:52] section has more ghosts, but now they're
[20:54] red, so you know they're angry. There
[20:56] are spectral axe throwers who will throw
[20:58] axes to apply bleeds. Phantasmal mystics
[21:00] will cast chain lightning, a must kick,
[21:02] and also attempt to cast blood lost at
[21:05] at
[21:05] health. Lastly, there are lingering
[21:07] marauders who will bayblade and might
[21:09] need to be CC'd if they're too much for
[21:11] your group. We are then on to our third
[21:13] boss, Commander Kro'lok. He will cast
[21:15] two reckless leaps back-to-back
[21:17] targeting the furthest player from him
[21:19] each time. This leaves a dot as well as
[21:21] a ton of debris circles around the area.
[21:23] Overlapping with the second leap circles
[21:25] is intimidating shout that will fear
[21:27] players not standing with other people.
[21:29] You only need to be near one other
[21:30] person, so ranged can go with ranged and
[21:32] melee with melee. At 66 and 33% health,
[21:35] the boss will go into an intermission
[21:36] with rallying bellow that does initial
[21:38] AoE damage and summons four haunting
[21:40] grunts, a phantasmal mystic, and a
[21:42] spectral axe thrower. During this
[21:44] intermission, the boss is immune and
[21:46] will fixate a player with bayblade.
[21:47] Killing the adds ends the intermission,
[21:49] so focus them down. Afterwards, you are
[21:51] sent right to the final boss, the
[21:53] restless heart.
[21:54] This boss revolves around managing the
[21:56] permanent dot of squall leap, which is
[21:57] removed by touching an arrow. Touching
[21:59] an arrow will fling you up into the air
[22:01] and leave a puddle at your feet, which
[22:02] can be removed later with gust shot. You
[22:04] should remove one stack of squall leap
[22:06] right away and use the arrow to remove
[22:08] another when bull's eye wind blast is
[22:10] cast so that you can get over the wave.
[22:13] Additionally, the boss will channel
[22:14] arrow rain, which follows a player, so
[22:16] aim this at a wall. There's also a tank
[22:17] buster with a large knockback, so make
[22:19] sure you are also hit into a wall so you
[22:21] aren't accidentally knocked into an
[22:22] arrow.
[22:24] So there you have it. Those are the four
[22:25] new dungeons coming up in Midnight
[22:26] Season 1. If you have any questions,
[22:28] feel free to leave a comment down below.
[22:30] Once the season launches, I'll be coming
[22:31] out with a ton of new content as well as
[22:33] a new zero to hero series. So make sure
[22:35] to subscribe and turn on notifications
[22:37] so you don't miss a thing. Thanks so
[22:38] much for watching.
⚡ Saved you time reading this? Transcribe any YouTube video for free — no signup needed.