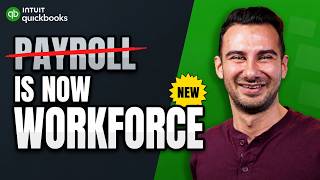

QuickBooks Payroll is Now Workforce!
45sThe major rebranding and new AI features are surprising and immediately relevant to small business owners.
▶ Play Clip"Delivers exactly what the title promises — a thorough, practical tutorial on the new QuickBooks Workforce features."
QuickBooks Payroll has been rebranded as QuickBooks Workforce, introducing a new AI agent for payroll and a comprehensive HR suite. This video provides a detailed walkthrough of the new features, including recruiting, onboarding, document management, and performance reviews, helping business owners choose the right plan.
QuickBooks Payroll is now QuickBooks Workforce, with a new AI agent for payroll and a new HR side covering recruiting, hiring, onboarding, employee handbooks, and HR processes.
Workforce Payroll, Premium, and Elite. Payroll AI is on Premium and above. HR features are on Premium and Elite. Performance reviews are Elite only. Benefits Administration requires 20+ employees.
The Payroll agent is found under the Feed section on the QuickBooks homepage. It texts employees for hours, verifies them, and drafts payroll for approval. You can set the cadence and whether it collects hours, overtime, etc.
For employees paid the same amount each period, Auto Payroll can be enabled per employee, paying them automatically without manual approval.
The Teams app includes a Recruiting tab to create job postings. You can generate job descriptions, set application requirements (resume, cover letter, etc.), add screening questions, and publish to a public link.
AI pulls key details from resumes and cover letters, displaying them on the right side of the candidate list, saving time from digging through PDFs.
Add Employee wizard now includes onboarding steps: basic info, base pay, additional pay, I-9 and other forms, offer letter, and HR workflows. The offer letter template is customizable and can be signed digitally.
HR Workflows are repeatable checklists for onboarding, termination, and other processes. They consist of steps with instructions, variables, and assigned owners. You can start from a library template.
Under Teams > Documents, you can create or upload documents like employee handbooks. You can set signature lines and assign them to employees for e-signature within the app.
Workforce Elite includes Performance reviews with templates like simple review, 360 review, monthly, annual, and weekly progress. Reviews have employee and manager steps, and you can add custom questions.
QuickBooks Workforce integrates payroll and HR into a single platform, with AI-driven payroll and comprehensive HR tools. The video provides a practical guide to setting up these features, helping businesses streamline their operations.
What is the new name for QuickBooks Payroll?
QuickBooks Workforce
Which plan includes Payroll AI?
Premium and Elite
00:34
What is the minimum number of employees required for Benefits Administration?
20 or more employees
01:06
How does the Payroll AI agent communicate with employees to collect hours?
It texts them, or they can use the Workforce Mobile app.
01:47
What is Auto Payroll and how does it work?
It automatically pays employees who receive the same amount each pay period, on a per-employee basis.
02:44
What are the three plans offered for QuickBooks Workforce?
Workforce Payroll, Premium, and Elite.
00:46
Which features are exclusive to the Elite plan?
Performance reviews.
00:46
What does the AI do with resumes and cover letters in the Recruiting tab?
It pulls key details and displays them on the right side of the candidate list.
04:19
What are HR Workflows?
Repeatable checklists your team runs through for every new hire, termination, and everything in between.
06:15
How can you create an employee handbook in QuickBooks Workforce?
Go to Teams > Documents, click Add Document, and either upload an existing document or create a new one.
08:09
Rebranding to Workforce
Signals a major shift in QuickBooks' product strategy, integrating payroll and HR into a single platform.
AI Agent Automates Payroll Collection
Demonstrates practical AI application that saves business owners significant time by automating employee hour collection.
01:19Auto Payroll for Salaried Employees
Provides a clear solution for a common payroll pain point, reducing manual effort for fixed salaries.
02:44AI Candidate Summaries
Highlights how AI can streamline recruitment by summarizing resumes, a valuable feature for HR professionals.
04:19HR Workflows Standardize Processes
Emphasizes the importance of repeatable checklists for consistent HR operations, a core principle for scaling businesses.
06:15[00:00] QuickBooks Payroll is now QuickBooks Workforce, and there are two new things you need to know about it. First, there's a new AI agent that chases down your employees to submit their hours for payroll.
[00:12] And second, it grew a whole new HR side. That means recruiting, hiring, onboarding, employee handbooks, and building your own HR processes. We're going to cover all of that today. Now, you might know QuickBooks Workforce as the app your employees use to see their pay stubs and W-2s.
[00:29] That app still exists. That name just now covers payroll and HR. I'm David. I've partnered with Intuit to walk you through it. You can get started with QuickBooks Workforce through the link in the description below. To sign up for QuickBooks Workforce, you pick one of three plans, workforce payroll, premium, or elite.
[00:47] Here's what's new in each of them. You'll find payroll AI on premium and elite only. Then everything related to HR is also premium and elite. That includes hiring and onboarding, recruiting, HR resource center, and HR workflows.
[01:01] Performance reviews are elite only. Now, you'll also see benefits administration under this take care of your team section. You need 20 or more employees for that, so most small businesses don't qualify. I'll walk you through all of these new capabilities today so you can pick the right plan for your business.
[01:17] Let's start with the biggest change to payroll, the payroll AI agent. From the QuickBooks homepage, you can find the payroll agent by clicking on Feed in the left sidebar. If you've run payroll at least once, you should see a card that looks like this.
[01:31] The idea is that instead of you chasing your employees to submit their timesheets, the Payroll AI agent does it for you. To set it up, you click on See How It Works. That takes you to this wizard where you see the three-step process.
[01:43] The agent first texts your team for their hours, makes sure they're actually correct, and then drafts your payroll for you. To set it up, first you set the cadence of how often it reaches out to your team. When you click Edit here, you can choose the days of the week that the agent reaches out,
[01:58] as well as whether it collects hours, overtime, or both. By default, the AI agent reaches out to your employees over text, but you'll need to track that they consent to that text on your own. An alternative is to use the Workforce mobile app.
[02:10] You'll most likely use this for hourly employees, but if you have salaried employees eligible for overtime, the AI agent can take care of them as well. Once it gets all those hours, it'll draft your payroll and send them to you a day before payroll
[02:23] is run. You can also make changes to employee pay rates directly from your phone. You still control and approve the final payroll numbers. It's just that the agent makes it easier to get those numbers Now if you have employees who are paid the same amount every pay period you don want to use this Instead in the payroll app under overview you see this card called auto payroll
[02:44] You can click on this off link to configure it. Any employee you put on auto payroll will be paid automatically. It is a per employee choice, so run that payroll agent for your hourly team and auto
[02:56] payroll for your salaried folks. Now, those are the changes in payroll. The bigger change is the whole HR size, and that starts with recruiting. To get there, go to the Teams app and then click on recruiting. Here you can create a new job posting, so let me show you how the basics work.
[03:11] So I own a donut shop, and we are looking for a donut designer. You'll fill in some more information like the work location and pay details, and then move on to the job description. If you don't have a job description, you can generate one as a starting point. Now this isn't
[03:25] a real position, but I think it does a decent job here. Moving next into the application form, you decide what applicants send you. That means some combination of a resume, cover letter, LinkedIn profile, and website. And yes, you can add your own screening questions that are multiple
[03:40] choice or a free response. So here we could ask about their experience with Donuts and why they're interested in the position. Then before you publish the job, you need to pick the hiring team. It's assumed that you are the HR professional here, and you can add a hiring manager by clicking
[03:54] add team member. Finally, you can review the entire job posting and then publish it. You can publish it to a public job site called ZipRecruiter by checking this box at the bottom of the page. You don't have to check it, though. If you click Publish Job without it, it just goes to a page
[04:08] hosted on QuickBooks Workforce. This is a public link, so you can publish it anywhere you like, and applicants can apply on this page. Back in QuickBooks, under the Recruiting tab, you'll see your new job posted. You'll see all the candidates who have applied on the left side
[04:22] of the screen, and on the right side, AI pulls key details from each resume and cover letter into an overview, so you're not digging through those individual PDFs or Word docs. If you scroll down, you'll see a lot more information pulled directly from the resume.
[04:35] So work history is an example, education history. Of course, you've got the screening question responses too. If you want to move forward with a candidate, you'll click the move candidate button at the top of the screen. It's called move candidate because you're moving them to a new
[04:48] stage. So anytime you move to a stage, you can also add notes. So anyone else who has access to this candidate's file can see what you're thinking. Once you hire someone, that's where onboarding kicks in. You can onboard a new employee by going to All Apps,
[05:02] Team, and then Employees. Once you're here, click on Add Employee. So in QuickBooks Workforce, this has changed a bit. You still enter the employee name email and hire date You can still let them enter their own info but you got onboarding steps which are new The first three pages of this wizard are largely the same There are a few new fields like you can select a manager now but overall you seen basic info base pay and additional pay This document
[05:28] center on step four is new though. Yes, you could get a signed i9 form before, but now you can add more types of documents. By default, that's an employment offer letter that's built into QuickBooks. Clicking start here gives you a DocuSign-like experience.
[05:43] This offer letter template gives you a good start because you can customize terms per employee without creating a new letter. When you're done, you sign it at the bottom with your name and then you send it to your employee to sign. Then you move on to step number five, which is HR workflows.
[05:58] This is where you can set up onboarding tasks and assign them either to Alex or his manager or other people inside of the company. For example, setting up a training meeting or ordering a laptop. Once you finish those steps, your new hire will get this email.
[06:12] Once they accept the invite to QuickBooks Workforce, they can enter all of their personal info and sign that offer letter. Now, let's go back to those HR workflows because those are the repeatable checklists your team runs through
[06:24] for every new hire, every termination, and everything in between. To find them, go back to the team app and then click on HR Workflows. To create a workflow, click Add Template. I recommend starting with something from the library for inspiration.
[06:38] There are quite a few built-in workflows. We're going to start with the onboarding checklist. It'll pop up in the templates list and then you click finish setup. A workflow is just a set of steps. Here's an example of one called order laptop. Each step has instructions for a certain
[06:52] person. For example, here we're asking a person to please order a laptop for this new employee. Steps can pull data from variables like employee legal first name. You can access them by clicking on variable. They can also have fields to fill in, like laptop serial number or laptop model.
[07:10] You create those by clicking on the fields button. When we scroll further down, you'll see the step is assigned to someone. You can assign the step to the team member who is the employee in question, their manager, or other groups or specific people within the org. The idea is that when a step is
[07:25] active, whoever owns it should know exactly what to do. Once you've proofread all the steps, you You can approve it and then start it for any employee. That's as simple as clicking start this workflow
[07:37] and then selecting the employee you want it to start for. So, let's select Alex, our new hire, and then click start. You'll see it in your portal that Alex has started his onboarding checklist. Now that first task is assigned to his manager,
[07:49] and his manager is Isaiah Langer When Isaiah goes to his HR workflow session he see the checklist for Alex When he clicks view he can see the exact next step that he needs to take So we extended
[08:01] that offer letter to Alex, but maybe it's not quite the one that you want. Here in the document center under teams documents, you can build anything you need your team to sign. To get started, just click add documents. You've seen what an offer letter looks like. Let's add an
[08:16] employee handbook this time. You have two paths here. You can upload a document you already have or create the document directly in Workforce. Most people upload an existing doc, so let's follow that pattern. You'll next set up whom the document is assigned to. I'll modify it so only
[08:31] the team member has to sign. Next, you'll set up where those signature lines appear inside the document. The Word doc appears in the center pane, and you can make all the edits that you want to it. So when I said we don't need the manager's signature, we can just delete it here. But we do
[08:45] need the employee's name. So I'll select these underscores and then in the left side, click on show five fields to see the full name field and click that to replace it. When you're finished, click publish in the top right and you can assign this to any person on your team. They'll see it
[09:00] inside of their workforce app and they can sign it right there. No external app required. Now, there's one special workflow only available in Workforce Elite called performance. As you might guess, it is for performance reviews and goal setting. The simple review template is already
[09:16] available to you, but you can add other templates. Take a look at some of the others. 360 review, monthly, annual review, weekly progress check, goal brainstorm, and back to the simple review. Now the simple review and many of these other reviews have two steps. One for the employee
[09:32] and one for the manager. Now this employee step starts actually very simply. It's just a rating on their overall assessment. But if you want to have more substantive discussion with an employee, you can click on the fields button for more questions. You can use any of these preset
[09:47] questions or add your own. For sake of example, let's just add what areas of improvement could you work on. By default, the answer to this question will not flow into the manager's step. You have to do that yourself. Notice that the employee rating here was done for you.
[10:02] So to add the answer to that question, click somewhere that you want that answer, click on variable, and then scroll all the way down to see performance review fields, and then select that question. That makes sure the manager can see the employee's responses
[10:15] and hopefully have a great discussion. Now you've seen what's new in QuickBooks Workforce, the payroll AI agent, HR, including recruiting, hiring, onboarding, handbooks, and the workflows that tie them all together. Set it up with a link in the description below. I'm David,
[10:31] and I'll see you in the next video.


⚡ Saved you 0h 10m reading this? Transcribe any YouTube video for free — no signup needed.