
The Dual Write Problem Explained
60sClearly explains a common distributed systems challenge that resonates with developers, making it highly shareable.
▶ Play Clip"Delivers exactly what the title promises — a clear, practical tutorial on Wolverine's outbox and inbox patterns."
This video explains the outbox and inbox patterns for reliable messaging in distributed systems, focusing on the dual write problem. It then demonstrates how to implement both patterns in a .NET application using the Wolverine messaging library with EF Core and PostgreSQL.
The outbox pattern solves the dual write problem where you need to atomically write to a database and publish a message to a broker.
Messages are stored in an outbox table within the same database transaction as the main write, then a background processor publishes them to the broker.
The inbox pattern stores incoming messages in an inbox table within a transaction, then processes them asynchronously, ensuring at-least-once delivery.
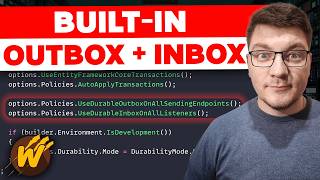
Enable outbox and inbox with two lines: options.Policies.UseDurableOutboxOnAllSendingEndpoints() and options.Policies.UseDurableInboxOnAllListeners().
Outside Wolverine handlers, use IDbContextOutbox<TDbContext> or IDbContextOutbox with EnrollDbContext to participate in transactions.
Wolverine uses a store-and-forward approach: messages are persisted in the outbox table long enough to commit the transaction, then published and deleted.
What problem does the outbox pattern solve?
The dual write problem: you want to write to both a database and a message broker atomically, but they are separate systems.
00:42
How does the outbox pattern solve the dual write problem?
It stores the message in a special database table (the outbox) within the same transaction as the main write, then a background processor publishes it to the broker.
01:23
What delivery semantics does the outbox pattern provide on the publisher side?
At-least-once semantics.
02:14
How does the inbox pattern work?
It stores incoming messages in an inbox table within a transaction, then processes them asynchronously.
02:42
What two lines of code enable outbox and inbox for all endpoints in Wolverine?
options.Policies.UseDurableOutboxOnAllSendingEndpoints() and options.Policies.UseDurableInboxOnAllListeners().
06:38
What interface should you use to participate in outbox transactions outside a Wolverine handler?
IDbContextOutbox<TDbContext> or IDbContextOutbox (non-generic) with EnrollDbContext.
09:27
How does Wolverine's outbox implementation differ from the classic polling approach?
Store and forward: messages are persisted in the outbox table long enough to commit the transaction, then published to the queue and deleted.
11:57
Outbox pattern solves dual write problem
Core architectural pattern for reliable messaging, explained clearly with database transactions.
01:23Inbox pattern for idempotent consumption
Complements outbox by ensuring at-least-once delivery on the consumer side.
02:42One-liner configuration in Wolverine
Shows how Wolverine abstracts away boilerplate with simple policy methods.
06:38Wolverine uses store-and-forward, not polling
Key implementation detail that differs from classic outbox pattern, improving performance.
11:57[00:02] messaging inside of your applications, maybe you were exploring the outbox and inbox patterns. In this video, we're going to take a look at both of these patterns, understand what problems they solve, and I'll show you how we can
[00:15] implement both in a couple of lines of code using the Wolverine messaging library. Let's first spend a moment to understand how both of these patterns work, and we're going to begin with the outbox pattern. The outbox is applied on
[00:29] the publishing side of things. So, whenever you want to publish some sort of message to a message broker, you're going to employ the outbox to improve the reliability of the publishing operation. Now, why is this? Well, most
[00:42] of the times, you want to do some sort of write into whatever database you're using, but you also want to publish this message to a message broker. And this is essentially a dual write problem. You want to write something to both systems,
[00:57] and you can't do this in an atomic way. This means either both will succeed or both of them will fail, and when everything is atomic, you can't end up in an in-between state where, let's say, the first operation succeeds, but the
[01:11] second one fails. So, that's the general problem we are trying to solve. I've talked about this a couple of times on this channel already, so I expect that some of you already know what problems this solves. Now, how does the outbox
[01:23] pattern solve this? Well, it uses the fact that databases support transactions. And what do you do? You open a transaction, you perform your open a transaction, you perform your write operation, but you also model your
[01:35] message publish as another write operation into a special table in the database that's called an outbox. You then commit the transaction, and the benefit is that either both of these changes succeed and they are processed
[01:48] successfully, or they both fail and you don't end up in an in-between state. Now, you also need another component here, usually an outbox processor, which is a background service that's going to poll from from the outbox table, find
[02:02] any messages that are as of now unprocessed, and then proceed to publish them to the message broker. The message broker then delivers this to the consumers, which execute some business logic of the road. So, that's the most
[02:14] common way of how an outbox pattern is implemented. And this gives you at least one semantics on the publisher side, which means that you may end up case of retries, but you can also be sure that you're going to publish it at
[02:28] least once. Now, the outbox pattern is often paired together with the inbox pattern. The inbox patterns, in this case, we start from the message broker, and instead of an outbox table, we now have an inbox table. And what happens
[02:42] when we get a message from the broker is we first store it in the inbox table within the database. And we can also do this inside of a transaction, which gives us atomic guarantees that we're either going to store the message or
[02:55] we can safely attempt to redeliver the message from the broker until we eventually manage to store it. After this completes, we check for any pending messages within the inbox table, and we hand off the message to the respective
[03:10] this is where we actually execute the business logic. So, in both examples, we are relying on the database to improve the reliability by removing the message broker from the equation, where we temporarily buffer the outgoing or
[03:24] incoming messages within our database table before processing the message asynchronously in the background. And now, let me show you how we could implement this inside of a .NET application using Wolverine. Here's the
[03:36] baseline implementation that I have in place, which is already using Wolverine, and inside of the call to use Wolverine, we're setting up the connection to RabbitMQ, which is our message broker. We're disabling conventional local
[03:50] routing so that everything goes through RabbitMQ, and we're using Postgres for message persistence, and this is mainly used as a lightweight storage for persisting our saga state. In the Futures folder, I have a Register User
[04:03] handler that handles the Register User message, and it publishes a User Registered Event, and this kicks off the User Onboarding Saga, which consists of persisted in the database using the Wolverine lightweight storage approach,
[04:19] which essentially creates a database table per saga class that you have in your code, and it maintains the saga state while the saga is executing. It gives you optimistic concurrency by versioning the saga, and it eventually
[04:31] removes it after it completes. Now, we want to make our entire implementation more robust by adding support for the outbox and inbox pattern. And here, we have to use one of the two storage mechanisms that support this, which is
[04:46] either opting into Marten, which is also part of the so-called Critter Stack, and document database. I made a very beginner-friendly introduction to this a the link to that video in the description, but for our use case, I'm
[05:01] going to look for Wolverine, and I want to add EF Core message persistence. So, we have to find the Wolverine EF Core Entity Framework Core library, and I'm going to go ahead and install it. So,
[05:14] with this installed, we need to do two things. The first one is tell Wolverine which storage mechanism we are using, in this case, Postgres. So, we say process messages with Postgres. If we were using SQL Server, we would call the respective
[05:27] that library. Then, we're going to say options, use Entity Framework Core transactions, and this introduces support for saga persistence using EF
[05:39] Core, where you can rely on your existing database context, and it also introduces transactional middleware, which comes into play when you execute you're using Wolverine HTTP. This is something I haven't covered, and I might
[05:52] do a video about that in the future. You can also opt into transactions by saying options policies, auto apply transactions. And another way to opt into using EF Core is saying options services, add DB context with Wolverine
[06:09] integration. What this does is it registers your DB context as a additional optimizations behind the scenes, as it is doing some code generation to make everything work at runtime, but I don't want to go into
[06:23] this approach. So, we're going to stick to the baseline variant that I have here. Then, to configure where we want to use the outbox and inbox, we're going to say options policies, and then we're going to say use durable outbox on all
[06:38] sending endpoints, and we're going to say options policies, use durable inbox on all listeners. Now, when the application starts, Wolverine is going Postgres instance. I'll show you that in a moment. And among the tables inside
[06:53] that schema, you'll see two tables for incoming and outgoing message envelopes. And this is essentially what implements the outbox and inbox patterns, and it's where our messages will be persisted before Wolverine dispatches them to the
[07:06] message broker. Another thing you can do if you are running this locally is check if builder environment is development environment is true, and in that case, you can access the durability settings and update the durability mode to be
[07:21] solo, and this will help you improve performance when running this locally, as the outbox and inbox agents should start up faster. What else do we have to do? If I go into my database context, I
[07:33] can additionally help out Wolverine by saying model builder and then calling map Wolverine envelope storage. So, what this does is it just adds two more database sets into your database context setup. These are the incoming messages,
[07:48] which it maps to the respective table, and the outgoing messages, which represent your outbox, and incoming messages are the inbox. Now, by default, these will be excluded from database migrations, because Wolverine takes care
[08:01] of creating them. It just populates them into the database context to make it easier for the EF Core implementation. Let me close this down, and let's go back to our program file. And the next question is, after we've enabled the
[08:14] outbox and inbox, do we have to do something special inside of our code? Well, that depends on where your code is located. If you're executing a message handler or a Wolverine HTTP endpoint, then you don't have to do anything. It's
[08:28] going to be automatically part of a transaction where the inbox and outbox will be applied. So, in this example here, I don't have to change any code, and my message bus publish will respect the outbox pattern. Another common
[08:42] scenario that you might have is when you aren't running this within a Wolverine handler. So, let's say I've got all of this inside of an API endpoint. Let's create it here. Let me first copy this one and use that as the baseline. So,
[08:59] let's say users, and I'm just going to call this outside Wolverine. And next to the message bus, let me also inject my database context. Going to align the arguments vertically, and then we're going to just copy the code that we had
[09:14] here. Let's drop it in here. Everything should compile, and I just need to pass in the user ID. So, now this runs outside of the Wolverine pipeline, and you would need some way to tell Wolverine to make this part of a
[09:27] transaction. So, how you can do this is by replacing the IMessageBus with the IDBContext outbox. Now, there are two options. I'll show you both of them. Let's first go with the strongly typed one, where you
[09:41] pass in your database context type. So, I'll rename this to outbox, and it still has the publish async method, because it implements the IMessageBus interface under the hood. Now, what happens with the database context? Well, I can
[09:55] the database context? Well, I can replace it with Outbox DB context and continue having the same behavior and the key is not calling save changes here and instead in the end we're going to say Outbox save changes and flush
[10:09] messages async. So this takes care of both persisting everything inside of our database and publishing the message to our message broker. So this is option one. Let me denote this by appending one
[10:21] to the route here. I'll show you option two just below where we're going to use an IDB context Outbox without a generic argument. So now we go back to using our native database context. We still don't need to call save changes async
[10:35] ourselves, but we do need to tell the Outbox how to know about our database context. We're going to say Outbox enroll DB context and then we proceed with publishing a message and calling save changes and flush messages async.
[10:48] So these are two variants when running let's say in a minimal API endpoint, maybe inside a background job or anywhere else outside of the Wolverine pipeline. And then finally, let's take a look at how all of this works when we
[11:00] run this example. If we take a look at our database when we start the application, you'll see there are two distinct schemas, the public schema that contains my user table, but also there's this Wolverine schema that contains
[11:14] eight tables inside and two of those are the Wolverine outgoing and incoming messages which represents our Outbox and Inbox tables. Now if I go into Postman and I send a post request to create a new user you will see that this succeeds
[11:28] pretty quickly and I can even go ahead and use this user's ID to verify the email. And if we examine the distributed trace for this command, you will see happening under the hood. So first of all, we've got this insert to create a
[11:44] all, we've got this insert to create a user followed by a publish to RabbitMQ. Now the Outbox support for Wolverine is a bit different to what I've been showing on this channel. What I showed you is a store in the Outbox together
[11:57] out messages from the Outbox and publishes them to a broker. With Wolverine, it uses a store and forward approach where messages are persisted in the Outbox table long enough to commit a transaction and then it's published to a
[12:11] queue and deleted from the Outbox. This span here is our receive operation which is going to do an insert into the Wolverine incoming envelopes table which is effectively our Inbox and then it's going to trigger the respective handler
[12:26] which can then publish some more messages which get written to the Inbox again and this is all part of our saga which completes here after we call verify email. This triggers a couple more handlers and eventually the saga
[12:38] gets completed. If I refresh the incoming envelopes table, you should be able to see that we now have a couple of messages here and most of these are handled. The two scheduled ones are the timeout messages that are going to get
[12:50] published in 5 minutes from the start of the saga. You can see the message types that were stored in the Inbox and also which message queue sent them to our RabbitMQ and you can see the respective message types and these map to the
[13:04] respective exchanges and queues inside of our RabbitMQ message broker. So overall, enabling Outbox and Inbox support with Wolverine is basically a piece of cake because these two patterns are built into the messaging framework
[13:19] and you don't have to do additional work to make this happen. Now I also urge you this. I'm going to leave it in the description. You can take a look at the Martin integration with Postgres which is much more native to the entire
[13:32] greater stack than the EF Core approach and then you can decide which one works better for you. If you want to see how you could build your own Outbox pattern, I'll show you how to implement the Outbox from scratch. If you enjoyed this
[13:46] video, consider gently tapping the like button. Thanks a lot for watching and button. Thanks a lot for watching and until next time, stay awesome.
⚡ Saved you 0h 13m reading this? Transcribe any YouTube video for free — no signup needed.