
Why I Started Streamer MasterClass
45sRelatable story about fixing audio issues and personal connection with viewers.
▶ Play Clip"Delivers a solid, in-depth tutorial that matches the title's promise, though the 15-minute claim is a bit optimistic given the depth."
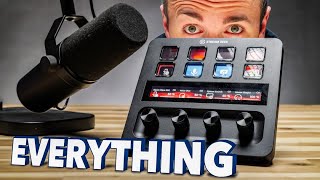
This video is a detailed tutorial on setting up audio for live streams using Elgato equipment, specifically the Wave XLR and Stream Deck Plus with the WaveLink software. The host demonstrates how to configure microphone settings, create submixes, route audio channels, apply audio effects, and integrate the setup with a Stream Deck for easy control. The tutorial is part of a series called 'Streamer MasterClass' and aims to provide a comprehensive guide for streamers.
The video is the first in a series of four in-depth tutorials on popular audio devices for streamers: Elgato, Beacon, Roland, and Road. Each video will focus on the strengths of the respective device.
The first step is to install the WaveLink software and the Stream Deck plugin. The host notes that the plugin now includes a quick link feature for easy access to mixing controls.
In WaveLink, add a new channel and select your microphone (e.g., Elgato XLR Dock). Rename it for clarity. Adjust gain settings: add 48V for condenser mics, not for dynamic. Use the scale to set gain; dynamic mics need more gain (e.g., SM7B up to 55-60 dB).
WaveLink allows submixes: two separate mixes (monitor and audience). Each channel has two faders, one for what you hear and one for what the audience hears. This enables separate volume control for different audio sources.
Apply audio effects like EQ to polish the voice. For example, add a high shelf boost around 3-4 kHz, a bump at 120 Hz for thickness, and cut at 500 Hz to reduce muddiness. Effects can be applied to any channel.
Add channels for game audio (using system) and music (e.g., Spotify). Route them separately for independent control.
In Windows sound settings, set 'Elgato System' as the default device and 'Voice Chat' as the default communication device. This routes system sounds to the system channel and communication apps (like Discord) to the voice chat channel.
In WaveLink, use the plus button under Spotify to route it to the music channel, separating it from game and Discord volumes.
Use the 'Link Faders' feature to link the monitor and audience faders for a channel, so adjusting one adjusts both. This is useful for music volume control.
Drag channels to reorder them in the mixer. The host prefers to have microphone, chat, system, and music in that order.
Use the 'Export profile to Stream Deck' feature in WaveLink 2.0 to send the mixer layout to the Stream Deck Plus. The Stream Deck shows channels with knobs and buttons for control.
On the Stream Deck, each channel has a knob and a button. The button toggles between monitor and stream mix. Adjust the step size to +/-4% for faster volume changes.
Add a mute button on the Stream Deck for the microphone, useful for muting during private calls.
Use the 'Toggle Output' action to switch between two outputs (e.g., headphones and speakers). This is useful for switching between monitoring and speaker output.
The video provides a comprehensive guide to setting up an Elgato audio system for streaming, covering everything from initial installation to advanced mixing and Stream Deck integration. The host emphasizes the importance of submixes and routing for a professional streaming setup.
What is the first step in setting up the Elgato WaveLink system?
Install the WaveLink software and the Stream Deck plugin.
01:39
How do you add a microphone channel in WaveLink?
Click the plus button on an empty channel, scroll to find your microphone, and select it.
02:05
What is the difference between condenser and dynamic microphones in terms of gain?
Dynamic mics require more gain (e.g., SM7B up to 55-60 dB) than condenser mics.
02:43
What is a submix in WaveLink?
A submix allows separate mixes for the streamer (monitor) and the audience, with independent faders for each channel.
03:23
How do you apply EQ to a channel in WaveLink?
Click the audio effects button, add an EQ, and adjust settings like high shelf boost, low bump, and mid cut.
04:32
What is the purpose of setting default devices in Windows?
It routes system sounds to the system channel and communication apps to the voice chat channel.
08:08
How do you route Spotify to a separate music channel?
In WaveLink, click the plus button under Spotify and check the box to route it to the music channel.
09:04
What does the 'Link Faders' feature do?
It links the monitor and audience faders for a channel so adjusting one adjusts both.
09:44
How do you export a profile to Stream Deck?
In WaveLink, click 'Export profile to Stream Deck', select your Stream Deck Plus, and create the profile.
10:34
What is the recommended step size for volume changes on Stream Deck?
Change the step size to +/-4% for faster volume adjustments.
12:15
How do you add a mute button for the microphone on Stream Deck?
Add an input action for the microphone and set it to mute.
13:21
What does the 'Toggle Output' action do?
It allows switching between two outputs, such as headphones and speakers, with a single button press.
13:51
Submix Concept
Explains a key feature that sets WaveLink apart: separate mixes for streamer and audience.
03:23EQ Techniques
Provides practical EQ settings to improve voice quality, applicable to any streaming setup.
04:32Windows Routing
Shows how to configure Windows to automatically route audio to the correct channels.
08:08Stream Deck Integration
Demonstrates how to export the mixer layout to Stream Deck for tactile control.
10:34Toggle Output
A clever way to switch between headphones and speakers with one button.
13:51[00:03] exactly how to set up audio for your live streams using Elgato equipment. That's the intro. That's the whole intro. Run the animation.
[00:31] inspired four upcoming videos on this channel. I was in Japan last month and while we were helping him set up his audio or fix his audio for his live stream, one of the things he said was whenever something breaks on his stream,
[00:45] he goes to my channel and hopes that I have a video helping him fix it, realize that I've done a lot of videos on audio gear recently, but I haven't done any in-depth tutorials on how to actually use them from start to finish.
[00:58] streamer master classes are going to be in-depth tutorials on the four of my favorite and also four most popular audio devices for streamers, namely Elgato, Beacon, Roland, and Road. And because each of the four products has
[01:12] out, and because I don't want to be redundant and say the same thing in all four videos, I'm going to do a bit of a deeper dive into whatever audio element is the strength of that device. That way, these videos not only help you
[01:24] but even if you don't use any of them, they will still all be really helpful one of this four is on the Elgato WaveLink system. I've got the Wave XLR and the Stream Deck Plus with the Wave Wave XLR doc. That is a mouthful. Let's
[01:39] jump right in. So, of course, first thing we need to do real fast is install thing we need to do real fast is install the have a stream deck, make sure you download the plug-in, too. They just
[01:53] those are new. That quick link, that's nice of them. That'll get you mixing right at your fingertips. So, when you open up Wavelink for the first time, like this. I have already added one channel. This is my microphone, so you
[02:05] let's load in your microphone. First thing on the empty channel one, you're going to hit the plus button and you're going to scroll down until you find your going to scroll down until you find your microphone. For me, it was Elgato XLR
[02:17] doc. I'm also going to rename it the name of my microphone so it's a little easier for me to remember. We're going to say shotgun mic. Clicking on this down arrow gives you your basic microphone settings. And
[02:30] Elgato does a good job of making it very simple. You're going to add 48 volts of You're not going to add that if it's a dynamic mic. And then they give you this little scale of how much gain to add, whether it's a condenser mic or a
[02:43] dynamic mic. Now, don't take these words as gospel here cuz I'm actually using a It needs a little bit more gain. So, I'm all the way up in dynamic territory here. But typically, dynamic mics require a lot more gain. I'm up to 38 dB
[02:57] than condenser mics do. And if you're on an SM7B, you're going to be going up to, you'll hear me get louder here. You're going to go up to like 55 dB, maybe up to 60, but I'm good at 38 here. Basically, you're just going to slide
[03:09] this around until your loud points, like check, check, check, loud, are in the You've also got a couple more settings down here that realistically you don't need to touch unless you're doing something unique. So, we're going to
[03:23] this simple. Now, the thing that Wavelink does really well and really made it stand out when it first came out is that it was kind of the first streamer system that allowed for submixes, meaning two different mixes.
[03:37] So, you can see here I've got two faders on my microphone. One is what I hear and one is what my audience hears. Now, you can see I've got mine muted here. are kind of an exception to the rule here. But if I were to add another
[03:52] channel here, let's say I add my voice chat, and this is where my Discord call, my teammates pop in, and I wanted my teammates to be footsteps in the game, but I wanted this side to be loud so my audience could
[04:05] hear them at full volume. Well, that's that's what this is for. This is called a submix. We have multiple channels, which is my microphone and my voice chat that I can control separately. And then we have multiple mixes. We have our
[04:19] seeing on the left side of each of these. And then the audience mix that the separate channels are like the different inputs. The two mixes are the different explanations of the same thing, but I want to make sure you guys
[04:32] and channels in a little bit. I want to get back to the microphone because we're going to do here. We're going to polish up our voice just a little bit. effects, audio effects. So, this is where you can add things like EQ,
[04:47] Elgato has also recently added a really cool feature where you can record your adding effects, taking them on and off and adjusting them. I'm going to use Voice Focus and some effects, I'm going to tell you about today's sponsor.
[05:01] Owned.pro, your one-stop shop for all your stream widget needs. Owned.pro, your one-stop shop for all your stream widget needs. Owned.pro, your one-stop Own.pro. Pro has been hard at work making a number of really clean, really
[05:16] look more professional. For example, I use four of them on my stream. The music widget, and the two that I helped them design, the label rotator, and the hypometer. I like it around 40% here. Let's add an EQ. The label rotator is a
[05:30] great clean way to show your most recent donator or subscriber or YouTube member. shows. The hypometer is a really cool way to keep a train going on your stream. And again, you control which actual events trigger the train to keep
[05:44] completely free. So check out the link in the description down below. Check out widgets to your stream today. I think that sounds awesome. EQ is almost like but for your voice. It's like a color grade. We'll do more on EQ and audio
[06:00] effects on the Beacon video next because Beacon does audio effects better than anybody else. But just know that typically a condenser mic doesn't require as much EQ as a dynamic mic where you really get some muddiness
[06:13] unless you fix it up in here. So I'm just going to add a little bit of there. I'm going to right click and make it a high shelf. Just, you know, around 3 4,000 hertz. We'll maybe boost it up two to three
[06:27] dB. I can use my scroll wheel to smoothen this out a little bit. That looks about right. And then usually I'd be listening to it while I do this, but how this goes. So I'm going to double click. I'm going to add a little bit of
[06:42] a bump here at 120 hertz just to give it a little bit of thickness. Just one and a half dB. And maybe we'll pull out a little bit at 500 to get rid of some of the muddiness, but not even a full decel. Let's take a listen to it with
[06:56] and without this EQ. Now a recording of my voice. It's just a good sample for me to listen to so I can see how it sounds. Now, I'm kind of far from the hear some room voice. Let's fix that. You can hardly even hear the difference.
[07:09] of sheen. The highend gives it a little bit of sparkle, a little bit of texture. thickness, especially since I'm so far from the mic. And I think we're going to you can put these kind of effects on any of the channels. If you want to add some
[07:23] EQ to your gameplay to increase the footsteps, you can do that. It's pretty microphone here. Let's get into some deeper mixing and add some more I want to add our game. I'm just going to use system. I like using system for
[07:38] they all go into the same one. It feels like a general PC volume channel. Then, let's add one more for music. But since I use Spotify, I'm just going to call
[07:51] this Spotify. Now, one of the first things I like to do is let our computer I'm going to right click on this little speaker down here. Going to go to sound settings. Scroll down to more sound settings. And this little guy up here,
[08:08] you can see this isn't the right one. We want to do Elgato system as our default device and voice chat as our default communication device. And that's under going to do is it's going to send any sound we have from our computer into our
[08:23] system sound except for apps that identify themselves as communication apps, things like Skype, things like Discord. Windows knows that's a communication device. And so it's going to send those directly into voice chat
[08:35] we go into a voice call, they're going to come through voice chat, and we can And then when we open a game or a YouTube video if we want to make people's content, we it's going to automatically route it through system
[08:49] We're going to take the microphone. In this case, we're going to say Elgato XLR make sure it's both the default device and the default communication device. neither of them show up means that is correct with a little check mark next to
[09:04] it. We're all good there. I do however want to route Spotify through its own music on its own. So what I'm going to do is I'm going to open up Spotify. I'm like stream beats link in the description down below. Let's turn on
[09:18] some Loi. You can see by default it's coming through system. But if I hit the little plus button under Spotify and check the box. Hey, look at that. It's check the box. Hey, look at that. It's shifted over to
[09:32] the music on its own, totally separate from my game volume or my Discord volume. You'll notice one of the things I had to do was move my audience mix and my personal mix separately. So, this is how much I hear of the music. This is
[09:44] Well, there's a tiny little feature down here called link faders. When we do that, when you drag one, it drags them both. And every time I talk about this feature, I feel compelled to remind you that that was my idea. Elgato still
[09:57] hasn't paid me for it. Maybe one day. I got to stop giving away my ideas for free. So, this is great. And because when I'm streaming, I like to have my music volume slightly lower than my audience's volume. I'll usually
[10:09] give it a little bit of an offset like this. And then I'll link it. And now you can see how they move. Perfect. Now, so far this is looking great, but come before my voice chat. For some reason, that's that's where the
[10:22] just going to click in the middle here, and I'm going to drag it and I'm going to drag it over, and it reorders for me. And now this is my mix. This is how I like it. This is great. In fact, the last thing
[10:34] I'm going to do here after I lock these two as well is I'm going to send this to my Stream Deck. So now I can adjust these things on the fly. So there's this new feature in Wavelink 2.0. Export
[10:46] profile to Stream Deck. If I click this, I'm going to choose my Stream Deck Plus. That's the one on the right over here. I'm going to hit create right stream deck. And look here, you can see on the
[11:02] stream deck, it ordered them the way I ordered them. We've got our microphone, chat, you can see a little voice bubble there. It always puts the master output on the far right. And if I swipe over, we've got our last one, the music. But
[11:15] these are set up by default. You can see in the second one here, my system right with the little headphones right there. If I click it in, it'll switch to the audience mix. It's layering two different actions that you switch
[11:29] between by clicking the button. We're switching back and forth between the monitor mix, which is my mix, and the stream mix or the audience mix. But the thing is, I've got them linked, which you should have most of
[11:45] the time anyway. So, if I adjust one, it adjusts them both. Anyway, so we're installed the Wavelink plugin for Stream Deck when we installed the software. going to drag input onto here. So, now it's just a single input. It's not a
[12:00] stack anymore. And we're going to change this back to system the way it was. It's even matter which mix I choose because they're linked. I like to have the sense for me to see the volume the way I hear it. And then also if I'm gaming
[12:15] when I'm not streaming, the volume still makes the most sense. I also like to change the step up to plus and minus4. You can see when I'm at plus or minus one, every click of the dial changes it by one%. Meaning if I want to go from
[12:28] 100 to zero, it takes a lot of scrolling. I'm going to change this up to four. So now every click of the dial, it goes down by every click of the dial, it goes down by 4%. And now I can go 0 to 100, 0 to 100
[12:42] in a single turn. Let's do that with all of them real quick. Input over here. Voice chat. I'm also going to get rid of the microphone because I never actually change the volume of my microphone on
[12:55] move all these over. Let's move music into this one or Spotify. Move that up to four. And now we can have all three of our tracks that
[13:08] we want to adjust and our master output all in there. Now, I never actually adjust this dial, this master volume. I just like to be able to see the levels there's actually sound coming out of it. And if I switch it to be able to see
[13:21] going to my audience and no sound going to my headphones. Perfect. That's what I to do is we're going to add an input to our button over here. And we're going to microphone. And we're going to mute it
[13:36] call from my mom. She wants to tell me how much she loves my streams, but I think it's a little bit cringey. I don't want that coming through on the
[13:51] me how great I am. My audience doesn't have to hear it. But there is one last like to share with you. We're going to grab this device right here and we're output. And under here, we're going to select toggle output. Now, what this
[14:08] allows you to do is it allows you to set your two different outputs. Let's say click of one button, you can switch between those two outputs. So, output is going to be the monitor mix. The primary is going to be my headphones, which are
[14:22] actually going into my Beacon mic right here. So, that's my primary output. My secondary is going to be the DLC Creator XS. And that is how my speakers are connected. And then for the title, just to make it even more obvious, we're
[14:35] this little symbol, maybe a space little symbol, and then DLZ. So, I can see the headphones are the speakers are when the right one's lit up. And when I click it, it switches
[14:50] back and forth. And you can actually see it happening in Wavelink as I press that. Headphones, speakers. Really cool. But I think we're going to call that a day. That should cover about 99% of anything you guys
[15:04] ecosystem, except for maybe a deeper dive into audio effects like EQ or even that'll be live on the next one. Make sure you subscribe for that. Hit the dives and these tutorials. Hit the like button while you're down there. And if
[15:20] questions, just leave your favorite emoji for engagement because I appreciate you guys. Helps out a lot more than you know. And as more than you know. And as always, happy streaming.
⚡ Saved you 0h 15m reading this? Transcribe any YouTube video for free — no signup needed.