
New Streaming Software: Meld vs Stream Suite
60sCompares two new streaming tools, sparking interest and debate among streamers.
▶ Play Clip"Delivers a solid beginner setup guide, but the '20 minutes' claim is optimistic and the sponsor segment adds fluff."
This video is a beginner-friendly tutorial on setting up a professional Twitch stream using OBS and the Stream Suite plugin. The host walks through installing the software, configuring basic settings, building two scenes (gameplay and chatting), adding a webcam, and creating a smooth move transition with a blur effect. The tutorial is part of a series and focuses on practical steps to get a stream running quickly.
The host introduces the tutorial as the first in a 3-4 video series on setting up a live stream, covering beginner to advanced topics. This video focuses on basic setup with two scenes: gameplay and chatting.
Two new software options are discussed: Meld (simple, reliable, 'Apple of streaming') and Stream Suite (a plugin for OBS with more creative control and professional tools). The tutorial uses Stream Suite because it includes advanced features like enhanced broadcasting and pre-installed plugins.
Download OBS from the official site, then install Stream Suite as a plugin. Stream Suite comes with many plugins pre-installed, including vertical and multiream plugins, so no extra installation is needed.
OBS has organizational tabs: 'Build' for setting up scenes and sources, and 'Live' for streaming controls like chat and activity. This helps keep the interface clean and focused.
Set canvas to 1920x1080 at 60 FPS. In output settings, set bitrate to 6000 kbps and encoder to hardware (NVENC for Nvidia, AMD for AMD). This ensures good quality and performance.
Add a display capture source for gameplay. Use Ctrl+F to fit to screen. Enable 'Force SDR' if using an HDR monitor to avoid color issues. Consider using 'grab any full screen application' for lower resource usage, but beware of privacy risks.
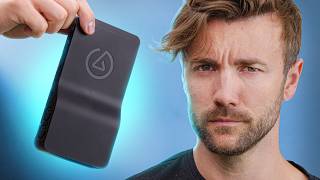
Add a video capture device for the webcam (Elgato Link 2C Pro). The host promotes the webcam, highlighting its large sensor, background blur, and presets. This is a sponsor segment.
Duplicate the gameplay scene to create a chatting scene. Make the webcam larger and position it vertically centered. Use Alt+drag to crop the webcam individually per scene without affecting the other.
In Stream Suite, add a 'Move' transition to animate the webcam between scenes. This creates a smooth sliding effect. Adjust transition duration to 500ms for a more natural feel.
To blur the gameplay background in the chatting scene, use a 'Source Clone' to create a separate instance of the display capture. Add a 'Composite Blur' filter with Gaussian algorithm, set to about 8. Then add an 'Advanced Mask' with inner feather to soften edges.
Add microphone audio globally via Settings > Audio. Set 'Desktop Audio' and 'Microphone Audio' to the appropriate devices (e.g., Elgato Wave XLR). This ensures audio is present in all scenes without adding per-scene sources.
After signing in with Twitch, the stream is ready. The host mentions that advanced topics like alerts, widgets, and vertical streaming will be covered in the next video.
This tutorial provides a solid foundation for setting up a professional Twitch stream using OBS and Stream Suite, covering essential settings, scene building, and a smooth transition with blur. The series promises to expand into more advanced features in subsequent videos.
What are the two streaming software options mentioned in the video?
Meld and Stream Suite (a plugin for OBS).
01:23
What is the recommended bitrate for a 1080p stream at 60 FPS?
6000 kilobits per second.
04:30
What keyboard shortcut fits a source to the screen in OBS?
Ctrl+F.
05:22
What is the purpose of the 'Force SDR' button?
It fixes color issues when using an HDR monitor.
05:38
How do you crop a source individually per scene without affecting other scenes?
Hold Alt and drag from the side of the source.
10:17
What is a 'Source Clone' used for in this tutorial?
To create a separate instance of a source so filters can be added without affecting the original.
12:56
What is the recommended Gaussian blur value for the background in the chatting scene?
8.
14:04
How do you add audio globally across all scenes?
Go to Settings > Audio and set Desktop Audio and Microphone Audio.
17:01
What is the 'Move' transition used for?
It animates the movement of sources between scenes, like the webcam sliding.
11:11
Software Comparison
Provides a clear distinction between Meld and Stream Suite, helping viewers choose based on their needs.
01:23Optimal Stream Settings
Gives concrete numbers for resolution, FPS, and bitrate, which are essential for a quality stream.
04:02Move Transition Trick
Demonstrates a professional-looking transition using a pre-installed plugin, saving time and effort.
10:58Source Clone for Filters
Shows a workaround to apply filters to a source without affecting other scenes, a common OBS challenge.
12:56Global Audio Setup
Explains how to set up audio once for all scenes, simplifying the streaming workflow.
16:33[00:01] I'm excited for you to be here today. We got a handful of fun things packed into a super simple tutorial to help get you on your way. Whether this is your first stream or you just need a a refresher after a couple years. And some of you
[00:13] a while that I redo these beginner setup tutorials every couple years as the tools advance and change. In fact, last time I did this about two years ago, I people stream with, OBS and Streamlabs. Today we're talking about two totally
[00:28] different softwares. We also have more new things like 1440p streaming on vertically and horizontally at the same time on Twitch. So, this will be the first of a three to four video series on setting up a live stream. Everything you
[00:41] need to know that'll get progressively more advanced as we go along. So, you everything you want to learn. And today, what we're going to learn is this. We're with two different scenes. You can see our first one is our gameplay scene here
[00:54] gameplay and then we have a chatting scene here to go between games where our background blurs and moves into the background a bit and our camera gets screen. It got that cool little move transition into it with a drop shadow
[01:09] intimidating, don't worry. This is actually fairly simple to do and I'll beginning and we'll get to a couple more advanced tricks at the end that I want you to try because maybe it'll trigger some creative ideas. Let's jump into it.
[01:23] What streaming software should you be using? Well, since I did the last video two years ago, two big softwares have been released. One is called Meltd, and ago. The second one is actually newer, and it's called Stream Suite by the
[01:38] company Adom, which full disclosure I am a part owner of. Stream suite is actually a plugin installed in OBS, kind of like a reskinning in order to give you some extra flexibility and some extra creative tools. And so the way I
[01:50] see this is Meld is for people that just want a clean and simple stream. A lot of the tools are easier to use and more reliable. It feels like the Apple of streaming. Whereas if you want to do more fine-tuning, you want more creative
[02:03] control, you want some more professional tools like enhanced broadcasting, you've using Adam Stream Suite in this tutorial because as we progress through the three that I'm going to be teaching you that are only in that software. But some of
[02:17] Meld and I'll let you know if that's the case so you get a good idea of what you download OBS. So we're going to go to operating system that you're using. I'm on Windows right now. It's going to
[02:31] just going to go through the installer. The next thing we're going to do is going to scroll down a little bit till we get to stream suite and we're going are familiar with our vertical plugin and our multiream plugin. Those are both
[02:44] included in Streamuite. You don't have to install multiples. Streamuite already has a bajillion plugins pre-installed in it, so you don't have to go out and try yourself. Now, if you've used OBS before, the first thing you'll notice is
[02:56] it should open up to look exactly like it did the last time you used it. If you're new to OBS and this is overwhelming, just ignore everything except this little spot up here. These tabs up here are organizational tabs, so
[03:08] you only need to see what you need to see. And by default, it starts off with a user tab, which is your previous user settings. They don't disappear when you user here. But we're not going to use this. We're just going to use these two
[03:23] tabs. We've got the build tab and we've got the live tab. The purpose of these you'll use when you're not streaming. That'll help you set up your scenes and and transform tabs right there, so you don't have to open up windows to adjust
[03:37] your sources, all your filters ready to go at a glance. And when you're ready to go live, you switch to the live tab. And that has all the things that you need live, like your chat and your activity and your stream info. Before you had to
[03:50] have everything you wanted all in the scene at the same time, even if you building or while you were live. So, this is an organizational tool for you. like build being first. And the first thing we're going to do is we're going
[04:02] we're going to make sure our canvas is ready for us. So, just for now, we're going to be setting up a 1080p stream. Nothing crazy. So, let's go to video. Let's switch this to 1920 x 1080 in both. And we're going to have it at 60
[04:15] you can sign directly into your Twitch account or you can choose YouTube, platform to be. And then one last setting here in output. We want to make kilobits per second. We're going to keep the settings simple for now. We'll get
[04:30] get into things like multiple audio tracks for removing music from your VODs have 6,000 kilobits per second and make sure the video encoder is set to hardware. Envank if you have an Nvidia GPU, AMD if you have an AMD GPU. Cool.
[04:45] stream. So, if you're looking at this and you're going, "Oh my gosh, there are here. I don't know where to look." We're going to look at three different things to start. We're going to look at this big blank black rectangle. That's our
[04:58] building our stream on. Then we're going to have scenes and sources and we'll go on from there. We're going to start by building one scene and this is going to actually going to extend this up a
[05:10] scenes, so I don't need this rectangle to be very large. We're going to add a source. We're going to add our gameplay in. Now, personally, I use display capture. What this does is this takes my computer monitor and it records it and
[05:22] it puts it right in the canvas. But you can see it is uh larger than the canvas because my monitor is 4K, but our canvas we only made 1080p. So we're going to use Ctrl+F. That's going to fit to the screen. You can also just resize it this
[05:38] ways. And I'm also going to click this force SDR button here, which you can see grayed out. I've got an HDR monitor and it kind of screws it up for people that if you're running a PC that's maybe a little bit underpowered, PC components
[05:54] are super expensive nowadays, and you're noticing some lag when using display capture. And this uses a little bit fewer PC resources. And what you can do is you can set it to say grab any full screen application, meaning anytime you
[06:07] a window or anything, that's what's going to go in there. My computer can little bit more. It means if I pull up something like YouTube or or something, means that if you pull up something like an address or a phone number, uh, your
[06:21] audience is going to see that. So, you know, do that at your own risk. Next, going to be a video capture device. Let's go and call this webcam. And we're going to do the Link 2C Pro. This is our webcam of choice here today.
[06:35] And you can probably see why just by looking at it. It is an incredibly natural looking webcam, even with some natural background blur, which is kind of insane for webcams. Let's talk about this because they are the sponsor of
[06:47] continue making these free tutorials without charging you anything. This entire tutorial is shot on both the Link 2C Pro and the Link 2 Pro over here. And these two webcams are phenomenal. With the new Link 2 and Link 2C Pros, one of
[07:01] the things they added is a much larger sensor. This is what allows the webcam to stop looking like a webcam and start looking more like a traditional camera, which is something that webcams usually do poorly. It also adds extra background
[07:13] background blur. I'm always kind of blown away when I look at that. But they that make life as a streamer a lot easier. It's also got a built-in green and easy to use. And while the Link 2C Pro is like a traditional webcam, the
[07:28] got those gimbal motors on it. Probably one of my favorite features and honestly presets where you can set different camera angles and then save them as presets. And now with Stream Deck integration, that becomes even easier.
[07:42] different camera settings, I'm going to make this one preset number one. And I can just hold this arrow. It'll turn the whole webcam over to my Mac setup and I number two. I can hit the one button and bring it right back over here. And then
[07:55] over here. I can even turn this dial to zoom in and out. If you're interested in picking up a Link 2 Pro or a Link 2C Pro today, check out the link in the to get a discount during Prime Day in late June. Biggest sales in the middle
[08:07] building our scene. So, this is going to be our gameplay scene, meaning our camera is going to be kind of small and off to the side. Let's worry about where exactly it's placed once we have the other scene built. Also, for now, this
[08:19] is fine. We have our gameplay and we have our camera. Let's build a second scene for in between games where we're talking to our audience. This is our chatting scene. So, we're going to call it chatting Tatum. You can see
[08:31] disappears. We're going to have to add everything in one at a time. Now, we deal. But if you're doing this, you've already added all your alerts and again. We actually do [clears throat] this instead. Let's get rid of that.
[08:44] We're just going to duplicate this scene. And now we can just make the adjustments we want on the new one. So, let's make the webcam larger. If you remember from the beginning, this is about about where
[08:56] of the scene sticking out from behind really intentional. I don't want it just sliding from spot to spot. I want them thing just vertically aligned in the center. So I've got it snapped to the
[09:11] right side and I'm going to rightclick and I'm going to say transform center vertically. And that's going to put it vertically at the center of the screen. You can see if I do uh transform center horizontally, it moves it to the
[09:23] center of the screen horizontally. But we don't want that. Let's go ahead and do that again. There we go. And this for now seems like exactly where I want it. don't accidentally move it. In fact, I'm going to do that for both. Now, let's go
[09:35] back to scene one. We're going to rename this one as gameplay. And with this one, obviously, the main purpose of this scene is to see as much of this as possible, but my camera has so much blank space on the left and right side
[09:48] I think I want my gameplay camera to be a tall rectangle. Now, there is a way of doing that by going into filters down here, and we can add a crop. You can see here, and we can add a crop. You can see if I add 500 pixels on the left and 500
[10:04] pixels on the right here. Here we have a tall rectangle. But if we go back to our chatting scene, you can see it did it to this one, too. We don't want to do that. Actually, before then, let's go ahead and um center this one vertically as
[10:17] well. So, our two cameras on both scenes are perfectly aligned. If you hold alt and you drag in from the side here, it'll crop in, but it'll only crop in on this instance of the source. Meaning if we go to this scene, it's still full
[10:31] screen. And that way you have individual control over the crop of each scene. Now it touching the edge. I'm going to have it right there. And then again, let's go ahead center vertically. Should probably just do that last after I got everything
[10:43] else done. In fact, let's make it a little bit larger. And then do it again. Maybe I can crop it in a little bit more on this side so it's a little bit more I'm going to lock it. Lock them both. Right now, we've got a fade going on
[10:58] between the scenes, and that's not what I'm looking for. We want the camera to do that? Well, before in regular OBS, you had to install a move transition plugin. With ADOM Stream Suite, it's already pre-installed for you. So, I've
[11:11] got scene transitions here, another tab. Yours might be down in the bottom. I it once and then I never touch it again. And you can see we got a cut and we got a fade. But if we hit the plus button here, we have more options. We can add
[11:24] multiple transitions. So, let's set a move transition. You got a bunch of with them. We're going to keep it simple. Now, if we switch between scenes, what happens here? Look at that. What it does is it sees
[11:38] that webcam is on both different scenes. And so, when you're switching scenes, it animates that transition between them. Very cool. But sometimes between the two scenes, you want to add a couple different filters or effects, right?
[11:52] remember from the beginning when we went to the chatting scene, this big scene back here not only got smaller, but it got blurry. It helped emphasize the camera more. So, let's go ahead and bring this in. Let's make it about that
[12:05] bring this in. Let's make it about that size instead. Just a little bit smaller that way. And we got a little bit more life to it. That's kind of fun. Now, we want to add a blur effect here. If we click on
[12:17] display capture, which is our screen here, and we add a filter, you can see Now, there's a little bit of a bug on this plugin. You can see that the screen just went black. If we change it to a different type and then change it back
[12:30] why it does that. That's just the way it is right now. But if we add that filter to it, oh, now we have the filter on our gameplay scene as well. We don't want that. And unfortunately, there's no trick like the camera crop one where we
[12:43] here's what we're going to do. Let's remove that blur real quick. And we're actually going to remove the display capture from the scene that we want the the one we want the blur on. So, let's remove it. And instead, we're going to
[12:56] add a whole different source called source clone. This is just cloning our completely new source. So, any filters we add to it don't affect the original one. We're going to name it the same thing
[13:11] with a one at the end. There's a reason for that. It's going to be a clone type source canvas. This is our main canvas here. And what do we want to clone? We want to clone display capture. For some reason, it put gives you the option to
[13:23] clone the the clone itself. That seems redundant. Okay, display capture. Let's screen. Let's bring it down below our webcam. So, our webcam's on top. And again. Right to where we had it, right about here. Now, make sure we have
[13:38] display capture settings. Sometimes I've added a filter and it's actually on the uh the whole scene itself. But you can see we got display capture one, our clone here selected and we're going to add a composite blur. Let's go ahead and
[13:50] switch the the algorithm type and back to gausian. Gausian is like the regular add a blur, 99% of the time you use gausian. Uh that seems a little bit too much. Let's bring it down a little bit. Also, man, nobody would ever want more
[14:04] than like 20. We're going to bring this up. I think I think eight is the sweet to do seven? That's it. Ignore the rest. The reason we named this display capture one is because the move transition recognizes sources that have the same
[14:20] name with a number at the end. And you can see even though they're two different sources, the move transition still works. If you do this, you'll notice the transition between the blur and the not blur is a little bit choppy.
[14:34] frame. Mine isn't [clears throat] looking like that, but it did the first to our move transition again. And we're going to go into the properties of this move transition. This is the properties of this transition we've made. And down
[14:49] here where we see matched items, we're going to change the transition to fade. So now, as you're moving between two different objects, one being uh blurred,
[15:01] fade between those two instead of cutting between those two. Just like that. Look how smooth that is. Oh, I do feel like this is a little fast. I want to I want to let this transition uh breathe a little bit more.
[15:17] 300 milliseconds or.3 seconds. Let's go to a half a second instead. See, that feels nicer. That feels like it's not rushed, you know? One thing I don't like, though, is I don't like how hard this edge, like,
[15:32] crisp. I feel like the whole thing should be blurred. And that's just the way blur works when the actual source itself goes to the edge of the frame. We're going to add one more filter to this. It's here in advanced mask. And
[15:46] again, you can see it disappear. I feel like the default for a lot of these plugins should be totally different because you can see it's got a hefty mask on it. All I have to do is size this properly. So, this is a a 4K screen
[15:59] We're not trying to crop this. This is our uh cropping tool here. We actually called feathering, which is going to like blur the edges of this. But first, for some reason, we have to adjust our mask width to be the width of our of our
[16:16] mask width to be the width of our of our screen. So 4K is 3840 by is it 2160? bring it back to the way it was when we started. And then let's make this an inner feather. And then Ooh, isn't that nice? Let's see. Maybe
[16:33] right about there. Let's see how that looks. looks. Oh, have to do here. That's add a microphone into our live stream here. Now, you can
[16:47] go into sources and add an audio input capture. And in here, we'd be able to pick our microphone or our stream mix. I'm using an Elgato Wave XLR, but that means we're going to have to add that to every single scene. Now, if you have
[17:01] scene, that's a great option. But if we want to add audio that is across every across every scene, like our microphone, our stream mix, what we're going to do is we're going to go into our settings up here. We're going to go to audio and
[17:15] we have desktop audio and microphone audio. Now, desktop audio is if you want to capture something internal from your computer, like you just want to capture be the right thing to do to grab our game volume, but in this case, because
[17:28] mic. A lot of these have mixing software. That's all going to come in just going to add our stream mix and we're going to control what the stream hears through our audio software. Hit apply. You can see it adds this here.
[17:43] stream mix, which I have it all turned off right now, you'd see this jumping up this real quick so you can see what this is supposed to look like. Like this. this. Check, check, check. You can see my microphone when I talk. This goes up
[17:57] and down. You can check your volume there. All of that audio stuff will also want some real deep dives on how to control your audio in a live stream. alerts, maybe chat overlay on the screen. We're going to get to that in
[18:09] the next video. Beautifying the stream. But right now, we have a working stream. We're signed in with our Twitch account. We're ready to go. We could hit go live have noticed in the beginning of this tutorial when I showed off what we were
[18:21] going to do that my camera had a drop shadow on it, which I really liked and I would do if I was doing this for myself, but that actually got a little bit complicated because as I crop the side here, that would also crop the drop
[18:35] shadow. But I'm going to leave that as homework to see if you can figure out series. In that one, we'll do things like the alerts, some widgets, the vertical plugin, streaming to Twitch in both vertical and horizontal at the same
[18:48] subscribe and show up to that one. If this helped, hit the like button. Let the algorithm know that was helpful. And as always, happy streaming.
⚡ Saved you 0h 19m reading this? Transcribe any YouTube video for free — no signup needed.