
From Zero to Stream-Ready in 60 Seconds
45sPromises a quick transformation from no setup to a full overlay, hooking beginners.
▶ Play Clip"Title accurately reflects content: a comprehensive beginner's guide to OBS setup."
This video provides a comprehensive beginner's guide to setting up OBS for streaming, covering scene creation, source management, alerts, chat integration, and audio configuration.
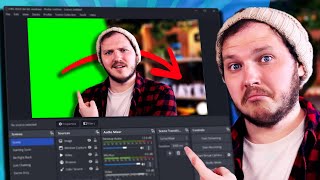
OBS has a display window, scenes, sources, mixer, scene transitions, and controls. Unlike Streamlabs, OBS doesn't have built-in event lists or chat.
Right-click to create scenes (e.g., game scene). Use the plus sign to add sources like game capture, video capture (webcam), media source (animations), and browser source (widgets).
For Twitch alerts, go to Twitch dashboard, create alert box, copy browser source URL, and add as browser source in OBS. Test with 'Send Test Alert'.
Use Stream Elements to add labels (e.g., latest follower). Create an overlay, upload support bar graphic, add label, customize font and size, then add as browser source in OBS.
In Stream Elements, create a new overlay, add chat widget, customize style (e.g., remove background), then add as browser source in OBS. Position below camera in source list.
Create a new scene, add webcam full screen, chat on side, and alerts. Use Studio Mode to preview transitions before broadcasting.
Add a stinger transition by selecting a video file (webm), set transition point to frame 30, and adjust as needed. Use override for different transitions per scene.
Set mixer to vertical, hide unnecessary sources. Add mic and desktop audio in settings. Adjust volume levels and use audio monitoring carefully to avoid echo.
Use custom browser docks to add Twitch chat and activity feed directly into OBS for easy monitoring.
By following this guide, beginners can set up a complete OBS streaming environment with scenes, alerts, chat, and audio, and are encouraged to customize further using linked tutorials.
What is the difference between OBS and Streamlabs regarding built-in features?
OBS does not come with event lists, chat windows, or alerts built-in, unlike Streamlabs.
01:01
How do you add a game capture source in OBS?
Click the '+' in Sources, select 'Game Capture', then choose the game.
02:44
What setting must be enabled for animated media sources to loop?
Loop must be turned on in the media source properties.
05:01
How do you set up Twitch alerts in OBS?
Go to Twitch dashboard, click Alerts, create alert box, copy browser source URL, add as browser source in OBS.
03:13
What is the purpose of Studio Mode in OBS?
Studio Mode allows you to preview a scene before transitioning it to the live broadcast.
10:40
How do you crop a source in OBS?
Hold Alt and drag the edges of the source to crop it.
08:29
What file format is recommended for stinger transitions?
WebM is recommended for stinger video files.
12:13
How do you add a custom browser dock in OBS?
Go to Docks > Custom Browser Docks, name it, and paste the URL of the popout chat or activity feed.
17:20
What should you avoid when monitoring your microphone in OBS?
Avoid monitoring your microphone if desktop audio is also being captured, as it can cause a double-up echo.
16:29
OBS Interface Overview
Provides a clear tour of the main components: display, scenes, sources, mixer, transitions, and controls.
00:48Setting Up Alerts
Demonstrates a simple method to add Twitch alerts using browser sources.
03:13Using Stream Elements for Labels
Shows how to integrate external tools for dynamic labels like latest follower.
05:20Cropping Sources with Alt+Drag
A quick and useful shortcut for resizing sources without losing quality.
08:29Studio Mode for Seamless Transitions
Explains how to preview scenes before broadcasting, a key feature for professional streaming.
10:40Avoiding Audio Double-Up
Highlights a common mistake with audio monitoring that can cause echo.
16:29[00:00] installing OBS can be confusing and
[00:02] streaming isn't meant to be confusing it
[00:04] is meant to be fun right today you'll go
[00:06] from having nothing set up to having
[00:08] this awesome overlay set up and
[00:10] understanding how to customize and
[00:11] control every single thing you want
[00:14] including the dreaded audio when you
[00:18] first install OBS you'll most likely
[00:20] either have a blank slate or maybe
[00:22] you've already played around a bit or
[00:23] even installed a template overlay from a
[00:25] website for this I want you to start
[00:27] with a blank slate so come to the top of
[00:29] OBS click this little drop down that
[00:31] says scene collection and click new once
[00:33] it opens name this one whatever you want
[00:36] I'm going to name mine today subscribe
[00:38] this will add a new blank setup if you
[00:40] want to swap back go to the same process
[00:42] you did but don't click on new and
[00:43] instead click on the overlay in your
[00:44] list don't worry everything I've done so
[00:46] far hasn't deleted all your work okay
[00:48] let's give you a quick tour of OBS and
[00:50] yes don't worry I'll Deep dive into
[00:52] everything but first you need to know
[00:53] your way around in the middle you have
[00:55] your display window this is what you'd
[00:56] be broadcasting to Twitch if you were
[00:58] live right now but right now it's blank
[01:01] obviously unlike other tools such as
[01:03] streamlabs or twitch Studio OBS doesn't
[01:05] come with event list so you can't see
[01:07] your new follows or new subscribes or a
[01:09] chat window even so you can't even see
[01:11] your Chatters but don't worry we'll set
[01:13] both of these up later as docs and
[01:14] they'll be on your left and right just
[01:16] like any other tool below that we have
[01:18] four boxes on the far left we have
[01:19] scenes you'll set up different scenes
[01:21] for different reasons for example you'll
[01:23] need a scene for gaming a scene to say
[01:25] you're going be right back or a scene
[01:27] for just chatting to your viewers if we
[01:29] had those three scenes set up and
[01:30] clicked between them then we would be
[01:32] transitioning more on that later in the
[01:34] middle we have sources these are the
[01:36] assets you have added to the scene you
[01:38] have selected on the right we have the
[01:40] mixer these are your audio sources that
[01:42] will be transmitted out and you can
[01:44] control and edit your audio from here
[01:46] further to the right we also have our
[01:47] scene transition controller this lets
[01:49] you set up stingers and animations for
[01:51] transitioning between scenes and then on
[01:53] the far right you have controls this
[01:55] lets you start stream start recordings
[01:57] turn on Studio mode and of course open
[02:00] your settings and that is really
[02:01] everything you need right now for
[02:02] getting set up the rest will be covered
[02:04] throughout the video but I will quickly
[02:05] mention if you're wanting to learn about
[02:07] streaming settings in particular and how
[02:09] to avoid laggy streams well there is a
[02:11] playlist in the description that has a
[02:12] video about fixing laggy streams and
[02:14] making sure your stream settings are
[02:15] crystal clear so I will show you how to
[02:17] install alerts chat widgets and fix your
[02:19] audio in only a few seconds but first
[02:21] let's cover the basics on the left we
[02:23] have scenes as I said you'll make your
[02:25] scene for different purposes for example
[02:27] you'll make a game scene so we right
[02:29] click and name game scene now I might be
[02:32] setting up a gaming scene but I'll cover
[02:33] everything you need to know to build any
[02:35] scene you want think of this as building
[02:37] blocks in the middle we have sources
[02:39] sources are again all of your media that
[02:41] are in the scene you currently have
[02:42] selected right now it's empty but if we
[02:44] click this plus sign at the bottom we
[02:46] can add sources such as game capture
[02:49] which you'll need if you're trying to
[02:50] capture a game in your gaming scene if
[02:52] you don't have a game open it will be
[02:53] blank for now but don't worry about it
[02:55] and also it's important to remember that
[02:56] not every game will be captured in this
[02:59] some games games need window or display
[03:01] capture to actually be captured so you
[03:03] might have to try different options but
[03:05] anything you want to add to a scene
[03:07] you'll do it with this plus sign that
[03:08] could be video graphics or it could be
[03:10] still images or it could be any of the
[03:12] dozens of widgets you'll add with
[03:13] browser sources for example we also want
[03:15] alerts so if someone follows while
[03:17] you're live an alert plays on screen
[03:19] unlike streamlabs OBS doesn't come with
[03:21] alerts but with twitch alerts you can
[03:23] set these up in 10 clicks or if you're
[03:25] on YouTube you can use stream elements
[03:27] for twitch alerts head to your Twitch
[03:29] dashboard click alerts create alert box
[03:32] name it click edit alerts and then in
[03:34] the bottom right copy this browser
[03:35] Source URL come back to OBS click the
[03:38] plus click browser name it alerts and
[03:41] then paste the copied URL I showed you
[03:43] into the URL box click save and now if
[03:46] you click send test alert you'll see you
[03:48] have all the default twitch alerts set
[03:50] up there's a full video in the
[03:51] description on customizing these alerts
[03:53] for now that's the basics let's move on
[03:55] your game scene will probably also need
[03:57] a webcam maybe some support bars for
[03:59] your latest follower or latest
[04:00] subscriber and potentially you'll also
[04:02] want your chat on screen first let's
[04:04] start with the webcam let's click the
[04:06] plus again and click video capture
[04:07] device we'll then select our webcam and
[04:09] then resize it down by clicking the
[04:11] corner and dragging it down now the
[04:13] source list isn't a random order it's
[04:15] actually layers imagine the bottom layer
[04:18] is behind everything else so if I drag
[04:20] my webcam below my game capture it is
[04:23] hidden if you can't see a source it's
[04:25] worth considering whether or not it's
[04:26] placed in the right section of your list
[04:28] now I want to add my support bars that
[04:30] the name of my latest follower will
[04:31] appear in so I would click the plus and
[04:33] I can either click image if my support
[04:35] bar graphic isn't animated or I can
[04:37] click media Source if it is an animation
[04:40] or a video file all of the graphics I
[04:42] use in today's video are available for
[04:43] free for download from the Discord
[04:45] server Linked In the description I think
[04:47] we have about 3 to four dozen fully
[04:49] animated overlays in there now just for
[04:50] free so you can have those if you want
[04:52] my support bars are animated so I click
[04:54] media Source I'll find my animated bars
[04:56] file on my computer and I will add them
[04:59] in here since they are animated I also
[05:01] need to make sure I double click my
[05:02] support bar layer so the settings open
[05:04] and then I'll click Loop or else it will
[05:06] stop playing after the animation
[05:08] finishes any animation you want to keep
[05:10] playing forever needs a loop turned on
[05:12] this process is also how you can import
[05:14] a frame for your webcam or really any
[05:16] other graphic but first we want to add
[05:17] our follower name to our support bars
[05:20] the issue is OBS doesn't come with label
[05:22] widgets built in making it a little bit
[05:24] tricky instead you'll have to use stream
[05:25] elements to add these don't worry it's
[05:28] actually really simple once you do it
[05:29] once so you'll head to stream
[05:31] elements.com you'll log in and connect
[05:33] your Twitch or YouTube account if you're
[05:34] streaming there click streaming tools on
[05:36] the left at your dashboard and click new
[05:39] overlay set your overlays resolution to
[05:41] the same size as your OBS if you don't
[05:43] know what that is you can check this in
[05:45] the settings video and it's the base
[05:47] canvas so for us it's 1080p you're going
[05:50] to click the plus and click add static
[05:52] SL custom click video and then in the
[05:55] top right click change video upload and
[05:58] you'll upload your support support bar
[06:00] file from your computer the reason we
[06:01] are adding this support bar graphic
[06:03] again but now on stream elements is
[06:05] because it will be far easier for us to
[06:07] add the label to fit the bar if we do it
[06:09] all in one place rather than adding a
[06:11] label to elements and then trying to
[06:13] make it fit in OBS click the plus sign
[06:15] again click labels follower latest
[06:17] follower and you'll see it's been
[06:19] dropped in here but then if you click it
[06:21] you'll be able to edit what it says up
[06:22] here in the top left you can change the
[06:24] font you can change the size of the font
[06:26] you name it you can do it here however
[06:28] those actually come with custom fonts
[06:30] that match the design so for example
[06:31] this is the paint splatter pack so I'll
[06:33] set this to blow brush so it looks a bit
[06:34] like it's someone spray painting I'm
[06:36] going to turn on Dynamic font size so I
[06:38] can resize it onto the bar and I'll add
[06:40] a little drop shadow to it now I know I
[06:42] went through that a bit quick but stream
[06:44] labels are simple to add and really
[06:47] powerful even just opening the drop down
[06:49] you can see dozens of other types of
[06:51] labels and if you want in the playlist
[06:53] Linked In the description I have a
[06:55] stream labels tutorial that covers
[06:57] everything you need in about 9 to 10
[06:59] minutes this video would go on far too
[07:01] long if I did a deep dive into labels
[07:02] now so instead I'm showing you the
[07:04] basics so you can get going and the
[07:06] other video can help you become a pro
[07:08] later once you've positioned your label
[07:09] and you're happy with it you'll click
[07:11] save you'll name it and then click this
[07:13] little chain to copy the URL head back
[07:15] to OBS hit the plus select the browser
[07:17] source and paste this in just like you
[07:19] did last time but extra step change the
[07:22] width and height to match what you set
[07:24] your canvas resolution and overlay
[07:26] resolution so remember mine was 1080p so
[07:28] I'll set this to 19 20 x 1080p for you
[07:31] make sure it just simply matches your
[07:32] base canvas now what if I don't like
[07:35] where my bars have fallen naturally and
[07:36] I want to move them all to the bottom of
[07:38] the screen well I can I just click and
[07:40] drag that Source all the way down and it
[07:42] moves everything because I'm simply
[07:43] moving the stream elements overlay I
[07:45] made and imported but LJ now we're left
[07:47] with two support Parts don't worry I did
[07:49] that on purpose so I could show you guys
[07:51] how to delete a source if you go down to
[07:52] your Source list click it and click
[07:54] delete but if I wanted to move my webcam
[07:56] and its frame that goes around it I can
[07:58] click and drag one individually to move
[08:00] them but a much easier and neater way is
[08:03] to select both my graphics and hit the
[08:06] plus button then add a group source and
[08:08] drag all the sources into one folder
[08:10] named webcam I can then click the group
[08:12] and move that around and it will move
[08:14] everything inside it now we do hit a
[08:16] snag we have about three to four support
[08:18] bars on our screen and yeah you could
[08:21] use these other bars for things like new
[08:22] donation labels or new sub labels but if
[08:25] you want to get rid of them or crop
[08:27] anything inside OBS you can just
[08:29] clicking on the source holding down alt
[08:32] and then dragging it to resize from the
[08:34] vertical or horizontal boxes personally
[08:36] though I will say if we're resizing or
[08:38] cropping sources that come from stream
[08:39] elements first I prefer to Simply crop
[08:42] and resize it there on their overlay
[08:44] editor because then it loses less
[08:46] quality when scaling it up inside OBS
[08:48] this old drag also works with every
[08:50] other source and specifically when it
[08:51] comes to resizing your camera sometimes
[08:54] you want a square camera inside your
[08:55] game to block less of the gameplay so if
[08:58] we import this Square webc cam frame
[08:59] that comes optional with all of our
[09:01] overlays and lay it over our webcam we
[09:03] can then hold alt and we can drag the
[09:05] camera source to be a square and it will
[09:08] fit inside the Box nicely the last step
[09:10] of our game scene let's add chat to your
[09:12] screen you'll need to head back to
[09:14] stream elements and follow the same
[09:15] process as earlier and make a new
[09:17] overlay you don't want your support bars
[09:20] and chat in the same overlay once you
[09:22] have your new overlay hit the plus sign
[09:24] and click stream tools then click the
[09:26] chat it'll add the default chat box most
[09:28] likely and it doesn't look great so at
[09:31] the top left of the properties you can
[09:32] change the height and width to change
[09:34] the size of the box but also it has some
[09:37] presets of chat Styles personally I
[09:39] prefer setting it to custom so I can
[09:40] remove the hard background and then if
[09:42] you click text settings you can change
[09:44] the font add drop shadows and well
[09:46] really anything you want once we're done
[09:48] we'll copy the browser source and then
[09:50] paste it as our new browser Source in
[09:52] OBS and just like earlier we're going to
[09:54] make sure that the browser Source
[09:55] matches the resolution of the overlay
[09:57] resolution that we set and now let's put
[10:00] this chat box below our camera and our
[10:02] followers type something in twitch chat
[10:04] for the tests and make sure it is below
[10:06] your camera in the source list so now
[10:08] that it Scrolls up it'll go under your
[10:10] camera nicely it just looks nice and
[10:12] smooth this way congratulations you have
[10:15] a game scene set up now let's go back to
[10:17] our scene list and make a just chatting
[10:19] scene we're going to hit the Plus on the
[10:21] scene list and name it just chatting and
[10:23] then hit okay and with that all our work
[10:25] is gone oh my god what have we done just
[10:28] kidding it isn't actually gone it's just
[10:30] in another scene if you click the game
[10:32] scene it will transition back to that
[10:34] one we just set up now you might not
[10:36] want to transition every time you select
[10:38] a new scene so what do you do well you
[10:40] click on Studio mode on the bottom right
[10:42] and now when I click game scene it shows
[10:44] me the game scene on the left and I can
[10:46] click transition and it moves to the
[10:48] right what is shown on the right is
[10:50] being broadcasted out and what is
[10:51] showing on the left is the preview of
[10:53] the scene that you're looking at
[10:54] transitioning to you can go ahead and
[10:56] set up your just chatting scenes however
[10:57] you want it is the same process as your
[10:59] game scene just hit the plus and insert
[11:02] the source that you're trying to add for
[11:03] me I recommend adding your webcam as a
[11:05] full screen or at least quite large you
[11:07] can add your chat to one of the sides
[11:09] and don't forget to add your alert box
[11:11] as well so you can hear when people
[11:12] follow in this scene you can just copy
[11:14] and paste most of this from the game
[11:15] scene and then resize it but if you want
[11:18] chat alerts or other browser sources to
[11:20] look and be different between scenes
[11:22] well then you need to set up a new
[11:23] overlay on elements or twitch alerts and
[11:26] then add the new browser Source it's the
[11:28] same process as I showed you earlier
[11:29] though but you can see the difference
[11:31] here my game scene my chat is small and
[11:33] fits under my camera but in my just
[11:35] chatting scene it's really large these
[11:37] are two different resolutions and two
[11:38] different sources from elements you'll
[11:40] see on my chatting I decided to make my
[11:42] camera full screen and put the chat
[11:43] largely on the side with my alerts in
[11:45] the bottom of the other corner I just
[11:47] find this is a really nice default just
[11:49] chatting setup and I do recommend it for
[11:51] everyone once you have that let's add
[11:52] some Polish to our transitions between
[11:54] your scenes so let's quickly add an
[11:56] animation to this transition rather than
[11:58] this weird fade head head to the scene
[11:59] transition section in the bottom right
[12:01] click the plus change it to stinger and
[12:03] now you want to find the Stinger file on
[12:05] your computer remember every graphic in
[12:07] today's video is downloadable in the
[12:09] streams game Discord so once you find it
[12:11] import your video file make sure you use
[12:13] a webm for the video Stinger change this
[12:15] from time to frame and then set the
[12:17] transition point to 30 this is what fits
[12:20] the animation I am using but you can
[12:22] adjust when the transition point is
[12:23] moving it further or back until it fits
[12:25] yours then hit done and make sure this
[12:28] drop- down menu says ER hit done and
[12:31] click between your two scenes Tada
[12:33] you've got a new transition this is the
[12:35] global transition so that means it will
[12:37] play every time you change scenes but if
[12:39] you wanted you could add custom rules
[12:41] for this transition if we click on just
[12:42] chatting right click transition over rde
[12:45] and click cut now if we click to
[12:47] transition it will play the global
[12:49] Stinger but if we click back it will
[12:51] hard cut to the scene we just set to the
[12:52] override look this gets overly
[12:54] complicated fast and if you are in need
[12:56] of multiple transitions for different
[12:57] scenes I don't recommend using the
[12:59] override I recommend a plugin called
[13:01] transition table for now I prefer using
[13:03] just one singer and one hard cut
[13:05] depending on which scene I'm going to so
[13:07] we don't over complicate it plus I also
[13:09] have a video where I show off literally
[13:10] 50 plus free animated stingers and how
[13:13] to get even more custom with your
[13:14] Stingers it's in the playlist Link in
[13:16] the description and they're all
[13:17] downloadable again from the stream
[13:18] scheme Discord now before we move on to
[13:20] audio maybe you didn't want to set every
[13:22] Source up by hand maybe we just want to
[13:24] set up a template overlay and then use
[13:26] everything I just taught you to
[13:28] customize it well sadly with OBS there
[13:30] is no simple way to do this you'll need
[13:32] to make a series of scenes and then
[13:34] install all of the sources by hand as
[13:36] I've shown you the best I can offer is
[13:38] the fact that we have about two dozen
[13:40] three dozen fully animated overlays in
[13:42] the Stream scham Discord so at the very
[13:44] least you can take those and build an
[13:45] overlay you love with all these modular
[13:47] animations everything you've learned so
[13:49] far though is the building blocks to
[13:51] becoming a pro at OBS if you can do
[13:53] everything I showed you then you can
[13:54] build an entire overlay if you're
[13:56] patient and take it one step at a time
[13:58] plus if you need help with our overlays
[14:00] an install guide is linked in the
[14:01] playlist and we have a list of
[14:03] frequently asked questions in the
[14:04] Discord as well and about eight
[14:05] volunteers to help out and get you set
[14:07] up okay let's cover the mixer over here
[14:09] on the right let's select our game scene
[14:11] now on the right you'll see that your
[14:13] audio sources are anything that you have
[14:15] in that scene this could be media files
[14:17] like animations it could be widgets
[14:19] really it's just anything that's in
[14:20] there it might even be your webcam we're
[14:22] going to focus on just three audio
[14:24] sources our desktop audio our mic ox and
[14:27] our game capture these might not be on
[14:29] your OBS yet don't worry they will all
[14:31] be there soon first I want you to click
[14:33] on the three dots on the bottom of the
[14:34] mixer and click set to Vertical I find
[14:37] this just makes it look neater and then
[14:39] we're going to hide anything that isn't
[14:41] one of those sources I just mentioned
[14:43] you'll do this by clicking the three
[14:44] dots under a source let's say the webcam
[14:47] and then click hide in mixer box now
[14:49] it's cleaned up let's add your mic and
[14:51] desktop audio we'll click on the
[14:52] settings in the bottom right and Below
[14:54] output you'll see audio so click audio
[14:57] and then I want you to click your mic Ox
[14:58] one one and select your microphone in
[15:00] the dropdown now these will all be named
[15:02] differently but it should say your brand
[15:03] of microphone or something like USB mic
[15:06] be careful not to leave this as default
[15:08] because it might default to say your
[15:09] webcams microphone or something else
[15:11] that picks up audio on your computer
[15:13] which will likely sound awful in the
[15:15] same area I want you to select desktop
[15:17] audio and click default this will
[15:19] capture all Desktop sound and anything
[15:21] that plays through your default sound
[15:22] output on your PC if it isn't capturing
[15:24] all of that then you'll need to try a
[15:26] few different options till you find one
[15:27] that is there are more complex ways to
[15:29] set up audio capture but I find this is
[15:31] a really good place for a beginner to
[15:32] start so once we've got those two things
[15:34] added we'll head back to our mixer and
[15:36] if we talk into the mic is being picked
[15:38] up on these bars your bars for your
[15:40] microphone should be hitting the top of
[15:41] the yellow and a tiny bit of the red but
[15:44] no higher and any audio that we can hear
[15:46] on our computer is usually being picked
[15:48] up by our desktop audio so if we're
[15:50] playing music that is being picked up
[15:51] there playing a game it should be there
[15:53] as well and if we send a test alert to
[15:55] our alerts they'll be here as well to
[15:57] mute our microphone or Des toop audio we
[15:59] click this little button here on screen
[16:01] and to lower the volume you can click
[16:03] and drag the actual level on your screen
[16:05] as well the final step here is that
[16:07] you'll want to click the Cog wheel in
[16:08] the bottom and open advanced settings on
[16:10] the right you'll see audio monitoring if
[16:12] it says monitor off it means you can't
[16:14] hear this Source out of OBS but your
[16:17] viewers can if you have monitor only it
[16:19] means that only you can hear it and OBS
[16:21] isn't transmitting it and then Monitor
[16:23] and output means that not only are you
[16:25] listening to the source from OBS but you
[16:27] are also outputting it now remember
[16:29] though if you monitor something say your
[16:32] microphone to listen back to it but your
[16:34] desktop audio is also being captured
[16:37] then you'll transmit that cuz you can
[16:39] hear your microphone which causes a
[16:41] double up so make sure you're not
[16:42] monitoring your microphone at all times
[16:44] now if you want to Deep dive into audio
[16:46] specifically one that lets your mic
[16:47] sound amazing that is also in my
[16:49] playlist Linked In the description I
[16:51] made a $10 USB mic from a grocery store
[16:54] sound pretty damn good with absolutely
[16:56] zero plugins no extra cost I'm I'm
[16:58] really proud of that video but for now
[17:00] that is the basic setup done and you are
[17:01] ready to start streaming almost we need
[17:04] to add event lists and chat to OBS so
[17:07] you can actually see when someone
[17:08] follows or chats easily now personally I
[17:10] prefer to open my twitch dashboard or
[17:12] YouTube stream Studio dashboard and just
[17:14] have them here on another monitor but I
[17:16] know everyone is different so we will
[17:18] give you a few options instead first
[17:20] head to the dock click custom browser
[17:22] Doc and now you'll type in Doc name
[17:24] twitch chat leave this open and head to
[17:27] your Twitch dashboard and then click the
[17:29] three dots on your Twitch chat and click
[17:30] pop out now copy the URL of this pop out
[17:33] and paste it into the URL of the doc
[17:35] that we had open you'll need to log into
[17:37] twitch now but once done OBS will have
[17:39] that chat window as a dock that you can
[17:41] move around and slide right into OBS if
[17:44] you just hold it over the section here
[17:45] you'll do the same process but this time
[17:47] using the activity feed and drop that on
[17:49] the left now you can see chat your
[17:51] latest followers latest subs and you can
[17:53] see what you're transmitting your scenes
[17:54] your sources your audio and your
[17:56] Stingers all in one place the final tip
[17:58] of this video is is to remember this
[17:59] guide has taught you the basic building
[18:01] blocks and provided a full overlay to
[18:03] build if you follow along step by step
[18:05] you'll be able to build an overlay and
[18:06] master OBS but that's only if you didn't
[18:09] take shortcuts and tried to skip through
[18:11] the video now click this video here to
[18:13] fully customize those alerts we added
[18:14] earlier or this video here to fully
[18:16] customize your stream labels and your
[18:18] support bars and I'll see you guys next
[18:19] week
⚡ Saved you 0h 18m reading this? Transcribe any YouTube video for free — no signup needed.