
Why Your Green Screen Setup Sucks
45sStarts with a bold claim that everyone is doing it wrong, hooking viewers who want to improve their stream quality.
▶ Play Clip"Title accurately promises a comprehensive green screen guide; video delivers on setup, lighting, and creative backgrounds."
This video teaches streamers how to properly set up and light a green screen for OBS or Streamlabs, covering equipment choices, lighting techniques, and chroma key settings. It also provides creative ideas for using custom backgrounds to enhance viewer engagement.
Most streamers use green screens incorrectly; the video aims to fix setup, lighting, and chroma key issues.
You need a webcam (e.g., Logitech C922), a green screen (e.g., Elgato, but not recommended due to cost and durability), and proper lighting.
Lighting makes or breaks green screen quality. Even lighting without shadows or bright spots reduces shades of green, making removal easier.
Using weak USB lights (e.g., Neewer USB lights) that force digital brightness increase, resulting in poor quality.
A two-pack of Neewer 9Ws (around $100-200 AUD) outputs 2100 lumens each, has high CRI (95%+), and adjustable color temperature (3200K-5600K).
Add video source, set resolution (1920x1080 or 720p), FPS to 30, color space to 709, color range to full, and turn off auto settings. Set exposure to -5 to avoid lag.
Key light at 45° angle, 10 cm above eyes; fill light on opposite side. Raise brightness slowly. Set lights to 4700K and match webcam white balance.
Place green screen not too close (to avoid shadows) and not too far (to cover frame). Ensure even lighting.
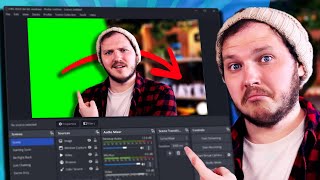
Add chroma key filter to webcam source. Adjust similarity and smoothness. Use Alt+drag to crop edges if needed.
Use free-to-use photos to create interesting backgrounds (e.g., grocery store, doctor's office). Add depth by layering images.
Proper green screen setup involves good lighting, correct webcam settings, and chroma key adjustments. Creative backgrounds can significantly boost viewer engagement.
What is the number one mistake streamers make with green screens?
Using weak USB lights that force digital brightness increase, resulting in poor quality.
01:43
What are the three reasons to recommend Neewer 9W lights?
1) Affordable ($100-200 AUD for two-pack), 2) 2100 lumens each (double brightness), 3) High CRI (95%+) and adjustable color temperature (3200K-5600K).
02:42
What exposure setting is recommended for the Logitech C922 to avoid lag?
Exposure set to -5.
04:35
How should the key light be positioned relative to the subject?
At a 45° angle, about 10 cm higher than the eyes.
05:27
What is the purpose of the fill light?
To fill in shadows on the opposite side of the face from the key light.
05:54
What Kelvin temperature should lights and webcam white balance be set to?
4700 Kelvin.
06:51
What are the two chroma key filter settings to adjust in OBS?
Similarity (how many shades of green to remove) and smoothness (to smooth edges).
08:09
How can you crop the webcam frame if green screen edges remain?
Hold Alt and click-drag the edge of the camera source.
08:35
Lighting Makes or Breaks Green Screen
Emphasizes that even lighting is critical for effective chroma key removal.
01:00Recommended Lights: Neewer 9W
Provides specific, affordable lighting recommendations with key specs (lumens, CRI, color temp).
02:42Match White Balance
Highlights the often-missed step of matching light and camera white balance to avoid color issues.
06:34Creative Backgrounds Boost Engagement
Shares personal success story of gaining viewers through creative green screen backgrounds.
08:46[00:00] everyone I see on Twitch is using green
[00:01] screens wrong every tutorial I see is
[00:03] telling you how to set them up wrong
[00:05] today we are fixing that you will learn
[00:06] where to get one how to set it up and
[00:08] light it properly for OBS or streamlabs
[00:11] and most importantly I'm going to give
[00:12] you dozens of backgrounds to perfectly
[00:14] trick your viewers into thinking you
[00:15] have the coolest or at least funniest
[00:17] stream room in existence straight out of
[00:19] the gate let's talk about what you will
[00:21] need first a webcam I I don't think I
[00:24] need to say more today we're going to
[00:26] use a Logitech c922 for this tutorial
[00:28] second you will need a green screen way
[00:32] you might think I don't need to say this
[00:34] but I do get asked every day how to turn
[00:36] on the green screen effect inside
[00:40] OBS anyway I will link in the
[00:43] description several different options
[00:44] for green screens from different brands
[00:45] that I personally trust at different
[00:47] budgets for everyone today I am going to
[00:48] be using the Elgato green screen it's
[00:50] expensive and I don't recommend it both
[00:53] because of that and because mine broke 2
[00:55] weeks after getting it but I'll link it
[00:57] anyway because people love Elgato you
[00:59] will also need lighting the reality is
[01:01] this will make or break not just the
[01:02] green screen but also your webcam
[01:04] quality you see a green screen works by
[01:06] telling your software to remove all of a
[01:07] specific shade of green so the better we
[01:10] light our green screen evenly without
[01:11] Shadows or bright spots the less Shades
[01:14] there are and that means the easier it
[01:15] will be to remove and obviously it
[01:18] removes all green things not just green
[01:20] screens so don't wear a green shirt is
[01:23] he going to hit the
[01:27] corner personally I prefer running a
[01:29] cheap two light set up I currently have
[01:31] one on either side of me at different
[01:32] intensities to light myself properly but
[01:34] if you have a green screen sometimes you
[01:36] might need a third light that we call a
[01:37] green screen fill which will help remove
[01:40] har Shadows that you might be casting
[01:41] from the lights that are on you see look
[01:43] there are Shadows on it I haven't lit
[01:44] this yet with lighting the number one
[01:46] and I really mean the number one mistake
[01:49] every streamer makes is wa you'll hear
[01:51] that secret in a second first why not
[01:52] enter our giveaway sponsored by own.tv
[01:54] own has given me dozens of vouchers
[01:56] which also work alongside their Global
[01:58] sales which means right now you could
[02:00] grab pretty much any of their overlays
[02:01] for either free or just a few dollars
[02:04] they have both animated overlays alerts
[02:05] and more for your stream but they also
[02:07] have static overlays that take up much
[02:08] less PC resources meaning you can let
[02:11] those resources focus on encoding your
[02:12] sick gameplay I'll give these bouches
[02:14] away in the comments all you have to do
[02:15] to enter is comment # owned giveaway
[02:17] massive thank you to owned for
[02:18] sponsoring this video if you want to
[02:19] support me enter the giveaway so I can
[02:21] give back to you guys and now back to
[02:23] the video no seriously the number one
[02:25] reason your webcams and green screens
[02:27] tend to look like crap is because you
[02:28] buy these little newer USB lights for
[02:30] $65 du that's Australian dollars these
[02:33] things are incredibly weak they're cheap
[02:35] and it will mean that you usually end up
[02:37] having to digitally increase the
[02:39] brightness of your webcam which makes it
[02:40] look like personally I recommend if
[02:42] you're a beginner getting a two pack of
[02:44] newer 9ws because of three major reasons
[02:47] reason one usually they're around 100 to
[02:49] 200 AUD for a two pack which is very
[02:51] cheap for America and Europe reason two
[02:53] they output 2100 lumens each essentially
[02:56] they're nice and bright those little
[02:58] newer ones only output 1,000 ,000 each
[03:00] so you're getting double the brightness
[03:01] per light for not double the price
[03:03] reason three they are high CRI of 95% or
[03:07] more and they by color between 3200
[03:09] Kelvin and 5600 Kelvin so the light
[03:11] essentially can produce a really
[03:13] accurate color but you can also change
[03:15] their temperature to be warmer or cooler
[03:17] to suit your skin tones and your camera
[03:19] I will link a few different lighting
[03:20] options down below but it's really
[03:21] important to remember these will change
[03:23] a lot throughout the year so if they're
[03:24] out of stock or unavailable try to look
[03:26] for lights that have those three rules I
[03:27] just mentioned once you have your lights
[03:29] let's get the set up first you need to
[03:30] set up your webcam or camera today as I
[03:32] said I'm using this cheap $1100 e do
[03:34] Logitech c922 which means inside OBS or
[03:37] streamlabs we'll go to sources click add
[03:39] new source add a video source and we'll
[03:41] click our webcam for a specific webcam
[03:43] setup I'm going to do this quite surface
[03:45] level and focus more on the green screen
[03:46] today as I have a full video on all of
[03:48] these settings so for now though you'll
[03:50] see it is just terrible or the technical
[03:52] term it looks like ass to fix this first
[03:54] we need to turn off all of the automatic
[03:56] settings so right click the camera
[03:58] Source properties change change default
[04:00] to custom and now you can edit the
[04:02] resolution to be 1920 x 1080P or 720p
[04:05] but if you plan to crop in on your
[04:07] camera or zoom in later 1080p is
[04:08] probably the resolution you want but
[04:10] remember it is more intensive on your PC
[04:12] so that's why I actually recommend 720p
[04:14] for most people next is FPS or frames
[04:16] per second I noticed a lot of really
[04:18] laggy issues with this when I set it to
[04:20] highest so instead I set this to match
[04:22] the source or set it to Simply 30 and
[04:24] that solved all those problems color
[04:25] range you once set to 709 and finally
[04:27] the color range is set to full this just
[04:28] means you're getting proper colors now
[04:30] we click the configure button and we
[04:31] need to turn off all of the automatic
[04:33] settings in here as well and the final
[04:35] step the exposure setting here this is
[04:37] set to minus5 I found any other exposure
[04:40] whether it's higher or lower than minus5
[04:42] causes aggressive lag but you might be
[04:44] using a different camera to me or a
[04:45] different computer so try it out for you
[04:47] but this is where I recommend starting
[04:49] if you go to these settings and OBS
[04:50] isn't giving you control over then then
[04:52] you'll want to try and update your
[04:53] webcam drivers or look for a specific
[04:55] branded software such as the Logitech
[04:57] Hub where you can make and save your
[04:58] adjustments in there instead doing all
[05:00] of this will give us our base look just
[05:02] a dirty webcam shot without any
[05:04] adjustments now depending on your room
[05:05] and how much natural light it gets you
[05:07] might get a lot more quality than me but
[05:09] my stream room has no natural light
[05:10] because I prefer to block it all out
[05:12] turn off my ceiling and instead just use
[05:14] these two lights so without my own
[05:15] lights as you can see it looks like
[05:17] utter garbage now again I have an entire
[05:19] video on the theory of lighting Linked
[05:20] In the description I do recommend that
[05:21] after this but today it's green screen
[05:23] Focus so let's get straight into setting
[05:25] up your lights let's start by turning on
[05:27] what we call our key light so for me
[05:29] that is my light I have positioned to my
[05:31] right about 45° and about 10 cm higher
[05:34] than my eyes it is a bit dark so we're
[05:36] going to slowly raise the brightness
[05:37] until it starts to look nice not too
[05:40] dark but not too bright I do find most
[05:41] streamers end up sitting in the dark
[05:43] because they're scared of overexposing
[05:44] but seriously just give it a little
[05:46] extra boost come on come on give it a go
[05:48] instantly you can see this is beginning
[05:49] to feel much better but the light is so
[05:51] far to my right I've got Shadows on the
[05:52] other side of my face to fix this I turn
[05:54] on my other light my fill light to fill
[05:57] in the other side and make myself have a
[05:59] much nicer shade and again I will do the
[06:01] same slowly raising the brightness until
[06:03] it feels like it looks nice if you end
[06:05] up not having two lights you'll just
[06:06] want to move your key light to about 25°
[06:09] and then ease the brightness this way
[06:11] and by moving it across you'll still get
[06:12] that nice shading from Bright to dark on
[06:14] your face without having it look really
[06:15] harsh cuz it's coming from so far to the
[06:17] side instantly you can see this is so
[06:19] much better that's because I'm using
[06:21] directional light to light the key
[06:22] subject akm myself and most importantly
[06:24] I set my webcam or camera to its base
[06:27] exposure and then lit myself properly
[06:30] rather than trying to digitally increase
[06:31] my brightness seriously follow these
[06:33] rules oh but I also set my white balance
[06:35] correctly this is a step most people
[06:37] mess up or Miss entirely and it will
[06:39] make your green screen section brutal
[06:41] later let alone just making your footage
[06:43] look crap earlier I talked about lights
[06:45] being by color or a Kelvin range this is
[06:47] essentially the temperature or white
[06:49] balance the light they produce is I like
[06:51] to set my lights to 4700 Kelvin and then
[06:54] on my webcam I set it to the same 4700
[06:56] Kelvin as well to match is really
[06:58] important to match these if you if you
[06:59] don't you'll end up looking washed out
[07:01] maybe you'll look green red or another
[07:02] technical term you'll look trash once
[07:04] you lit nicely we need to set up our
[07:06] green screen but I would quickly say
[07:07] your eyeline is really important here I
[07:09] recommend placing your webcam at eye
[07:11] height or even just a little bit higher
[07:13] if you have to don't go too extreme
[07:14] though too high up and it ends up
[07:16] looking like a really weird shot and I
[07:17] really don't recommend setting the
[07:19] webcam low because if it's looking up at
[07:20] you it can really accentuate any double
[07:22] chins you might have or in my case
[07:24] quadruple chins hidden behind a very
[07:26] pubic beard some people love the low
[07:28] angle but they have better and don't eat
[07:30] like a pig so for now I height is better
[07:33] okay let's grab the green screen and get
[07:34] it set up properly you see placement is
[07:36] really important you don't want your
[07:38] green screen too far away or you don't
[07:39] want it too close to you if it's too
[07:41] close you'll get these harsh Shadows
[07:42] from your shoulders and back but too far
[07:45] away and it won't cover enough of the
[07:46] frame to remove or it could get really
[07:48] dark and shadowed because you don't have
[07:50] enough lights to light you and the green
[07:51] screen when you're starting out because
[07:53] of the lighting setup I used earlier and
[07:54] the brightness of it I actually have
[07:56] quite an evenly lit green screen already
[07:58] it can be improved though and if you see
[08:00] lots of dark or bright spots well you'll
[08:02] need to adjust your lighting but not
[08:04] just yet first open OBS find your webcam
[08:07] Source add a filter and click chroma key
[08:09] next you're going to use similarity to
[08:10] change how many similar shades of green
[08:12] are being removed Just slly Adjust this
[08:14] don't go too extreme and then once
[08:15] you're done you'll use smoothness to
[08:17] smooth out and fall off the edges of the
[08:19] green around you if you can't get it
[08:20] nice without moving party yourself it
[08:22] might be time to add another light to
[08:24] remove dark spots or even adjust your
[08:26] main lights to have less bright spots
[08:28] essentially going to be slowly adjusting
[08:30] your lights and the filter settings
[08:31] until it's evenly lit and cleaned up
[08:33] nicely once you do if you have little
[08:35] edges where you can't get the green
[08:36] screen to cover just hold alt on your
[08:38] keyboard click the edge of the cam and
[08:40] drag it in and Tada look at that magic
[08:42] congratulations you officially have a
[08:44] green screen set up but let's be real
[08:46] this is boring as you're only
[08:48] scratching the surface of what you can
[08:49] do and in fact the truth is I got a lot
[08:52] of my first 20 to 30 average viewers
[08:54] because of my green screen yeah I grew
[08:56] because of a piece of gear that's so
[08:57] weird specifically because I took a
[08:59] photo of a mil KY at a shopping center I
[09:01] blurred it a little bit so it looked out
[09:02] of focus and I put it behind me so
[09:04] perfectly that when people saw it they
[09:06] had to click the stream just to ask hey
[09:09] are you actually in a f grocery store
[09:10] Mille I would do event streams where I
[09:12] got a picture of a doctor's office with
[09:14] a desk and then I'd copy that image so I
[09:15] had two but cut out the desk and then
[09:18] add the background to OBS add the desk
[09:20] and then place my webcam between the two
[09:22] and Tada it looks like I'm in a fancy
[09:24] office with actual depth and 3D to it so
[09:27] I want you guys to hunt for free to use
[09:29] photos to make your background so much
[09:30] more interesting but I want you to think
[09:32] about what you can make or do to stand
[09:34] out be different be interesting and make
[09:36] people laugh look at my mate reaps he
[09:38] created a full CGI set to make it so he
[09:41] is hosting a late night talk show and
[09:43] when you do pick a great background just
[09:44] add it to OBS as an image source place
[09:46] it either full screen behind you or
[09:48] inside your webcam frame or just use it
[09:50] in just chatting and have nothing behind
[09:52] you for gaming so you don't block your
[09:53] game screen the uses are endless
[09:56] speaking of endless saw on my videos so
[09:58] why don't you click right here where I
[09:59] spent 7 Days mastering seven skills for
[10:01] Content creation where I was told it's
[10:02] the most valuable video I've ever
[10:04] produced I'll see you guys next week
⚡ Saved you 0h 10m reading this? Transcribe any YouTube video for free — no signup needed.