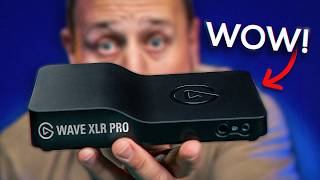

€349 Audio Interface? Here's the Truth
40sThe high price point and promised features create a controversial yet compelling hook for viewers to see if it's worth it.
▶ Play Clip"Delivers a thorough, balanced review that matches the title's promise – not hype, just honest evaluation."
The Elgato Wave XLR Pro is a compact audio interface designed for streamers, offering extensive connectivity and advanced DSP features. It promises to replace bulky mixing consoles with a small footprint and deep software integration, including Wave Link 3 and Stream Deck compatibility.
MSRP of €349.99; described as a complete audio system rather than a simple interface.
Developed with Lit, enables hardware-based audio processing with low latency.
Two XLR inputs with 48V phantom power, up to 80 dB gain (eliminates need for Cloudlifter). Also includes line in/out, two USB ports (host and AUX), two headphone jacks (3.5mm and 6.3mm) supporting up to 600 ohms.
Only one USB-C cable included; second USB port requires separate cable, criticized at €400 price point.
Core control hub; provides fine-grained routing, individual input/output management, and hardware-based mixing.
Automatic clipping prevention by internal level management; works even without Autogain Wizard.
VST plugins processed on-device for ultra-low latency; filtered signal available directly in Windows applications like Discord.
Monitor, Stream, Chat, Record, and Aux mixes; each can be routed to different outputs (headphones, USB, etc.).
Automatically reduces volume of specified sources when speaking; per-source exclusion possible.
Built-in compressor and limiter per mix to ensure consistent loudness without clipping.
What is the MSRP of the Elgato Wave XLR Pro?
€349.99
00:54
How much gain do the XLR inputs provide?
Up to 80 dB
02:20
What is the purpose of the second USB port (USB AUX)?
To connect a second PC or console for dual-stream setups
03:35
What does the VST Insert feature allow?
Processing VST plugins on the hardware for low latency, making the filtered signal available system-wide
08:35
What is the Ducking feature?
Automatically lowers volume of other sources when the designated main source (e.g., microphone) becomes active
18:10
What is the maximum impedance supported by the headphone outputs?
600 ohms
04:16
How many separate output mixes can be configured in Wave Link 3?
Five (Monitor, Stream, Chat, Record, Aux)
10:22
80 dB Gain Eliminates Inline Preamps
Removes the need for external boosters like Cloudlifter for low-output microphones.
02:20Hardware VST Processing
VST plugins processed on-device offer near-zero latency and system-wide availability.
08:35Intelligent Ducking
Automatically balances audio sources without manual intervention during streaming.
18:10Per-Mix Maximizer
Ensures consistent loudness across different outputs (stream, recording) without clipping.
20:10Deep Stream Deck Integration
One-click export of all controls to Stream Deck replaces physical faders with customizable buttons.
22:08[00:03] as a mixing console for my Streama Audio with Dual PC. 24 inputs and a touch monitor for controlling the tracks. So, in itself a dream, and yet I've been considering rebuilding my entire setup for weeks now, because when
[00:17] I heard about the new Elgato Wave XLR Pro , I was really excited, and today I actually hold it in my hands. In this video I would like to in my hands. In this video I would like to
[00:29] my setup, and of course also discuss for whom it is worthwhile and for whom it is for whom it is worthwhile and for whom it is not.
[00:41] the Elgato Wave Pixel Air Pro ? Elgato calls it an audio interface, but I wouldn't quite say that. It's more like a complete audio system in a super compact housing, yet it still has a lot of
[00:54] connections. The Wave XL Air Pro has a MSRP of €349.99, which is definitely not a toy for an impulse buy. However, if we talk a little more about all the features, some people's mouths will start watering
[01:09] . Together with the company Lit, which by the way has been producing extremely good studio microphones for years, a chip was developed that is responsible for processing the audio signals in the internal Wave XL Pro and
[01:21] can really get a lot out of it. The whole thing is called the Wave FX processor and is also part of the new Elgato Wave XLR MK2 and the Elgato Wave 3 MK2. I already presented both devices here on the channel a few weeks ago
[01:34] should be immediately noticeable is the complete absence of any volume controls on the Wpixel R Pro. No faders, no knobs, nothing. However, this is absolutely no problem and actually quite smart. I'll show you
[01:48] all the connections, and that's where it gets quite interesting, because we only have connections at the front and even more connections at the front and even more connections at the back, so there are a lot of connections. Let's
[02:04] go through this step by step. no combo connectors, only XLR, but they are for two microphones. Both microphones can be powered with 48 volt phantom power . Pretty good too. And
[02:20] up to 80 dB of gain can be used at both connections . That means no more Cloudlifter or Fathead. Simply connect, for example, an SH SM7B, get enough gain, and that's it. Then we have two analog 3.5mm jack
[02:37] eye connections, one as line in and one as line out. That's obviously super practical, because I can use the line in, for example, to connect any analog devices. Whether it's a field recorder,
[02:51] a smartphone, or an older console, it's no problem at all. I can just infiltrate them. Lineout becomes interesting when, for example, I becomes interesting when, for example, I
[03:09] some console where I want to implement this. But there's something even better for consoles , if they support it. Let's take a look at that in a moment . That's also on board. Then we have two USB ports, and that's where it gets
[03:22] relatively interesting, because we have the host port, and the host port is used to connect the device to the streaming PC. I can control everything through that; I have all sorts of separate inputs and outputs, it
[03:35] gets really wild. I also have a second USB port, which is for a second USB port, which is for dual PC setup or a console. That's also possible. This means that if I have a
[03:50] streaming setup where I want to control everything on my streaming PC via the Wave streaming PC via the Wave XL Pro, but at the same time have I can send my microphone to the console and get the
[04:03] console audio directly back into my mix via USB, just like with a dual PC. That's really, really interesting. But then we also have something else: at the back we have
[04:16] a 3.5 mm jack and a 6.3 mm jack for headphones. And the same applies to the front for headphones 1. So we can work with headphones with an impedance of up to 600 ohms, which is really amazing. So, studio headphones are no
[04:32] and of course I can control each one separately, who hears what. That makes perfect sense if I have two XLR connectors here. This is especially exciting for a
[04:44] podcast setup, if you think outside the box when considering alternatives to streaming. , but we do have a mount here on the back. That means we can theoretically screw and attach the Wave XLR Pro anywhere
[04:59] , whoever needs it. If it happens at all, it will probably just end up on the table. However, if we look at the scope of delivery of the Wave XLR Pro, there is one harsh criticism that I simply have to get off my chest. We
[05:13] do get the Wave XLR Pro, yes, that's nice, and we also get an additional USB-C we also get an additional USB-C to USB cable to connect the Wave XL Pro to our host system via the host port . But why on
[05:29] earth don't they include at least one more USB-C to USB cable for the second USB port? I mean, we're talking about a one-cent item and a device that costs €400. So
[05:46] yes, the whole thing doesn't really become powerful because of the ports that are available here, but rather because of everything you can do in the software . And we'll take another look at that now. The
[06:00] linchpin of the Elgato Wave XLR Pro is once again the Elgato Wave Link, or Wavelink 3, the brand new version, which
[06:15] possibility of directly accessing the Wave XL AR Pro up here, where we then have, among other things, the individual inputs. That means we get our USB AUX, the second USB cable that we can connect. We
[06:30] have our analog line in, we have an XL MIC 2 and an XL Airmic 1. The overall setup, how it's configured now, does n't change. That means you should also check out the linked videos for the Wave XLR MK2 or
[06:46] Wave 3 MK2 below the video, and , but let's take a look at that . That's pretty cool. We can access the connected headphones here. I now have
[07:01] headphones connected and I can activate the High Power Mode to, for example, activate the High Power Mode to, for example, also adjust the volume of the USB AUX input here and activate a gain lock. The USB
[07:15] AUX is the second USB connection, which I can then connect to, for example, a gaming PC or a console. Otherwise, I get the same Otherwise, I get the same
[07:28] means we can set the gain, we have an Auto Gain Wizard, we have a Clipguard, we have phantom power, and we have all the DSPects. And we need to elaborate a bit,
[07:41] because it's quite interesting. First, with the input, we have our Clipguard, which is Clipguard 2.0, and it ensures that the volume is calculated internally in the device via the Wave FX processor , so that
[07:57] clipping is virtually impossible. This means that even if you set it up completely wrong, because you don't use the Autogain Wizard, Clipguard ensures don't use the Autogain Wizard, Clipguard ensures that you don't clip. Yes, quite
[08:09] simple. The effects we have are calculated on the Wave XLR Pro. Just like with the Wave 3 MK2 and the Wave XL MK2, we have
[08:21] hardware effects here that are calculated directly on the device , thus causing no latency, and yes, that makes it a lot of fun. What's also new is that we
[08:35] can now insert VST effects, i.e., VST plugins, which are otherwise calculated via software and cause a relatively high amount of latency in this entire have here, however, is that these software effects are also calculated on the Wave XLR
[08:52] Pro, resulting in very, very, very low latency. This is an innovation, it's quite ingenious. Otherwise, the entire setup is the same; as we have already seen with the new
[09:06] XLR Mic 2 products, we can adjust exactly the same settings. We can also edit Linein. That means if I use the analog line-in connection on the back of the device to connect, for example, a field recorder, an
[09:20] older console, or something else, I have the option to adjust the input level and also add effects. In this case, however, no hardware effects are used, only VST plugins, including Voice Focus. Let's also take a look at
[09:36] USB AUX. So, as I said, the second USB port, which I have connected to a console in this case, for example, namely for the microphone. This is a dual-channel USB port. We tested
[09:50] the output via USB to the connected device and the input from the connected device back into the Wave XLR Pro. As I said, I can boost the input here. I can also add effects, namely
[10:05] Voice Focus and Channel Boost, which can achieve a boost of up to 12 dB. But first, let's talk about the device itself and what I The mixing possibilities are getting quite exciting now, and
[10:22] you can take a look at them again under Mixes . As I said, Wavelink 3 is available for free to everyone, even if you don't have any Elgato products. And here we're getting a few more things included. I don't even want to introduce all the basics of
[10:34] . As mentioned, linked videos are below in the video description. But we have again on the right side, or up here, the five mixes we can output. And these five mixes, which are quite special, are
[10:50] also calculated on the device. This means that software rooting no longer takes place in the traditional sense, but rather hardware routing. And then I can, for example, create a mix for myself. So, what am I hearing? And I can then output that
[11:04] on the first headphone jack, on the second headphone jack, on both jacks. Can I just go into the settings here and say where the audio should go? In this case, Headphone 1, so just for
[11:17] me. However, I could also add an output , Headphone 2, and simultaneously output it on the second headphone jack, or if I have speakers connected there, for example . Pretty
[11:29] mixes. I have a mix for myself. For example, I have a Stream Mix that I can then integrate directly into OBS . I have a chat mix that I can integrate directly into Discord. I have a Record Mix that I
[11:42] can use for recording, for example. But I also have, for example, a mix that I output to another device via the second USB port . The Aux Mix is initially just a mix in the software by default, but if I
[11:56] click on the pencil icon and add the USB via Add Output, then I get the option to pass the whole thing on to a device. And you can see how cool that is if you, for example, connect a console
[12:10] . I have a Playstation connected here and I can play there Playstation connected here and I can play there . Going into the audio input, I now have the microphone directly connected via this second
[12:23] USB port (USB AUX) under Microphones Input Device, and of course I can adjust what's the audio comes in here, and if I were to turn off the music here, for example, I would no longer have any output on this USB port at that moment. But if I now add something
[12:39] else, like my microphone here, then suddenly I have an output again. Well, that's pretty cool. I can control all of this from here and also output it via the second USB port. Furthermore,
[12:55] I also have all the devices listed here on the left as input. So, as you can see, I have a lot of expenses. So, if I buy it, I also have a high expense for the purchase. I mean audio outputs,
[13:15] namely the line input, which we have at the back of the device. We have the USB AUX, the second USB cable, we have XL Mic 2 and 1 separated, and I can route all of that separately, and we can then
[13:31] Wavelink 3 and the other devices. So, I can add anything here. If I have a console connected, I could now I now say on my Playstation, " Okay, I want to use the USB headset as the output device,"
[13:46] namely the connected USB cable to the Wave XL R Pro, then my audio from the console will also be output directly on this extra root the channel here, e.g., if I want to
[14:00] hear it myself, the stream should hear it, the chat shouldn't hear it, then I might, for example, remove it completely. That's cool too. So, I'm completely free to experiment again and have
[14:17] you then look at all the devices I'm getting in Windows, for example, you'll see that the individual mixes I'm creating individual mixes I'm creating
[14:30] simply integrate it into OBS as an AU aux with an AUX device . It looks like this. If I go to Audio here, I have Microphone Aux Audio and can now Microphone Aux Audio and can now
[14:44] the mixed audio directly. However, I can also access other devices, because I also have Desktop Audio, and here I can see, for example, AUX 1 and System Audio directly, and if I create additional tracks,
[15:00] I can use them here as well. With the microphone devices, I not only get the mixes, but if I look here, I also get USB AUX. connected console on a separate track, but also the
[15:13] scroll further down here. So, I can also record each microphone as a separate, individual track. I am not only limited to the five mixes I have in Elgato Wavelink 3, but I can access the individual
[15:26] devices and actually create recordings with separate audio tracks, where I can really adjust everything cleanly in video editing. That's pretty ingenious too. If I only want to integrate my console in this way and use the
[15:38] USB AUX port for games, for example, because I'm running a dual PC setup for my gaming PC , I can also integrate my console separately via the capture card . That means, for example, I use a capture card from Gato for the Elgato
[15:50] HD60X. If I simply click on it, the capture card appears as a separate input device, and I can now select the audio again for myself, for the stream, for recording. That's good too. And now, to compare the
[16:03] , here's another explanation of why this is so incredibly exciting for me personally: the Soundcraft UI24R can do all of that too , but I have to work with multiple adapters, need multiple cables, and all of that comes in a
[16:17] separate "R" (presumably referring to a specific device or unit). Actually, when you think about it , it's absolutely insane. I could simply place the Wave XLR Pro on my desk, plug it in, and theoretically have three cables: USB to the streaming PC, USB to the gaming PC, and
[16:30] one for my headphones. And that's about it , but that's just a side note . Let's take another look at the other features, because there's even more on board. VST Insert is quite ingenious, among other things. If I
[16:43] among other things. If I look at my microphone, the XLR mic, and I apply effects to it, such as the low-cut filter, the expander, and so on, then the microphone is filtered. That's great. And in
[16:56] I filter my microphone, I first had to route the filtered microphone signal in software so that it would also arrive in Discord and elsewhere, and not just in OBS. The following happens via VST Insert . All these effects
[17:12] are calculated directly on the hardware . including the VST plugins. So, if I add further effects here via VST plugins, they are also via VST plugins, they are also calculated on the Wave XLR Pro and
[17:25] You can imagine it like this: if I select my microphone directly as the input device, I don't get the pure microphone signal , but rather my microphone signal, I really need WD40, directly
[17:41] really need WD40, directly filtered into this device, i.e., this audio device in Windows. And if I now select, for example, my audio device in Discord under Speech and Video, simply XLR Mic 1,
[17:55] then the filtered microphone is there via the VST insert. That's really, really good. A completely new feature that we can only get with the Wave XLR Pro, for example, is the topic of ducking. Ducking
[18:10] is a functionality that allows other audio devices to be automatically turned down when one audio device gets louder. Imagine it like this turned down when one audio device gets louder. Imagine it like this . WD40, for example, I have my
[18:25] microphone here and then in Wavelink 3 I have my microphone. Now I would like music and
[18:38] game audio to be turned down at the moment I speak, so that it doesn't drown out other sounds. Then I could, for example, simply say, okay, my I could, for example, simply say, okay, my microphone is the main source, so to speak.
[18:51] colored pencil icon, go to the Ducking tab and can now say: "Make XLR Mic as a key channel." So, this is the main channel. If I activate this, my microphone becomes the main device and I can
[19:05] say, okay, which other channels should be covered, i.e., should be covered, i.e., turned down, e.g. Spotify or my system audio. Then I can simply adjust this setting and say, okay, this
[19:18] Maybe even USB AUX, i.e., the Playstation. Now, when I speak, the audio volume is turned down. That means the output of that is decreasing. For example, I might not want that at all in certain
[19:32] now seeing small icons indicating that audio is being muted, and please don't mute the game audio in the stream ." Then I go to
[19:44] the three dots and say: "Don't allow ducking". and then it will be removed from here. So, I can
[19:56] a pretty cool feature that allows me to dynamically adjust my sources without lifting a finger, so that it's done automatically when I talk . Also included, also
[20:10] new, also pretty ingenious. Then there's another new feature: if I want to ensure that the individual mixes always have a consistent volume and are mixed really cleanly, like
[20:25] for a proper JA broadcast , I can go to the JA channel, e.g., Stream Mix, and
[20:39] ensures that gain is automatically added to the entire mix, along with a compressor and a limiter, which results in the audio being consistently louder without clipping. And
[20:54] by turning up this maximizer using the rotary knob or this slider . You can see that I'm getting into the red here, but I never clip because the maximizer makes sure I don't clip and
[21:08] great, so you no longer have the problem of somehow adjusting the volume levels for streaming, recording, or anything else correctly. Simply activate the maximizer, adjust the intensity, and yes, off you go.
[21:25] However, as I said at the beginning of the video , the Wave XL Pro has many connections, but no faders, knobs or buttons to control the audio . And yes, I have Wavelink 3 and I could control everything via the software
[21:39] , but you might not always want to use and control it while streaming. And the reason why this is solved so cleverly is actually the following. I can completely take over the control of my
[21:53] Wavelink 3 and, consequently, my Wavelink XLR Pro with all Elgato Stream Decks. For example, I have the Elgato Stream Deck Plus XL monster deck here. But I'll show you how simple it is to set up . I
[22:08] . I installed the Wave Link plugin in my Streamdeck software . For example, I can see here that I can now . For that, I can simply go to Export
[22:22] to Stream Deck in the top right corner. Then I choose which Streamdeck, e.g. the Plus XL. I simply click on Start Export. The whole thing is exported to my Stream Deck, so for example, install it here in the Plus XL and presto, you can
[22:37] see on the Stream Deck how awesome it looks. I now have the individual controls here to, for example, control the outputs. I have all the mixes down here. I can do everything using the rotary knobs, for example. So, this
[22:52] is just a small example, of course. It will be exported to me fully prepared, and theoretically I can control my entire Wave XLR Pro via my Streamdeck, and I can customize all of that. That means if I
[23:04] say in the software, okay, I want to do something completely different here, namely not just one channel, but I might want to have a dial check . Yes, I get many more pages. So the whole thing is set up
[23:18] can really control everything. That makes it very extensive again. Personally, I would probably put everything on one page and make it a bit more rudimentary. I just wanted to show her the integration with Stream Deck for the Wave XLR Pro, it
[23:34] 's really next level. That's really brilliant. I don't need anything else anymore, and I can set it up as flexibly as I want to control it later, and not as the device dictates with its fixed faders.
[23:49] only one big question remains . Can it replace my current audio setup? Honestly, for most streamers and content creators, yes, probably with significantly less effort. The Soundcraft UI24R
[24:04] offers more physical inputs and has haptic controls. It's more flexible for very complex setups, but I pay for that with size, complexity, and price. The Wave XLR Pro is more compact, cheaper, has VST Insert, automatic stucking, the
[24:19] Auto Gain Wizard and the entire Wavelink plus Dream Deck ecosystem. So for a dual PC, it covers almost everything I need on a daily basis. But despite all the excitement, whether I personally switch, I'll tell you as soon as I've intensively tested the Elgato Wave
[24:34] XLR Pro in my daily work routine over the next few weeks. Anything else would just be rushed , I'd say. However, if you simply want to set up a stream, only use
[24:47] one microphone, and dual PCs or a setup with a console are out of the question for you , then in my opinion the Wave XLR Pro is not for you. Are you more of a power type? If dual PC is absolutely essential for you, or if you
[25:00] want to quickly and easily integrate a console, then the Wave XLR Pro is definitely worth a look. For a price of just under €350, you get a truly powerful mixing console that leaves nothing to be desired for 99% of users
[25:14] . But what is your opinion on this topic? The device you've been waiting for, or perhaps far too much for your setup? Be comments and then I'd say see you in the next video.



⚡ Saved you 0h 25m reading this? Transcribe any YouTube video for free — no signup needed.