
Budget Audio Gear That Beats Expensive Brands
45sChallenges the common belief that expensive is better, offering a relatable hook for budget-conscious creators.
▶ Play Clip"Delivers a thorough, hands-on review of the device's features and update, though the 'perfect' in the title is a slight overstatement."
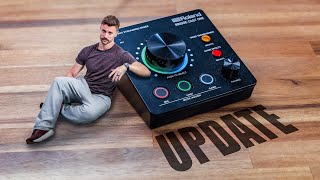
The video reviews the Roland Bridgecast One, a budget-friendly audio interface for content creators, highlighting its new firmware update (Balance 2) and features like mic setup, EQ, voice transformer, and game effects. The presenter demonstrates how to achieve high-quality audio without breaking the bank.
The Roland Bridgecast One is more affordable than competitors but still offers comprehensive features, making it ideal for new content creators needing good audio without a high budget.
The software provides a mixing screen with three inputs controllable via the device dial, and additional inputs via software. Users can assign channels to control different audio sources like Discord chat, game, or music.
The presenter proposed a new balance mode (Balance 2) that uses two separate faders for chat and game volumes, allowing independent adjustment and a reset to default levels by holding the button.
Basic mic setup includes selecting mic type (dynamic or condenser) and setting gain. The gain graph helps visualize levels, aiming for peaks around -5 to -10 dB to avoid clipping.
The device includes a de-esser, compressor with visual feedback, and a noise suppressor that works as an expander, gradually lowering volume instead of harshly cutting off, reducing artifacts.
The updated EQ provides visual feedback and draggable bands. The presenter recommends a boost and sweep technique, cutting boosts in half for a natural sound.
Voice effects are processed on-device, saving PC resources. Five presets can be customized with voice changer and reverb, and can be switched via the device button without alt-tabbing.
The device includes analog line in/out for two-PC setups and a console mode for PS5/Switch, allowing USB output of mic or full stream mix.
The presenter notes the lack of a VOD track (stream mix minus music). Submix mode offers limited options, not including the full mix without music.
The Roland Bridgecast One is a powerful, affordable audio interface that, with the new update, offers excellent value for streamers and content creators, despite minor limitations like the missing VOD track.
What is the main advantage of the Roland Bridgecast One?
It is budget-friendly yet offers comprehensive features for content creators.
00:01
What is the purpose of the Balance 2 feature?
It allows independent adjustment of chat and game volumes with a reset to default levels.
03:28
How does the noise suppressor/expander differ from a traditional noise gate?
It gradually lowers volume instead of cutting off abruptly, reducing artifacts.
08:22
What is the recommended gain level for voice peaks?
Aim for peaks around -5 to -10 dB.
08:09
What is the 'boost and sweep' technique for EQ?
Lift a band, sweep across frequencies to find problematic or pleasing sounds, then adjust accordingly.
09:28
What is the rule of thumb when adjusting EQ?
Cut the amount you think sounds good in half.
10:07
What is a limitation of the Bridgecast One?
It lacks a VOD track (stream mix minus music).
13:03
Balance 2 innovation
Shows how user feedback led to a new feature that improves usability.
03:28Expander vs noise gate
Explains a technical audio concept in an accessible way.
08:22EQ rule of thumb
Practical advice for beginners to avoid over-processing.
10:07Missing VOD track
Identifies a gap in the product that matters to streamers.
13:03[00:01] Usually, the more expensive something is, the better that thing is. Which is what makes the Roland Bridgecast 1 such a special device. Even though it's more budget friendly than all of its competitors, it still does everything
[00:13] never get as much attention as they deserve because they aren't as sexy as a under every single button. But when you're a new content creator and you just need to capture good audio from your voice, but you also need a new PC
[00:27] and a camera and software, a budget device like this that does everything can be perfect. This video is not sponsored by Roland, by the way. In sponsor at all, but I will be using Stream Beats as the music in the
[00:42] Beats is copyright free music for streamers and YouTubers. It has free. So, link to that in the description down below. Welcome back to quickly show you how to set up good, easy, high-quality audio using the
[00:55] show you their brand new update that we actually worked together on for the last much more userfriendly, making audio easier for streamers, YouTubers, podcasters, anybody, even while on a tight budget.
[01:10] anybody, even while on a tight budget. Let's get into it. software. And right from the get-go, it looks very familiar as it did before.
[01:23] Just as a quick recap, we have all three inputs that you can control from the device itself. We have the rest of our inputs you can control from the software here. So, this is the mixing screen that you're going to spend most of your time
[01:35] channels that you can control with the dial itself, and you click the button to if I want to change the volume of my Discord chat, I switch to the chat one by clicking in the button and then I lower the chat volume. If I want to
[01:49] button to the game one and I lower or raise the volume. If I want to change control my music instead of my mic volume, I click on this mic right here. music input. And you can see the mic has moved down to the more input section and
[02:04] the music is up here. It still says mic right here to let you know that it is the channel labeled as mic on the device. And then this drop-own menu button does when you press it. Even though we've set this channel to control
[02:16] the music volume when we change the dial. If I press this button here, like most modern interfaces, there are two mixes that you can control at any is what you hear in your headphones, and you have the stream mix, which is what
[02:31] want the music to be kind of loud on stream for the audience, but kind of quiet in your headphones so you can hear the game better, you can unlink the two, them back together, and then when you turn the dial, it moves them up and down
[02:45] together, but your mix has quieter music than the audience mix. Now, I'm really excited about this new update. It was something I proposed to Roland about a this device. And in the comments, you guys were super vocal. You made it very
[02:58] implementation. So here we have the original implementation balance one. How third channel. So if we click this button, you can see it now highlights you a two-toned dial with these two colors. If I want to hear my voice chat
[03:14] better, I turn the dial towards chat and it lowers the game volume. If I want to game and it lowers the chat volume. I've suggested a new idea which they just released called balance 2 because I just noticed that as long as I used it I had
[03:28] to think every time okay I want to turn down game so I need to turn it towards counterintuitive to me. So you can see the new idea that I suggested when you click on balance 2 and this is the main part of the new update. When you change
[03:40] to that you can see it goes from a complete ring of lights to two meters two different volume levels. If I want to lower chat, I pull down on the chat side and I can raise it back up to get it back to zero. If I want to lower the
[03:54] game volume, I pull down on the game side. Then when I turn it back up, it when I change the volume of something, it's a temporary change. And I want to put it back to exactly what it was before. So, if I were to turn down the
[04:07] back to where I had it before, all I have to do is click and hold for about a have to do is click and hold for about a half a second and it jumps back up to my setting, my 100% setting. Which brings us to my third suggestion for this
[04:19] implementation is the center point, the default point of both of these faders was always 100%. But whenever I had a mixer set up, I never have them both equal or even both at 100%. I want to be able to set
[04:33] what my default levels are and then have it reset to those when I'm done messing with them. So, you have this little arrow here. I'm going to change this one to 70% and the game volume to 90%. That's where I
[04:47] like it when I'm not changing things. Now, when I turn down the chat, it goes down from 70% and then it stops at 70% before it starts changing the game volume. And if I were to click and hold, it goes back
[05:01] to those default settings. So now I can adjust my mic or I guess music because I changed it to music over here independently. I can set where I like my chat and my game volume when I'm normally playing or normally streaming.
[05:13] And then I can adjust stuff on the fly and I can reset it by holding the button the comments liked their original idea, the way they had their balance mode, But if you like this way a little bit more, balance two is there. And that's
[05:27] that we finally got this out. It's really cool to see an idea that you came up with a year ago actually in these devices. So, thank you guys for being vocal about which one you like most in the comments. And thank you Roland for
[05:40] listening to the audience and actually putting all that time into making these that we understand how mixing works, sending proper volumes to both your let's talk about setting up a microphone. We're going to go into mic
[05:53] setup here. This is the basic mic setup that you need to do first. This section has two different important areas and they're very set and forget. Once you and change them again. So, what kind of microphone do you have? Right now, I'm
[06:06] using an SM7B. This is a dynamic microphone, so I set it to dynamic. But maybe uh one of those blue condenser microphones that a lot of people use, power and change it to condenser mode. Right here, down here, you have
[06:18] where you change the gain of the microphone. And again, if you want to microphone in your stream, you do not change this. But a lot of interfaces you have a little thing that goes up and down. It's really hard to read the
[06:32] actual gain of your microphone. So having a gain graph like this that was Beacon makes it much easier to see if quiet, even while there's inflections in your voice. The idea is to sit at a
[06:45] how far you will sit when you're using it normally, talk into it normally, and here until your voice typically sits at your voice kind of dips into the yellow, like some of these parts here, you'll be
[06:59] okay. But it is a warning zone to make sure you don't go above zero cuz that's When we want to start polishing our voice, they have a section called mic add things like a DSER to get rid of some of the high-pitched S's or a
[07:12] loud parts of your voice quieter and the is great for people playing scary games that have a tendency to yell your audience's eardrums. This is what you use. Now, there are a couple new
[07:25] of the things I talked about with the Roland team is that compressors are really hard to understand if you're not an audio engineer. Not a lot of people hood. So having something like this, some visual feedback to tell you what's
[07:39] actually changing is really important. So if I turn this on and I start to turn this up, what this does is it tells me when the compressor is kicking in. And down, letting me know, hey, we're compressing your voice now. So you can
[07:54] see at the loud parts here, if I turn it up, it's compressing my voice down by about 5 to 7 dB, which is what it's supposed to do. You don't need to fully me to tell you that what you're aiming for is the loud parts of your voice. You
[08:09] for is the loud parts of your voice. You want that to be between -5 and -10 gain for. Over here by noise suppressor, we have another new thing. They've added this was something kind of pioneered in the gaming space by Beacon. Typically,
[08:22] the way a noise gate works is that if the volume of your mic gets too quiet, it cuts it off. It assumes you're not talking and it shouldn't pick up any noise. The problem is if you whisper or you get really close to that gate
[08:34] threshold there, you get that on off cut on and off kind of kind of like if I'm like this. This is the way gate work not working properly. The way an expander works is instead of cutting it off quickly, it gradually lowers the volume.
[08:47] So when you're not talking, it's still bringing it all the way down to zero, but anything between silence and talking is more of a gradual noise gate. It's a nice addition. I recommend using it. Play around with this until your voice
[09:00] heavily updated is the EQ down here. Prior to this, it looked like something understand how to use. But now, they've given you visual feedback showing you where your voice is, but also instead of having channels that you can just raise
[09:14] and lower down at the bottom, you can just grab these bands and adjust them and place them where you want. And what I think the best way to do EQ is after you give yourself a little bit of a high. This is about 3 dB and a low boost
[09:28] just to give yourself some thickness and some brightness. Do something called a boost and sweep where you take one of these bands, you lift it up, you sweep so you're not going to hear it, but you sweep across until you find a sound that
[09:41] you like or you dislike. A lot of people are going to find that around 500 hertz it sounds muddy. If you find something that you like, I tend to like things around maybe a,000 to 2,000 htz, a little boost there, and then taking out
[09:54] a little bit around 500 htz, maybe even making that one a little bit wider. That is in theory a very simple and easy way to EQ your voice, even if you have no experience. A rule of thumb that I've had to learn the hard way a couple times
[10:07] is whatever you think sounds good as you're listening to this, cut that amount in half. So, if I pull this down by six dB and in my headphones that sounds right, only do three. Let's jump into the last big section of this video,
[10:19] are things that I really like about Roland's voice transformer. The main thing is that all the voice effects are done on the device itself. That means for the voice transformation, and it's not going to eat into your frames or
[10:32] to hear the voice transformation in your you get five different presets that you can adjust down here with these two options, voice changing and reverb. And you can see if I turn it on, only reverb
[10:45] little bit of reverb in my voice. If I turn on voice changer, you're going to >> Once you get to a setting that you like, you hit save file, and you can name it had a really creative idea of making voice changing really easy because not
[11:00] on and turn it off, but if I'm in the middle of the game and I want to switch to have to come in here with my mouse, alt tab out of the game, and switch it manually. I can hold that button and it gives me a switcher. It shows five
[11:17] lights on the right side, which is effect one through five. The color to each preset. And down here at the bottom with these two lights, it shows switching to a preset and the left light turns on, it means the voice changer is
[11:31] on, it means the reverb is on on that one, giving you an indicator of what this preset does. So, if in our fifth preset, I turn on voice changer and reverb. You'll see that now in this preset, both lights turn on. But if I
[11:45] switch to one where only the voice changer is on, only the left one turns on. Very cool. The game effects work very similarly. You have five different presets. You can adjust virtual surround sound. You can adjust volume limiters,
[11:57] And you have game EQ if you want to turn up and down footsteps in a game or something. And if you tap and hold on the game effects button, you can select between them. And again, those three lights up showing which effects are
[12:10] us to the IO on the back and something really cool that Roland has done on this companies have removed, which is an analog line in and a line out. This is things have gotten more digital, we've kind of lost these. But you can plug
[12:26] this into a two PC setup by plugging the USB into one PC and then the line in and line out into the lineins and lines out of the second PC. And this even has a switch on the back for console mode if you want to plug it into a PS5 or a
[12:38] Switch. I haven't owned an Xbox in a while. I'm pretty sure it doesn't work have to answer that for me in the comments down below. But in that situation, you would plug the USB into your console like the PS5, and you'd see
[12:50] an output. In console mode, you can choose what goes over the USB. Do you just want the mic to go over USB, which is what it's set to by default, so that only picks up your mic, or do you want to send your full stream mix? So, it's
[13:03] think they've made a very powerful device in a very affordable package. But here in my opinion. I think one of the main things it's missing is a VOD track, the ability to send your full stream mix minus the music. They do have a second
[13:18] mix available called submix mode. And you can see that in OBS. If I go to my audio, you can see we have another output coming from the Bridgecast one called submix. But the problem there is the
[13:31] only options you have are to send a copy of your personal mix, to send your microphone by itself, or to send a copy of what's coming in through the oxport. None of those allow you to have your full stream mix, but minus the music,
[13:43] added in there. What are your thoughts in general on this device? And if you the comments down below. I think they've proven with this update that Roland the users need, and I' I've been very impressed with them with that. So, leave
[13:57] a comment down below. If you don't have any suggestions or any feedback, just engagement. Hit the like button, subscribe while you're at it, and as subscribe while you're at it, and as always, happy streaming.
[14:09] always, happy streaming. [Music]
⚡ Saved you 0h 14m reading this? Transcribe any YouTube video for free — no signup needed.