
Stop Starting Your Shopify Store Until You Do This
45sThe hook addresses a common pain point and promises a crucial first step, making viewers want to know what they're missing.
▶ Play Clip"Delivers a solid, actionable tutorial that matches the title, though it includes some promotional content and could be more concise."
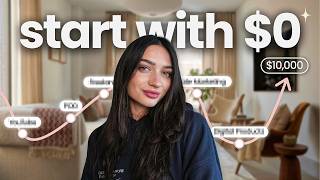
This video is a comprehensive Shopify tutorial for beginners, guiding viewers through the entire process of setting up an online store using print-on-demand to avoid holding inventory. The creator covers niche selection, store setup and branding, product design and listing, and basic marketing strategies, emphasizing the importance of starting and learning by doing.
The video promises to teach how to set up a Shopify store selling products without holding inventory, covering niche selection, store setup, branding, product design, and marketing.
Choosing a niche (e.g., book lovers, coquette, grunge, pets) is crucial for clarity and direction. Niche-specific stores tend to perform better.
Shopify is user-friendly for beginners. Sign up with a free trial (special offer: 3 days free, then $1/month for 3 months). Provide personal info and choose a store name that reflects your niche.
Only the Basic plan is needed. With the offer, the first three months cost around $3. Credit card info is required but not charged until trial ends.
Create a simple logo using Kittl templates. Set up a custom domain, preferably a .store domain, which signals to customers and Google that it's a shop and improves clicks and visibility.
Partner with Printify (free to set up, pay per order). Connect Printify to Shopify via 'Manage my stores' > 'Connect store' > 'Shopify'. Explore the best-sellers catalog for product ideas.
Choose a product first to get dimensions. Use Kittl for designs (templates, AI). Resize to exact dimensions, upload to Printify, and customize. Use preview to see mockups.
Printify generates curated titles, descriptions, and tags. Use AI optimization for specific details. Set pricing: charge higher than production cost (e.g., if cost is $12, charge $24-$30) to ensure profit.
Use Placeit.net or Kittl's AI to create mockups without ordering samples. Upload mockups to product pages for better presentation.
Shopify's free themes are sufficient. Customize via 'Online store' > 'Themes'. Add sections, pages (About, FAQ), and use ChatGPT for copy and SEO.
Set up Shopify Payments (or Airwallex for lower fees). Fill out policies using templates. Consider refund policy: print-on-demand suppliers don't accept returns, so you may choose not to offer returns.
Turn off password protection in settings to make the store live. After launch, focus on marketing, e.g., Pinterest, using existing mockup photos and keywords.
The video provides a step-by-step guide to launching a Shopify store with print-on-demand, emphasizing the importance of starting and learning by doing. It encourages viewers to take action and use the provided resources.
What is the recommended pricing strategy for print-on-demand products?
Charge higher than the production cost; e.g., if cost is $12, charge $24-$30 to ensure profit.
09:33
What is the benefit of using a .store domain?
It signals to customers and Google that the site is a shop, leading to more clicks and better visibility.
03:45
How does Printify pricing work?
You pay per order only; no upfront costs, so if you have no sales, you spend no money.
05:04
What is the first step recommended before creating a Shopify store?
Pick a niche to define your target audience and direction.
00:39
What is the special offer mentioned for Shopify?
3 days free, then $1/month for the next 3 months (total ~$3 for first 3 months).
02:27
What tool is recommended for creating logos and designs?
Kittl, which has templates and AI features.
03:06
How do you connect Printify to Shopify?
Go to Printify account > Manage my stores > Connect store > Choose Shopify, then follow steps.
05:31
What is the advantage of using AI mockups from Kittl?
You can create virtually any mockup that doesn't exist yet, using a photo of your blank product and a prompt.
11:35
Why is it important to turn off password protection?
So customers can actually visit and purchase from your store after launch.
17:40
What is the recommended free marketing channel mentioned?
Pinterest, because it acts like a search engine and you can use existing mockup photos.
18:35
Niche Selection is Key
Emphasizes that niche-specific stores perform better, guiding beginners to focus their efforts.
00:39Low-Cost Startup
Reveals a special offer that allows starting a store for about $3 in the first three months, lowering the barrier to entry.
02:27.store Domain Advantage
Explains that .store domains signal to customers and Google, improving clicks and visibility.
03:45Pricing for Profit
Provides a clear formula for pricing print-on-demand products to ensure profitability.
09:33AI Mockups
Introduces an innovative way to create product mockups without ordering samples, saving time and money.
11:35[00:01] Shopify store, don't exactly know where to start, what products to sell, or how to make a store look good so that people will actually buy from you. And so in all of that, and I'm going to share with you how to set up your own Shopify store
[00:13] selling products that you don't have to hold inventory on. We're going to go picking a niche and who to sell to, your store setup and branding, how to create designs and products that will sell, and then we'll talk briefly about how to
[00:27] your actual store so that you can get sales. So, first things first, and often something that people completely skip, is to pick your niche. Pick who you are
[00:39] selling to in simple terms. Why this is so important before starting your actual store is you'll actually have a clarity of who you're selling to and what types rather than going in blindly, trying to create a store, and not even knowing
[00:52] what direction you're going in. So, a niche meaning basically a topic, meaning that you're creating a store to sell to that specific topic. So, it could be for book lovers, you could design girly or coquette items, it could be a grunge or
[01:07] gothic store, or you could even create items for specific sports or professions or things like pets and list a bunch of pet products. There's honestly a lot of I'm going to show you with print on demand. Now, like I said, this is very
[01:22] important, but don't let it stop you from starting your store. I just idea because stores that are actually niche specific do tend to perform better. Now, your next step is to create your Shopify store, and Shopify is
[01:36] honestly user-friendly even if you are a beginner. To start your store, you're description. This has a free trial link and a special offer that I'll talk a little bit more in just a moment, but it does give you a free trial, meaning you
[01:49] can start this out with $0. So, what you're going to do is sign up for prepared to give some personal information so that that way at Shopify has all your details and when you start getting money everything is organized.
[02:02] In this process you'll also be able to pick your store name. That's why I talked about having a bit of a niche idea in mind so that you can incorporate that into your actual store name. This helps a lot with SEO and branding and
[02:14] your store is so that they can remember it and come back. The next thing Shopify will do will prompt you to choose your plan. Now the only plan you need is the basic for now so I highly recommend that one. That's the one that I like to use
[02:27] and with that special offer you'll actually get three days for free but then your next three months for $1. Meaning that you can start out this entire Shopify process for your first three months for only around $3 which is
[02:40] somebody that doesn't have a lot of capital and are starting your new store. You will have to input some credit card information but just know that you do have that three trial so you won't be charged yet until that trial is up. And
[02:52] after that you're in and you have your Shopify store we can brand and add recommend you to do before we add products is to work a little bit on our branding by creating a simple logo and adding a custom domain. To create your
[03:06] logo all you have to do is use a template. I like to use the ones on Kitl that you like you can then just put in your store name add in or change out any graphics to really make it your own and then export it and upload it directly
[03:20] a few minutes and really helps with the branding so that your store looks nice and cohesive. In this process as well I would also encourage you to go into your settings and set up a custom domain for your store name. This is important again
[03:33] for people remembering your store and knowing how to find you and to come back and remember you. And for your domain I recommend grabbing what's called dot store. This way your store name will be followed by dot store which works
[03:45] people know that you're actually selling products. And dot store domains are made specifically for online stores so it helps to signal to your customers and even Google that your website is a place to shop. They've also shown to get more
[03:58] clicks and better visibility, which can help with traffic and overall sales. It professional rather than having a random website domain or having something that says like my Shopify. It looks much more professional to show that you're a store
[04:13] people can search for you very easily. I will leave a link in the description below for dot store with a special code for a discount. All you have to do is go to get dot store, type in the store name that you chose for your Shopify account,
[04:25] select your domain, input the code, and then you can sync in your domain directly through your Shopify settings after setting it up on dot store. I've my stores. Many other brands do it as well, so it's definitely something that
[04:38] sure that that branding looks good. These two things with our logo and our custom domain already helps the legitimacy of our store. So, now let's go ahead and start talking about how to list products and exactly how products
[04:51] work with your Shopify store. Now, as I talked about earlier, we're doing a method that doesn't necessarily require any shipping at all. And how that works is by partnering with what's called a print-on-demand supplier. So, I use
[05:04] before, but essentially, they're a company that will sync with your Shopify store and fulfill and ship your orders as they come in. And to set up a Printify account is actually free. You don't have to put any money up front,
[05:17] and you only pay per order you get. Meaning, if you have no sales, you have no money spent. To sign up to Printify, all you need is an email address. You'll automatically in. And the next important step of this is to just quickly make
[05:31] sure that our Shopify store is linked directly with our Printify store. To do this, all you have to do is go on your Printify account, go up to manage my stores, connect store, choose Shopify, and then follow the steps that Printify
[05:45] shows you to connect your store. This happens in just a few minutes, and then you already can start listing products on your store. Now, Printify has a very impressive and full catalog of tons of different products. And if you're unsure
[05:58] best-sellers category that I recommend checking out. It shows you the top-selling products and things that are trending and that other print on demand sellers are having a lot of success in. So, I highly recommend checking that out
[06:10] really sure what exactly you want to sell yet. Now, after going through the product catalog, make sure that your store is showing up in the top left so that we can start creating our product. Now, I like to choose a product first
[06:22] and then create a design so that we can get custom dimensions for how big we looks good. Once you click an option on Printify, you can select a provider. designing and it will bring you to a board where you can start uploading your
[06:37] products and customizing everything. Now, on the left-hand side, there is a what I was mentioning earlier for when we're going to create our design. So, creating a design for print on demand, a lot of people get caught up in this spot
[06:49] a design before." or "I don't know what types of designs to create." And that's demand products, they're blank until we actually put a design onto them, right? beginning, I'd recommend you to grab some inspo. Check out stores that are
[07:04] products that you want to create, things like that. And I like to use Kittl for platform. It's really great and one that I've been using all the time, especially sellers in mind. So, it has a lot of really great tools for us as sellers. I
[07:19] especially for beginners, because they have a template section that is really impressive. All you have to do is go to start with a template, and you can you can search for something in specific. So, for example, if I want to
[07:33] sell a coquette t-shirt, I can type that in. After you select a template, you just click start designing, and then you can input anything custom in here. You can switch out the text, the colors, or even the graphics by using the element
[07:46] tab on the left side. You can also utilize AI for this because Kittl has a really great AI where you can completely transform designs to your liking. Make sure that you resize your design before exporting to those exact dimensions that
[07:58] we saw earlier on our Printify account. Then head back over to Printify and you can drag and drop your design directly into Printify and it will show up on the product. Here you can size it, you can change things out, can even erase or add
[08:11] to the design, and you can create a pattern, and choose different variants and sizes depending on the product it is that you're selling. Once you're happy select the preview option and there you'll be able to see mock-ups of your
[08:24] printed out and shipped to your customer. This is great because Printify expect and what your customer can expect too. You want to make sure that all of your colors, your design is showing up correctly. Really spend some time to
[08:38] Printify will print it exactly as you upload it. So just keep that in mind will let you upload all of those mock-ups to your Shopify store. So you already have some curated photos to work with. We will get some more later on,
[08:52] that your store doesn't just look totally blah. Now, Printify makes this very simple. It gives you a curated title, description, and tags for what it saw your product was. I also like to use this AI optimization bar and type in any
[09:07] specific details or things you want to include in your product. Printify uses technology to do this and it comes out really nicely and then creates a curated have to sit there and do everything on your own. It's also going to give you an
[09:20] option to choose a price point. And Printify doesn't leave you hanging here pricing that they recommend for that specific product that you're selling. and something that I want to spend a
[09:33] matter. For your print-on-demand products, you need to charge higher than what it is for a production price. Printify does break this down for you, but it's important to understand how this works. As I said, everything is pay
[09:46] have your product produced and shipped, right? So, your Printify production over that price so that when your customer pays you, there is still a profit made. So, if your product cost is $12, I would recommend charging around
[10:01] $24 to $30 so that after you pay Printify, you still have a profit in between. So, if your product cost is $10, you want to charge more than $10 to make a profit. So, if you charge $30 for your customer, and that customer pays
[10:16] you $30, you pay Printify 10, you now have a $20 profit left over in between. That's essentially how profit works with Printify, and it's important to keep And then you can go ahead and publish to
[10:29] your Shopify store. Now, in just a few moments, back over on Shopify under my products, you will see your product listed, and you can now further edit it and add in any custom mockups or change out anything that you didn't do before
[10:42] important, and we're going to get some photos to actually use to make our listing a little bit more exciting. While the Printify mockups are great and looks like, it's also important to make sure that a customer is going to like
[10:57] what our products look like. And to avoid having to order tons of samples of our products, we do need to get mockup photos. Now, there's a few ways to get mockup photos for your print on demand products, and both of them that I'm
[11:09] you to order samples. So, what I recommend doing is using AI or a mockup generator. A mockup generator that I use is called placeit.net. You can just go to their website, choose a mockup of the product that you're selling, and then
[11:23] upload your design the same exact way that you did on Printify, size it out, and then you have a mockup photo you can download. There's also the option to use AI, and through Kittl. I really like this because you can create virtually
[11:35] any mock-up that doesn't exist yet. Simply bring in a photo of your blank Printify, upload it into Kittl, and then create what's called an image smartboard. Once you have this, you can type in at the bottom into the prompt
[11:48] exactly what it is that you're looking for. You can be as vague as you want or as specific as you want, and Kittl will create a custom mock-up for you, keeping that the product looks like. This has been recently my favorite way to do this
[12:00] just because of the endless opportunities that you can create, and then you can also make different images for your website and what I'm going to store. So, it really is something that I recommend that you give a try. And
[12:13] mock-ups, once you download them, you'll just upload it directly to that Shopify page for that specific product to make everything look a little bit better and more cohesive for your product. And again, to edit your product page, all
[12:26] product, and it will show you the description and different things about your product. And at the bottom, it even will show you the search engine, meaning traffic to your online store organically through the words that you type. You can
[12:39] also use ChatGPT if you really want to customize the copy here, if you want it branding. All these things are completely customizable, and I recommend it look good because remember, the more time that we spend on this, odds are we
[12:53] of the day, people are going to buy things that are on a website that looks in this. Now, once you have your products uploaded, the next step is to make our store a little bit nicer. We want it to look good. So, Shopify has
[13:08] something called themes, and this is basically the bones of your actual store. So, a theme is what your store is going to look like, and Shopify's great free themes for you to use and customize. So, to customize your theme,
[13:21] go to online store, hit themes, and you will see here that there's a lot of different options for different Shopify themes. The free ones work just fine. You can even open the store to see more of them and then just filter it by free.
[13:33] need to spend money right now and all the free themes really work fine. Select branding or idea for your store and then Shopify will automatically put that in it. Now, like I said, this is the bones of our store. So, everything you can
[13:49] you can switch out the images and you can even add things like sections or shop pages like about me or contact left side of your screen so you can simply add in and take away things. I
[14:02] recommend spending some time on this so you can really get an idea and feel for store as and also, as I mentioned before, you can use ChatGPT to input specific copy or have ideas for what to
[14:14] name your products or how to just make your store look better overall. I use ChatGPT a lot for copy on my online stores and for descriptions and stuff wouldn't thought of and that can really help with your SEO as well, which again
[14:28] through search engines. Side note, too, if you ever get stuck on Shopify, they have a little robot in the corner that will pop up on your screen. You can essentially type in any question you have about how to navigate, how to find
[14:41] you exactly to it. That has been such a help for me so I really like that they added that. So, anytime you're feeling stuck, literally ask the little AI bot what it is that you want to change out. In your store pages, you can also find
[14:56] and this is, as I mentioned, where if you want to have an about me section or an FAQ or anything that other online stores have. I would encourage you to do this eventually because it can make your store just look more legit and more
[15:09] professional by having these different things. You can also get your header images or photos or even videos for this. Like I showed you before with that mock-up generator or using AI, you can generate images and videos and lots of
[15:22] store. I'll leave a link in the description for how to create videos using the AI. I just did a video on it, and it's very helpful, so you can watch to really start branding your store with images. I'd also recommend checking out
[15:36] again for inspiration stores that are similar to what you're trying to create. Or even if it's not selling the same product, to just get an idea of what so you can kind of replicate that and add your own creativity to your actual
[15:50] important step so that we can get paid and protect ourselves. So, in Shopify you can click that and then select your store payments and policies. So, what I recommend doing is setting up Shopify payments through, as it sounds, Shopify
[16:05] payments. This will require again some personal information for you to set up. payments if you'd like to have them available, or if you're located in a different countries. Something I've talked about a lot is called Airwallex,
[16:18] which is really great to not have to deal with payment processing fees, but types of payments, that is where you can control all of this. But, make sure that that people can actually purchase on your online store. Next, you're also
[16:33] going to want to go to your policies and fill out your Shopify policies. And they give you templates, so you can go in and just add in your store name or are important to make sure that this is
[16:47] template. Just make sure that you go through it a little bit. And for when we're selling products like this, because we're not holding inventory on them, something that you should consider is your refund policy. Now, when you are
[16:59] going to be accepting refunds and returns or exchanges, these are all you're selling products that are made to order. Now, full transparency, when working with print-on-demand suppliers, they don't exactly accept returns or
[17:12] exchanges, meaning that for your online store, if you do choose to do this, you will have to accept that return or exchange on your own behalf. Meaning shipped to you. So, what I like to do, and I'm able to do because I'm in the
[17:25] US, so please check your location, is I don't offer a return or exchange policy completely up to you, but something that you want to consider when you are Shopify account. Now, once you've done all this, you are pretty much ready to
[17:40] start and launch your online store. But, the last step is to go ahead and turn off your password. So, a lot of Shopify stores will automatically come with a password protected, which is great when you're overall creating your store so
[17:53] purchase from you before it's actually launched. So, make sure that you do turn settings so that people can actually come to your store and make a purchase. And once this is finished, congratulations, you have a new Shopify
[18:07] store with products to sell, you have a setup in place, and you're ready to course, I'm not going to end this video with out talking a little bit about day, when you do create your online store, you are going to have the job of
[18:21] bringing people to that actual online store. So, I will leave a helpful video for you in the description box below on some free ways to do marketing through But, what I will say right now is that make sure you choose one avenue of
[18:35] marketing your products. What I would recommend is picking one social media mock-up photos that you already created for your online store onto social media. as I mentioned, it's a search engine. It works more like Google than a social
[18:50] media, but it's really great and a way that you can market your products for free. Again, taking the content that you already made, you already made content by getting photos for your website and for your products. So, you can utilize
[19:02] those same photo and video content to advertise for free on things like Pinterest. Simply upload the photos of your product, put in keywords for your niche and products. You can then directly link your product page so that
[19:16] if someone clicks on your pin, they can automatically start purchasing from your of traffic, and while it's not overnight, it definitely can help you to All right, and now your store is launched, and I encourage you to go
[19:30] ahead, get in there, and start designing, start creating products. I always say this on my channel, but it's so true. You have to just jump into go. No matter how many tutorials you watch
[19:43] or how many things you read, you're really not going to actually start start before you're ready, and I know for a fact that you absolutely can do able to do something like this, and it's completely changed my life. It's now how
[19:56] you can do it, too, with the right energy, strategy like I just showed you, and going ahead and getting started. Of linked in the description box below. Thank you so, so much for watching, and
[20:08] I hope to see you in the next video, and happy selling.
⚡ Saved you 0h 20m reading this? Transcribe any YouTube video for free — no signup needed.