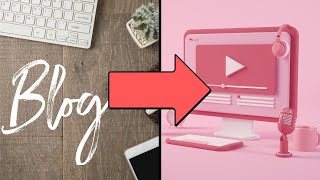

7 Hours to 5 Minutes: My Secret
45sThe stark contrast between 7 hours and 3-5 hours immediately grabs attention and promises a time-saving hack.
▶ Play Clip"Delivers a clear, actionable process with a realistic time-saving claim, though the sponsor segment and repetitive tips add some padding."
This video presents a systematic 8-step process for repurposing existing blog posts into YouTube videos, aiming to reduce production time from the average 7 hours to 3-5 hours per 5 minutes of video. The creator demonstrates the workflow using a real blog post example, covering everything from content selection and scripting to recording, editing, and publishing.
Most people spend around 7 hours creating a 5-minute YouTube video, but this process reduces that to 3-5 hours per 5 minutes of video.
Only a blog post and a content editor like Google Docs or Word are needed to start the repurposing process.
The process consists of 8 steps: break blog post into sections, script the video, review and update content, record, edit, export and review, write metadata, and publish.
Identify the different sections of the blog post (introduction, key takeaways, benefits, conclusion, FAQ) and select only the most important parts for the video.
The video structure follows: hook, list of benefits, key takeaways, conclusion, and a call to action to watch more content.
The hook is the reason viewers should pay attention. It can be adapted from the blog post's introduction, but may need rewriting to be more effective.
Use most of the existing content as is, especially if the blog post is written in a conversational tone. Copy, paste, and rephrase sentences for better flow when read aloud.
Write a conclusion that summarizes main points or highlights a key takeaway. Take a break before reviewing to catch mistakes with fresh eyes.
Read the script aloud a couple of times before recording to reduce mistakes and editing time. Practice makes a huge difference.
Edit content as usual, export a draft, and review for grammar errors in titles/lower thirds and encoding artifacts. Re-export if necessary.
Note timestamps for chapters, write the video description, add links, then publish or schedule. Optionally test thumbnails and titles.
The process is flexible and can be adapted to individual workflows. The key is to repurpose existing content efficiently while maintaining quality through careful scripting, practice, and review.
Time-saving claim
Quantifies the value proposition, making the process's benefit concrete and compelling.
Hook importance
Emphasizes the critical role of the hook in retaining viewers, a core principle of content creation.
03:03Fresh eyes review
Highlights a practical editing technique that improves script quality by avoiding fatigue bias.
04:34Read-aloud review
A simple yet effective method for catching awkward phrasing that is often overlooked.
04:59Artifact check
Warns about a common but non-obvious technical issue in video export, saving time in post-production.
05:46[00:00] Did you know that most people spend around 7 hours creating a 5-minute YouTube video? That's a significant amount of time. But what if you didn't have to spend that long creating content? I mean, think about how easier that would make things for your business.
[00:14] Well, in this video, I'll show you the process we follow for repurposing our blog posts into YouTube videos. And this process takes us anywhere between 3 and 5 hours of work for every 5 minutes of video.
[00:26] And all you need is a blog post for a purpose and a content editor like Google Docs or Word. Alright, let's go over the process. Okay, this process is very straightforward. All you have to do is break the blog post down into sections.
[00:41] Script your YouTube video. Review and update your content. Record your video. Edit your content. Export and review your video. Write your metadata. Publish your content.
[00:53] There are 8 steps in total. It feels like a lot, right? But in our experience, this is the best way to ensure the quality of the video. Now, if you feel like a step isn't completely necessary or could be improved, feel free to change it.
[01:07] Alright, let's kick things off by breaking the blog post down into sections. To show you what the process looks like, I'll repurpose our blog post about the benefits of logging for business. We publish this video on our channel, so if you want to watch it, we leave the link in the description and in the pinned comment.
[01:23] Ok, let's start by identifying the different sections of your blog posts. In my case, I have an introduction, a list of key takeaways, a description of what business blogging is, the actual benefits of blogging for business, a conclusion, and then some
[01:39] frequently asked questions. Now something important to mention is that you don have to use all the information from your blog posts What you need to do is identify the most important parts and think about the best ways to present that information
[01:54] For our video, I'll use our introduction, our list of key takeaways, the benefits of blogging for business, and our conclusion. I won't need anything else, but that doesn't mean we can't use the rest of the information for our videos.
[02:08] So, if you have more content, consider repurposing it into more videos or social media posts. Perfect. Now that we have the content we'll use, we need to think about how we'll present the information.
[02:20] Here's the structure I'll use for our video. First, we start with the hooks, then the list of benefits, then the key takeaways, next, a conclusion, and lastly, a call to action to watch more content.
[02:33] Alright, before we continue, a quick shout-out to our sponsor, The Marketing Project. The Marketing Project is a digital marketing agency that specializes in Q&A marketing. So, if you're interested in repurposing your blog posts, videos, and podcasts, check us out.
[02:47] We turn your existing content into more blog posts, email newsletters, and social media posts. If you're interested, the link's in the description. Now, let's go back to the video. Okay, now that we have a general idea of what the video will look like, we need to script our content.
[03:03] First, think about your hook. The hook is essentially the reason why people should pay attention to what you're talking about and why they should keep watching. Now, depending on the way you wrote the introduction to your blog post,
[03:15] you may be able to use a similar approach for your video. For example, in my case, I wrote about how some of the biggest challenges businesses face are e-generation and selling.
[03:27] And then I connected the initial idea to the solution I found which is blogging Now in hindsight this introduction is not great so I will rewrite it but I keep the general idea of addressing challenges and the solution I found
[03:43] And once you're done with your introduction, move on to the main content. This is the part where you'll use most of your existing content as is. Now, if you did a good job and wrote your blog post
[03:55] in a conversational tone, it should be easy to copy, paste and rephrase some sentences so they flow better when you read them out loud. Just take your time and think about how to do it so each sentence flows naturally
[04:08] and ideas connect well. And lastly, write your conclusion. One really good way to do it is to summarize your main points or highlight something important for the viewer to take away.
[04:21] Also, if you think it makes sense and flows well, you can reuse your existing conclusion to save even more time. And once you're done scripting your video, take a break. Relax and come back to it with fresh eyes.
[04:34] If you start reviewing your content as soon as you finish scripting your video, you'll likely miss mistakes and overlook better ways to phrase things. When we're tired, we get to an ambition. So it's best to leave it for the next day
[04:46] or send it to someone else on your team for feedback. A key tip I can give you is when you review your content, read it aloud. This makes it easier to spot awkward phrases and improve them.
[04:59] And when you finish reviewing your content, it's time to record. Something I like doing is reading my script a couple of times before recording to get familiar with what I want to say and how I want to say it.
[05:12] Sometimes I skip these steps and I end up making a lot of mistakes like mispronouncing words or just not liking how I say things and this ends up in us spending a lot of time editing So just practice a bit before recording and I guarantee you it makes a huge difference
[05:31] All right at this stage you should be able to edit your content fairly quickly. So if you took the time to practice your script you should be able to do it without much trouble. Just edit your content as you normally would and export your video draft. I say video draft
[05:46] because even though we do our best to create the final version of our video, sometimes there are issues we don't catch right away. And that's where the next stage comes in. Review your content. Make sure all the grammar is correct in your titles and lower thirds,
[06:00] and check for artifacts. This isn't something that happens all the time, but sometimes when we export our videos, they have artifacts because they don't encode properly. So just watch out for those, and re-export your video if necessary.
[06:14] And once that's done, focus on your metadata. Take note of all the timestamps for your chapters, write your video description, and add all the links you want to share with your audience. And finally, publish your content or schedule it for later.
[06:29] There's really not much else you need to do except maybe test thumbnails and titles, but that's really up to you and your existing workflows and content strategy. And again, this is just a process for repurposing blog content into YouTube videos.
[06:43] So, if for whatever reason you feel like something isn't ideal or could be improved, feel free to change it to fit your workflow. There are tons of different ways to do this, so do what's best for you and your team.
[06:56] Now, if you want to do the opposite and repurpose your YouTube videos into blog posts, watch this video right here, because we walk you through the process we use to repurpose our content in minutes. Alright? See you in the next one.
⚡ Saved you 0h 07m reading this? Transcribe any YouTube video for free — no signup needed.