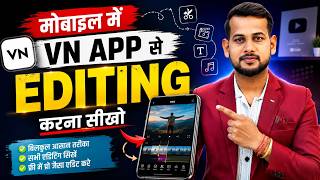

Make Your Videos Shine with VN App
45sThis segment opens with a visually striking promise of making videos 'shine' and hints at multiple cool effects like glitch and logos, instantly grabbing attention.
▶ Play Clip"Delivers a solid, practical tutorial that matches the title's promise, though it includes some repetitive filler and a lengthy intro."
This video is a comprehensive tutorial on how to edit videos using the VN video editor app on a mobile device. The creator demonstrates various editing techniques, including cropping, splitting, adding filters, adjusting quality, adding audio and voiceovers, incorporating screen recordings, and applying text and animations. The tutorial is aimed at beginners and covers both short and long video formats.
The video opens with a demonstration of various effects possible with the VN app, such as making videos shine, adding glitch effects, and creating logos. It sets the stage for a comprehensive editing tutorial.
The creator instructs viewers to search for 'VN' on the Play Store, install the free app, and then create a new project by tapping 'New Project' and saving it to open the gallery.
The tutorial explains how to select between long and short video formats, including the 16:9 ratio for YouTube and the short format for platforms like YouTube Shorts.
The creator demonstrates how to crop a video using the timeline and tools, explaining that the timeline is where the video is visible and tools are located below it.
The video shows how to use the audio graph to identify empty spaces and split the video to remove damaged or unwanted parts, ensuring smooth playback.
The tutorial covers applying filters to improve video quality, adjusting filter intensity, and using the 'Apply All' option to apply changes to all parts of the video.
The creator demonstrates adjusting exposure, contrast, brightness, and saturation to enhance video quality, noting that these adjustments can be applied to the entire video.
The video explains how to add separate audio tracks, including voiceovers recorded during editing and generated audio from the gallery, using the music option.
The tutorial shows how to add screen recordings to a video, resize, rotate, and position them, including using a mobile frame for a professional look.
The creator demonstrates adding text like 'please subscribe', changing fonts, and applying animations such as fades, spins, and slides to make text dynamic.
The video explains how to use keyframes to animate text or objects, moving them across the screen at specific points in the video.
The tutorial covers applying FX effects like glitches, adjusting video speed, and using the split option to change speed for specific parts.
The creator shows how to adjust volume, apply fade in/out, rotate, flip, and fill the video, as well as using blur to obscure parts of the screen.
The video concludes with instructions on exporting the final video, recommending at least 1080p resolution and 60 FPS for quality, and saving it to the gallery.
The video provides a thorough, step-by-step guide to editing videos with the VN app, covering essential tools and techniques for both beginners and intermediate users. By following the tutorial, viewers can create polished videos directly from their mobile devices.
What is the first step to start editing with the VN app?
Search for 'VN' on the Play Store, install the free app, and create a new project.
01:22
What aspect ratio is recommended for YouTube videos in the VN app?
16:9 ratio.
02:44
How do you remove an unwanted part of a video in VN?
Use the audio graph to find empty spaces, then split the video at that point and delete the unwanted section.
04:45
What is the 'Apply All' option used for in VN?
It applies a filter or adjustment to all parts of the video at once.
06:45
How can you add a voiceover while editing in VN?
Tap the music option, select voiceover, and start recording your voice.
08:33
What is the purpose of using keyframes in VN?
To animate text or objects, moving them across the screen at specific points in the video.
14:59
What is the minimum recommended export resolution and FPS for VN videos?
1080p resolution and 60 FPS.
18:42
Free App Emphasis
Highlights that the VN app is free, making video editing accessible to everyone.
01:09Audio Graph Technique
A practical technique for identifying and removing unwanted parts of a video using the audio graph.
04:45Color Grading Basics
Demonstrates how to adjust exposure, contrast, brightness, and saturation to improve video quality.
06:57Keyframe Animation
Explains a powerful feature for creating dynamic movements in videos, essential for professional-looking edits.
14:59Export Quality Standards
Provides clear guidelines for exporting high-quality videos, ensuring viewers get the best output.
18:30[00:02] see this. Now it is shiny, isn't it? In this way you can also make your video shine. And leave this aside, if suppose you want to learn to edit AI videos in this way, then brother, I will teach you that too. Suppose you have to make a transaction, you can
[00:15] make the transaction in this way also. Suppose you want to add glitch effect, you can add glitch effect in this way. And let me show you another miracle. You can also make YouTube logo, Facebook logo, Instagram logo in this way. Let me show you one more thing.
[00:27] Look, this YouTube is standing on my finger, now look, I am moving it here, it has come here, I am moving it here, it has come here, now look brother, it has come here, now look, it will remain standing here, it is standing here, people, now look, it will get up and come in my hand,
[00:39] you can also do it like this and brother, leave this aside, suppose you see here how the typing is happening, you can also do such typing very easily and yes, the sound of your typing will also come and along with it, if you
[00:53] want to play music in the background, then brother, you can also play music etc. in this way. videos, that too from a mobile absolutely free. Just watch this video. After that, you
[01:09] because later you people forget to like it. So like it immediately and if you are new to the channel then subscribe. Let's move on to our video. Now look friend, Now after going to Play Store, you have to
[01:22] search VN there. So you have to install this app. It is a free app, that is why is a free app. So click on it and install this app in a simple way. What to do after installation? Let me show you the details on the screen.
[01:35] Now after opening it, you will see an interface like this. So After clicking, you have to tap on New Project here. And here you have to simply click on Save. Your gallery will then open. Ok? Now friends,
[01:48] look here, one of all will appear in front of you, one of video will appear, one of photo will appear. Suppose you want to edit photos by adding them, then you can edit your photos by clicking on the photo here. you only want the video, then you can get it from here. If you want to take both photo and video
[02:02] Meaning you can import whatever you want to edit from here. So let I will edit this video and show you. After clicking, click on Next here. Now after clicking on Next, you have reached here. Now look, suppose
[02:15] you want to edit a long video or a short video, I will teach you the process of both. Just watch the video and understand. Ok? Now the first thing that you are long video. But suppose your video is short then what should you do? So
[02:28] look, you have to click on the original which is visible here and here you will get you want to edit. Suppose you want to edit a short video, then I will click here. If you
[02:44] can take this version. Look for YouTube, you can take it in 16:9 ratio. For example, click on the short. We will do it here. Now look, now look, mine has arrived. What is there to do for that? Simply tap on it. Like look
[02:58] I'm going to tap on mine. I can pick it up and put it wherever I want. I can adjust it as per look, this is what has happened to me now. Ok? How will quality etc. improve now? I will tell you everything. Now friends, suppose the format of short has come like this. Now the rest of the
[03:11] or a long video, the process is the same for both. You just have to For example, look at the tools available at the bottom, where they are used and how to use them, if you understand them then you will be able to edit every type of video, so let me
[03:25] show you how to edit a long video, what will I do, first of all I will click here and from see it is done, okay, now I will tap on it and first adjust it from here like this, now look here, suppose
[03:38] more on the side, I do not want to keep it that much, so what do I have to do to crop it, timeline, where our video is visible, this is called timeline and below are its tools. So we'll get into tools. Here we will click on crop. And look, ours has
[03:51] this way, crop as much as you want. After cropping like this, Ok? Look, let's crop it. after cropping, I will do it in a simple way, see it here, I will
[04:05] click on done here below. Now look, this crop of mine is done. Ok? In this way. edit. We have done it till here. Now suppose we have to increase the quality etc. a little, me turn up the sound a little bit on the video here. Let me show you.
[04:18] When I started. Look friends, today I will tell you, look my video has started from here. Ok? The part here here here was messed up. Ok? It started from here. Now you will see one more thing. Look here, I will
[04:30] Look, here you will see seconds. This is it in 0 seconds 2 seconds. It's up to here in 4 seconds. It is even here. So you can make it bigger or smaller with both your fingers. Ok? Do this with your finger. Ok ? So you do it. Now look here, you will see a graph of this audio.
[04:45] is empty space here. Then here's the pay graph. So, that means my video starts from here. play it once and see. Friends, today I am telling you friends, today ok, this is where I I'll bring the cursor here. Now after bringing the cursor,
[04:58] option of split here. Look at Split. Ok ? You have to click on it. Now look here, it has been done in two parts. So this part of mine was useless. So we'll This part of ours has been deleted. Now our video will directly
[05:10] play. Friends, today I am going to tell you a new YouTube from mobile phone, right? So, this way you can remove and throw away any damaged part. Now Like for example, both things are there. Ok? First of all,
[05:23] can see this. Now for example, suppose click and split here. Now from here, where the part is damaged, I will bring the after that, suppose this middle part of mine was bad. I may have coughed on it or made
[05:37] some mistake or received a call from someone. So we will split this part here, the Now that part of ours has been completed. Ok? So if you want to tap on it, it will come back like this. Ok? It has been learned
[05:51] how to correct a part , remove the bad part, crop it. long video, both have the same process. Now friends, after that suppose you want to increase the quality of the video, then how will it be increased? Simply click on your timeline.
[06:04] look below, you will find an option of filter here. Look at this. Ok? You have to tap on it. Now as soon as you tap on it, friends, an come to impose a flutter here. For example, you can choose all these filters as per your choice from here.
[06:18] beauty in it. Ok? So you can take any filter from here as per your choice. Ok? As an example, let me show you here. can take whatever you like. Like suppose that, let's say I take this filter.
[06:32] Ok? So you can increase or decrease its capacity. getting, you can increase or decrease it here as per how much you want to keep. So I keep half. Now from here I am done. If there are many parts in your video, cut it.
[06:45] Ok? If you have added a lot of parts, you can click on Apply All here. This one will be applicable in all parts. So let me click on Apply All. Or I would like to do this on this. So look here you will get adjustment. You have to click on it. From here
[06:57] See how the quality is changing. Exposure increased. Now we will come to the contrast. can also increase the contrast. Will come in brightness. We can increase or decrease the brightness as per our requirement. We can also adjust the saturation here as per our requirement. Ok
[07:10] you can use all the options available here. It will outdoor or indoor. Ok? So let me do it
[07:22] ? Ok. Now admit it, I've done it. After doing this I will apply all pay so that it will be Now see how well our quality has changed here. You can see here what the So look here, the earlier quality was like this but
[07:37] If I give it a little more time, it will become more enjoyable. You do it as per your wish. friends, what to do after that? Like you learned here how to do quality color grating etc. This has also happened. Now, suppose for example, you have a
[07:52] separate voice over in the short video, generated separate audio , created audio or suppose you , created audio or suppose you do it? Like suppose that I do n't have audio in it. Ok?
[08:06] me play it first. There is no audio on this for example. Ok? Now I have to put separate audio on it. So how will it feel? So what do you have to do first Sorry, you will find it above, not below. Look at this one here. Tap on it. The
[08:18] music option that is coming. Now here you get three options. One is for happens, you can apply a lot of fad etc. effects from here. If you you can do it from here. I will show you that too. Let me tap on top of it.
[08:33] want to do voice over while editing. If suppose you shoot a blog, mini blog, let's say I start here. Ok ? Look, it's starting and I'll start speaking. My mic will start. So friends, today I
[08:47] will tell you the correct way to create a YouTube channel from a mobile phone and will also tell you how you can earn money from YouTube. Now look, I have stopped you by saying this much. Ok? Look, from here to here, I'm done with 7.85 seconds. Now I can play it and listen to it. Let
[08:59] me tell you. I will see. So friends, today I will tell you the correct way to create a YouTube channel from a mobile phone and will also tell you how you can earn separately how I did voice over. Ok? So you can do it this way. If
[09:11] you like this voice over and what he has said is correct, then click on Done here. If half is good then you can delete the bad part by clicking on Split here. That's all you can keep. Suppose you want to keep me then I will do it
[09:24] this ad of mine has been done here. Ok? Let me delete this. Now suppose you have generated audio. Just have to add it. Ok? It is ready made. So here go to music here. Ok? Now after going to Music, you have to go to My Music
[09:37] and your gallery will open here. So bring whatever you need from the gallery. For example, let's Hey Halku, run quickly. Ok? I will do it in the village. Now see, this audio of mine will come, the one which was generated.
[09:49] Ok? Look Hey Halku, run quickly. Dreaded bull lion in the village. Look at it this way, it has arrived. Ok? So you can add such audio very easily. Ok? Or if you are predicting the future. So let me delete this one as well. Now
[10:02] any screen recording nearby or anywhere else, then how will you show it? It's a simple thing. Look here, what do you have to do? Here you have to click on it. Ok? Look, this media that is visible, you have to tap on it and after tapping,
[10:15] click on the photo video option that is available and your gallery will open here. Now whatever you want to show in the screen recording, So let me add screen recording anything. Like, want to add this here. Ok? Look, this is the screen recording. So I have
[10:29] me try it here. Look how it's scrolling. Now friends, I did not want to show this screen recording here. I had to show up next. Suppose I had to show from here. So what will we do? We will hold it, lift it, turn it here and leave it here.
[10:42] start from here, I will drop you here. Now look my screen screen recording has come in the middle. I have to put this aside. So can do it here or anywhere. Ok? Look at this. Here it has been sidelined like this. Now
[10:55] looks something like this. If you want to make it bigger or smaller, then from here you can easily make it bigger as per is an option to enlarge it. Here you can also rotate it as per your wish by clicking on it. Ok? You will get all the options here. There
[11:08] screen now. But now I will show you the smaller one in which I will also teach you how to put the mobile frame. Let me delete this and add a different screen recording from here. Ok? For example, suppose I add this one.
[11:21] what will I do with this one? First of all, I'm going to make this a little bigger here. In this way. Look, I have done a big tax here. Ok? It has happened at this place. What should want to put the most mobile frame on top of it. As you can see, I have started screen recording on the side.
[11:34] This is how the frame has to be placed on it. So what will you do? First we need to download the frame. Where can I get the frame? You can do this from any application. For example, look at and write here whatever frame you want. As I write mobile
[11:47] frame PNG. Look, it has arrived. I will click on it and after clicking, Whatever frame you want to put, just click it simply. Now as an example, suppose I take any one frame. Okay, suppose you accept this one, I will take this one.
[12:01] Now just what should I do with this frame? I have downloaded it now. I will come here now. look here I will click on plus. After clicking on this, I So look here I have added the frame. In this way. Now what
[12:16] Like look I will make it bigger. Pull it from here like this. Now this cut, crop etc. it as per your wish. Like you have a match in your frame and just place it on top of it. Ok? I am
[12:30] screen recording is done. So what should I do with it now? bigger. Now look, frame has been placed on my screen recording in a simple way. I haven't adjusted properly yet. But you
[12:45] That's why it will be like this for you. Ok ? Look here. Now this is my frame drawn till here. The length is up to here. If I want to make it longer, I can Ok? Now as far as keeping the screen recording or
[12:59] splits. Split this part also and delete it from here. Look at this, now I have reached this far. So in this way you is no problem. Now friends, suppose if you want to write any YouTube logo or your name
[13:13] how to do it. First of all, if you want to add some text or write it, then Tap on it and come to the text here simply. Now good way. For example, suppose I want to take this one. So
[13:28] here I want to write, for example, please subscribe. Ok? So I write here, please subscribe. Ok? Look, I have written this on my channel. In this way. comes Dunn. I can click on it and do it. Either if you want to change its font etc.
[13:43] or adjust the length etc. then you can do it as per your convenience from here. Ok? So let me just do it straight away. Look, it has arrived here. Now you can make it smaller or bigger as per your wish. You can keep it wherever you want,
[13:55] I will keep it here. Now look, this is mine, this one. Ok? So keep it as long as you want. Suppose I want to keep it here, till here. recording started. My screen recording has started from here. So
[14:07] I play. Now look, please subscribe is written here. Now it has been removed. brother, what should we do? Look here you will find many options of animation. Look at this motion that you are getting, you have to click on it. If you
[14:20] click on it, motion will appear. Now look, this will come from the Fed. So it will come like this. The scale will come while fading, it will spin like this, see it will rotate, it will slide down like this, okay, so whatever you want to keep, do it, now see it will
[14:32] come like this, see in which style it has come, you get the option like this, as soon as you get the motion, from here you can do many styles, this one is in, when it goes out, how will it look, how will it go like this, how will it loop, how will it remain in, that is, the total
[14:47] overview, all these options are available there, so you can do this very easily, suppose you want to move it, okay, if you want to move it, then how will you do it? So brother, as far as you want. Ok? For example, suppose I want to take it this far.
[14:59] Ok? Now accept this, I would like to make a movement. So what should I do? First of all I will bring you to the starting point. Now I will click on it. Ok? Who needs to be is an option of keyframe. Ok? You have to tap on it. As soon as I clicked,
[15:12] a dot appeared here. Ok ? Let me show you here at set up here. That means we have already made our stop there. We want that when it reaches here, it should come
[15:27] want that by the time my video reaches here, it will come here. In this way, now when my video reaches here, it will reach here. In this way, when my This is how I will show you now. Look, let me start. I will play.
[15:42] Look how it came down. Look, he came here. Look, it went up. Now look, So if you don't understand then you can look at the thing again. It is a very easy is no problem. Ok? This is called a frame. So this is how you
[15:57] tell you some more things. For example, if you want to improve something in the video, then you will find many options. Like you see, here you get FX. If we want to first we will click on the video. Click on FX. Now look here, you
[16:12] want to place it with a glitch. Ok? Look here, you can get glitches. If you see, the glitch will appear. In this way, many options are available in this way. So in this way you can apply it easily. Ok? Now friends,
[16:27] Look here there is a split option. If you want to increase the speed of the video then You will click on it. From here you have to come regularly as per your convenience and increase the speed of the video as much as you want. want to do double the speed. So I will do it from here and get it done. Now see how much speed it will reach.
[16:41] Look at how much speed the video is saying. Isn't it ? So this will also happen in this way. normal again then we will go to speed again and from here I will make it 1x. Ok? Now see, I will do it. Ok? It has become normal. Now similarly, if you want to
[16:55] click on the volume here. You can mute or unmute from here. You can increase this, you can make it 200. You can do everything here as per your wish. Ok? look here you get the option of fade. From here you can do fade in, fade out i.e. last and
[17:09] outside as per your requirement. Ok ? Now suppose if you want to crop any part then you have to this. I have already taught you this. Now after that you will see that if you want to rotate it then click on rotate. Look, it will rotate like this. Isn't it?
[17:22] rotate like a mirror. If you want to flip, you can do it brother. click on fill brother. It will fit. In this way, according to your own wishes. Ok click on busy here. Look here, you will find a lot of background. If you
[17:37] Ok? So this thing happened. Now just look, there are many options available here. If you want to blur, then the option of blur is also available here. Ok? And look If any part needs to be blurred. Like I'll show you. Suppose this
[17:50] part of it has to be blurred. So my screen recording has started from here. Ok ? I want to blur this. So I will come here, bring the cursor and look here, I So I will make it bigger or smaller as per my requirement and place it here on top of it.
[18:03] Ok? Look, I will get it done. Now pull it completely as far as you want to apply it. Let me turn this up a little bit. Look at this. This is my screen recording, now blurred. tell me how you can know from the same channel what happened? Our blur is
[18:16] what would we do here? I will draw the blurred music one like this. This will also happen. You can do it very easily. Now friends, after that look here below you reversing, freezing. So the more you use it,
[18:30] the more you will learn. Ok? But I have told you almost everything that a person needs to do. And when your video is ready, what to do? The simple way to do it is to click on export here and according to your choice, change the
[18:42] quality and resolution to 4K, 2.7K or you can export in 1080p, that is, minimum you have to export in 1080p only and you have to make the FPS 60 and video will be created and saved. It will appear in your gallery. Now you can upload this video wherever you want.
[18:57] So friends, this is the method of editing video with VN app. learn video editing from different apps, like Insort app, KineMaster app, then you can also watch all these videos by clicking on them. Here
[19:10] I have just taught how to edit videos in different ways. Ok? Rest friend, if you liked the video then please like it. If you are new to the channel, please subscribe.



⚡ Saved you 0h 19m reading this? Transcribe any YouTube video for free — no signup needed.