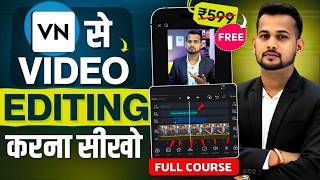

5 Mind-Blowing Video Edits You Can Do on Mobile
45sImmediately showcases visually impressive effects and promises easy mobile editing, which is highly shareable and curiosity-piquing.
▶ Play Clip"The title promises a complete editing tutorial, and the video delivers a thorough walkthrough of the VN app, though it includes some repetitive explanations and a lengthy intro."
This video is a comprehensive tutorial on how to edit videos using the VN video editor app on a mobile device. The creator demonstrates the entire process, from importing clips to adding effects, transitions, text, and audio, and finally exporting the finished video. The tutorial is designed for beginners and covers both short and long video formats.
The video begins with a promise to teach video editing for free on any mobile phone, covering both short and long videos. The creator encourages viewers to like and subscribe before starting the tutorial.
The first step is to go to the Play Store and search for 'VN'. The app is free and has no watermark, making it a good choice for editing.
After opening the app, click on 'New Video' and grant the necessary permissions. Then, select the video clips you want to edit from your gallery and tap 'Next'.
The creator explains the basic interface, including the timeline, where you can see your clips, and the various tools available for editing. He emphasizes that understanding these basics is key to editing any type of video.
For short videos, select the 9:16 ratio; for long videos, use 16:9. This is the only difference in the editing process between the two formats.
To remove bad parts of a video, use the 'Split' tool in the tools menu. Place the cursor at the point where you want to cut, split the clip, and delete the unwanted section. This is useful for removing mistakes or pauses.
Use the 'Filter' option to apply color grading, and the 'Adjust' option to tweak brightness, contrast, saturation, and sharpness. These adjustments can significantly improve the video's visual appeal.
To add a screen recording, import it from your gallery, place it on the timeline, and adjust its size and position. You can also mute its original sound and adjust the volume as needed.
Use the 'T' tool to add text to your video. You can choose from various templates, change the font style, and adjust the text's size and position. The text can be made to appear for the entire video or a specific duration.
To add transitions between scenes, tap the plus icon between clips and choose from options like fade, white, or zoom. This makes the video flow more smoothly.
Use the 'FX' option to add effects like glitch. You can adjust the effect's size and position, and even add sound effects to enhance the impact.
You can add external audio by tapping on 'Music' and selecting a track from your phone or the app's library. You can also record audio directly within the app. Adjust the volume to balance the audio levels.
Use the 'Speed' tool to speed up or slow down parts of your video. The 'Crop' tool allows you to crop the video to your desired size, and you can also rotate or mirror the video.
To blur a specific area, use the 'Blur' tool in the tools menu. You can choose from different blur styles and adjust the blur's size and position.
When the video is ready, click 'Export'. Set the resolution to at least 1080p (or 2K/4K) and the FPS to 60 for the best quality. The video will be saved to your gallery.
The video provides a complete, step-by-step guide to editing videos with the VN app, covering everything from basic trimming to advanced effects. The creator emphasizes that practice is key to mastering the app and encourages viewers to explore other tutorials for different editing apps.
What is the first step to start editing with the VN app?
Download the VN app from the Play Store.
01:07
What aspect ratio should be used for short videos?
9:16
03:44
What aspect ratio is recommended for long videos?
16:9
04:35
How do you remove a bad part of a video?
Use the 'Split' tool to cut the clip at the desired point, then delete the unwanted section.
05:29
What tools are used to enhance video quality?
The 'Filter' and 'Adjust' options, which allow you to change brightness, contrast, saturation, and sharpness.
07:52
How can you add a screen recording to your video?
Import the screen recording from your gallery, place it on the timeline, and adjust its size and position.
09:54
What is the purpose of the 'FX' tool?
It allows you to add effects like glitch to your video.
14:47
How do you add music to your video?
Tap on 'Music' and select a track from your phone or the app's library, or record audio directly.
16:45
What is the recommended export resolution and FPS?
At least 1080p resolution and 60 FPS.
20:59
Free and Watermark-Free
The VN app is free and has no watermark, making it accessible for beginners.
01:07Aspect Ratio is Key
The only difference between editing shorts and long videos is the aspect ratio, simplifying the process.
03:32Quality Enhancement Tools
Using filters and adjustments can dramatically improve video quality, a crucial skill for content creators.
07:26Transitions for Smooth Flow
Adding transitions between scenes makes videos more professional and engaging.
13:39Export Settings Matter
Exporting at 1080p and 60 FPS ensures high-quality output, which is essential for viewer satisfaction.
20:59[00:02] if you want to play screen recording then you will learn to play recording in this way also. If you want to add glitch effect to the video, then brother, you can also add glitch effect in this way. If you want to make a transaction somewhere, then brother, you
[00:14] can also make the transaction in this way. And let me show you one more interesting thing. Look, the YouTube logo is visible. Look here, the Instagram logo is visible. You can also do it this way. And see something even more interesting than this. Look here, there is the YouTube logo
[00:27] see it is coming down. I'm doing it again. It's going up. Brother, I am putting it down, so it is coming down. Now look, this is what I have got on this finger. You can also do all these miracles from any mobile phone. And if you
[00:40] want to do the tightening like this with sound, then brother, you can do that too. If you Meaning, today I will teach you how to edit videos absolutely free from any mobile. Whether you make a short video or a long video. I am going to give you a complete tutorial.
[00:55] Just look at the video. You will learn to edit every type of video. But friend, before that I request you to like the video right now, if you are new to the channel then subscribe and tell me in the comments from where are you watching this video, from which
[01:07] state are you watching it, please tell me in the comments. Let's start the video. So brother, first of all you have to go to your Play Store and search VN there. this app because there is no watermark on it and that is why it is a free app.
[01:20] Ok? Now I will open it here in a simple way. After opening, click on New Video here and what will you do here in a simple way? First we give the permission etc. Ok ? In this way. Now after that, an interface like this will appear in front of you.
[01:32] Look here, first of all when you click on New Project, all will appear in front of you, that is, photo, video, everything will appear. Then from here your only your photo will come. Ok? So like I want to edit a video. So what
[01:45] will you do? First of all, here I will tap on this video and here I will click on Next. Now let me tell you one thing. If you have three or four videos made an AIC short video in different parts, then how to add them all?
[01:58] So, look at my first part, suppose I am going to edit the video right now, in these two parts, this is the one, so I will tap on it. Now will tap on it. Now look, this has been written first on it.
[02:10] So this way this will be my ad. If you have more parts, then Ok? Then what will happen? Your addition will be done. Ok? Look here it is added. Now let me tell you some basic things first. After that
[02:25] I will definitely teach you editing. Now first remember one thing. This place where you will see timeline. Remember this. Ok? This is our timeline. And all their tools etc. are here. Ok? What to use? Which tool will be used for what
[02:38] which you will be able to edit every type of video. Ok? Now look here, this is done. Meaning, if you want to add any photo or video separately, then you will use that. We will use music etc. here. Ok? Remember the basic things. Now see one thing,
[02:53] you can make it smaller or bigger with both your fingers. Like look, I do it like this with both fingers. So look, right now the thing is getting smaller like this. Ok? Look at this. Now look here and you will see it. Like this is my first part. Look, the second
[03:05] cross here. Now look, the second part has started from here. Now look here, this is my third part. This is my four part. This is a five part. In this way So right now I will add only two videos. Ok? The rest of this
[03:18] what should I do? I have shown all this by adding it just like that. So will tap on delete. I will click on it again. I will tap on delete. I Look, I have only two videos. It is of two parts. Will edit from both parts.
[03:32] First this happened and second this happened. So what will we do now? The first thing you have to do is to correct any bad part of the video either at the beginning or at the end. But friend, before that, one important thing is that if you are editing a short,
[03:44] look here and click on it. Ok? The original is visible above it. Now look from here, if you are editing a short video then you have to tap on it. Look at the ratio of 91:16 visible above it. And if you are making long videos
[03:57] So for example, suppose you want to make a short then click on it. Do ok. Now look here it will be like this in the long ratio. Then you can zoom it with both fingers. Ok? Now I
[04:09] fitted it like this. Ok? Look, my shorts are ready now. Ok? You just have to do the ratio like this. Rest of the editing process is the same. If it is shorts then what should be done like this? Now look, I will
[04:22] and zoom it in and make it bigger. Look, this is the shorts ratio. That's the only difference. Apart from this there is no difference. Ok? So now let me show you how to edit long videos. Apart from this, you can also edit short videos using the same process.
[04:35] From here I will make a resolution of 16 nine. Ok? In this way. Ok? So here I have done the long one. Now friends, what is the first thing to do? If there is any bad part in the beginning of your video, then first correct it. For example, when I
[04:49] after starting I went ahead and stood at my place. Ok? So look, this is the bad part. So what will we do? We will delete this part. So to delete it, first zoom in a little. Look, if you do it with both fingers, what will
[05:02] you will be able to see it clearly. Ok? And look here you will see seconds. Ok? Look, you will see it like this: 1 second, 2 seconds, 3 seconds, 4 seconds, 5 seconds. So what to do? First I will do it in a simple way. Look here.
[05:15] Friends, today I will tell you the complete process of creating a new YouTube channel. Friends, look at this today, here you will see a graph, you can also guess from the graph. graph of your audio. Ok? So we will bring the cursor here.
[05:29] Ok? Look, my cursor is at this place. Ok? So we will keep it here here you have to come to tools and here you will get an option of split. Ok? Look at this split. You have to click on it. Then see, this too has been
[05:42] divided into two parts. Now this bad part of mine which was in the beginning will come in the bad part and here we can simply click on delete. Or Ok? Look, now my bad part is over. Now it has
[05:55] Friends, today a new see the end also. Like look, I play this.
[06:07] you need to do is say ok? Look, this is a little bigger one here, it was till here. make it. This far. Ok? After that I don't own anything. split. Now look, this part of mine is useless. So we will delete this also
[06:20] from here. Ok? is very easy. Now after that look again, idea from the graph also. So we'll click on it. We will splint it and delete this part. Now see how well the match will be. To
[06:33] create an ID. Meaning, if you So in this way, first of all, if any part is damaged, it has to be thrown away. Meaning, it has to be taken out and Now look, let me come to the end of this and see here till where the end is.
[06:46] Look, let's start here. I have said the last word. Now by clicking on it, we will split it and delete it also. Now know one more thing. Suppose you stop somewhere in the middle while speaking or something goes wrong, then
[06:59] like, let's say I'm messed up here. Ok? So what will you do? We will bring the cursor to the place where the problem occurred. Will split. Now where has it been from here Something was said wrong. So what will I do here? I will bring the cursor and
[07:13] this part was my mistake. So we will first cut this part here and delete that part from here. Now look, our middle part has been deleted. from here. Ok? I don't want to delete it because
[07:26] my part is not bad. Now the first thing is, if you want to increase the quality of the video, some cropping etc. then how to do it? For example, suppose I want to crop this a little bit. So what will we do? Click on it. Ok? Now
[07:39] What to do with both fingers? You have to zoom. Ok? Then you can adjust it here as per your wish. So let me not do it now. I am just Now friends, suppose you want to increase the quality. Ok? What should you do if you want to
[07:52] improve the quality of your video or make it shine ? So first of all you have to come here and look at the bottom you will find the filter option here. Okay, right ? You have to click on the filter. Now as soon as you click, you
[08:04] can also adjust your flutter from here. If someone matches your video, you can also use any of these filters. Ok? Ok? Look here, you will find a lot. Ok? Come on, look, there is a lot
[08:16] use it. If there is no match then I will tell you the solution for that also. Ok? Look, now as an take this. Is that okay? Look, let me reduce it a little. Now after that, look here, you will get an option called adjust. You have to tap on it. Now
[08:31] increase it as per your requirement. Ok? Now look, there's a contrast here. You can increase or decrease this. You can also increase or decrease the brightness as per your requirement. Ok? You can also increase or decrease the saturation as per your requirement. You can also increase or decrease the percentage as per
[08:45] Meaning, you get everything here to adjust. Ok? You will make your useless video very amazing. Now let's go like this, let me increase the sharpness a little bit here also. The quality will be good. Look, let me highlight this a
[08:58] little. Now look, now I want this to be the color grading that I just did. I just Sir, I want this to be added to all the parts. So we will what has happened? I had two parts.
[09:12] Look how bad the quality was earlier and how good it is now. Look, how well the quality has improved now. If you give it a little more time, it will be even better for you. Ok? So in this way
[09:28] show a screen recording somewhere nearby. Ok? So how to run it? For example, let's say So first of all you have to go to the place from where you want to start. Now suppose I have to run here for 8 seconds. Look here where there are 8 seconds, look at this place, you have to
[09:42] run it from here for 8 seconds. So we will first bring the cursor here. Now after that, to bring the cursor here. Now after that, to you have to tap on it here. You will click on it. So here
[09:54] click on it again here. Now here you have to take any screen recording or video from your gallery Now here you have to take any screen recording or video from your gallery So what do I do here? Let's put it simply, let's say
[10:08] I want to show. So I have added it here. Look, it has been added here. Now first pick it up and take it to the place where you want to apply it with your finger. Ok? Like you can do here. You can do it here. So I will do it here.
[10:20] Now how will this be big or small? So to enlarge it, you have to click on it, hold it and drag it. Will grow up. You can rotate it to move it around. Like if I want to make it bigger then bigger than the corner one. Now I want to put this much only. Ok? So I have
[10:32] put this much here like this. If you want to make it bigger, then hold the corner and pull it further. It will grow bigger this way. Ok? Look at this. Isn't it? are done. Now let me show you first. Now look at one thing. This one is making a lot of sound.
[10:44] you want to remove its sound then you will click on it. Then look down, you will get the option in tools, so you can check it here. You will get the volume option. Look at this. Ok? Look at this volume, if we click on it now, then its
[10:57] So by clicking on the volume here, we can reduce its volume from here or make it zero. Look, its volume is over now. Ok? Okay, right ? Now I just have volume. The screen recording volume is out.
[11:09] you can click on your volume and then come to volume here and increase it. You can reduce it. You can do whatever you want from here. Ok? In this way. Let me turn up the volume on this one a little bit.
[11:22] ? So, this is how to set up screen recording. Now as far as you have to apply I have to put it here. Ok? Look here, until 13 seconds. Ok? Seconds you will see everything here. Whatever it is, seconds, minutes , now we have to put it till here, so we will
[11:36] split it in a simple way. Ok? Look, I have cut it. Now look, So what will we do with this? I will delete it. Now look, my screen recording from here to here has been done perfectly. Ok? So you can do this also. Now
[11:50] add some text after this. Ok? For example, suppose I want to add text here on top of this or add text somewhere else, then you first have to go to the place from where you want to you get the option of T. Ok? You will click on it. You will click on the text.
[12:04] Now from here you can add whatever text you want as per your wish. Now look here, you get many options also. Adding text to different design templates. Ok? This one, this one, this one. So click on whatever you want to keep.
[12:18] After clicking, if you click on it here, the option to write this will appear. Ok? You have to click on it. Then the option to write this will Like let me write it here in a simple way, Arvind John. Ok?
[12:32] Look Arvind, I have zoned here. Ok sorry, I made a mistake here. Arvind Zone, ? You get many options here.
[12:45] can also adjust here as per your requirement. Ok? Let me do it here. Now see here how long you want to keep it. You can hold it and pull it to make it bigger. Look, right now it's showing me for 12 seconds, from here to here. Ok?
[12:58] Now I can also lengthen it by holding it and pulling it. Look, Like let's say I have to put the whole thing in the video. So I will do it in the entire video. After holding it like this, you can make it smaller with both your fingers. Make it
[13:11] Ok? See as per your convenience, I have made it smaller. Now you can place it wherever you want, whether you want to place it here or here, or in the corner, okay, I have placed it in the corner. Ok , then just click on the same text.
[13:24] Now look below, here you will get many font options. From here you can also increase or decrease its size. Ok? Here you can also change the font style. So in this way you can use text anywhere. Now friends, suppose
[13:39] how to do it? Ok? Or if you want to make a transaction etc. then how should you do it? Now suppose look here when my video is over. Look here, from here I have this place I want to place a transaction. Whenever you see him coming from one scene to
[13:53] another, then see, he has come suddenly. So I want to What you will find here is this plus icon. Above this you have to click here. Now as soon as you click on it, you will see that here you
[14:06] can place the transaction as per your wish. The fade one, the white one, the zoomed in one. Look at this one with a shift like this. here. Now after doing it, see how it will get animated. Does matter. I great. It is fun to watch. Ok? I will show you again.
[14:20] very perfectly. So in this way, if you I want to make a transaction here also. So I this plus icon is coming. Okay, right? This is coming from Plus. By clicking on it, we
[14:35] coming from Plus. By clicking on it, we Now I will do it. Now see how it will happen. Look brother, it's fun to create a channel, isn't it? So in this way you can make transactions wherever you want.
[14:47] Suppose you have to add glitch effect somewhere. For example, let's say I So first I will bring the cursor here. Now after that look down, you will get the option of FX here. Ok? You have to click on this one. Now
[15:00] Whatever I want to put in, like I want to put in glitches. So I will click on glitch. You will want to put in glitches. So I will click on glitch. You will get basic, you will get blur. You will get every click on Glitch. Now I want to glitch, so here I will click on glitch.
[15:12] Look, wherever you want to place it, you can make it bigger or smaller as per your requirement. Ok? Look, this thing that you can see, you can pick it up and take it wherever you want. Your glitch effect will be applied at that place. Ok? Look, look, he is coming, isn't he
[15:25] ? You will get to see it in a completely perfect way. Ok? Look at this. show you by doing it first. See, right? Now if you want to add sound on it, then you can [nasal sound] if you click on music from here,
[15:39] then here you have to come to music and if you want to add any effect, then here you will click on effect and you will enable it here. Now okay, you want a ring one, you want a vehicle one,
[15:52] like look, I click on the funny one, now listen to this, look it now listen to this, look it okay, this one, then what will I do here? I will click on use. On top of this.
[16:06] Ok? Look, I'll tap on top of this here. Now look, this is my Now at this place my heart will say wow. Look where it happened. Now you can adjust it by clicking on it.
[16:19] From here you can increase or decrease its sound volume. Of the effect. Look, the volume of the effect must have reduced now. Ok? See this. want to reduce any channel further then tap again. Come to the volume and turn it down here. Now it will be
[16:31] friend, look at any channel, it is coming a little bit. Okay, right? So this is how want to place it somewhere else, click on it, lift it with your finger, okay? You can pick it up and place it wherever you want. Ok? Look, you can plant it wherever you want.
[16:45] Now friends, after that, suppose you want to add some external audio. Suppose you are editing a video which has separate audio and you want to add it, then the click on music. Now after clicking on music, friends,
[16:59] if you want to record at the present time in a simple way, then you can also record from here. you click on it and look here, if you tap on it, then your recording will start. Then you can also do recording. Now look here, let
[17:13] me show you. You can see this music, right? Click on it. After clicking, you can add any music from your phone here. If you want to you will get a lot of background music here. Like look at the block. I
[17:25] take some music. Let me take this walker. Ok? I tap on this one that is visible. Look, I will click on use this. Now look, my ad has been done. So we'll be done from here. Now look here, this
[17:38] Let me delete this first. Look, what will I do by pulling this? I will make it completely big. Ok? Let's say I want to put this one in the background. Ok? In this way. Now how has listening come here?
[17:52] look at you, what is the problem right now? My sound is coming out a little low. This sound is coming more. So I have already taught you how to adjust it. You have to tap on it get the option of volume. Click and reduce its volume here.
[18:05] Now look, my audio will come a little better and that one is coming in the background. Ok? So in this way you can do this very easily. Now friends, after that look below, I will tell you some basic features. For example, suppose this has to be split somewhere. If
[18:17] any part needs to be cut, we will use this. If you want to delete it, you will use this. Ok? Now look, all this is cut out work. Now after that, suppose you want to speed up any part, then what will you do for it? You will click on speed. For example,
[18:29] Ok? Click on it. Now what will we do here? Tap on speed. And here you can adjust the speed as per your convenience. Somehow or if you want to speed up the entire video in regular then you will click on regular. Now
[18:43] Ok? Now from here I am done. Now see how much speed it will reach. Look create a YouTube channel. Is done? Till here this part became my speed. Look, it's done. Now suppose I have to slow it down. So brother, it also has the same process. You have to
[18:56] Just watch it, it will slow down. Friends, today Come on, what do I do now? I will let it remain normal. I will come to speed and make it 1x, okay, okay like this, now after that friends, if you want to increase or decrease
[19:12] suppose your audio in this is audible a little low, then you will click on this, then you will come to volume here and you will increase its audio by 200 times, 150 times, then this audio will become a little more, now after that, if you want to crop any part, then
[19:25] here, like suppose I want to crop this last part where crop this, then I will bring it here and after coming here, friends, you will get a simple method of cropping here. So you can crop it from either the corner or anywhere. For example, let's say
[19:39] I want to crop here. I want to crop it as per my wish. Ok? Look, I can crop it as per my wish. Ok? Resolution as per your requirement. Now suppose you want to rotate it here, then
[19:51] very easily. If you want to mirror, you get the mirror option. In this way you will get the option here. Now friends, after that see if any part has to be blurred. For example, my screen recording is going on. I want to blur it. So we will bring it here first. From
[20:04] blur from this point where my screen recording started. Ok? Now after coming here you have to look in the tools below. You will get the option of music. you will get to know in which style you want to blur. Look here you will find three styles.
[20:18] want to blur this vegetable thing. So in which style do you want to blur it? Do this. After that, do it here as per your wish. You me just blur the screen. This much. Ok? Now from here I am done.
[20:33] Now this blur that you see, it will be blurred as far as you want. Now look, the entire place where my short video started has become blurred. Ok? So this is how you can do this also. Look further, there
[20:47] are many options. The more you use it, the more you will learn. Ok? editing a short video or a long video, both have the same process. There is no difference. Now after that friends, when your video is ready,
[20:59] you will just click on export here and from here you will Ok? Now look here, the resolution has to be kept at least 1080p. You can also do 2K 4K and the FPS has to be made 60. After that you have to simply
[21:13] click on Export here. Then this video will be created and saved in your gallery. So this is how you can do editing. Rest friend, the more you practice, the more you will learn. Ok? And yes, if you want to
[21:25] learn editing from other apps apart from VN app, like Insort, KineMaster app, then for that you can watch this video. On this I have taught how to edit videos using the Insort app. I have taught how to edit videos using the KineMaster app. So both the videos
[21:38] are amazing. Click. Watch the video. One more thing I would like to say is that if you liked the video then do like it and if you are new to the channel then do subscribe too.



⚡ Saved you 0h 21m reading this? Transcribe any YouTube video for free — no signup needed.