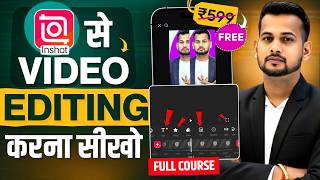

Edit Videos Like a Pro on Any Phone!
45sImmediately showcases impressive editing effects and promises a free solution for any phone, hooking viewers with high perceived value.
▶ Play Clip"Delivers exactly what the title promises — a practical InShot tutorial with clear steps, though it could be shorter."
This video is a comprehensive tutorial on using the InShot app for mobile video editing. The creator demonstrates how to edit both short and long videos, covering essential tools like trimming, adding audio, text, effects, and screen recordings, all without a watermark.
The video introduces InShot as a free video editing app that allows users to edit videos without a watermark, regardless of phone model.
Instructions to download the InShot app from the Play Store, emphasizing its watermark-free feature.
Steps to open InShot, select video/photo/collection, and start a new project by tapping 'New Project' and choosing media from the gallery.
Explains how to use the canvas option to select aspect ratios like 9:16 for Shorts/TikTok or 16:9 for long videos, and how to resize the video to fit.
Demonstrates using filters and adjustments (light, contrast) to improve video quality, with a before-and-after comparison.
Shows how to zoom into the timeline, use the split tool to cut unwanted parts, and delete them to clean up the video.
Covers adding music, recording voiceover, and importing AI-generated audio, with steps to sync and trim audio clips.
Explains how to overlay screen recordings using the PIP (Picture-in-Picture) feature, including resizing, cropping, and animating the overlay.
Demonstrates adding text, emojis, captions, and AI speech, with options to edit font, color, animation, and background.
Shows how to change video speed (e.g., double speed) and mentions other tools like background change, AI cut, voice enhancement, and crop.
Recommends exporting in 2K/4K/1080p with 60 FPS for best quality, and emphasizes practice to master editing.
The video provides a thorough, step-by-step guide to using InShot for mobile video editing, covering all essential features. It encourages viewers to practice and explore additional tutorials for more advanced techniques.
What is the main advantage of using InShot over other editors?
It allows editing videos without a watermark.
00:45
What aspect ratio should you select for YouTube Shorts or TikTok?
9:16
02:16
What aspect ratio is recommended for long videos?
16:9
02:43
How do you cut a video in InShot?
Use the split tool on the timeline to divide and delete unwanted parts.
04:41
What is the PIP feature used for?
To overlay screen recordings or other videos on top of the main video.
08:16
How can you add a voiceover in InShot?
Click on audio, then record directly or import an AI-generated audio file.
05:34
What export settings are recommended for best quality?
2K/4K/1080p resolution with 60 FPS.
14:21
Watermark-free editing
Highlights a key selling point of InShot, making it attractive for creators.
00:45Canvas ratio adjustment
Essential for optimizing videos for different platforms like Shorts vs. long-form.
02:01Quality enhancement via filters
Shows a simple way to improve video quality without professional tools.
03:50PIP for screen recordings
Enables creators to add tutorials or reactions, a common need for educational content.
08:04Export settings for quality
Provides concrete numbers (2K/4K, 60 FPS) for optimal output.
14:21[00:03] n't it great? You can also increase the quality of your video and video. Suppose you want to learn how to edit short videos like this, then you can do that too. Suppose you want to
[00:17] make a transaction like this then you can do that also. If you want to add glitch effect, you add some text or you want to put a page here, you can do this in this way also. And what's more brother, look, the Instagram logo is visible in my hand right now,
[00:31] look, it is coming down, going up, now look, it has risen and come in this hand, you can do all these things very easily and that too from any phone, if you have any phone, be it of Rs 5000, Rs 10, Rs 20000, I will teach you to edit this kind of video from every phone,
[00:45] that too absolutely free, how to do it, with which app, come, I will tell you, look, first of all what you have to do is open Play Store and download the Insort app from there, look friend, the simple meaning of using the Insort app is that you will
[00:58] not find a watermark on it. Ok? You Ok? That's why we'll download Insert. Now how to use it after that? Let me
[01:10] show you on the screen. Now after that, when you open the Insert app, you will see an interface like this. Now look here you will get three options. You will get one for video, one for photo and one for collection. So if you want to
[01:22] Ok? Now after that you will get the option of New Project here. You tap on it. Ok? Now your gallery will open here. Suppose you want to from the gallery, then click on the video. If you want to take a photo, click on the photo. And if you
[01:36] want to take both video and photo then click on All. Meaning, I have clicked on the video. Now from here I will add any one video. Let me click on it. I will do it. Now I am going to show you this
[01:49] edited video. now stop. Whether you have a short video or a long video , any video, I will teach you how to edit it all. Just look at the video. The entire editing process is the same. You just have to understand the tools and what each tool is
[02:01] process is same for both. First of all let us talk here. Suppose you have a example, suppose this is my long video showing right now. What if I Look here, you will get this canvas option. You have to tap on it. Then
[02:16] In which ratio do you want to edit? Suppose yours is for Shorts then click on TikTok here. Done it here like this. Now look, Look at it now, it doesn't look that much right now. But what will you do? We will click on it.
[02:29] Now after clicking, what will you do with both your fingers ? We will make it bigger. made. Isn't it? So this is how my shorts ratio has become. process of editing both is the same. Be it shorts or long.
[02:43] You just have to resolve it correctly. If it is a short video then it has to be brought in short resolution. If you have a long video, then click on the canvas and select the ratio of 16:9 here. Now look, the long ratio has arrived. Rest of the editing
[02:55] Now first of all suppose if you want to increase the quality then what should you do? To increase the quality, first of all look here, below you will get the filter You can add effects. You can add filters from here if you want. Look at it this way. For example,
[03:08] Ok? So you can easily get the filter from here. No problem. If you If you don't want to take it then click on original here. Suppose you want to make click on adjustment here and from here, increase the light as per your requirement. If you
[03:23] want to increase the contrast, increase the contrast. Ok? Look, I will increase the format like this. Ok? Let me do this. Ok? This is where you have to do everything. Ok? Whatever improvement you want to make in the quality of the video,
[03:36] ? So get it done. Now look, my quality has changed a lot. Let me show you. The earlier quality was something like this. Ok? Look, it was. But now better. So, this way you can change the quality by
[03:50] going to the filter option here. Now friends, suppose you have to make a cut somewhere in it. , part, let me show you. I will play. Ok? Let me turn up the sound a little first. Look at this. I will play. Look, this part of mine is bad. I have to remove this part.
[04:03] Friends, today I am going to show you my video from mobile phone, it has started from here. Ok ? This much part was bad. My beginning is from here. Let me show you my mobile, friends, today I am ok, my problem is from here, so you
[04:15] first I zoom with both the fingers and I see, friends, today my video has started from here, okay, so we will click on it on the timeline, we call it timeline, okay, the video that is playing, this is the timeline, so
[04:28] seconds, this is 4 seconds, this is 5 seconds, this is 6 seconds, you can zoom it by making it bigger or smaller, so here I will make a cut, to make a cut, first we will click on the timeline, like this, now look here in the tools you will get the option of split.
[04:41] You have to click on it. Look, there are two parts here. The cut has been made. Now this part of mine was bad. So we will click on it and part of mine is over. Now my video will start from the starting part.
[04:54] Friends, today I will tell you that the useless parts have been removed from the mobile phone. Now our play starts directly from where it started. Now friends, after that, suppose many times what happens is if you have a short video or
[05:06] editing a short video, then many times we have to predict the audio there or we have to take audio from somewhere else with AI, so what will you have to do in such a situation, for example, let me click on the volume here and I turn it
[05:20] not have audio in it, see, if there is can add audio in it, what will we have to do to add audio, see, we have to come to the beginning. add from the beginning. Now here, suppose you want to take audio from the middle, then you have to
[05:34] bring the timeline here. What to do now? Here you have to click on audio. Now look here, you get three or four options. You will get some music, you can add it, either can do the recording simultaneously. Ok ? So let me record it. So
[05:47] and look here, where you want to start. Guess I would like to do it from the beginning. and mine will start. I will start speaking. Let me show you. Look, the seconds are ticking. I will start speaking. Friends, today I will definitely teach you how to create a new YouTube channel from your mobile phone. I will
[06:01] Friends, today I will definitely teach you how to create a new YouTube channel from your mobile phone. I will Just look, I've stopped. I am done till here now. get the play option. Friends, today I will definitely teach you how to create a new YouTube channel from your mobile phone. I will
[06:16] also tell you how you can earn money from YouTube. Is keep it, then click on Done here. Now look, my add has been done here. part of mine starting from here is bad then we will bring the cursor here and split it
[06:31] Now lift it and slide it a little forward. Look at the direct starting point. Okay friends? Today I taught you how to create a new YouTube channel from your mobile phone, bad for me. So we will click here at last and click on split.
[06:43] Look here and we will delete this part. Now look, I have done the voice way you can do voice over. If you want to keep it then do it here. Ok? Suppose friends, if you want to add audio on this, suppose you have created audio from AI or from
[06:56] somewhere else, then what do you have to do, then you have to click on audio, now what will I do, I will simply click and delete it from here, want to do it again then you can record, if you want to add music, then you
[07:09] click on music here, after clicking, see a lot of it will come here, so whatever you want to keep, like suppose that I have already downloaded it, okay now I will play it, listen, there lived a clever farmer in a village.
[07:22] he works hard day and night and I have added it. In this way, if I suppose keep the last one till here, then we will bring it here, split it and delete it, in a village, now suppose I have to do it from a little ahead, then
[07:35] little smaller with both my fingers and then lift it and take it forward from where I have to start. first. There lives a clever farmer in a village. So in this way you have downloaded some voice over separately. You
[07:50] Ok? How to do it? I have told you. Now friends, suppose for play a screen recording, how will it work? So wherever you want to show the screen recording, I said it at one point in the video. Ok? I'll play first. Look, let
[08:04] me show you in a simple way. I had said it here. I told you my FF screen. Now I have to add screen recording here. So what will you do? First we will bring the cursor here. Now after bringing the cursor, look up,
[08:16] you will find the PIP option in the tools. You have to click on it. Now after clicking recording you want to add, you can add it in a simple way. Let's take screen recording here. Let me take this one. Ok?
[08:30] you can make it bigger or smaller by pulling it. Ok? You can fill this up. Ok? So let me make this a little bigger. And here I will want to make it bigger, you can do so by pulling it like this. Ok? Look,
[08:44] if suppose I want to cut the notification above and the we will scroll here and see here you will find crop, click on it and from here see this and we will crop the button from the bottom as well and make it straight,
[08:59] click on done here, see this is done for me now, if you want to make the entire screen close, then make it a little bigger, see it will close on both the top and bottom, there will be no gap, see this is done, okay, if you want to make it a little smaller, you can make it smaller as per your wish,
[09:11] you can adjust it as per your wish, now look, when my screen recording comes, if I want to add some animation in it, if it comes in a little style, then how to do it, then first we will click on it, now after clicking,
[09:23] option, click on it, now see, when it comes, when it comes out, means when it goes, okay, then which animation will I have at the time of coming, if I keep this, then it will be the fade one, if I do not keep it, then it will be the zoom in one, like this, okay, see this will be the second one, okay,
[09:37] come, so let's say I want to keep this one, so I will do it, now see when it comes, how will it if I want to show something here, see here, it has come in this style, you can do it in this way, if suppose you want to put an outro, when it will end, then
[09:52] click on animation and see, come to out, okay, and when it will end in out, then in here, you will get it here, so like now I will show you, come to the end, okay, now see how it will go to the end, see, it has become
[10:04] you can also do this easily, now friends, suppose you want to change something in this later, then in our PIP, then we will click on PIP, then see, it will automatically be shown here. Then you can click on it and do it as per your wish.
[10:17] Trim, cut, crop, whatever you want to do. Ok? You have to edit, filter etc. Ok ? Its volume needs to be turned down. Like if I Ok? So in this way you will get all the options here. Ok? Take a look here.
[10:30] want to increase the speed in it, then now click on speed and from here you can increase the speed of screen recording in this way. Ok? This has also happened. If you want to change the voice you get all the options here. So the more you see all this, the more you will
[10:44] talk after this. Suppose you want to add some text, how will it happen? In a simple way. For example, suppose I want to add text somewhere. So, I want my text to be added at this location. So here we will first bring the cursor
[10:57] get the tick option. Click on it. Now here you have to add emoji, add text , add caption or let's say you have to add AI speech, whatever you want to add, then I will click on text and write whatever I want here like
[11:11] I write please subscribe my channel like this. Ok? Now what will I do from here? I will simply click on Done. Now after clicking on Done, Ok? Look, wherever you want to place it, suppose I want to place it here, then
[11:24] I will click. Now friends, look here, in a simple way it does can also edit this text. So here we will click on edit and from here, by checking its font, that is, by clicking on it, you can adjust the font as per your requirement.
[11:37] And from here you can also adjust its color. Like if I want to make it some other color, I would like to do this one as per my choice. Ok? Let me do this one. changed like this. Ok? Isn't it ? Look at this. So you can do it as per your
[11:52] can also change its animation. If you want to add a background to it, you Look like this, my background is ready. So you can keep it wherever you want as per your convenience. If you want to here. Ok? I play. Look at this, right
[12:07] enlarge it, then pull it and enlarge it like this. Ok? Now when this is this way, see very easily it is done. Ok? Now let me tell you one more thing. Ok? If you want to make something run on the screen , or make it move from here to there,
[12:22] want to do the text only, then first I will click on the text here, that is, I will tap on it on the TT. Look, mine has just become visible. If we click, suppose I want to run it here and there, then we will come to the starting point and
[12:34] very useful. Click on it. Look, right now this one here is locked. What will we do now? Where should my screen recording go until my video plays and reaches here screen recording should be gone. This one up to here. Now when my video plays it should
[12:49] screen recording should go up to here. Ok? I will do it again like this, then I should go by then. Till here, that means wherever the video goes, my show you where mine was initially? Look, I will do it first. It is
[13:02] see that whenever my video goes there, it starts running automatically. Ok? I am not doing anything. Look, it is running automatically. You must have understood. If you don't understand then please rewind the video and watch it again. You will understand. It is a very easy thing. But it is a very amazing
[13:14] thing. Ok? Use this. You will learn very well. Once it is done, After doing this, friends, look here, this is increase or slow down the speed of the video, then how will it happen? For example, suppose I want to
[13:27] I will come here, click on it and I will get the speed option. I'll tap on it. if I want to double the speed as much as you want, I will come in double the speed. I will do it. Now let's see how its speed will increase. Look how much speed has been achieved. You can see. Isn't it? So in this
[13:41] Look further, there are many options available. If you want to change the background, you can do it from here. There is speed, there is animation, you want to cut with AI, you want to enhance the voice , if you want to crop then you can do it also. Look here like this, you can
[13:54] cut out, take the template, replace it. Meaning there are a lot of options available. So brother, see, If you want to edit even better, then brother, you will have to go inside and
[14:07] practice nothing will happen. I have just told you the function features etc. which can be edited with this. The more you practice, the more you will learn. Now when your video editing is complete, you will
[14:21] adjust the resolution as per your requirement. Whatever you want to do, do it as per your convenience in 2K, 4K, 1080p and it will be better if you keep the FPS at 60 only. Then look here, you created and exported here. An ad will play. Now friend, this is
[14:34] how to use the Insort app. But if you want to learn more editing techniques from different apps, then you can also watch these videos for that. In this video in the video below I have taught video editing using KineMaster app. So both
[14:47] can also check out all these videos once. Otherwise, if you found this video helpful, new to the channel, then subscribe right away new to the channel, then subscribe right away and also click on the notification.



⚡ Saved you 0h 14m reading this? Transcribe any YouTube video for free — no signup needed.