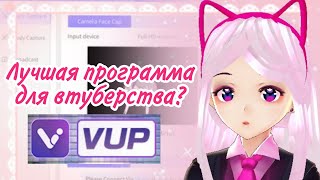

How to Add a VTuber Model in VUP
45sClear step-by-step tutorial that helps new VTubers start creating, with a fun cat girl moment.
▶ Play Clip"Delivers a practical guide as promised, though some tangents and technical issues slightly dilute the focus."
This video is a beginner's guide to using VUP, a program for capturing faces to create VTuber models. The creator demonstrates how to build a character, enable face capture, adjust settings, and use voice capture, along with tips for streaming and recording. The guide is aimed at YouTubers or aspiring VTubers.
The video is a small guide to VUP, a program used for capturing faces to make videos. The creator hopes it will be useful for YouTubers or future YouTubers.
There are standard characters, but you can upload your own models. To add a model, click 'Add a model' and import. The creator demonstrates switching to a new model.
You can load models and select actions for them, but actions can be laggy. They are located in the 'Action' tab.
To enable face capture, click on the 'Rafa' channel (initially off). You can turn on a mask to see your emotions, and adjust head tilt and translations. Enable 'capture over part of the body' for more realistic movements.
If you have devices for capturing body movements (e.g., a clip of cars), you can connect them here.
There are settings for eyes, including 'looking into the camera' which makes the character look only at the camera. This can be useful if you have a squint, but it's not very convenient.
Voice capture makes the model read your voice or emotions, not your facial expressions. The creator often uses it together with face capture for more accuracy and to avoid awkward freezing of emotions.
If you don't have a camera, you can download WAP and turn on sound capture to record sound from the microphone. This prevents frozen eyes and allows making videos without a camera.
Voice capture results in less emotion on the model, but the model reacts to any sound, which can be beneficial even when you are not speaking.
You can do screen capture with a green background and remove it through the image. For streaming, it's better to use a transparent background. There is also a screenshot recording feature that works with OBS.
The character appears on a default scene (a regular wall). You can upload any background or use standard rooms. The background can be moved, and the character can be rotated with the right mouse button and zoomed with the wheel.
In the filters settings, you can choose a green screen. There are also lighting settings that affect the atmosphere, which the creator recommends playing with.
The video provides a basic overview of VUP's features for creating VTuber content, emphasizing face and voice capture, and encourages viewers to experiment with settings to achieve desired effects.
What is the first step to add a custom model in VUP?
Click 'Add a model' and import your model.
00:18
How do you enable face capture in VUP?
Click on the 'Rafa' channel.
01:25
What does the 'looking into the camera' setting do?
It makes the character look only at the camera.
02:20
What is the benefit of using voice capture?
It makes the model react to voice or sound, reducing awkward facial expressions.
03:03
How can you make videos without a camera?
Download WAP and turn on sound capture to record microphone audio.
03:31
What is the purpose of the green screen filter?
It allows you to remove the background from your character.
06:14
Enabling Face Capture
This is the core feature of VUP, essential for VTubing.
01:25Voice Capture for Accuracy
Voice capture avoids awkward facial expressions and is more accurate.
03:03Screen Capture with Green Screen
Allows background removal for streaming, a key production technique.
04:36Lighting Affects Atmosphere
Lighting settings significantly impact the mood of the stream.
06:14[00:06] small guide with some attempts at this program that I use to capture faces. I use it to make videos. I understand that it's not just with but the main work is on it because I know that my videos can
[00:18] also be viewed by uber-types. I hope this will be very useful for YouTubers or those who plan to become YouTubers in the future. Let's start with building a character. As you can see, there are several standard characters here, but you can also upload some
[00:31] models, but I advise you to make your own. Choose for which there are already enough guides. First, to select a character, add a model. To do this, you need to click on this button. Add a model. From the model, you know new English. Click
[00:45] here to import. I just very successfully made another model for myself and will try to switch. In general, now I'm a real cat girl, and these ears are certainly not plastic. Doctor, these are absolutely
[01:00] real porridge girl ears. If anyone says that I'm not a cat girl, I'll be offended. Not every girl should have ears or feline attributes. A should have ears or feline attributes. A cat girl is a state of mind. Right, let
[01:12] 's go back to the guide, you understood how to load from the useful stuff, you can also select an from the useful stuff, you can also select an action for the model, for example, here, but nothing lags you because these actions are very laggy, but if you
[01:25] need them, you know that they are in the action tab. Now let's move on to the most important thing, to face capture. To enable Ilfat's face, you need to click on the Rafa channel, ISK about it, it's initially turned off, but we click and it turns on for us. As you can see,
[01:38] here you can turn on the mask and see what emotions you make, but you can also see your face without it, but I don't want to show you my faces, it's logical that way it wouldn't show it to you, but I'm very beautiful in reality. Here you can build things
[01:52] like head tilt and traditions. Be sure to turn it on if you don't have it enabled, and capture over part of the body, that is, so that you can bend over and the movements are more realistic. Here again, select and it's better to leave with the
[02:06] standard settings, but there are some things, but if you're really not happy with something, sliders and without the set default button and it will so also do you have any devices for capturing the body for example a
[02:20] clip of cars then here you can connect them and finally we will move on to the most connect them and finally we will move on to the most interesting thing namely these settings they on the eyes there was a refusal from useful here is a screenshot of
[02:33] looking into the camera if you want your character to look only into the camera for example if you have a squint like me but I don’t have a strong squint but the camera that is people don’t notice it but the camera is like this captured like
[02:48] wow damn what’s wrong with your eyes why let’s have jambs to the right or did you eat wrong you can use looking into the camera but it’s not very convenient as for me the features are somehow moving the model and probably the most useful here
[03:03] is voice capture that is your model will read not your emotions but your voice or emotion with the voice for example if you have something wrong for example I more often use a copter together with face capture and because it’s more convenient and so accurate there won’t
[03:19] be any awkward freezing of strange emotions but you can turn off face captcha and in In general, as you can see, I had some minor see, I had some minor technical issues here, and the yacht refuses to let
[03:31] you know how you can stream and how they eat, how multitouch videos like in the tube are not shown If you, for example, don't have one, then you download WAP and turn on sound captcha,
[03:44] and here we will record sound from the microphone and of the wing, no, and of the wing, no, and now you will have it so that the eyes are not frozen either, and so you can make videos without a
[03:57] camera, and you will have no problems at all with capturing the face, I'm still a porridge girl, even without porridge ears, if you are so porridge ears, if you are so interested in this, but as I say, here is
[04:11] voice capture, and it is precisely this, firstly, that there will be less emotion on your model, and in addition, so that your emotions are not visible, the model will react to any sound, and for example, if you talk to someone or Uncle Lobatu, this will be
[04:24] will benefit even when you are not the one speaking. So, of the useful things, sound captcha all the wing and probably pendant will be especially useful to you, and
[04:36] that is, with this you can do screen capture. That is, not a separate capture of the game from the display, there is a green background right now, that is, background and remove this green background through the image, but if you stream like this, it is
[04:49] not very convenient to keep an extra tab, so it is best of course separately, like ours with a transparent background. Also, there is another screenshot recording if you are not recording through an image and from clean and transport,
[05:02] this thing who only works with O B with this, you can also remove the background from your character, but there are, like, many ways and let's go to the scene, initially, your and let's go to the scene, initially, your character will appear on such a scene, this is
[05:15] just making a regular wall. Also, probably now you can't see behind me, but there also a green background from the elephants, you can upload any background of yours, but besides the standard one, there are also some rooms if you want to shoot some beautiful
[05:31] or you can upload your own, but I personally impose mine already in the editing, but here it is personally impose mine already in the editing, but here it is as convenient for everyone and also ours from the background can be easily moved, let me slightly change the location of my
[05:45] that you can see this screen completely. With the right mouse button, the character can be rotated and you can also move them with the wheel and eat them with ours, for example, in full height when you need it, like this You see, you can
[06:00] zoom out like this and show off your full self, for example, how beautiful you are, but you can get closer because usually they don't stream like this, and again, you have settings in the filters, you can choose green screen,
[06:14] and here I come, where he is, an iPhone 5, this is moving, now I can boast that they saw my model completely, they are only a part, and I will return to the usual format, and also in the price settings, you can choose
[06:28] things like lighting, that is, your character will be in the dark in the light, that unimportant, but in fact, it seems to me that this really greatly affects the atmosphere, so you can also
[06:41] play with the settings here, so these are all the standard things you need to start a video using the web. Here, this video helped you. Be sure to write comments, and that's all for everyone. Thank you very much for
[06:54] and that's all for everyone. Thank you very much for watching, bye everyone
⚡ Saved you 0h 07m reading this? Transcribe any YouTube video for free — no signup needed.