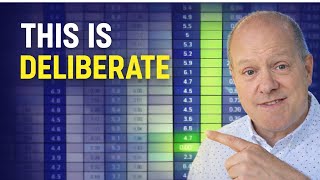

Why I Never Hedge My Trades
44sThe controversial stance against hedging challenges common betting strategies and sparks curiosity.
▶ Play Clip"Delivers exactly on the promise with a clear, practical demonstration of why hedging less can yield more."
The video explains why avoiding hedging during active Betfair trading can increase profitability. Using a real trade example, the speaker demonstrates how an unhedged approach allows traders to build a buffer within the traded range and capitalize on market volatility. The key is to trade relentlessly without hedging until the end, enabling better position management and more successful trades.
With a 100-pound stake, each successful trade yields a 10-pound profit due to the market increment.
Orders are initially placed on only one side to match unbalanced market volumes, aiming to get both sides filled quickly.
After a trade fills, new orders are placed at different prices to anticipate the next price move, without hedging.
The net stake box shows the remaining stake needed to complete a trade, helping manage risk without hedging.
By not hedging, a buffer is created within the traded range (e.g., down to 3.70 without loss), allowing trades to wait for fills.
Trading without hedging reveals the true net position, enabling traders to work within the active range and exceed market volatility.
Trading without hedging during active sessions allows traders to build a profitable buffer and let market volatility work in their favor, leading to more consistent profits than constantly hedging each position.
What is the profit per successful trade with a 100-pound stake?
10 pounds.
02:03
Why does the speaker reverse the ladder?
To offer bets to the market.
00:39
What does the net stake box indicate?
The remaining stake needed to complete a trade.
06:08
What is a key advantage of not hedging according to the speaker?
It reveals the true net position and allows working within the active traded range.
08:54
How does not hedging help with market volatility?
It creates a buffer so short-term volatility doesn't force a loss, and you can wait for orders to fill.
09:36
Fixed Profit per Trade
Establishes a clear financial incentive for each trade, making the strategy quantifiable.
02:03Net Stake Box Utility
A practical tool for managing stake without hedging, crucial for executing the strategy.
06:08Core Principle: Unhedged Trading
Explains the fundamental reason behind the strategy, linking it to better position awareness and volatility management.
08:54Volatility as an Ally
Shows how not hedging transforms volatility from a threat into an advantage by providing breathing space.
09:36[00:00] for trading that will significantly improve your ability to trade profitably. else, and you don't tend to see them in videos, but I think they're key,
[00:14] essential ingredients to being able to perform a successful trade or set of Without further ado, let's examine those things that I do, uh, that are critically
[00:26] important to me when I'm bet Fair Trading. I've tried to keep the ladder as simple as possible so that you
[00:39] The reason that I reverse the ladder is so that I can, um, offer bets to the market. the ladder look the way that it does.
[00:53] Go and watch that video because it is critically important for what we're about to do, but also understand how positions, um, are displayed on the letter.
[01:05] So you can display positions, either they're full trade value unhedged, But one of the things I always do is I do not. Hedge my trades as I go along because it makes absolutely no sense, and I hope
[01:18] that you'll understand why, uh, when you see, uh, what I'm about to show you. So without further ado, let me show you a trade that I did this Saturday, um, that together to produce a profitable trade.
[01:34] I haven't picked this race for any particular reason, it's When I decided to record this video, we're gonna use stakes of 100 pound and there's a couple of little things that I'll point out along the way.
[01:49] You can see here it's in yellow with the last 60 seconds in a darker pink color. the video at this moment to explain something a little bit further.
[02:03] The first one is if you put an order for a hundred pound, the increment in So for every successful trade we put through the market, we will get 10
[02:15] pound, but you'll notice that I've only put the order in on one side. I've got the ladder reversed, so I'm laying at this particular moment in And the reason that I've only done it on one side so far is there's
[02:28] 464 pound on one side, only 250 and the other, and my objective is to try and get the orders matched, um, sort of relatively close together. So you'll see me put the closing order in in a second.
[02:41] I want to get both those orders matched fairly quickly, one after the other. This gives me the gross trade value on each trade that I do.
[02:55] irrelevant at this stage of the process. I just want to see the gross value of the trade. So
[03:12] These two trades I've got and the amount of money that is waiting There's a little bit more money getting matched at four Points two But ideally when you do this type of trade, you want both sides of
[03:29] So yeah, it's, it's not a terrible trade to do. You can see that from the volume.
[03:41] You can see it's starting to match at 4.2. We haven't quite got the order filled at 4.2, but we are right at So if any, uh, price touches 4.2, we will start getting taken.
[03:56] We've had 45 pound taken and already we've got 55 left. Uh, we will get matched and that trade will be complete. Um, and I may consider putting another order in the market.
[04:10] Uh, ready for any price move in any one particular direction or the other, but Almost certainly you would feel. whether we actually wanna put a trade in at 4.3 to catch the money above it.
[04:25] Boom. So I popped another order at 4.1. Because I think the next move will be up in this particular traded range.
[04:37] And then I've gotta decide where I want to put, uh, the next order in. Will it be at 4.2 or 4.3 because I've got money on both sides of the market, neatly framing what could happen on the next move.
[04:49] Money's getting matched at 4.1, so I've canceled the one at 4.3. Um, the, we've almost got our entire order filled at 4.1. get filled 'cause it's near the front of the queue and there is 20 pound.
[05:08] So it can be really hard to narrate these things because what I'm doing is But of course, that's happening semi automatically Um, you can't, uh, sort of think this fast.
[05:22] know exactly what you're doing. But you will get there eventually, the more you practice, um, and the quicker You'll know where to put the trades, how to close positions, in and out and so on.
[05:38] Uh, but ultimately, uh, what we're doing here is we've put We're using a stake of a hundred pound, but we've now made 20 pound And therefore, in effect, what it means is that we're actually only really risk.
[05:53] were using a few trades ago. couple of different things on here. If you look, um, where my mouse is pointing at the moment, it's on the net
[06:08] stake box that is saying, uh, in order to complete this trade, we need to put You can see at 4.1, we already have a 100 pound order in the market waking to get filled, and that will return that next stake to zero.
[06:22] When we can choose to do another trade, we wouldn't double up or increase liability. Sometimes we may put orders above or below just because we think that that's to that a hundred pound steak.
[06:37] At where we're trading in the market at the moment, at 4.1, there's a, a So we can trade all the way down to three 80 without the fear of making a loss.
[06:50] green space will expand again. Uh, we can pop a new order in the market, we can go for another trade. And when this order starts to get filled, uh, you'll notice where that
[07:05] So as the order gets filled at four, you'll start to see the money get taken, and then you'll start to see where, um, we would, we would have So we can go all the way down to three point 70 without a loss, 365.
[07:19] But what you're doing here is you're effectively creating a nice big buffer within the traded range, uh, where you can just sit and you can sort of say, well go Uh, because I can sit here and wait for a reasonable amount of
[07:34] I don't need to guess the immediate direction within the market. my order is, uh, within there. about 10 pound, 40 pound gross.
[07:50] Or if we click on the hedge button, that will turn it into a profit 10 pound on every single runner within this race.
[08:04] The fact that we're using a gross profit when we're actively trading, And the reason for doing that is that that allows us to.
[08:16] Build up a bit of a green space within the market and hold our position for longer Uh, but yeah, that's, um, an approach that I use when I'm trading any market.
[08:28] So there are lots of little key components, um, within this particular I've done videos and all of these before, like, you know, the type of market. Which runner I was gonna select why I did that, um, how I put the
[08:41] Um, so, but the purpose of this video really was to talk to you about why you should actively trade without hedging and why you should only hedge right
[08:54] And the key reason for that is that you can see. How that influences your position, uh, on the trading ladder because you know, your You are working within that active traded range, and if you get enough
[09:09] you exceed the volatility within the market, which means that you are almost certainly going to get a successful. If you go in and you hedge a position, you'll never get the benefits of that.
[09:23] So that's why I always trade with a ladder un hedge so I can see what my true net position is within the market and I will keep on trading relentlessly on that, um, to make sure that I get as many trades through and create a position that is.
[09:36] It also has the benefit that, you know, any short term volatility, up and down on I see too many people sort of getting bullied by the market and having, feeling
[09:48] sensible trades in a sensible way and let the market volatility work for you. And that's one of the key reasons why you should trade with that, uh, ladder
[10:00] gives you that breathing space in order to wait for an order to get filled. Um, and that will allow you to create many more profitable trades. So anyhow, I hope that that video has been useful for you.
⚡ Saved you 0h 10m reading this? Transcribe any YouTube video for free — no signup needed.